CH21 - Leo Trio Complete ImagesPlus 5.75 Processing
Complete work flow for processing CH21 Leo Trio RGB data by Blair MacDonald of the DSLR_Astro_Image_Processing Yahoo Group
is shown below.
Processing Summary:
Initial RGB Processing
- Use Digital Development for the initial stretch.
- Crop the full size image to remove areas with no data after stacking.
- Scale the cropped image.
- Flatten the image using Multi Point Flatten.
- Remove stars from the image using the Feature Mask© tool.
Galaxy & Background Image Processing
- Apply curves with a starless luminance mask to brighten the galaxies.
- Increase saturation of the galaxies using the Hue-Saturation-Luminance tool with a starless luminance mask.
- Smooth the background between the galaxies using Multiresolution Smoothing with a feathered luminance range.
- Increase blue with a selective blue mask without stars.
- Increase red with a selective red mask without stars.
Star Image Processing
- Increase star saturation using a luminance star mask.
- Smooth the background between the stars using Multirseolution Smoothing with a feathered luminance range.
Star, Galaxy, and Background Merge Processing
- Combine Images is used to merge the processed star image with the processed galaxy and background image.
- Use levels to set the black point of the merged image.
- Sharpen just the galaxies using Multiresolution Sharpen with a starless luminance mask.
Each step is used with normal blend mode and 100% opacity unless otherwise noted. Many steps are explained in detail by links to additional tutorials. See ImagesPlus 5.0 Processing Tutorials for a list of all tutorials by function.
Initial RGB Processing Detail:
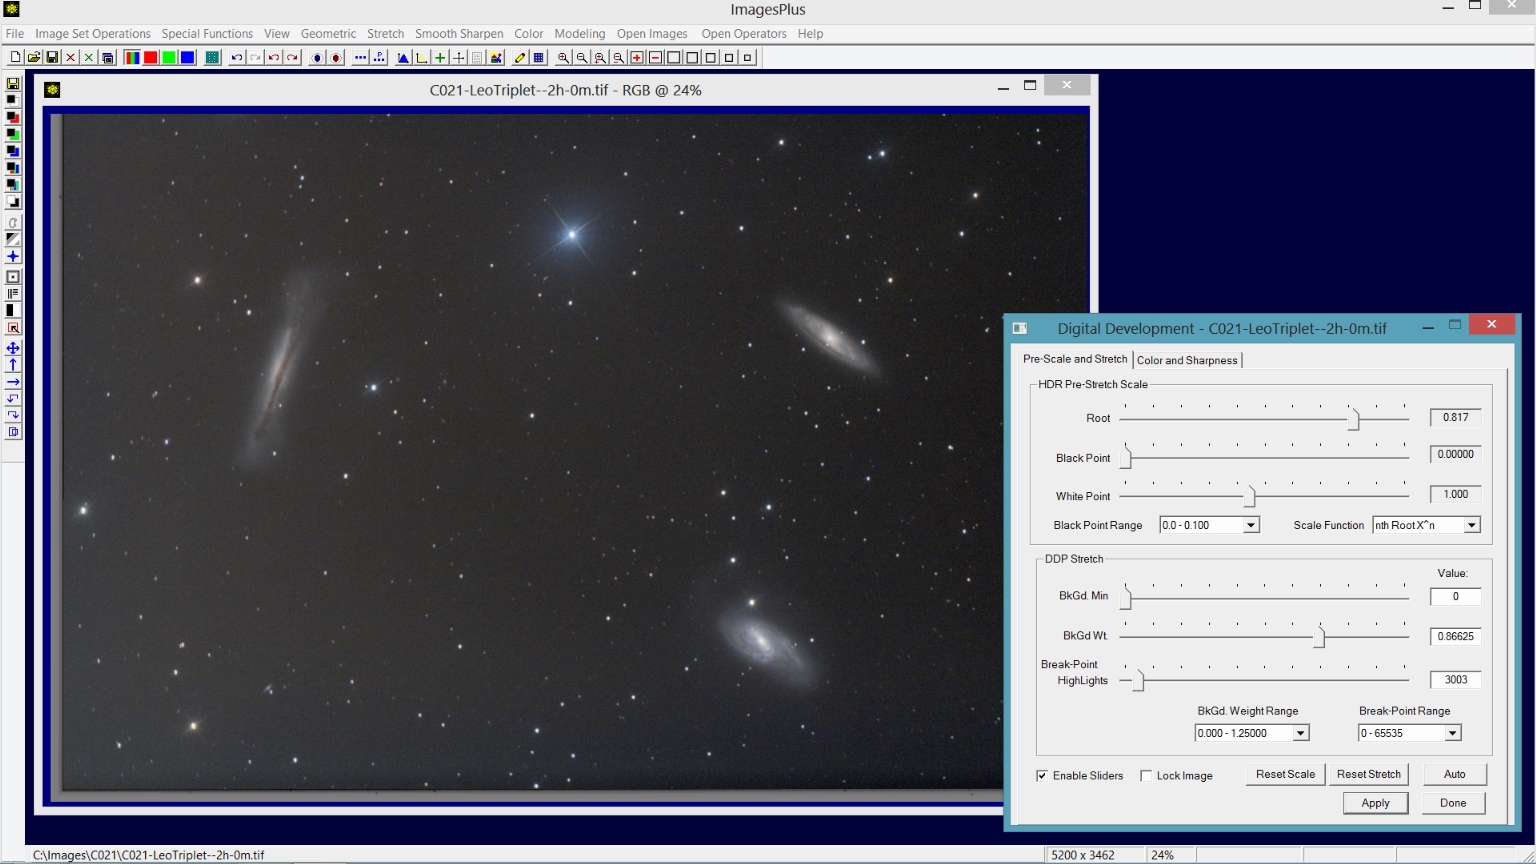
Step 1) Use Digital Development for the initial stretch.
The Stretch | Digital Development tool is used for the initial brightness stretch. First the Break-point and BkGd. Weight sliders are moved to the left to increase brightness and set the background level, respectively. Next the Root slider of the nth Root HDR Pre-Stretch Scale control group is moved to the left to adjust contrast.
Color decompression on the Color and Sharpness tab is adjusted to maximize color. Careful adjustment of the initial stretch parameters greatly simplifies processing that follows. Additional information for using the Digital Development tool can be found at Digital Development - Increase Brightness and Contrast With HDR and Color Decompression
 |
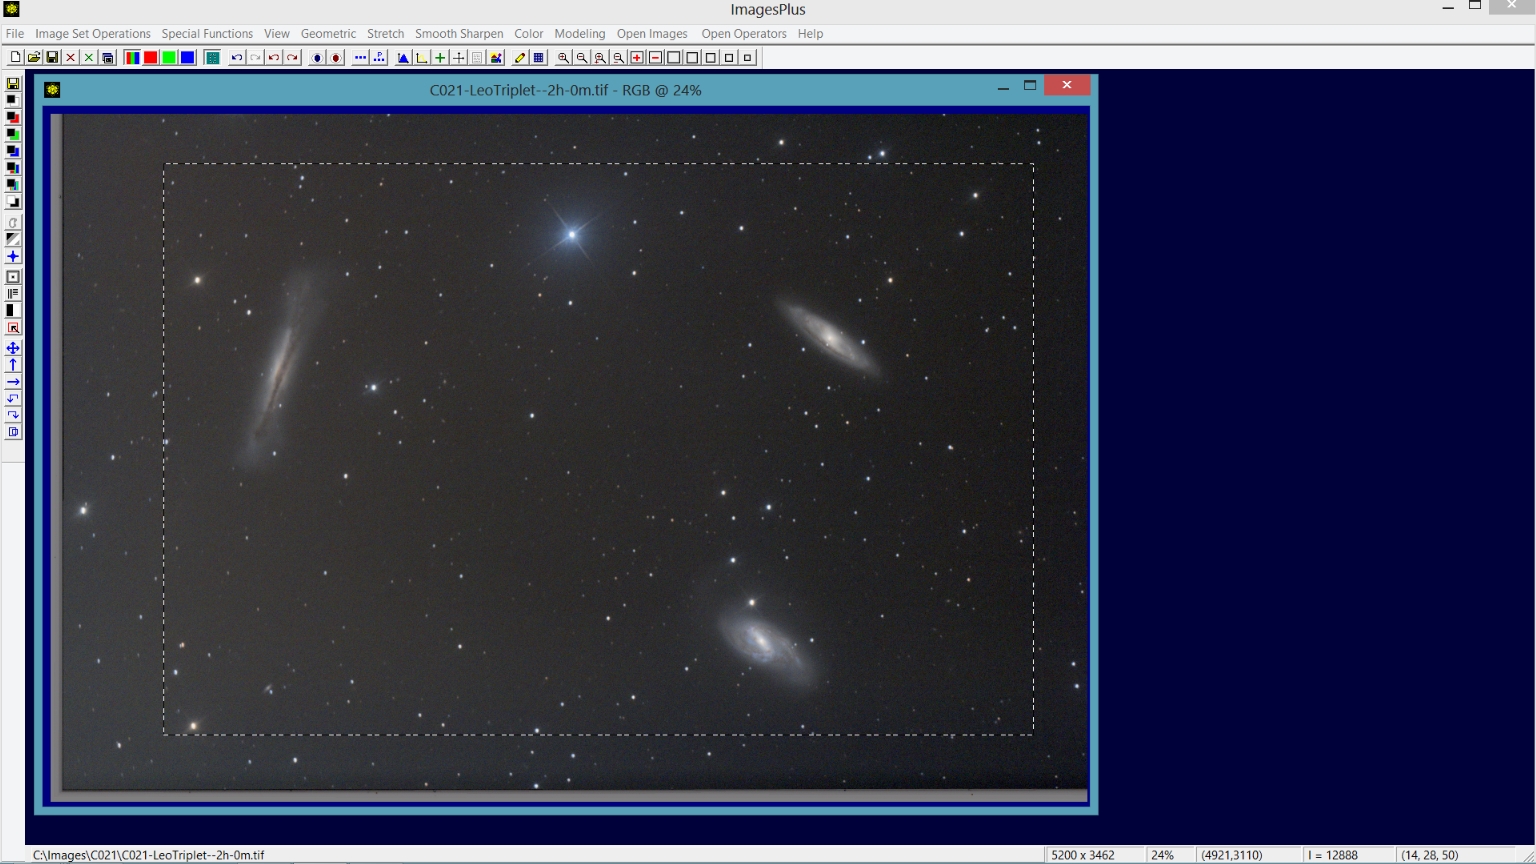
Step 2) Crop the full size image to remove areas with no data after stacking.
Click the Copy Portion button on the top horizontal toolbar then left click and drag a rectangle around the area to crop. The cropped image will appear when you release the left mouse button.
Close the uncropped full size image.
 |
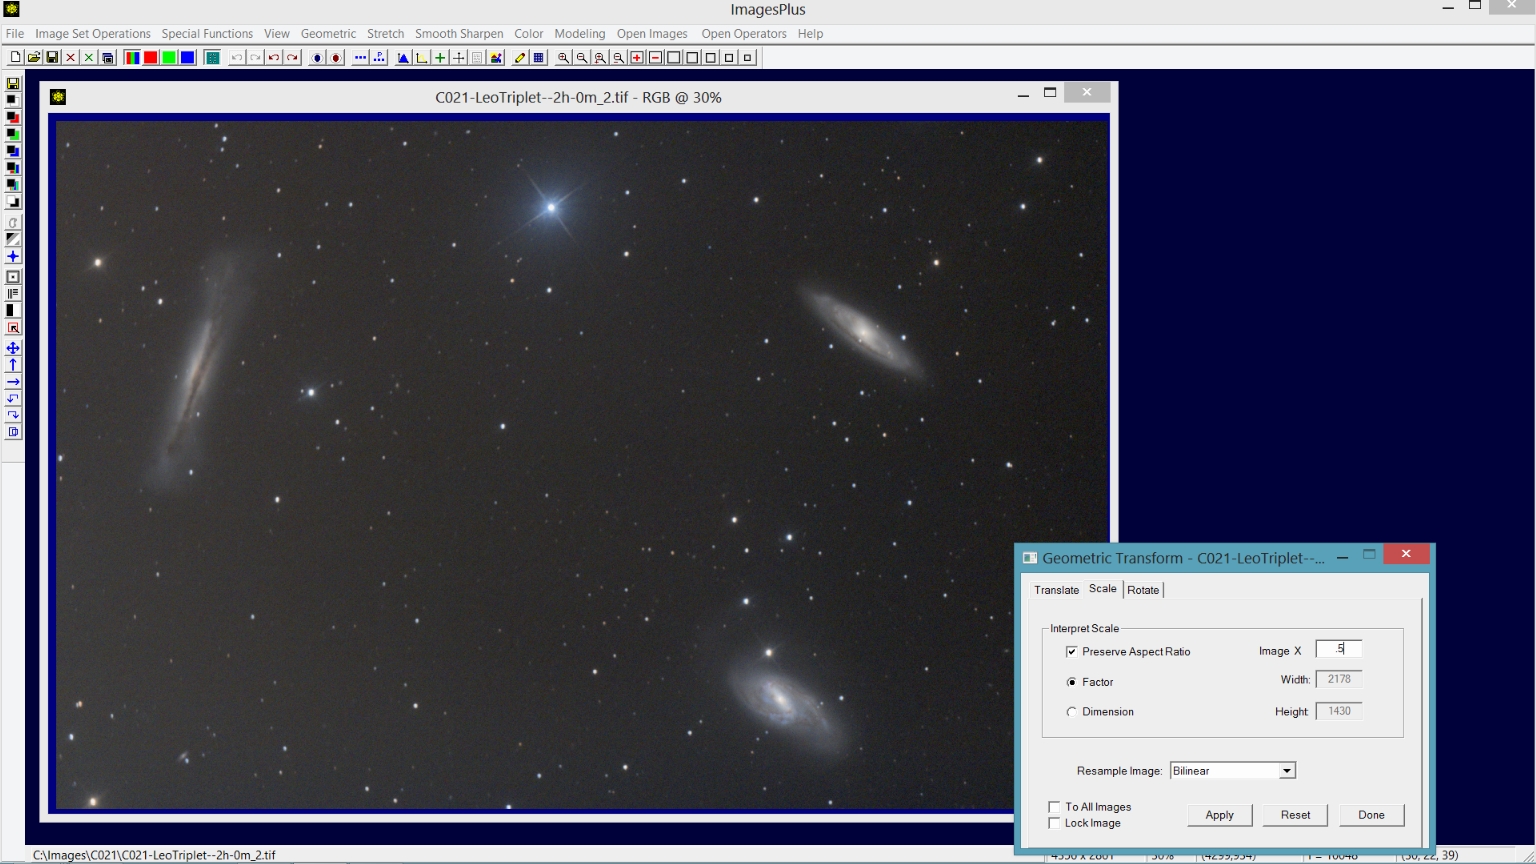
Step 3) Scale the cropped image.
Open the Geometric | Geometric Transforms tool and select the Scale tab. Set Image X to 0.5 and press the Apply button. Scaling early in the processing workflow smooths the image slightly and allows faster processing of a smaller image.
If you process the full size image completely including smoothing then scale the image down in size you will probably have too much smoothing.
 |
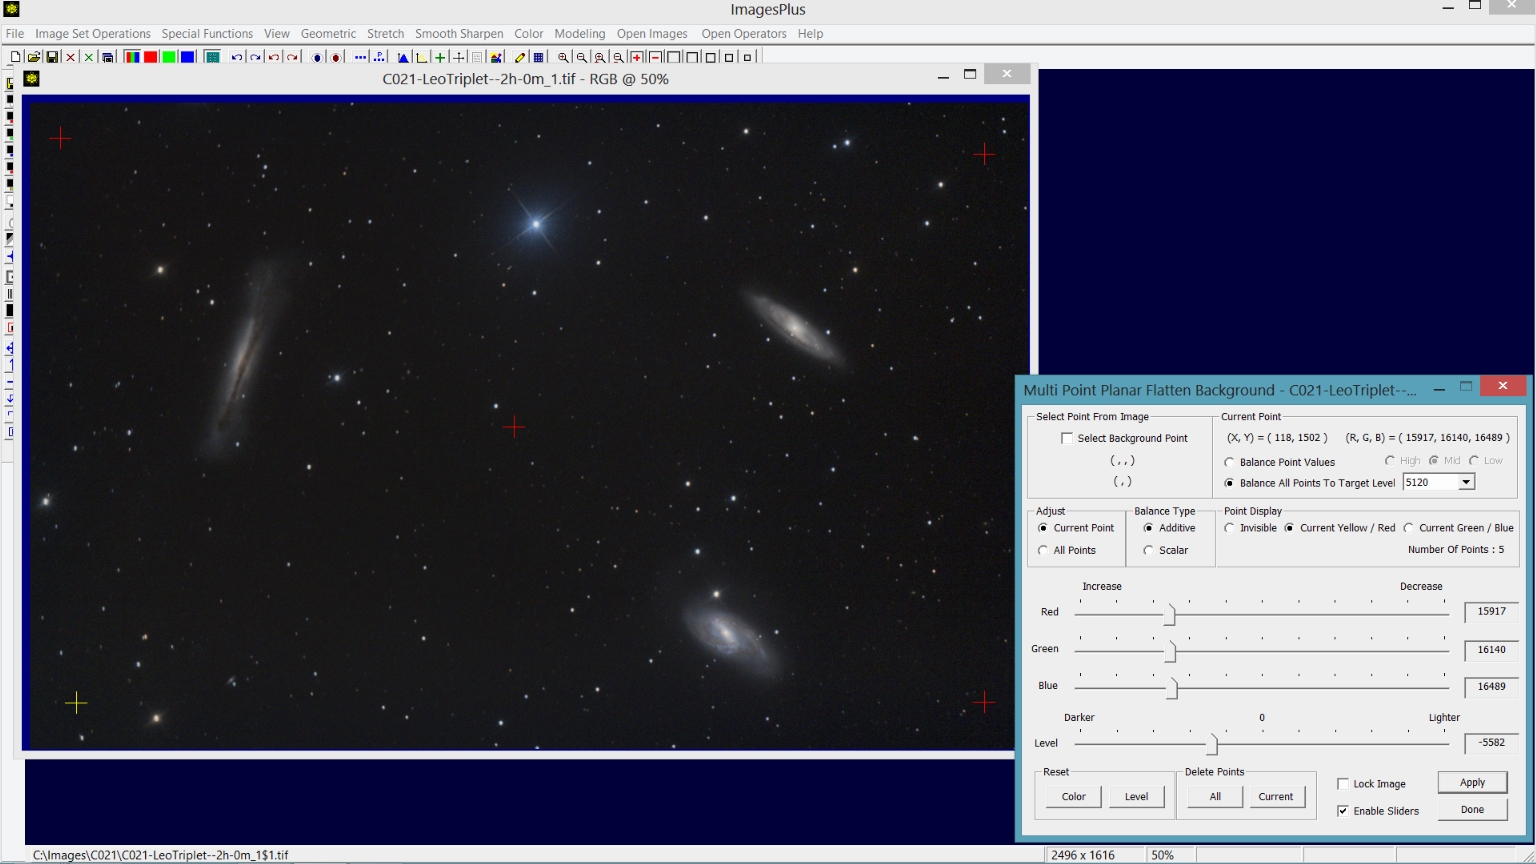
Step 4) Flatten the image using Multi Point Flatten.
Special Functions | Multi-Point Flatten Background is used to flatten, neutralize, and set the background level to dark gray. The gradient goes from left to right so correction points are selected in the 4 corners and center of the image. See Multiple Point Background Color Balance & Flatten Tool
for a tutorial.
 |
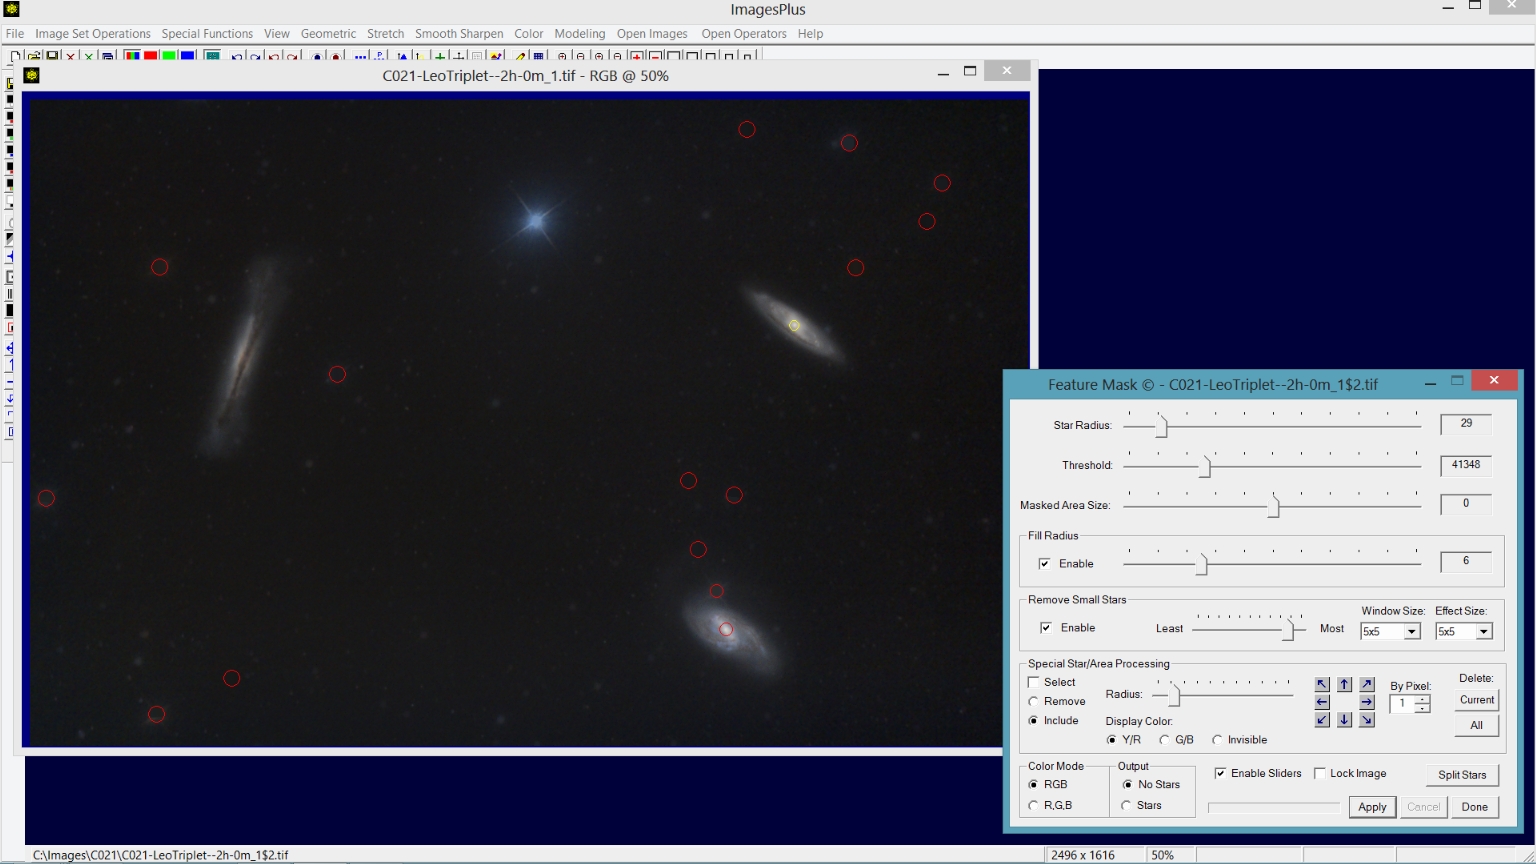
Step 5) Remove stars from the image using the Feature Mask© tool.
The Feature Mask© tool is opened using the 11th button from the top on the left vertical toolbar. Feature Mask© parameters are adjusted to maximize nebula detail while at the same time minimizing stars as shown by the nebula image on left. Bright stars and the center of two galaxies, shown as red and yellow circles, are selected for additional processing using the Special Star/Area Processing section of the Feature Mask© tool. Bright stars are removed and the star like centers of the two galaxies are not removed.
See Using the Feature Mask© to Create an Object Image, Star Image, and Masks for details.
 |
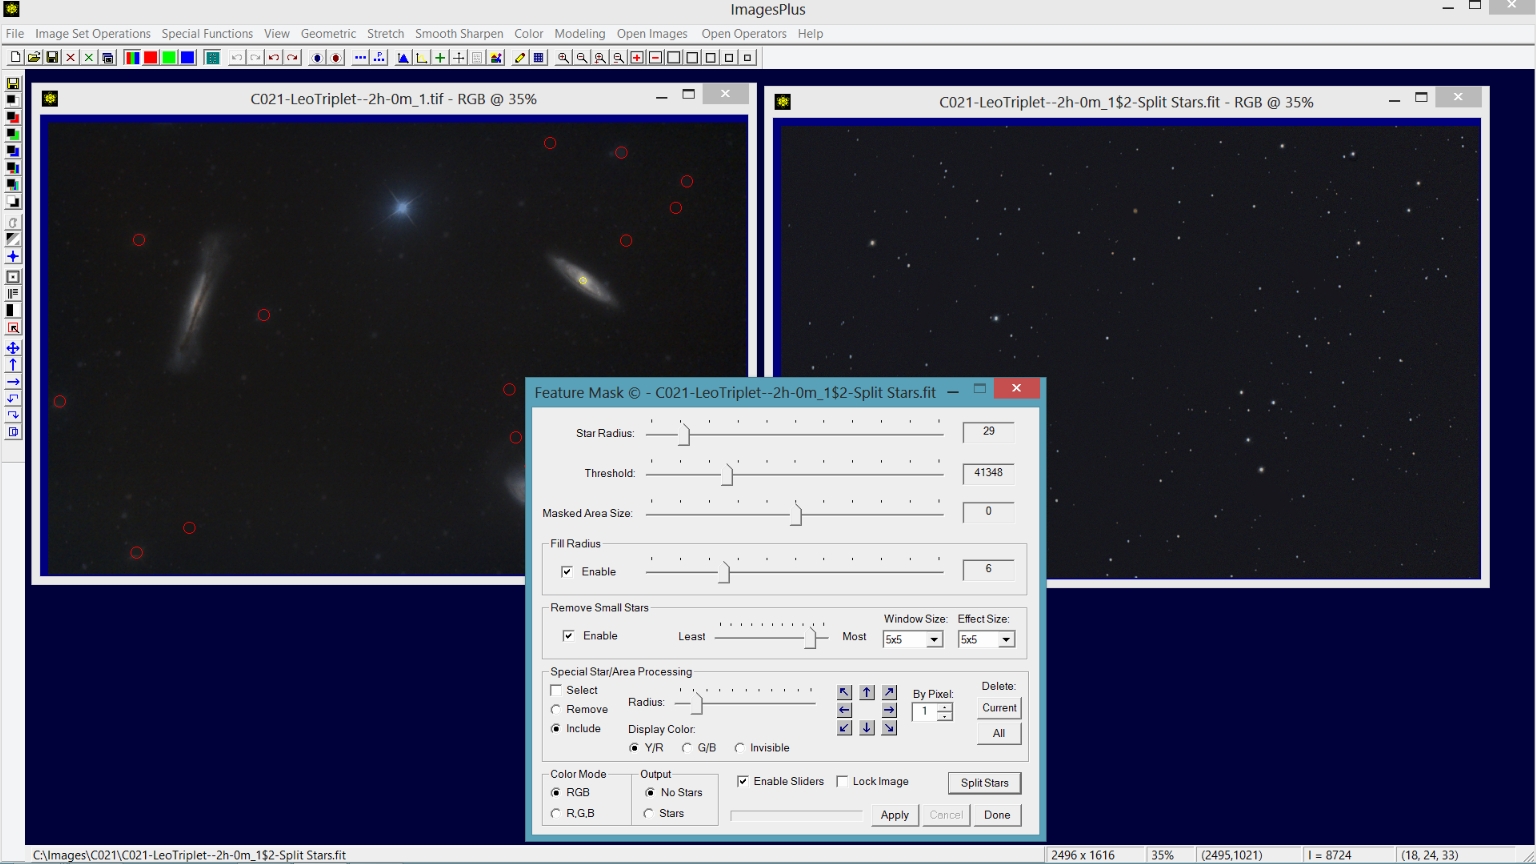
After Feature Mask© parameters are adjusted to remove the star press the Split Stars button to create the matching star only image. On x64 systems spilt and merge of the star and galaxy image is lossless.
 |
Galaxy & Background Image Processing Detail:
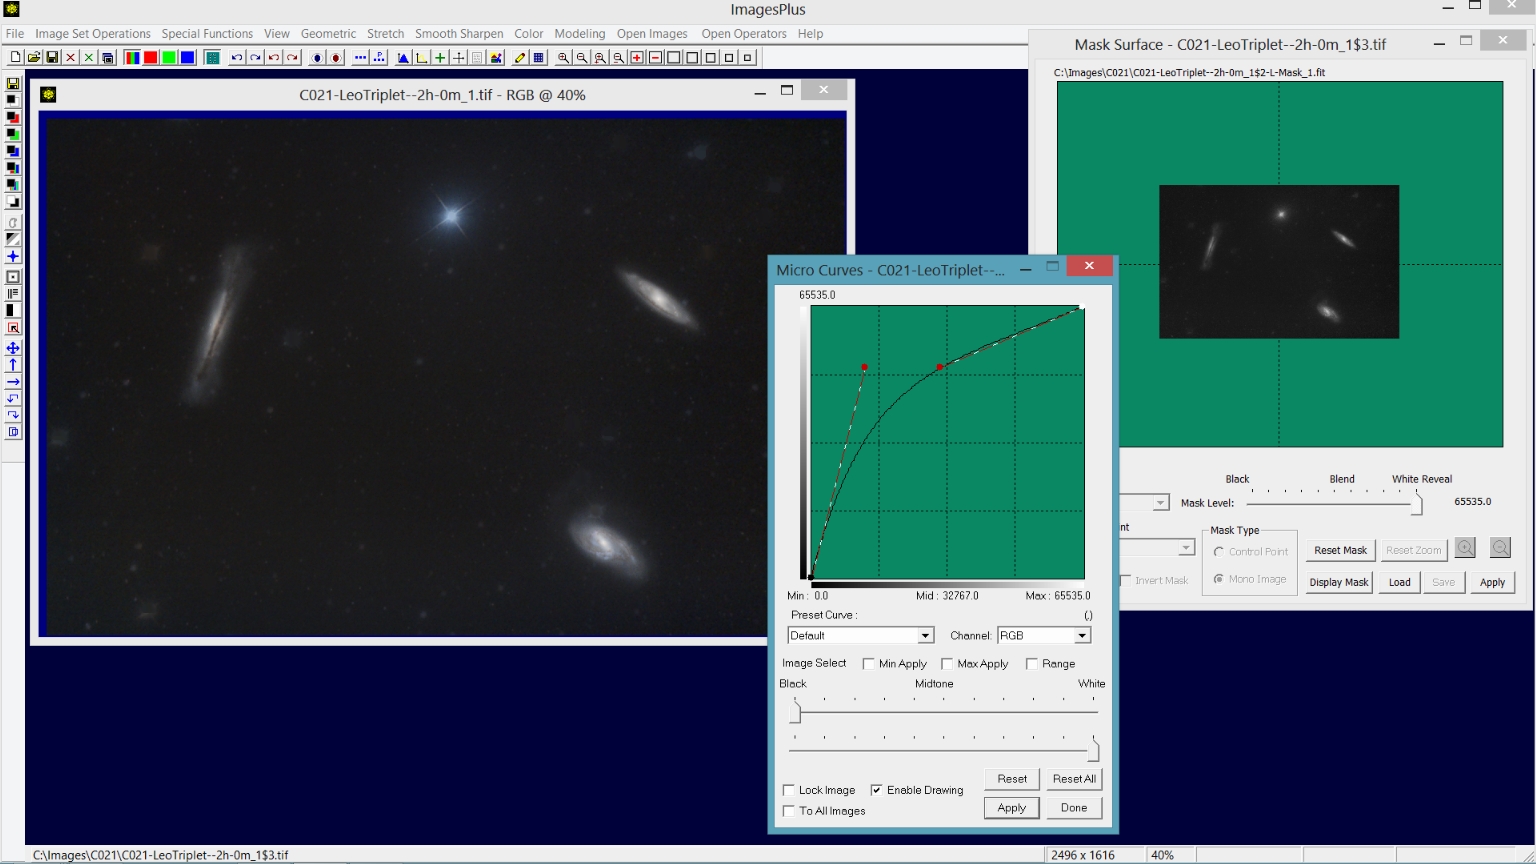
Step 1) Apply curves with a starless luminance mask to brighten the galaxies.
Stretch | Micro Curve is used with a luminance mask without stars created from the galaxy background image without stars. For an example of using Micro Curves with a mask see
Selective Color Adjustment Mask.
 |
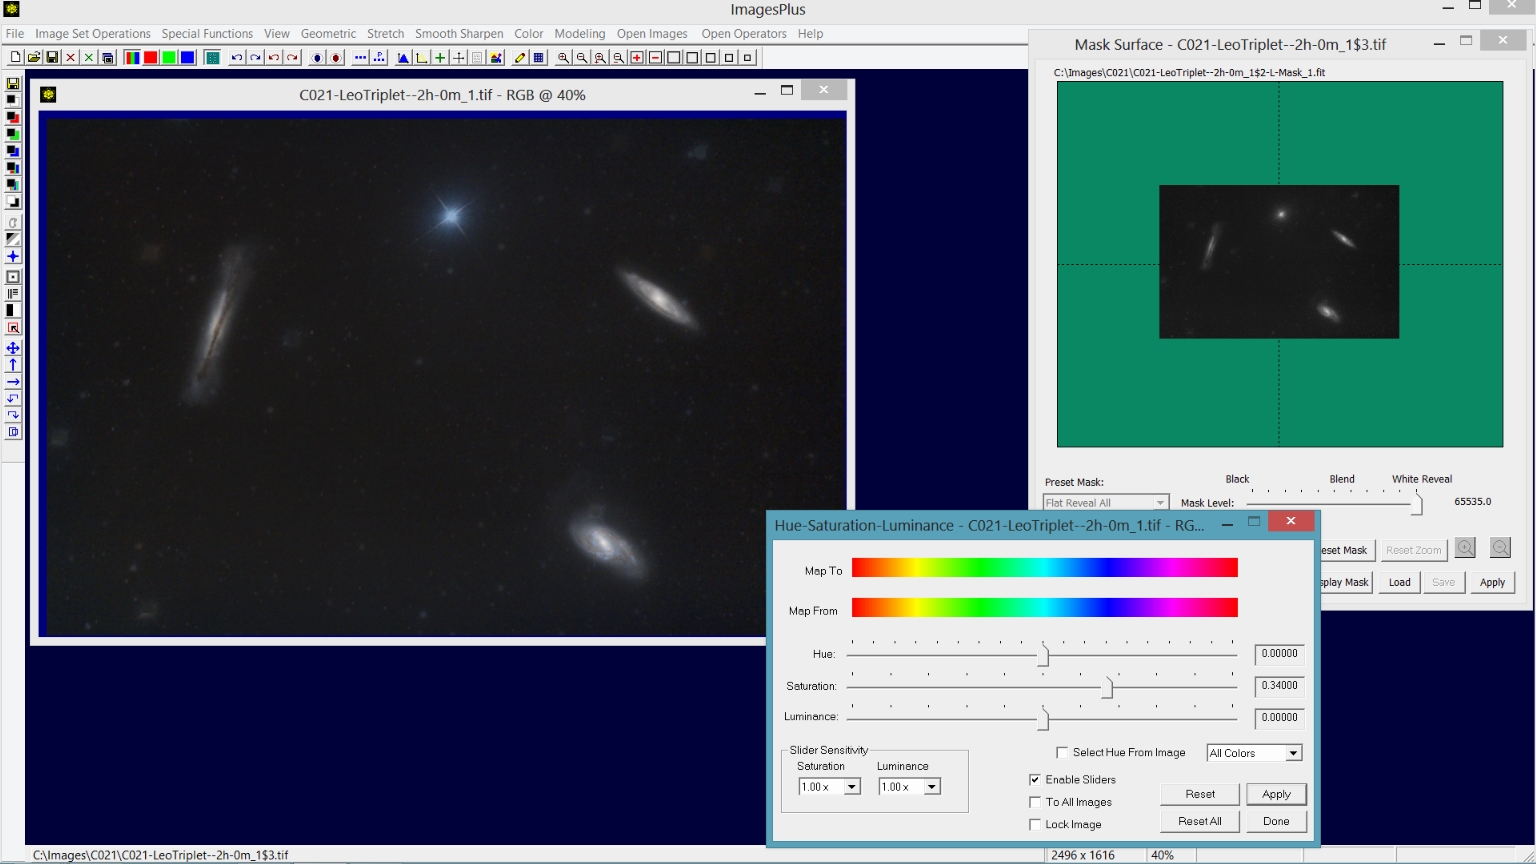
Step 2) Increase saturation of the galaxies using the Hue-Saturation-Luminance tool with a starless luminance mask.
Color | Hue-Saturation-Luminance is used with the same starless luminance mask used in the previous step to increase the saturation of the galaxies.
 |
Step 3) Smooth the background between the galaxies using Multiresolution Smoothing with a feathered luminance range.
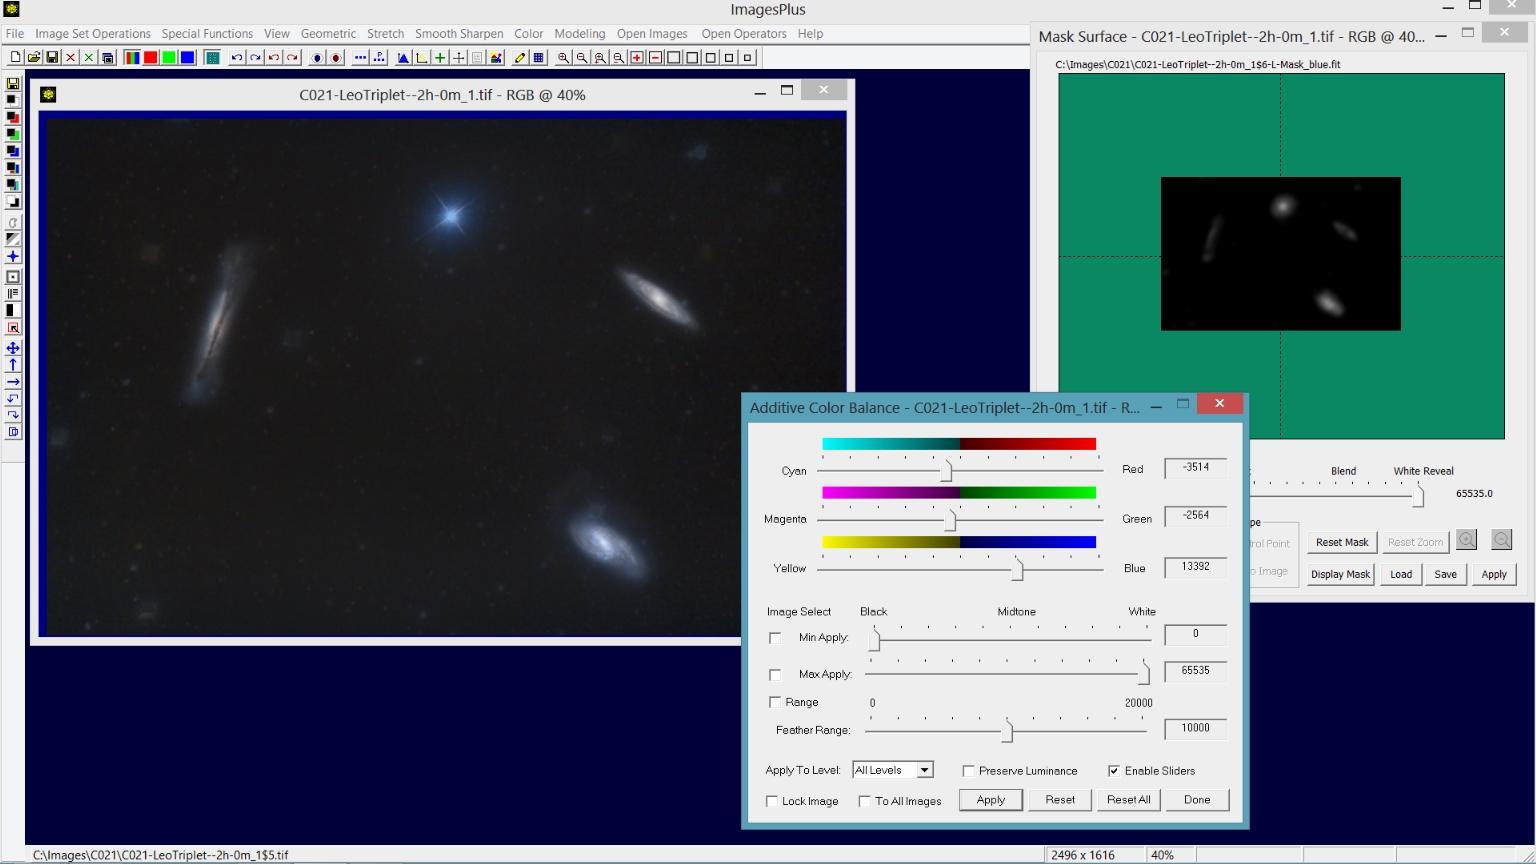
Step 4) Increase blue with a selective blue mask without stars.
A selective blue mask without stars is created from the galaxy and background image. Color | Additive Color Balance is used with the starless blue mask to increase blue. See selective color mask for instructions on creating and using a color mask.
 |
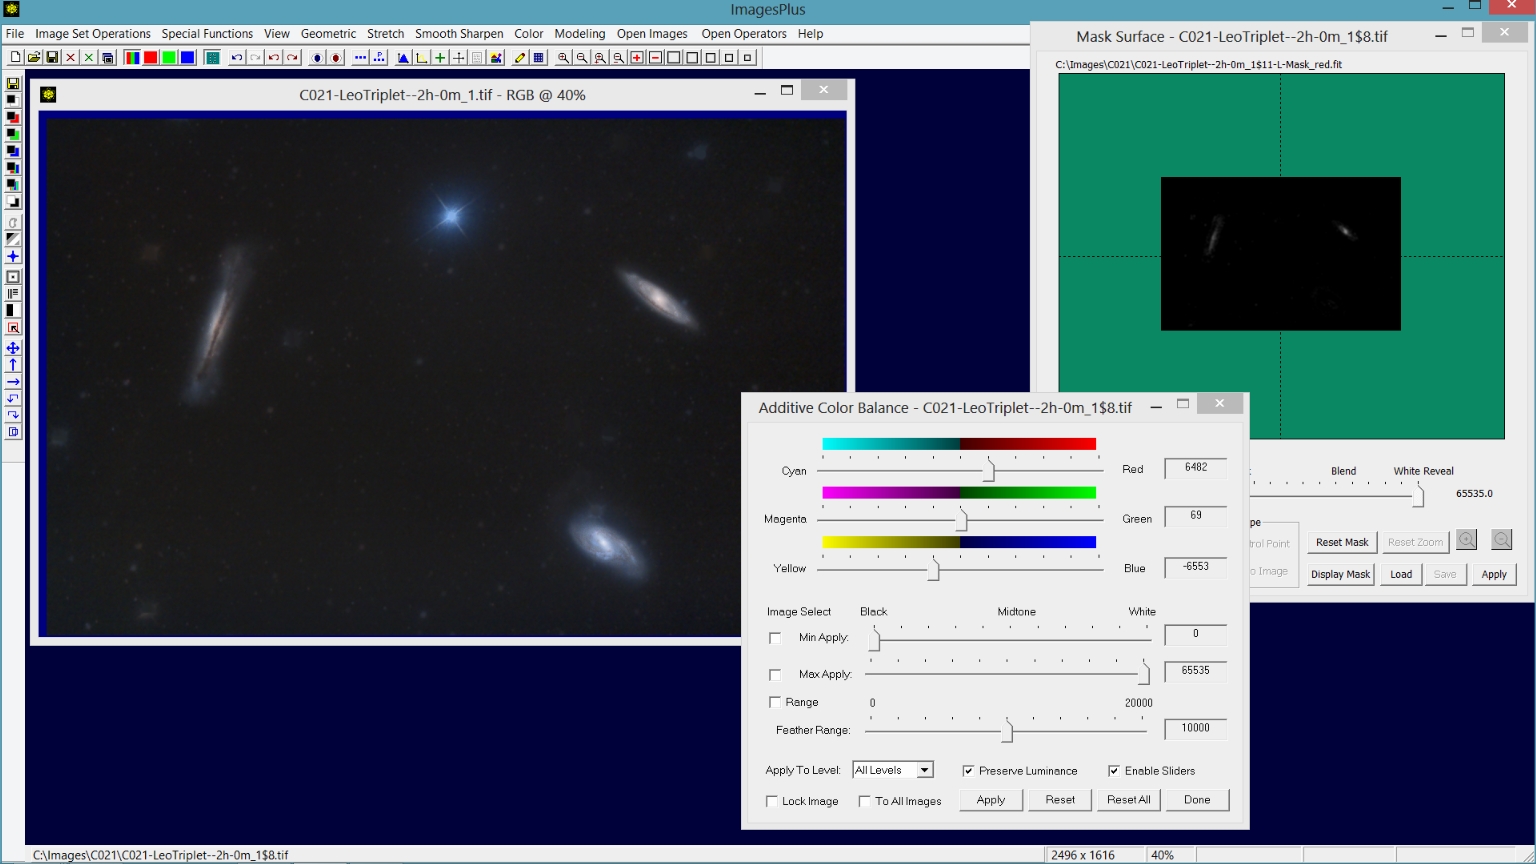
Step 5) Increase red with a selective red mask without stars.
A selective red mask without stars is created from the galaxy and background image. Color | Additive Color Balance is used with the starless red mask to increase red.
 |
Star Image Processing Detail:
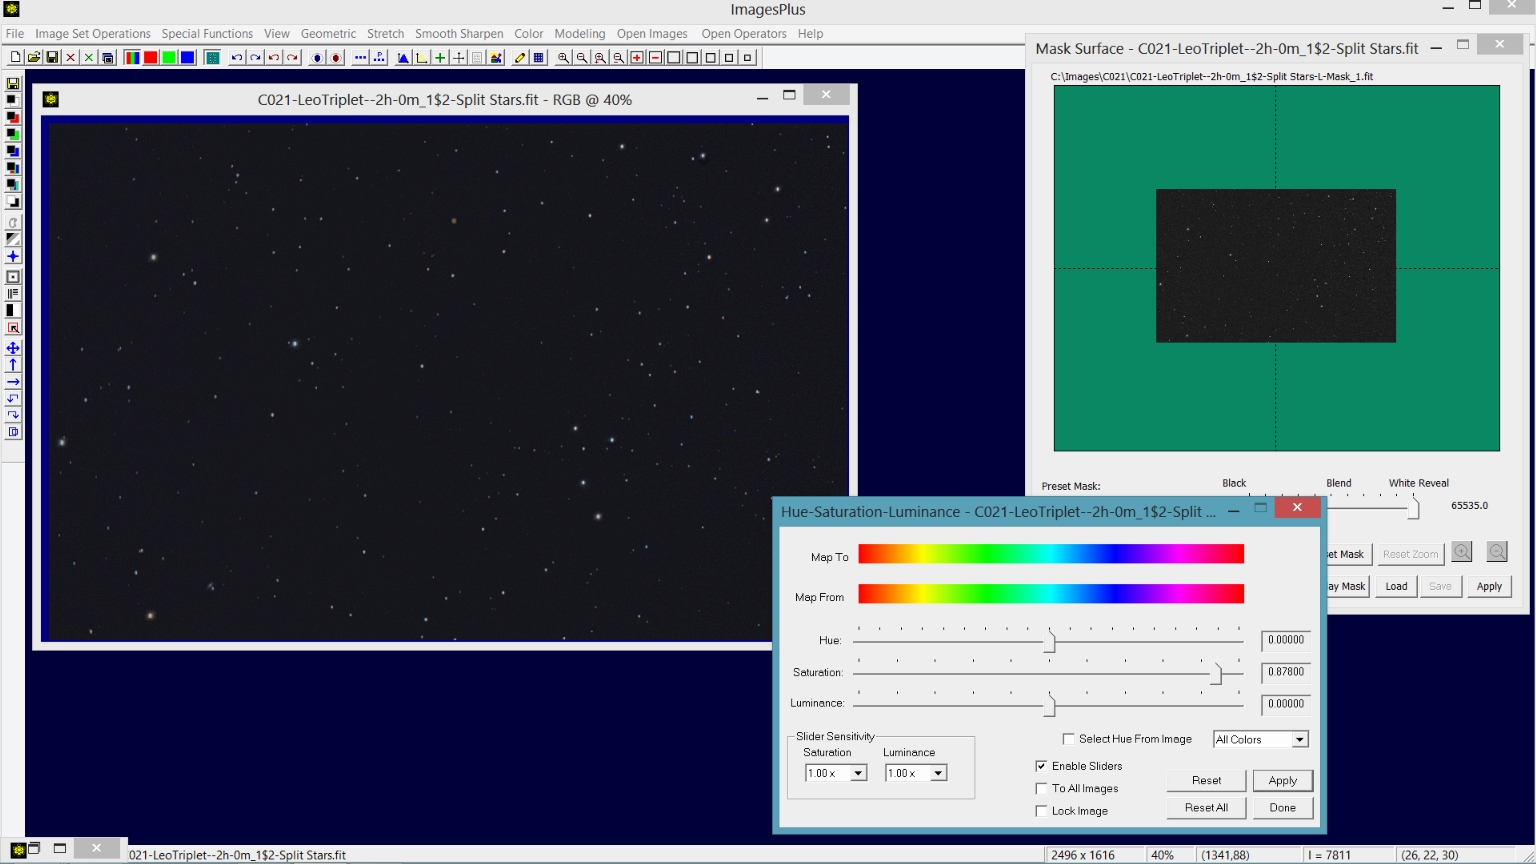
Step 1) Increase star saturation using a luminance star mask.
A luminance star mask is created from the star only image and used to increase star saturation.
 |
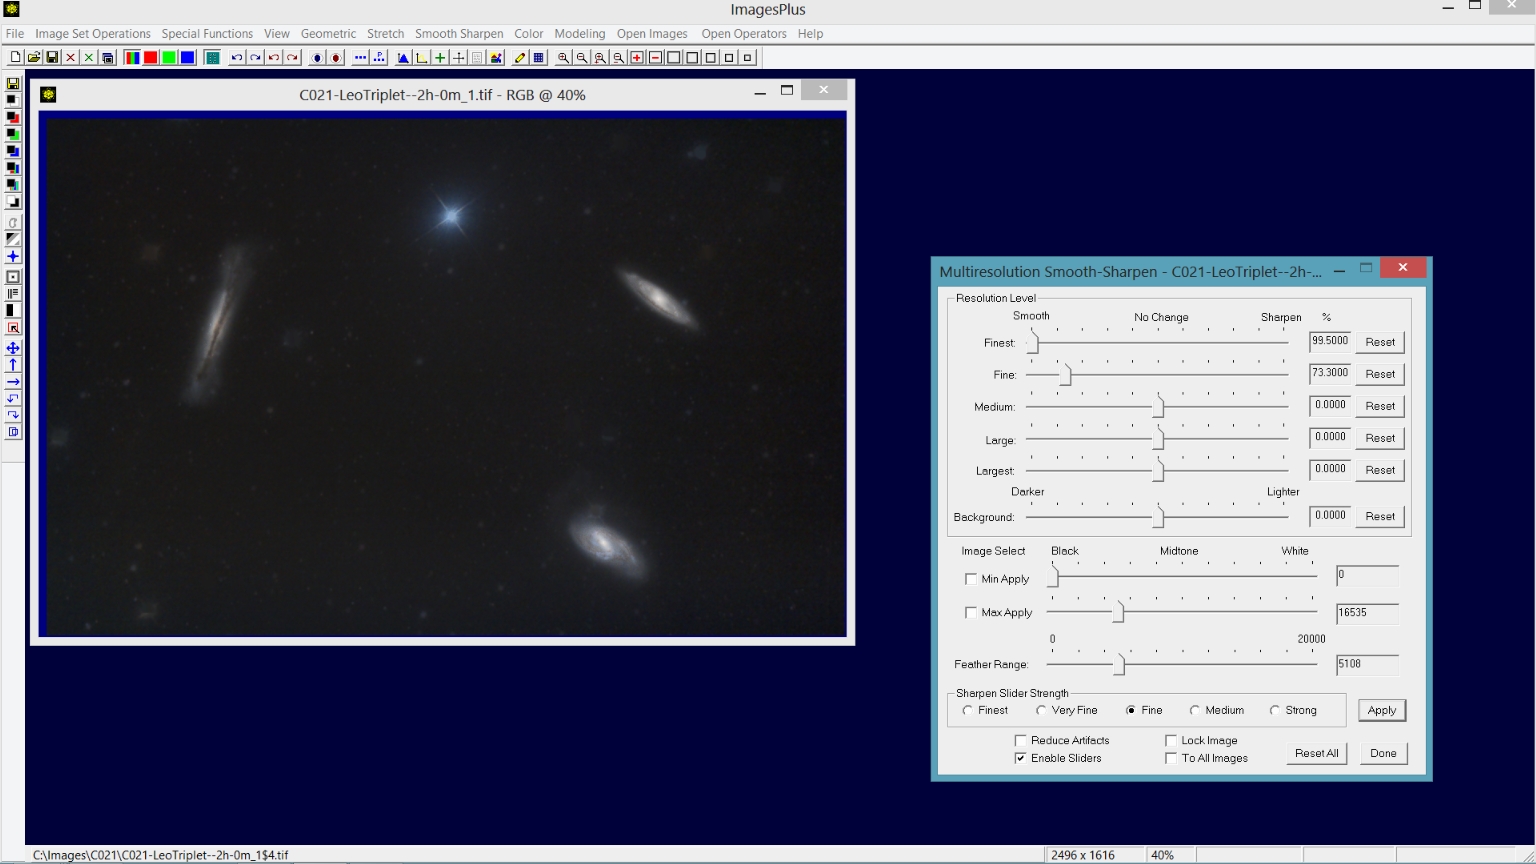
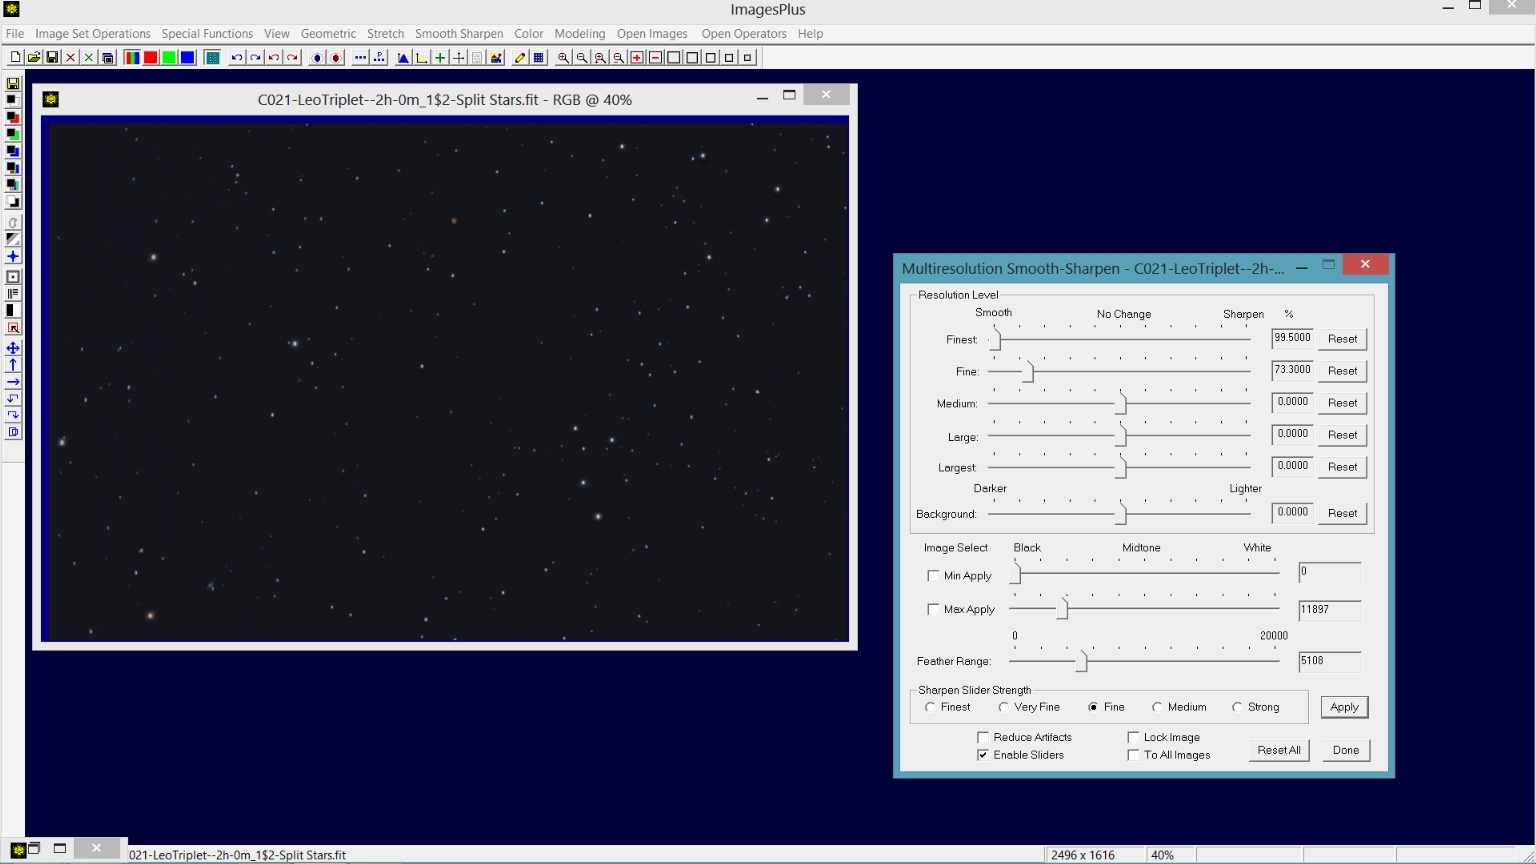
Step 2) Smooth the background between the stars using Multiresolution Smoothing with a feathered luminance range.
The dark area between the stars is smoothed using the Smooth Sharpen | Multiresolution Smooth tool with a luminance range set to [0, 11897] and a feather range of 5108 so that no area brighter than 11897 + 5108 is smoothed.
 |
Star, Galaxy, and Background Merge Processing Detail:
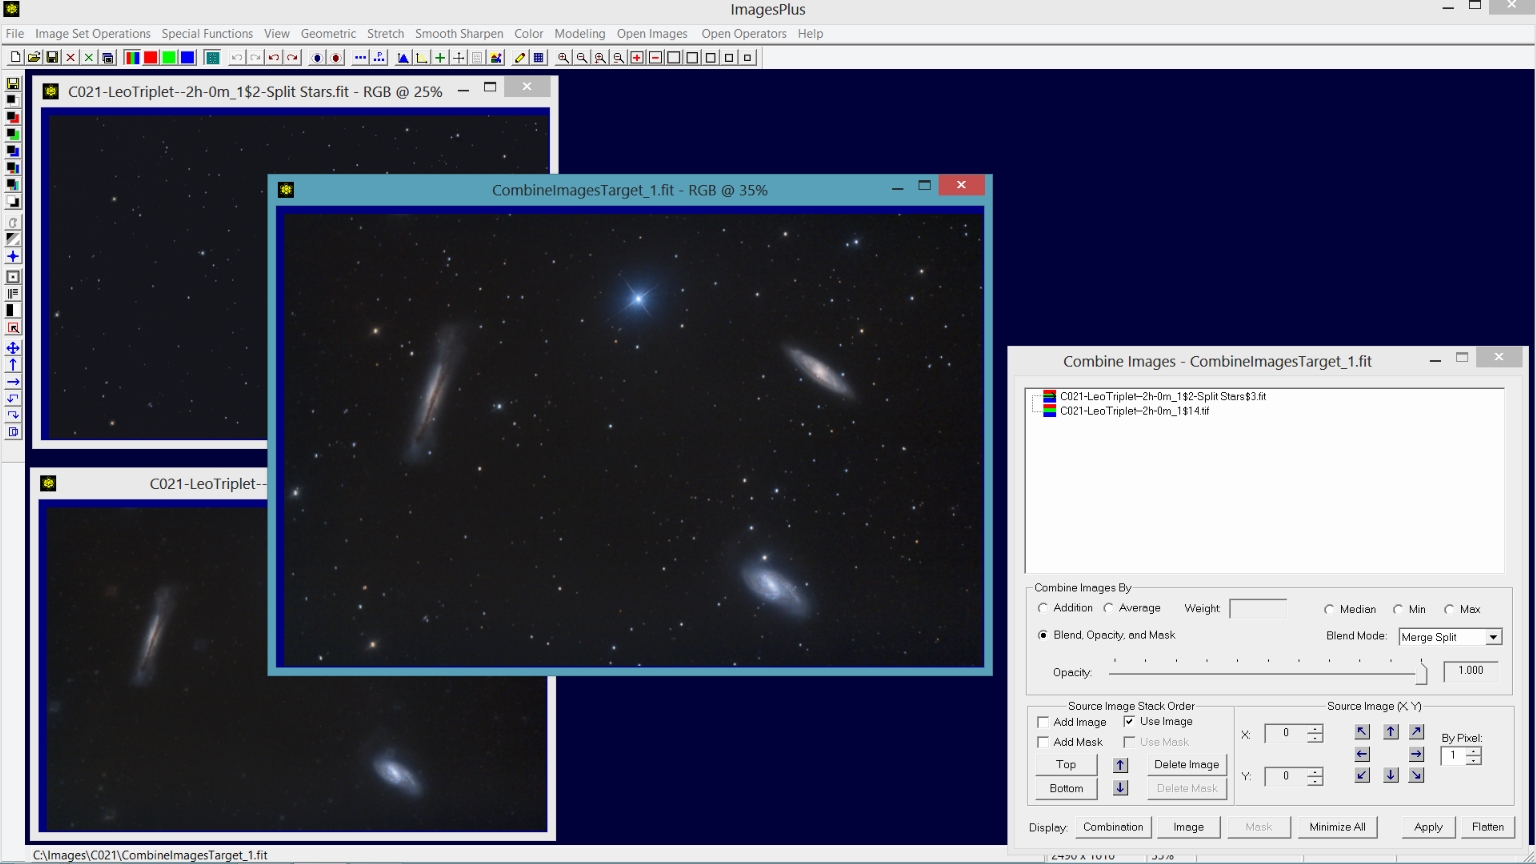
Step 1) Combine Images is used to merge the processed star image with the processed galaxy and background image.
The Special Functions | Combine Images Using | Blend Mode, Opacity, and Masks tool is used to merge the processed star and galaxy image. The galaxy and background image is placed on the bottom of the layer stack with normal blend mode. The star image is the top layer with merge split blend mode.
 |
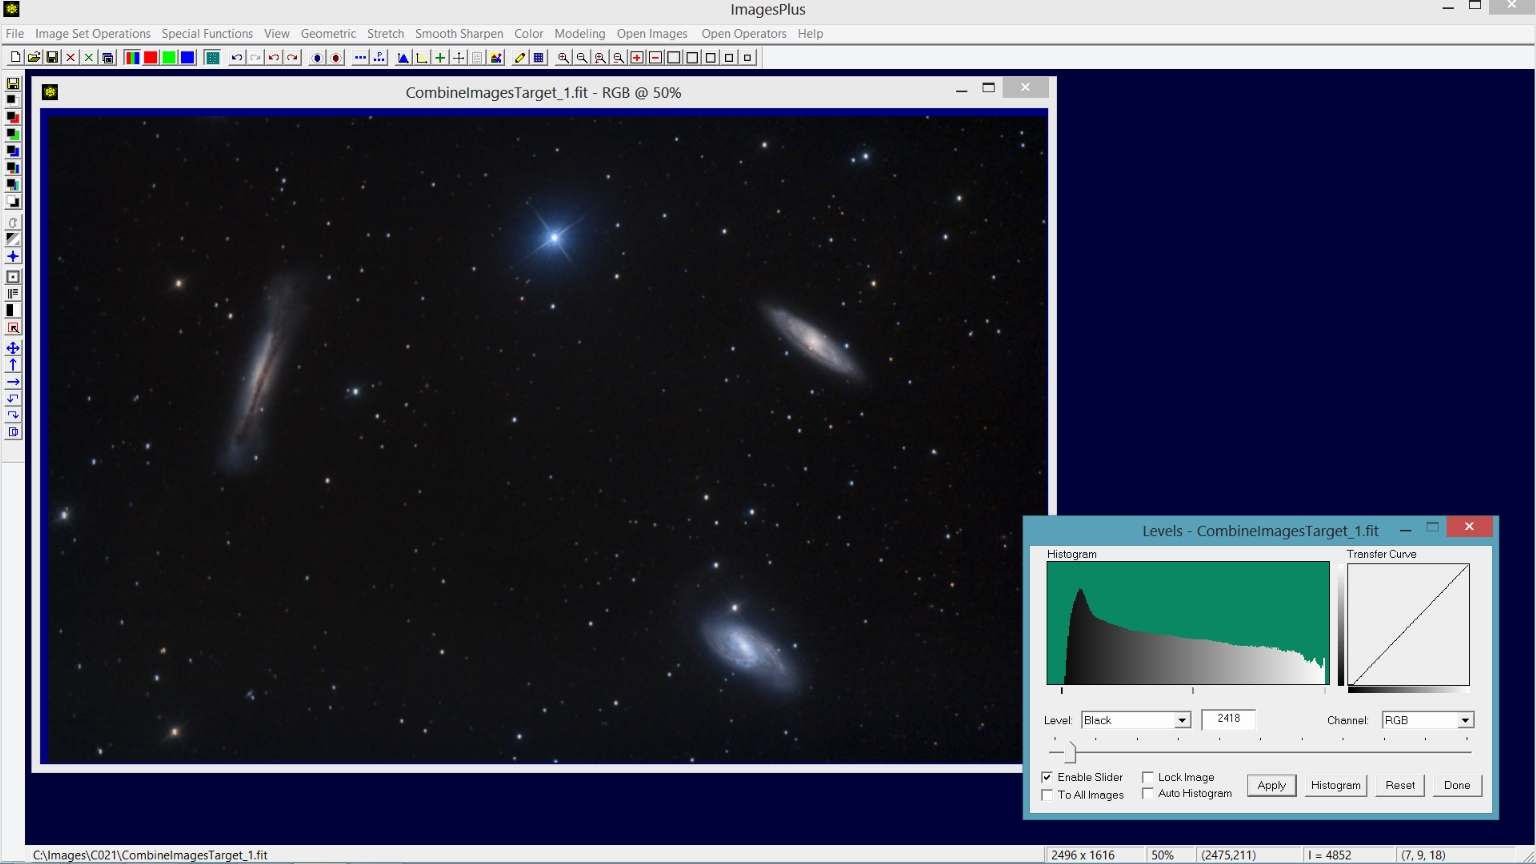
Step 2) Use levels to set the black point of the merged image.
The black point is set to the left side of the histogram using Stretch | Levels.
 |
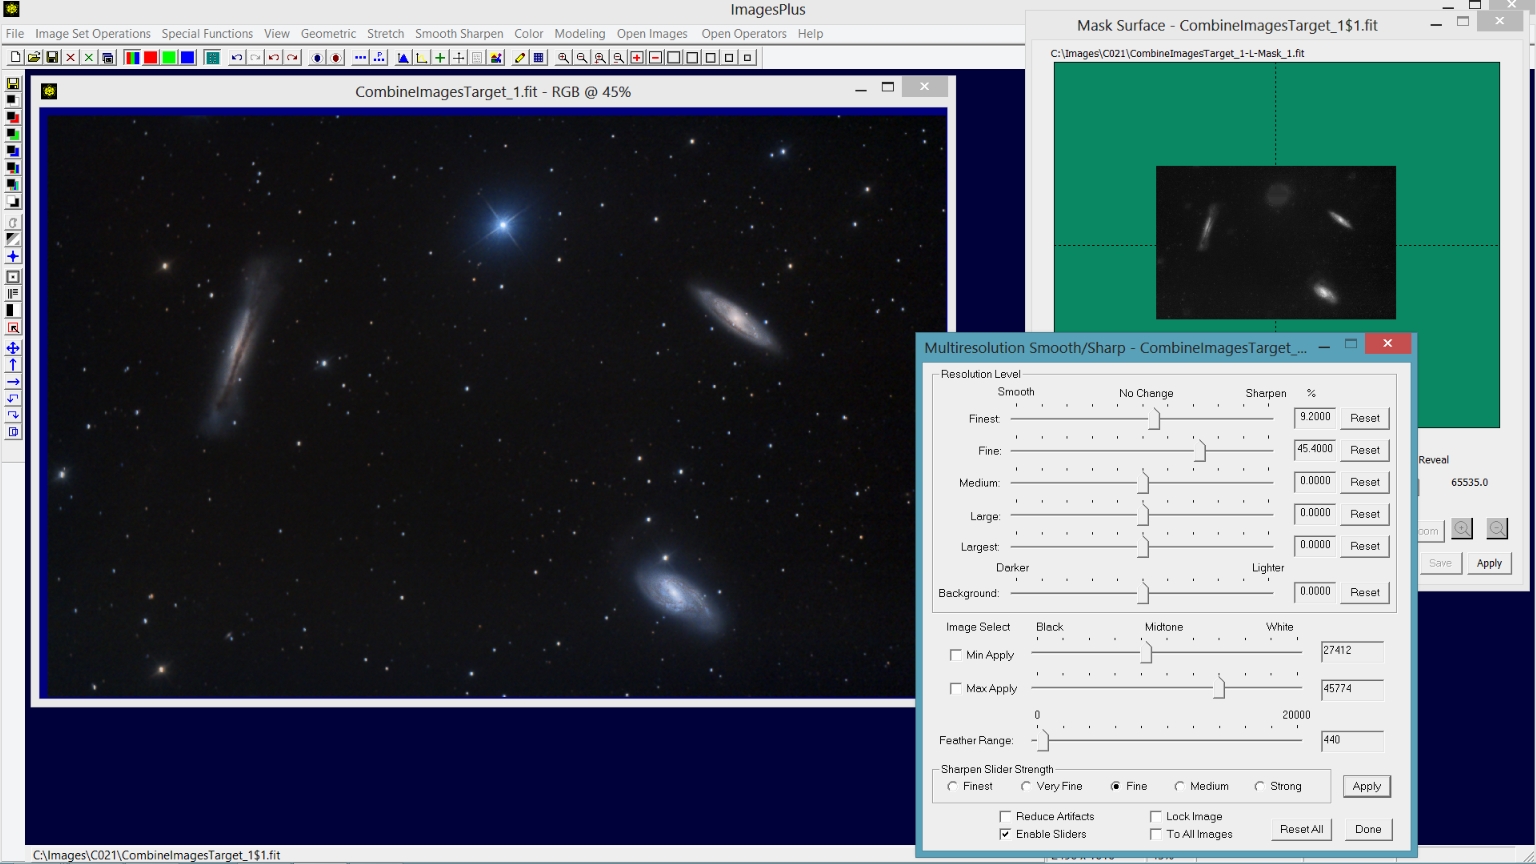
Step 3) Sharpen just the galaxies using Multiresolution Sharpen with a starless luminance mask.
Stars are removed from a duplicate of the image using the Feature Mask tool then a starless luminance mask is created. The luminance mask is used to sharpen the galaxies.
 |
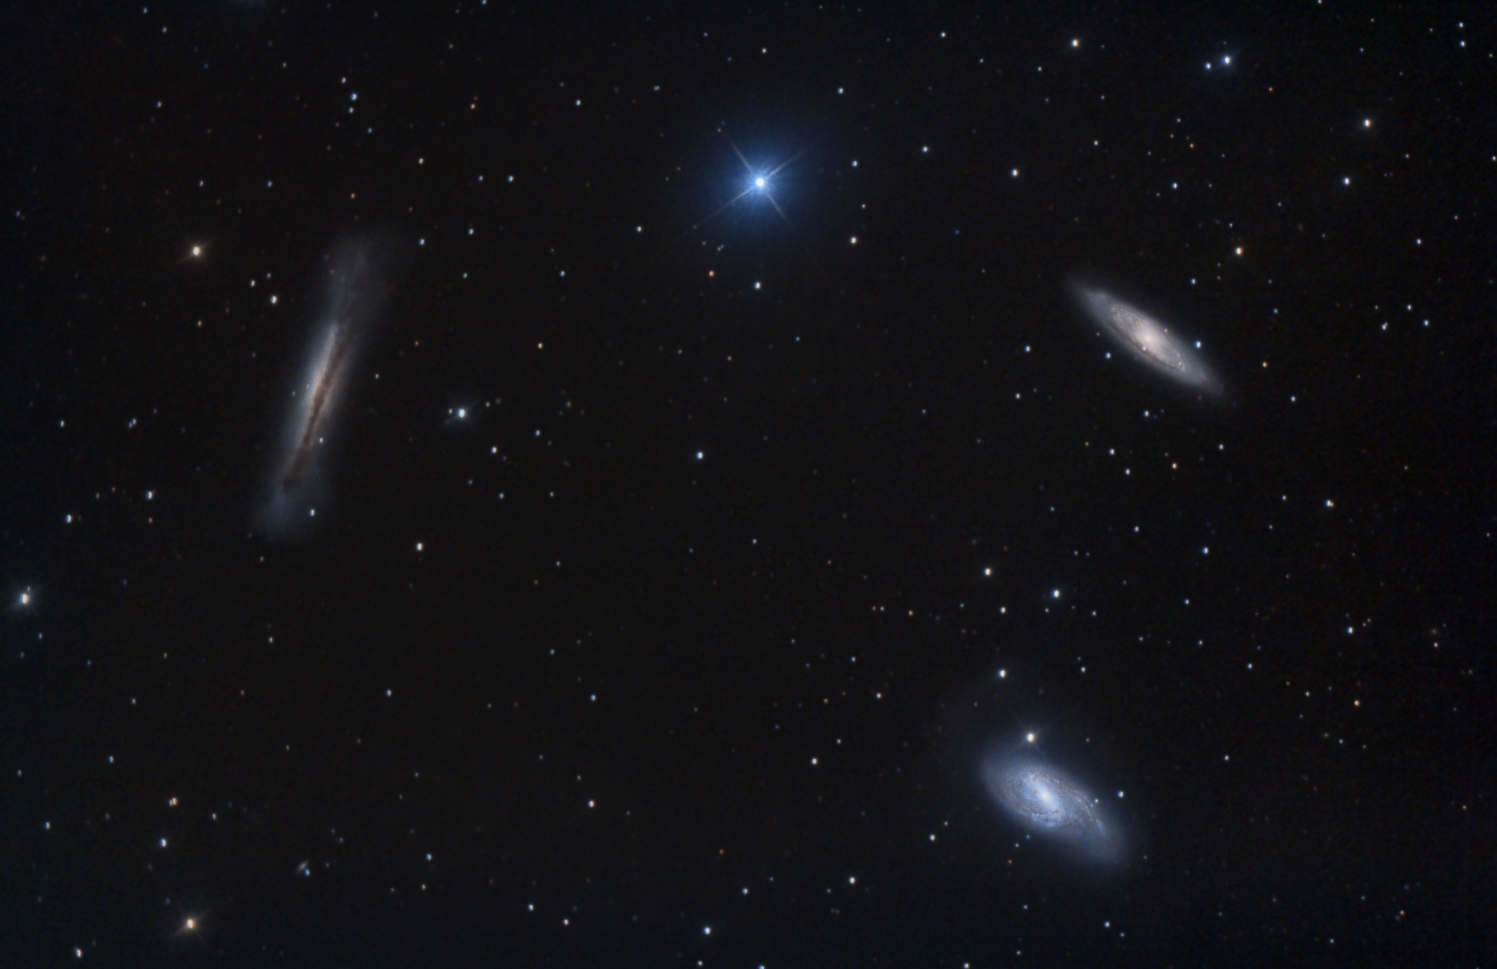
Final Leo Triplet image from RGB data by Blair MacDonald. Note that the stars are slightly elongated. See Fixing Elongated Stars for a simple solution.
 |
Copyright © December 20, 2013 MLUnsold Digital Imaging. All Rights Reserved.