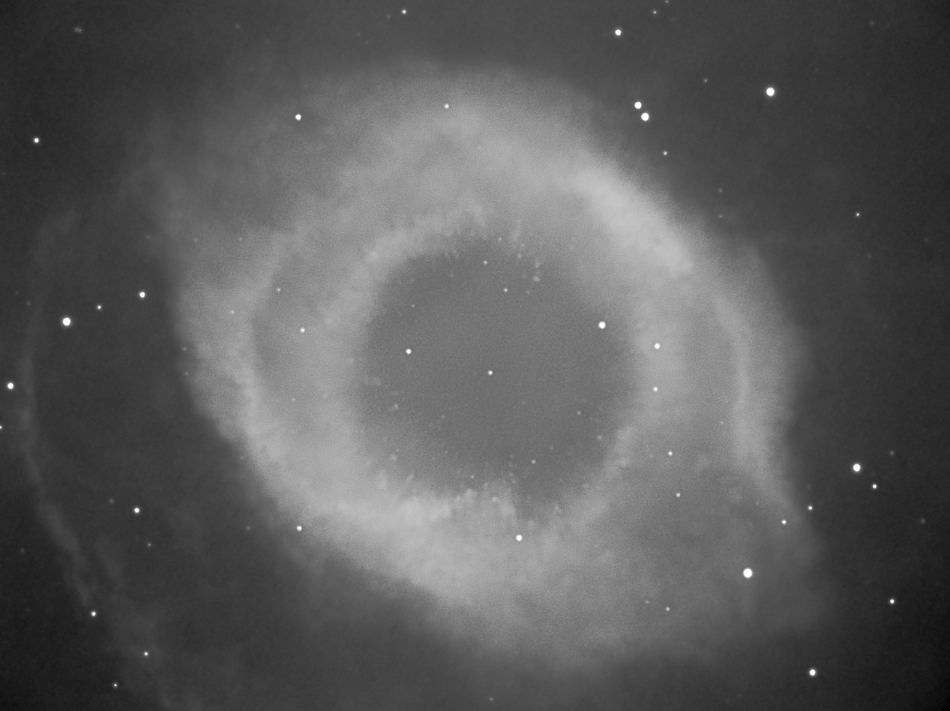
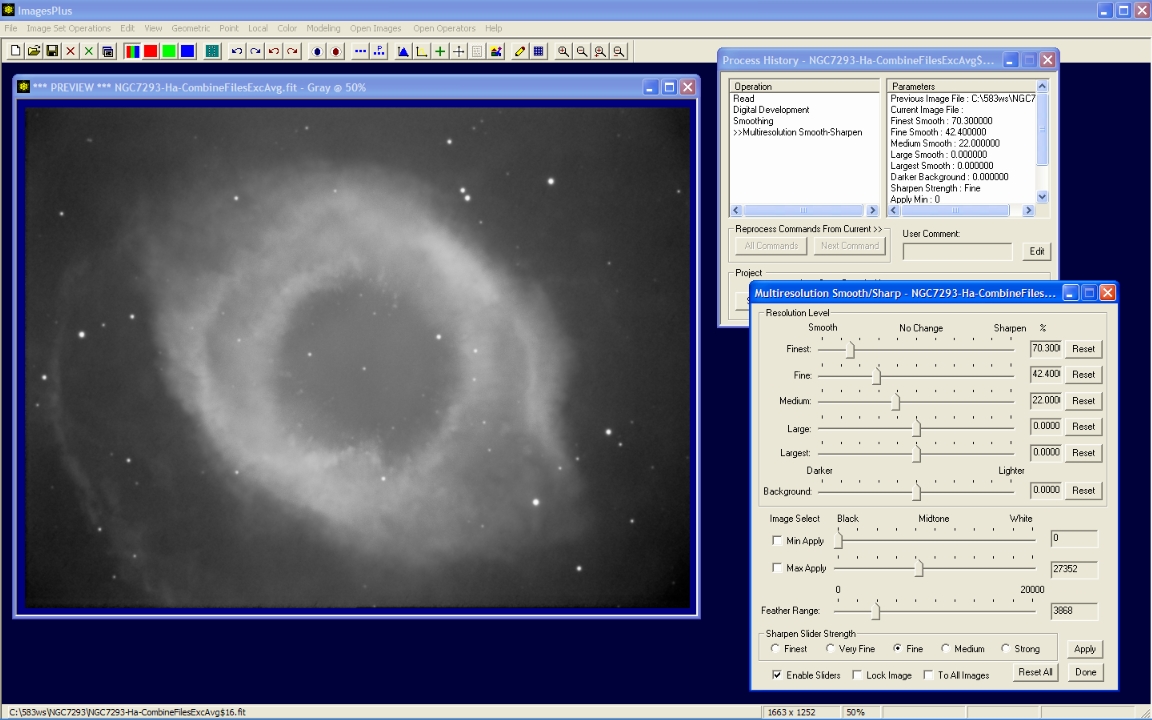
Digital development and local background smoothing were applied to a stack of 24 x 10 minute H-alpha light frames of NGC 7293. Additional smoothing and some sharpening of the detail in the nebula could improve the image.
The goal is to apply a small amount of wavelet smoothing to the background then wavelet sharpen the highlights.
Initial stacked image after digital development and local background smoothing.
 |
Step 1
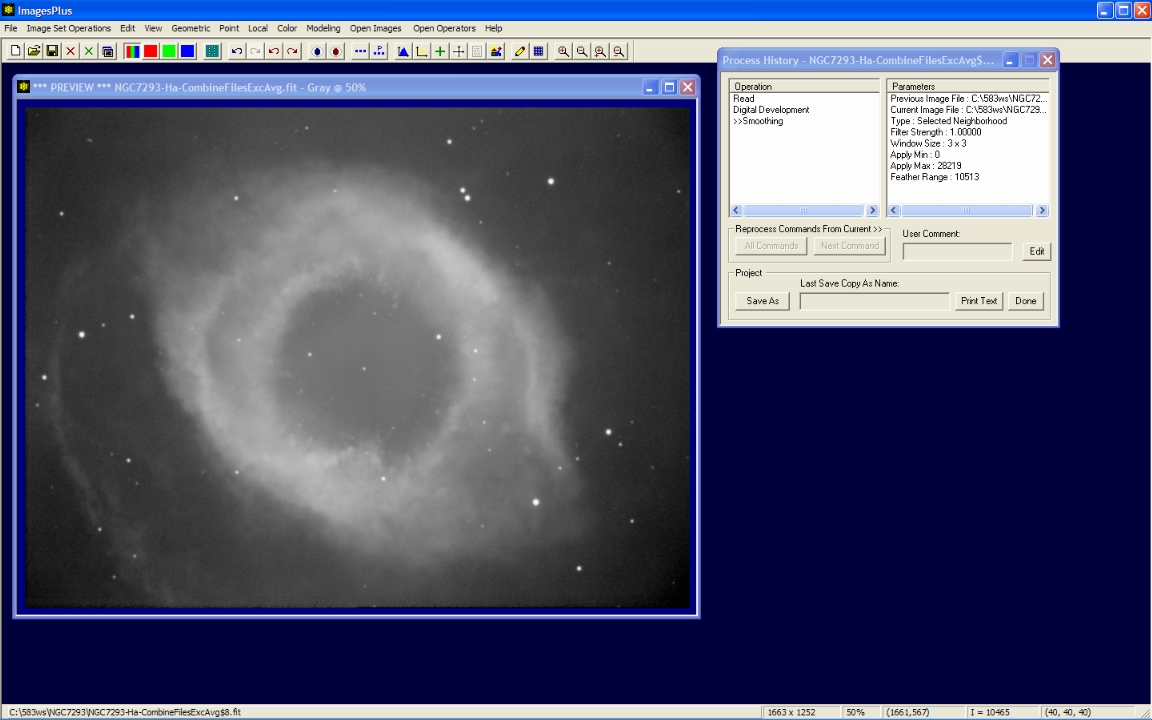
- The Local | Multiresolution Smoothing & Sharpening tool is used to smooth the background then sharpen the inner part of the Helix. The Max Apply box is checked then a left-click on the image at the position of the small red square is used to select the maximum image value to be smoothed.
The red dot shows the position of a mouse click used to select the maximum pixel value to recieve smoothing. The max apply to value is set to 27352 after the mouse click.
 |
Step 2
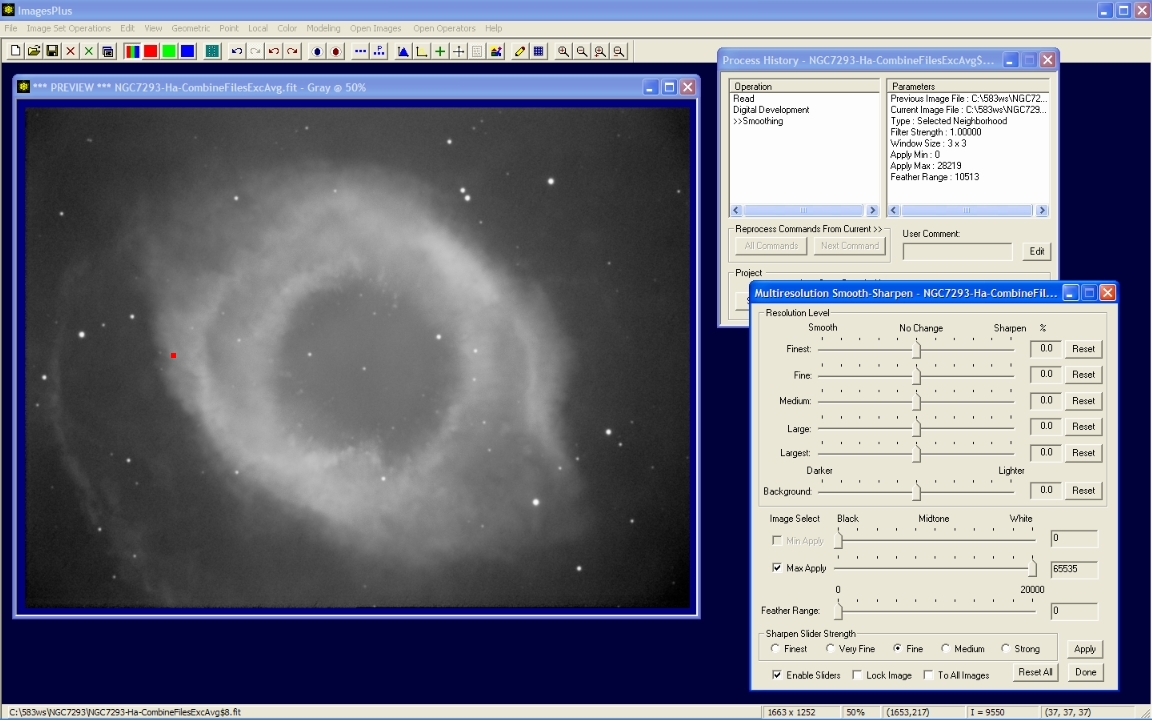
- The finest, fine, and medium detail levels are adjusted towards the left to apply a small amount of smoothing to those pixels values between the min and max apply values.
Pixels values between the min apply value of 0 and the max apply value of 27352 recieve full smoothing. The feather range is set to 3868 so pixel values between 27352 and 27352 + 3868 recieve a decreasing amount of smoothing.
 |
Step 3
- Next the lighter areas of the image with pixel value above 27352 will be sharpened.
- It is important to press the Set View tool bar button to save the smoothing application of Multiresolution Smoothing & Sharpening from step 2 above before applying the sharpening functions using the same tool.
- Uncheck the Enable Sliders box so that the action of resetting a slider is not applied to the image.
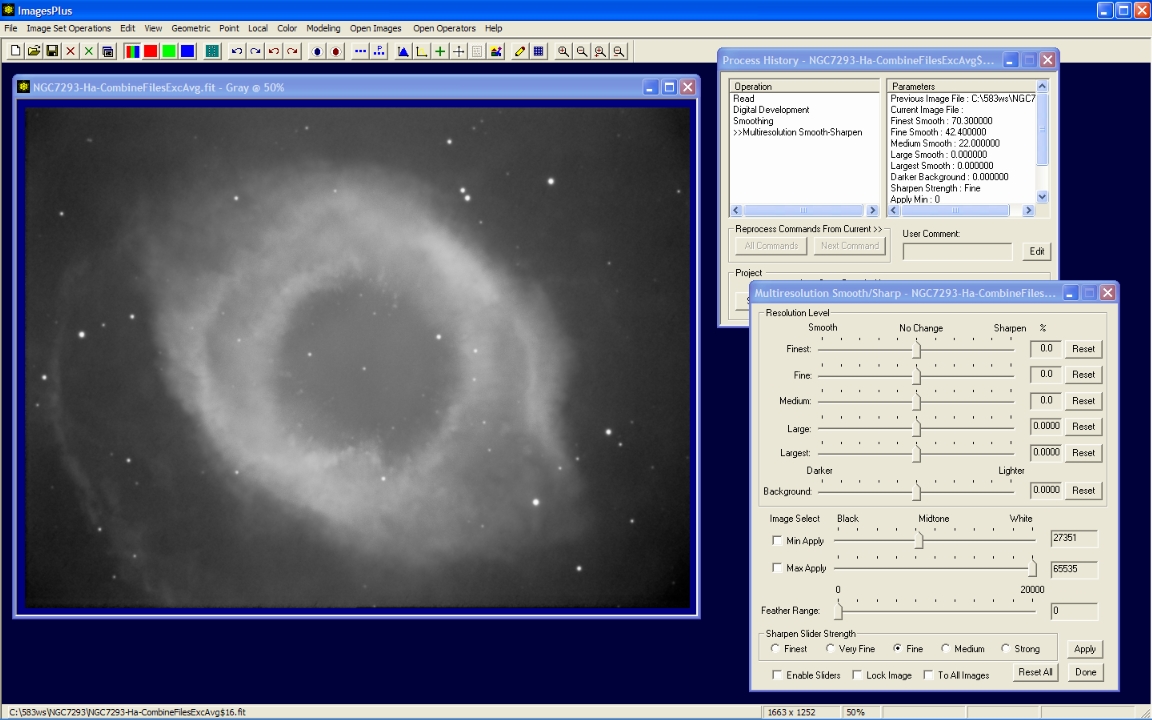
- After the Set View toolbar button is pressed to save the smoothing action reset the finest, fine, medium, and feather range sliders to 0. Set the min apply to value to 27351 which is the max apply to value used during the smoothing operation. Set the max apply to level to 65535.
- Check the Enable Sliders box so that the action of moving a slider is automatically applied to the image.
Multresolution Smoothing & Sharpening tool is set to the neutral position with the highlight range selected.
 |
Step 4
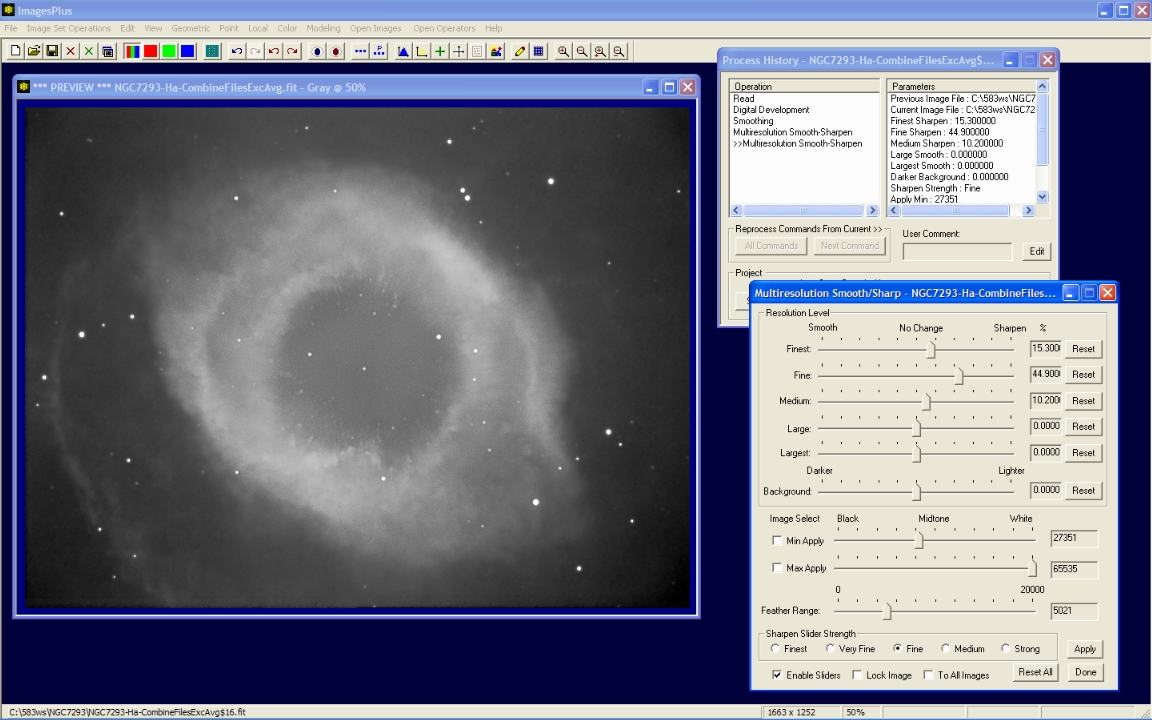
- The finest, fine, and medium detail levels are adjusted towards the right to apply a small amount of sharpen to those pixels values between the min and max apply values.
Pixels values between the min apply value of 27351 and the max apply value of 65535 recieve full sharpening. The feather range is set to 5021 so pixel values between 27351 - 5021 and 65535 + 5021 recieve a decreasing amount of sharpening.
 |
Step 5
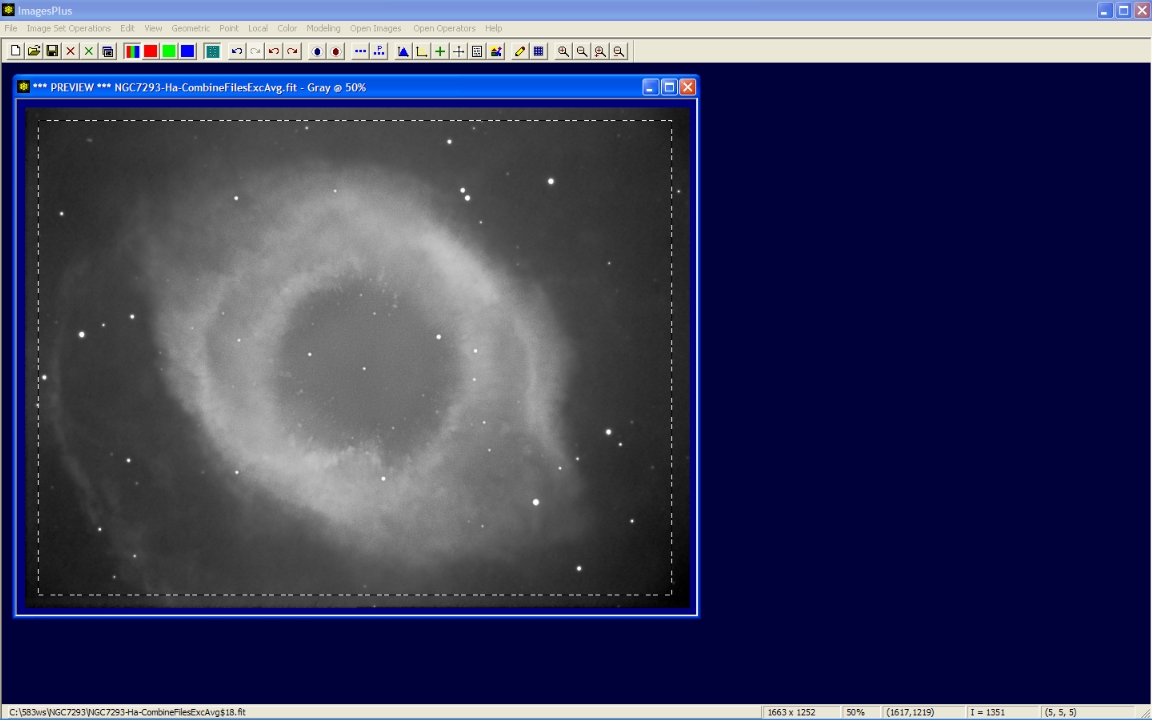
- The Copy A Portion Of An Image toolbar button is used to enable cropping.
- Left-click and drag the mouse around the object to define the crop area.
The image is cropped to remove the uneven edge caused by alignment shift and stacking.
 |
Step 6
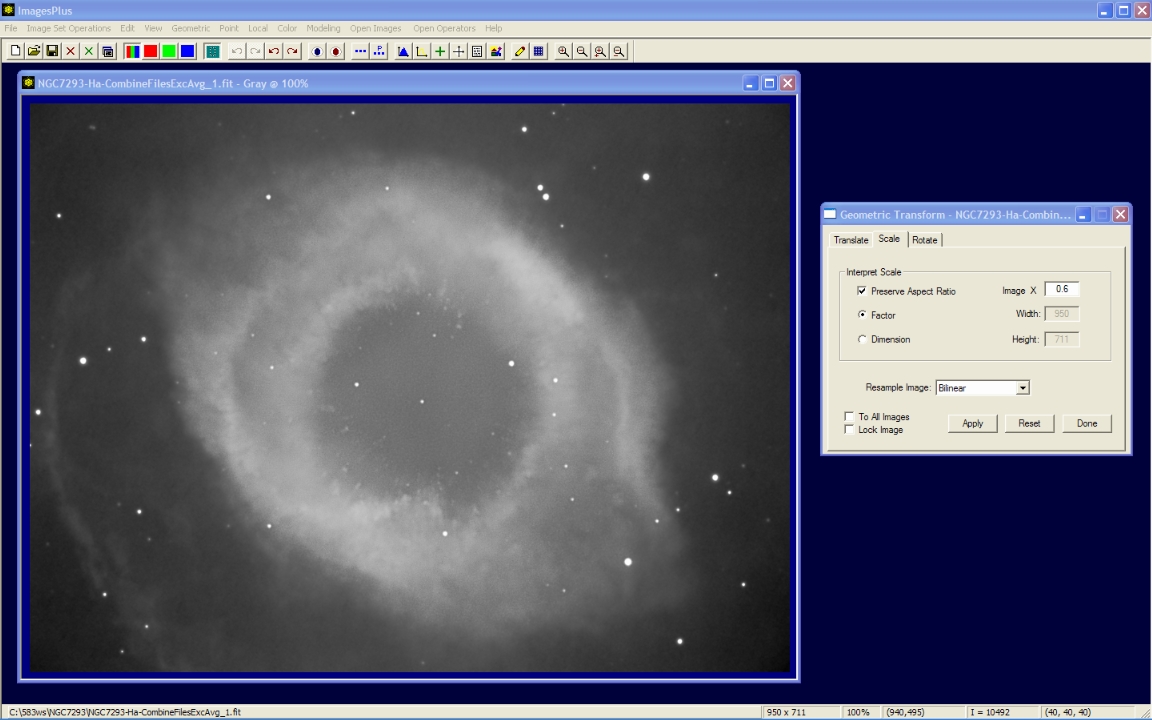
- The Geometric | Geometric Transform | Scale command is used to resize the image for display on the web.
- File | Save Copy As is used to save the FITS image as JPEG.
Note that NGC 7293 is displayed at 60% as shown in its window caption bar. So the image is scaled using a factor of 0.60 to achieve the same scale for display on the web.
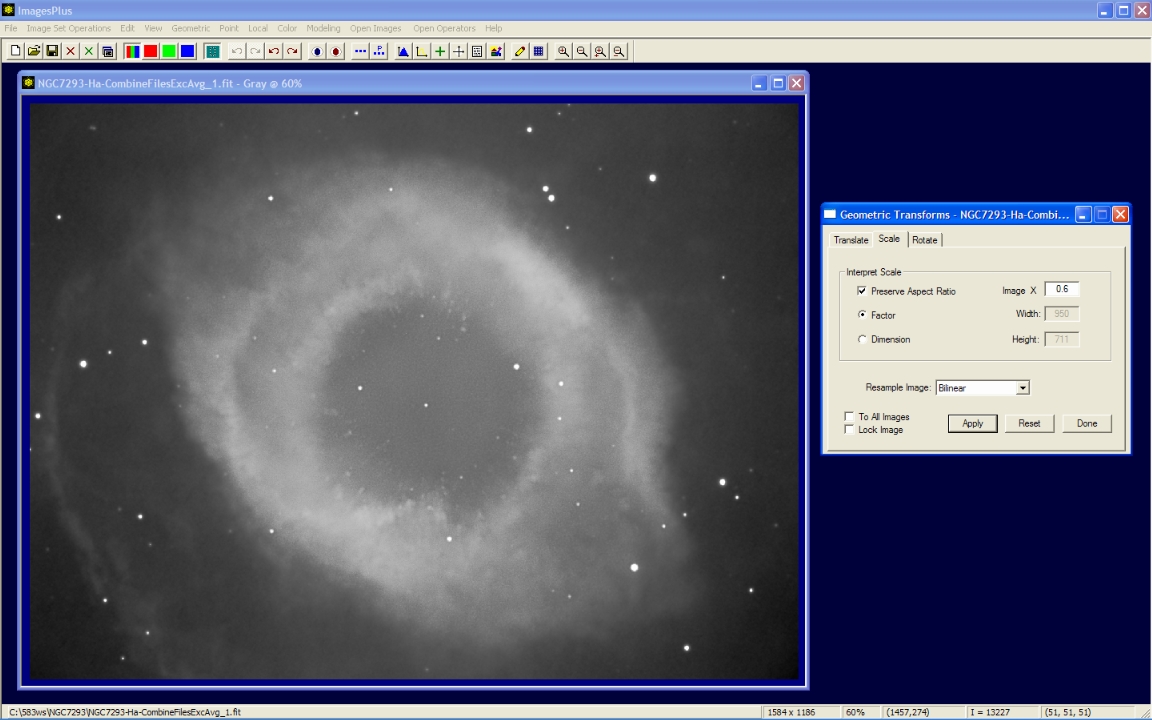 |
After the 0.6 scale factor is applied NGC 7293 is displayed at 100% as shown in its window caption bar.
 |
Copyright © 2009 MLUnsold Digital Imaging. All Rights Reserved.


