Using the Feature Mask© Tool With Color & Monochrome Images
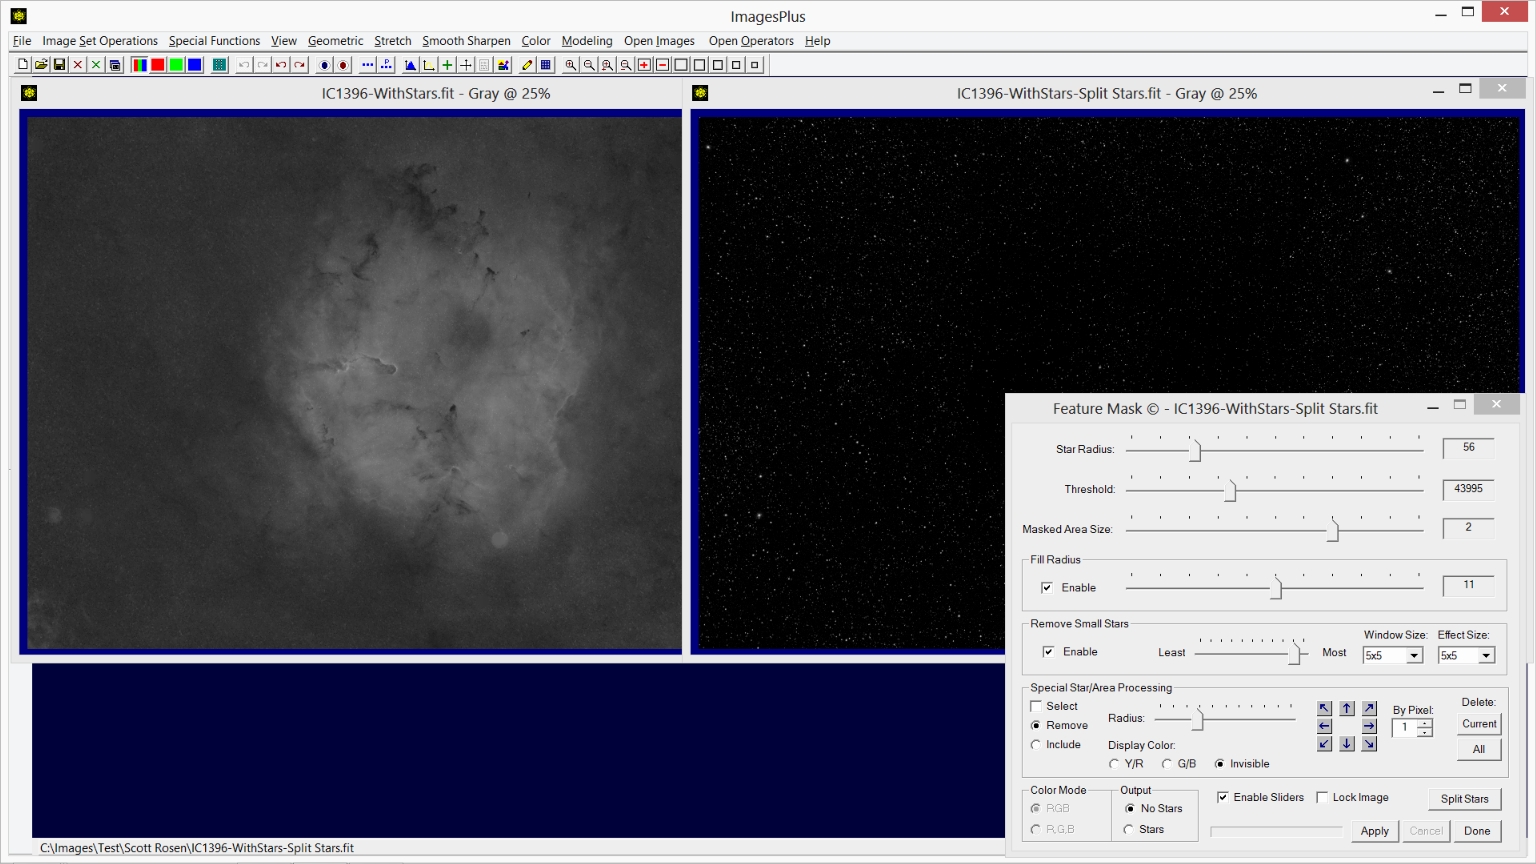
The Feature Mask tool can be applied to a color or monochrome image to separate or split stars from an object such as a galaxy, nebula, cluster, comet, and background.
The split star and object with background images can be used as masks with conventional mask process techniques. A mask created using the Feature Mask tool, unlike conventional mask that are often blurred to remove objects and stars,
are very detailed and allow precise selection. Often it is simpler to process the split star and object images directly using different tool with optional mask and luminance range control then merge the processed images. Feature mask split and merge is lossless when using
ImagesPlus x64 image processing on Windows x64.
Feature Mask Control & Use Summary:
Control Description
- Star Radius : Move the star radius slider towards the right to include larger stars in the selection. Keep selection of objects other than stars at a minimum.
- Threshold : For a given star radius some detail from objects other than stars may be included in the selection. Adjust threshold so that selection of objects other than stars is minimized and object detail is maximized.
- Masked Area Size : Move the masked area size slider towards the right to increase the area selected for a given star radius and threshold.
- Fill Radius : If fill radius is not checked then areas selected for removal are shown in black to make it easy to maximize detail. If fill radius is checked the areas selected for removal are in painted from the local surrounding area.
Move the fill radius slider towards the right to increase the in paint radius and generally make the painted areas darker.
- Remove Small Stars : Adjust the remove small stars slider towards the right and possibly increase windows size and effect size to remove small stars that remain for a given star radius and threshold.
- Special Star/Area Processing : Special processing can be applied to circular areas of the image to remove large stars or include areas of an object such as a bright star like galaxy core. Check the Select box then left click on an area.
Adjust the radius and position of the circular area. Choose the Remove option to remove the circled area or Include to exclude the circled area from the feature mask.
- Color Mode : If RGB is selected then an area is removed if the area is removed in the red, green, and blue images. If R,G,B is selected then an area is removed if the area is removed in the red, or green, or blue images. In general R,G,B selects and removes a larger area than RGB.
Color Mode does not apply to special processing areas and is disabled when the current active image is monochrome.
- Output : If No Stars is selected then stars are separated from the image and the Split Stars button will create the matching star only image.
If Stars is selected then objects other than stars are separated from the image and the Split Object button will create the matching object image. In either case the split star
and object images can be lossless merged using Special Functions | Combine Images | Using Blend Mode, Opacity, and Masks with merge split blend mode. Lossless merge requires
ImagesPlus x64 image processing on x64 Windows.
- Split Stars/Object : Press the button after you adjust and apply the feature mask to an image to create the matching star or object image depending on the Output selection.
- Enable Sliders : If checked the Feature Mask tool will be applied to the current open image each time a slider is moved.
- Lock Image : Locks application of the Feature Mask tool to a specific open image.
- Apply : Applies the current Feature Mask settings to the current active image.
- Cancel : Cancels application of the Feature Mask tool to an open image.
- Done : Closes the Feature Mask tool.
Suggested Feature Mask Parameter Adjustment In Order For A Color Or Monochrome Image
- For easy Feature Mask parameter adjustment select the Output | No Stars option. The star only image can be created using the Split Stars button once the Feature Mask parameters are adjusted for the object.
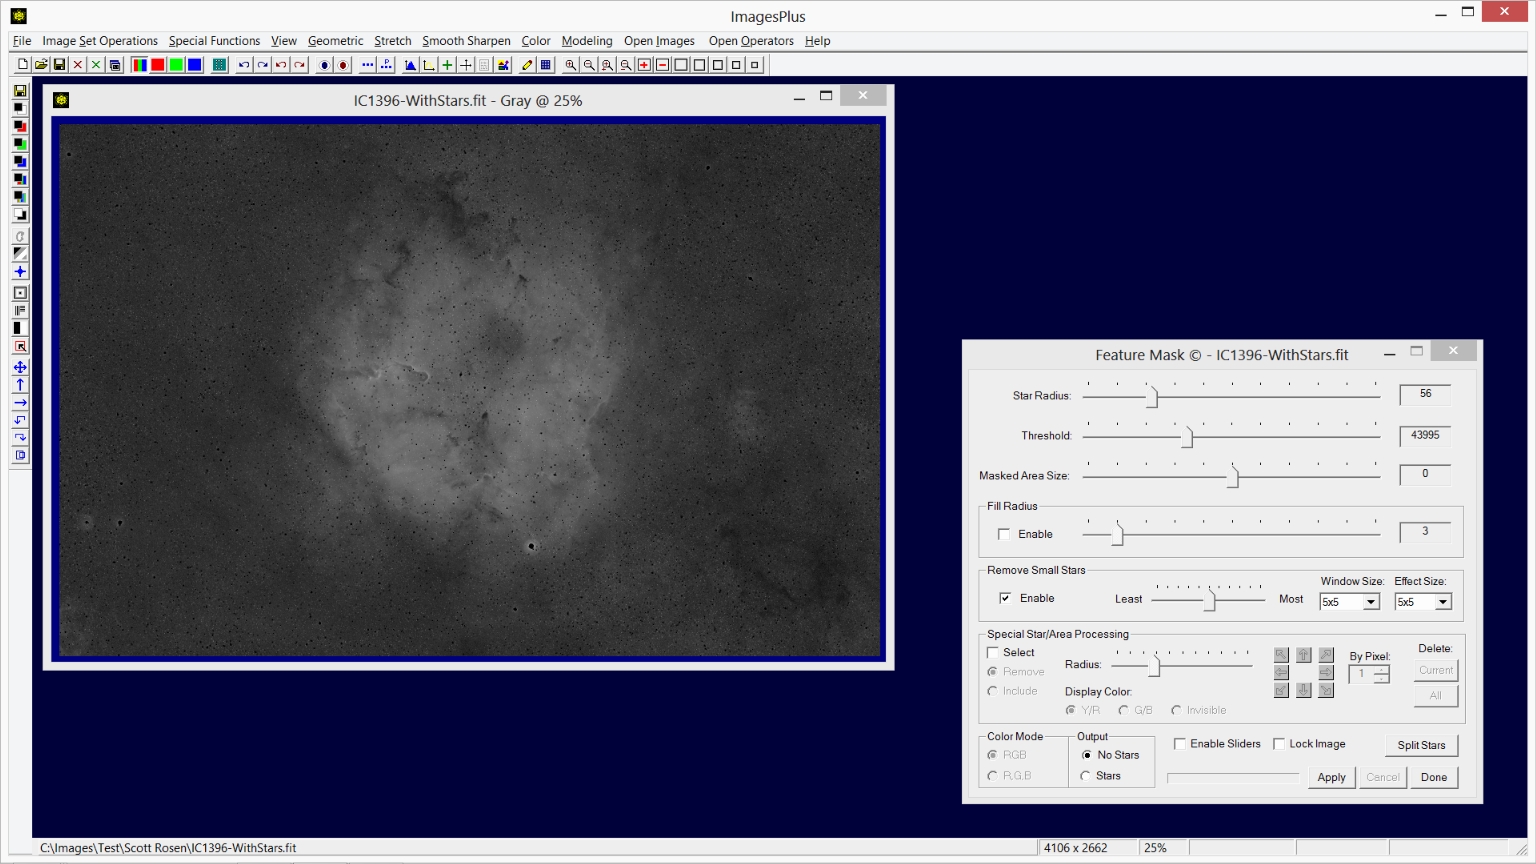
- Uncheck Enable Fill Radius so that areas that will be removed are shown in black. Adjust the Star Size and Threshold sliders to remove stars and retain good detail in the object. For a given star radius
adjust threshold to minimize object removal so that object detail is maximized. Do not worry at this point about very large or small stars and try to remove as many stars as possible with minimal
removal of the object. If threshold can not be adjusted so that object detail is preserved then adjust star radius and try to adjust threshold again. Large and small stars that remain will be
handled with the special processing and small star removal controls.
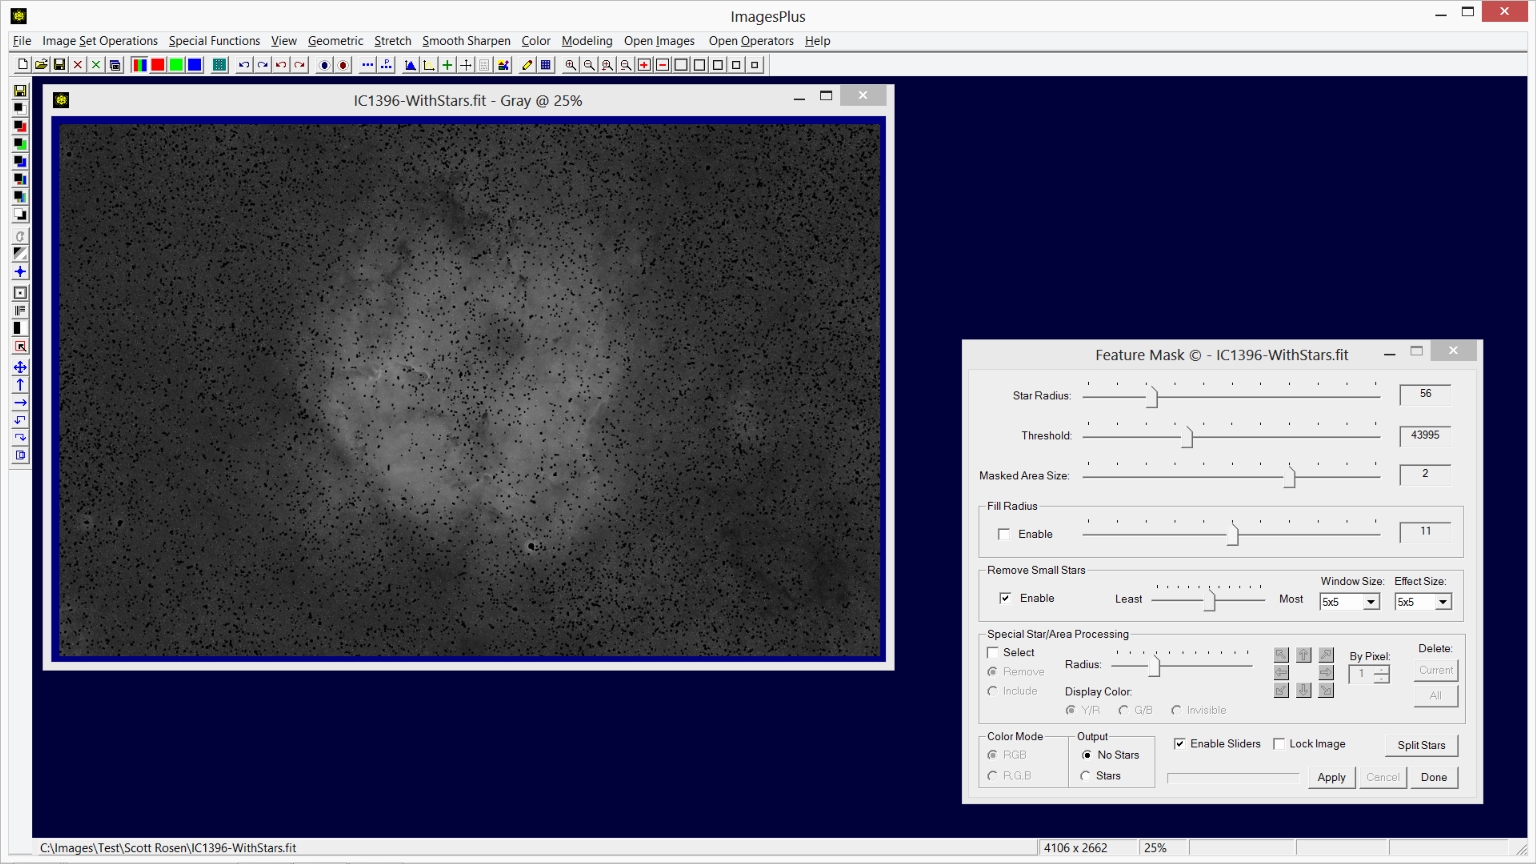
- If necessary use the Masked Area Size slider to increase or decrease the size of the removed areas shown in black.
- Check the Enable Fill Radius box and adjust the slider towards the right to make the in painted areas darker or blend in to the adjacent background.
- Use the Remove Small Stars controls as necessary to remove any small stars that remain. Move the slider towards the right and increase window and effect size to remove more small stars.
- Remove remaining bright stars or include a star like core of a galaxy using the Special Star/Area Processing controls.
- Create the matching star only image using the Split Stars button.
- The star only and object images can be used many different ways.
- Use the star only or object image as a mask with conventional mask processing techniques. See ImagesPlus 5.0 Processing Tutorials for mask processing tutorials.
- Apply processing directly to the star only and object images then merge using Combine Images with merge split blend mode. The examples below show how to process the star and object images directly before merging
the processed images.
Monochrome Processing Example:
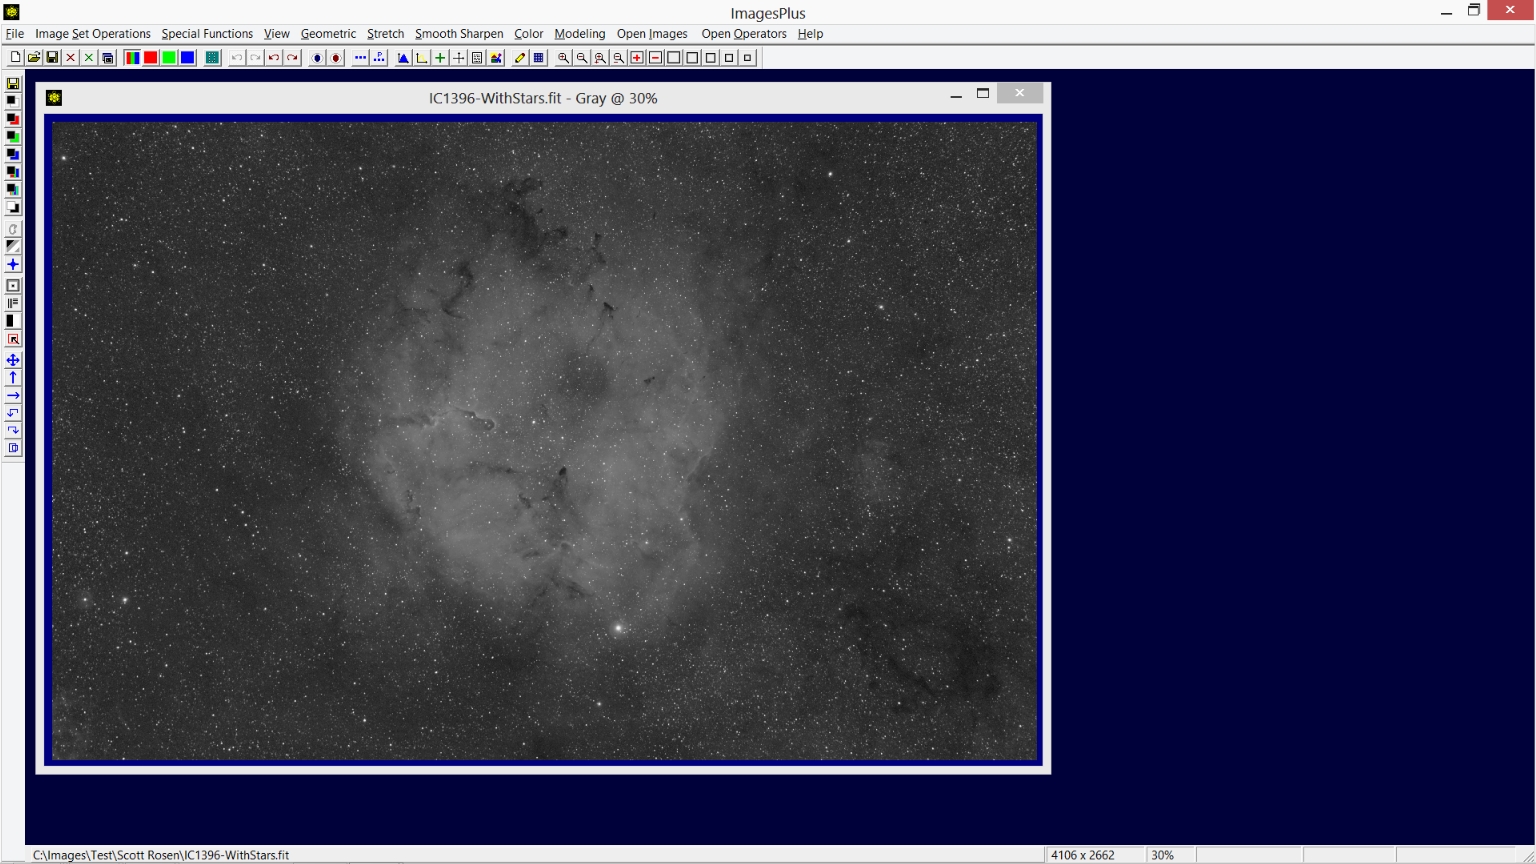
Step 1)
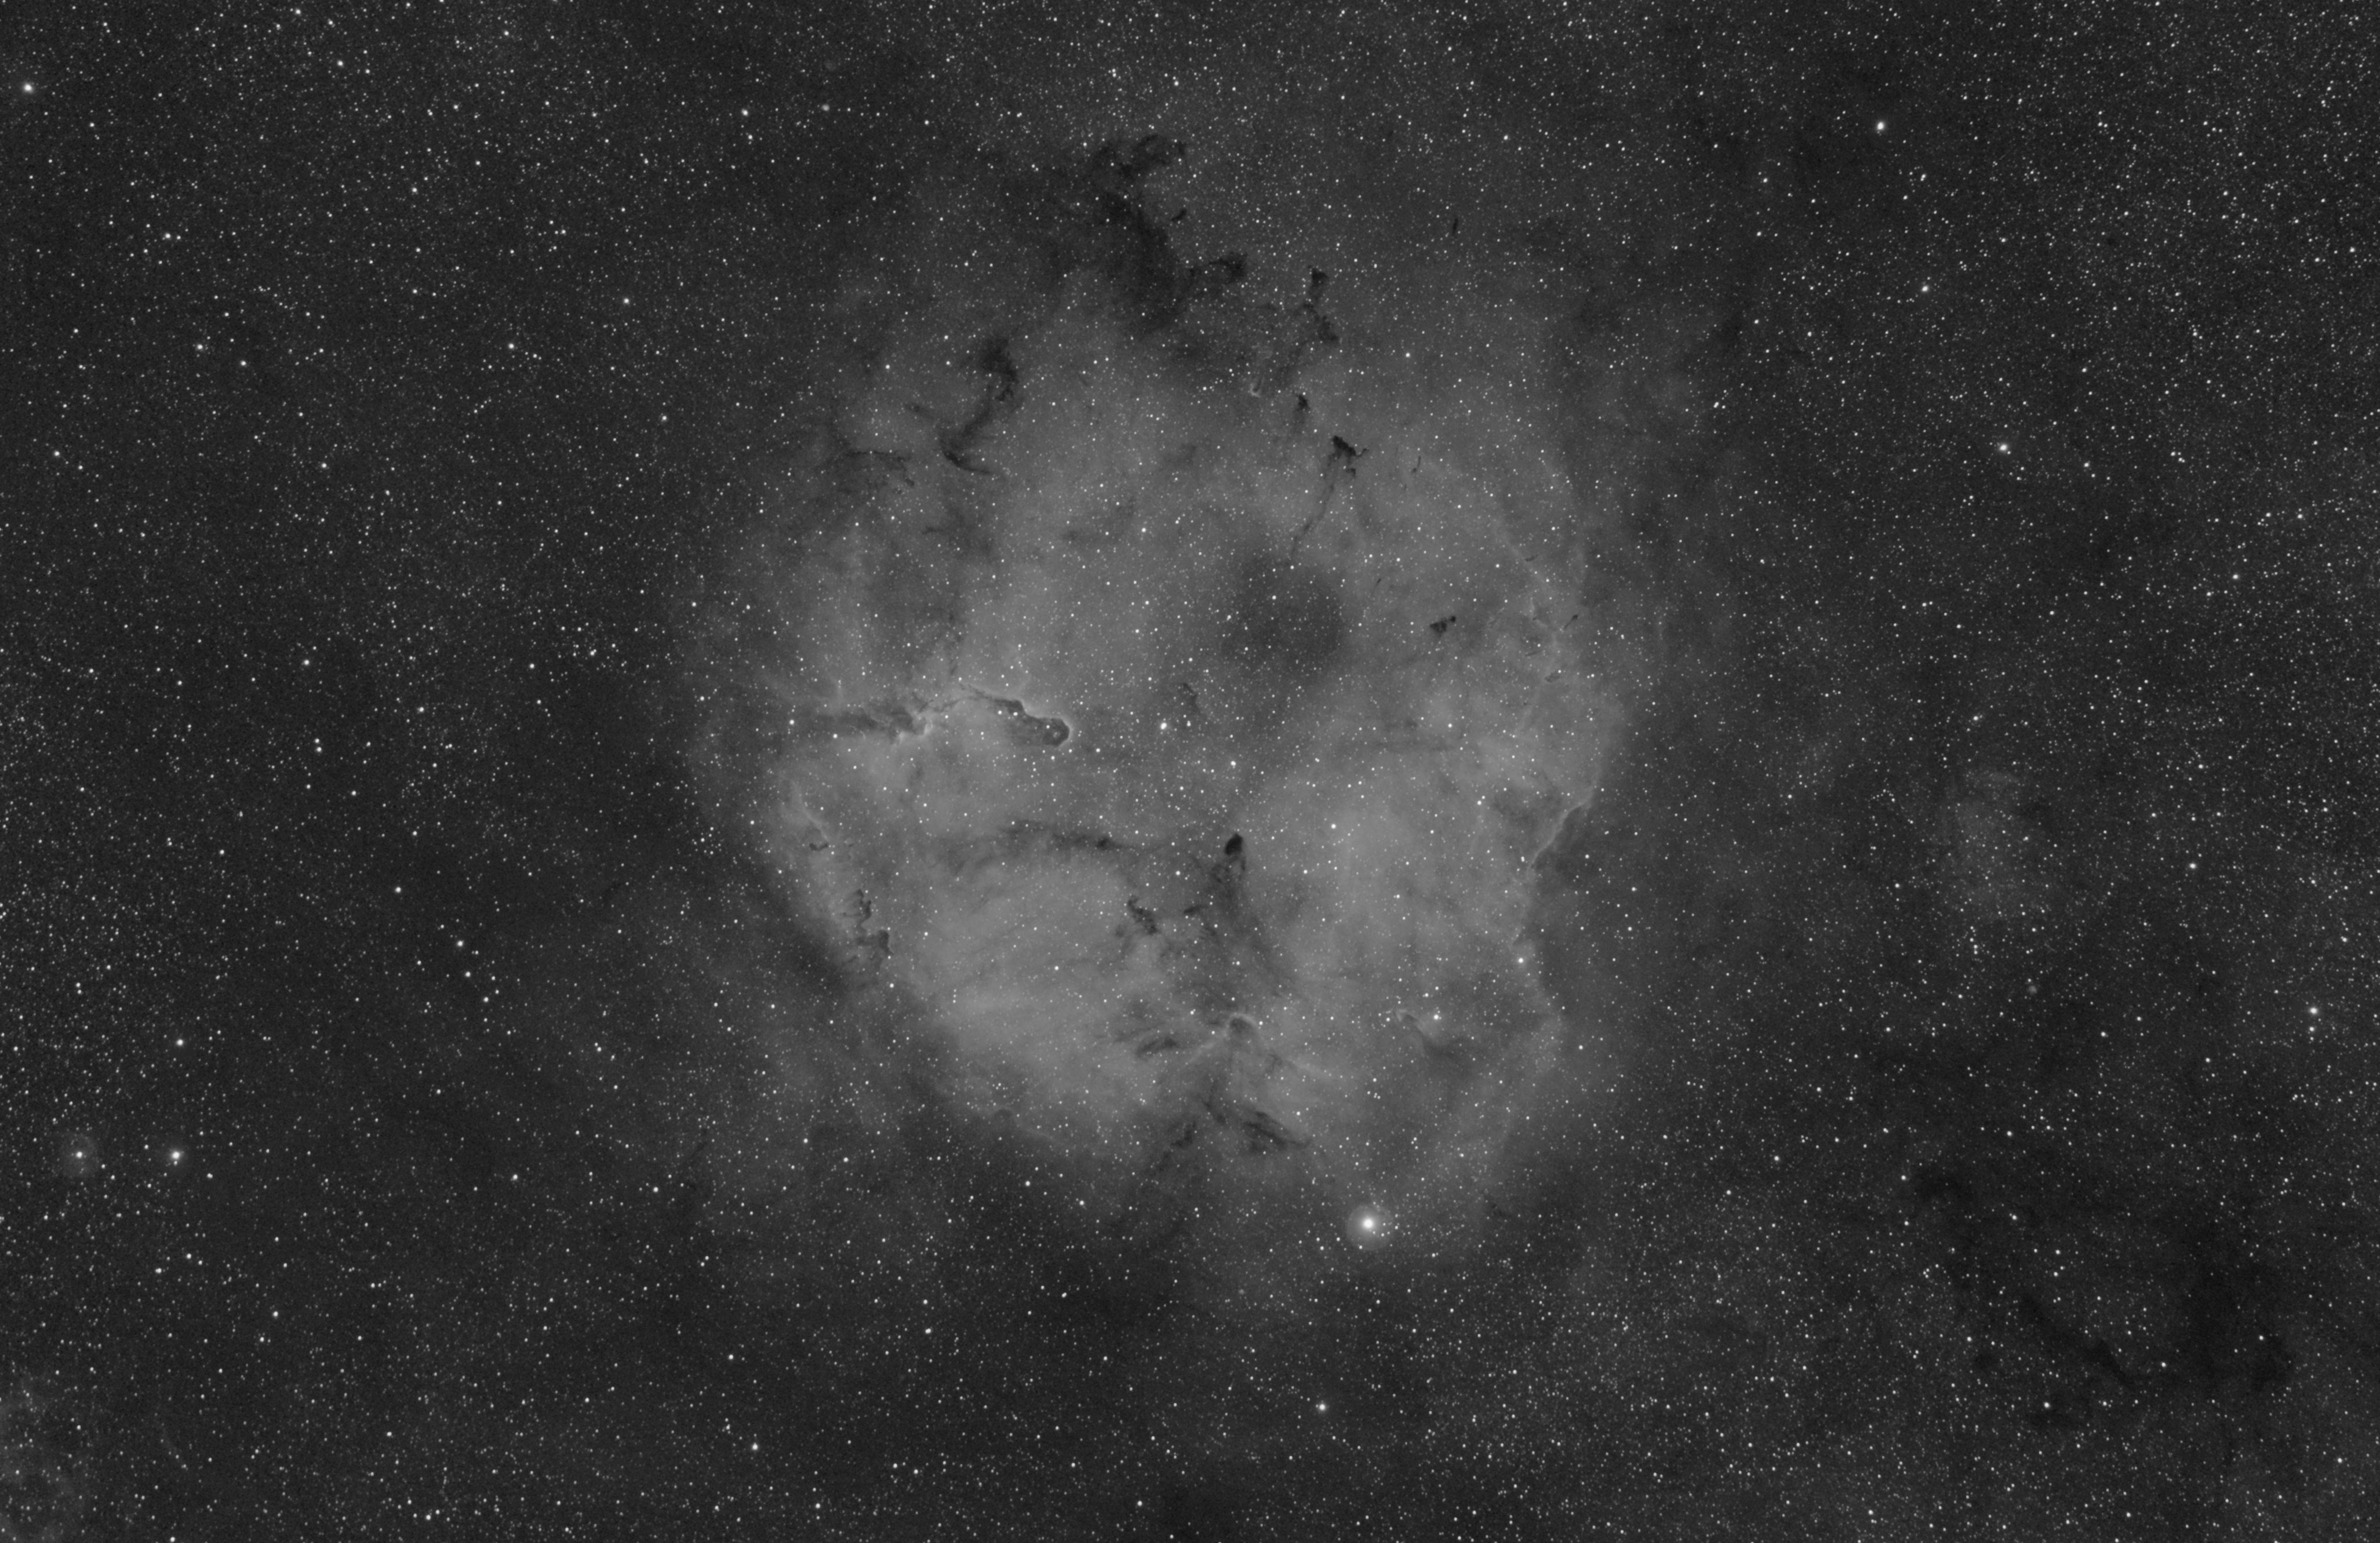
Initial DSLR H-alpha image with stars and nebula captured by Scott Rosen.
 |
Step 2)
Adjust the Star Radius and Threshold sliders to remove most of the stars and keep good detail in the nebula. Enable Fill is not checked so that the areas to be removed are shown in black.
 |
Step 3)
Move the Masked Area Size slider to the right from 0 to 2 to increase the size of the removed areas shown in black. This step helps remove larger stars. Make sure you do not introduce too much removed area in the nebula.
 |
Step 4)
Now check the Fill Radius | Enable box to fill in the black removed areas. Move the fill radius slider to the right to 11. This will make the filled in areas darker and blend in with adjacent areas.
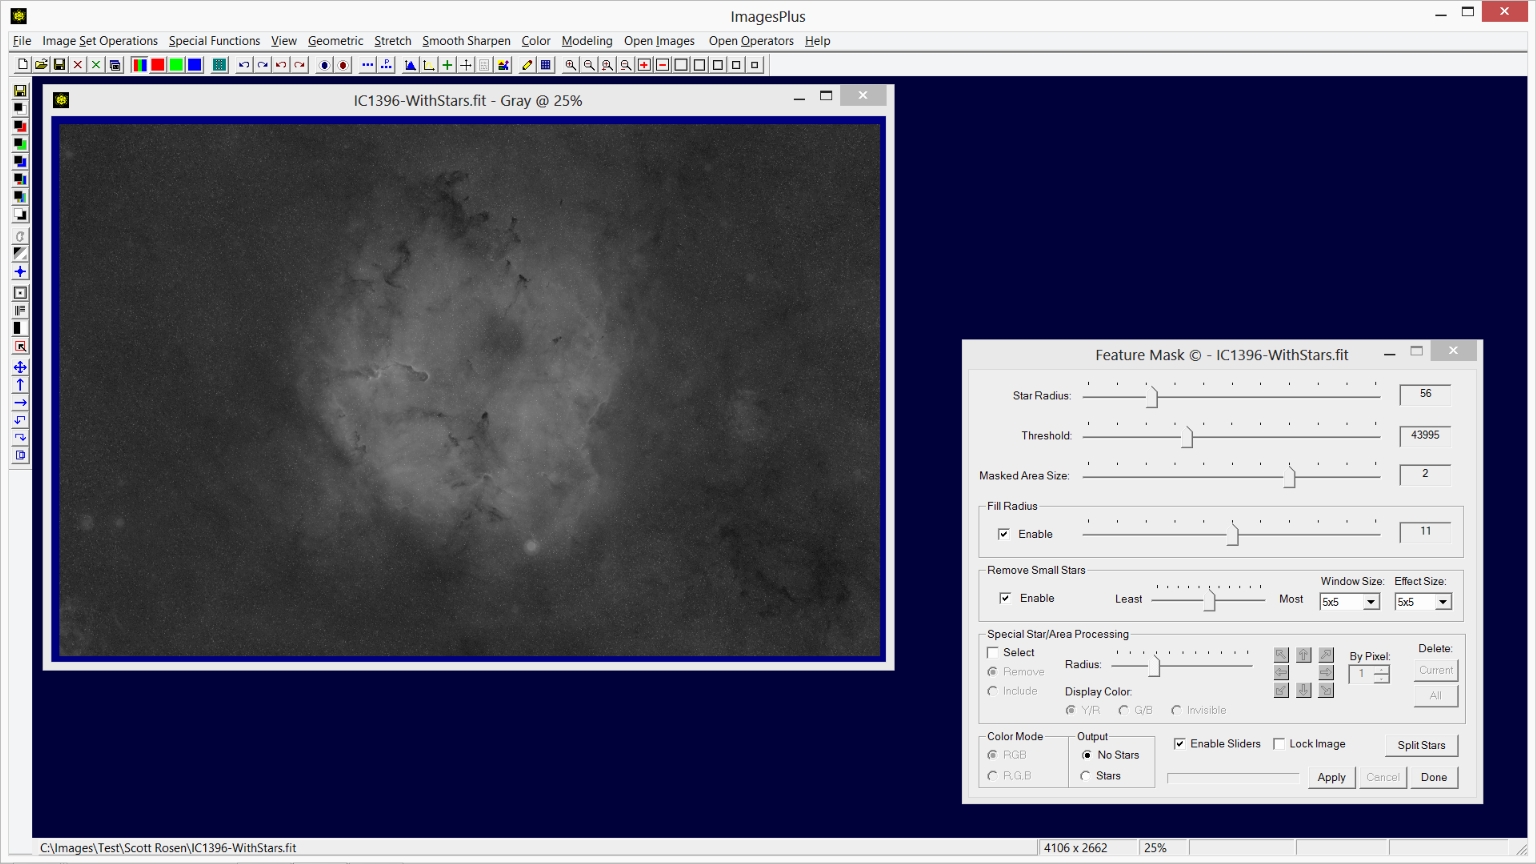 |
Step 5)
Next move the Remove Small Stars slider towards the right to remove the small stars and keep good detail in the nebula.
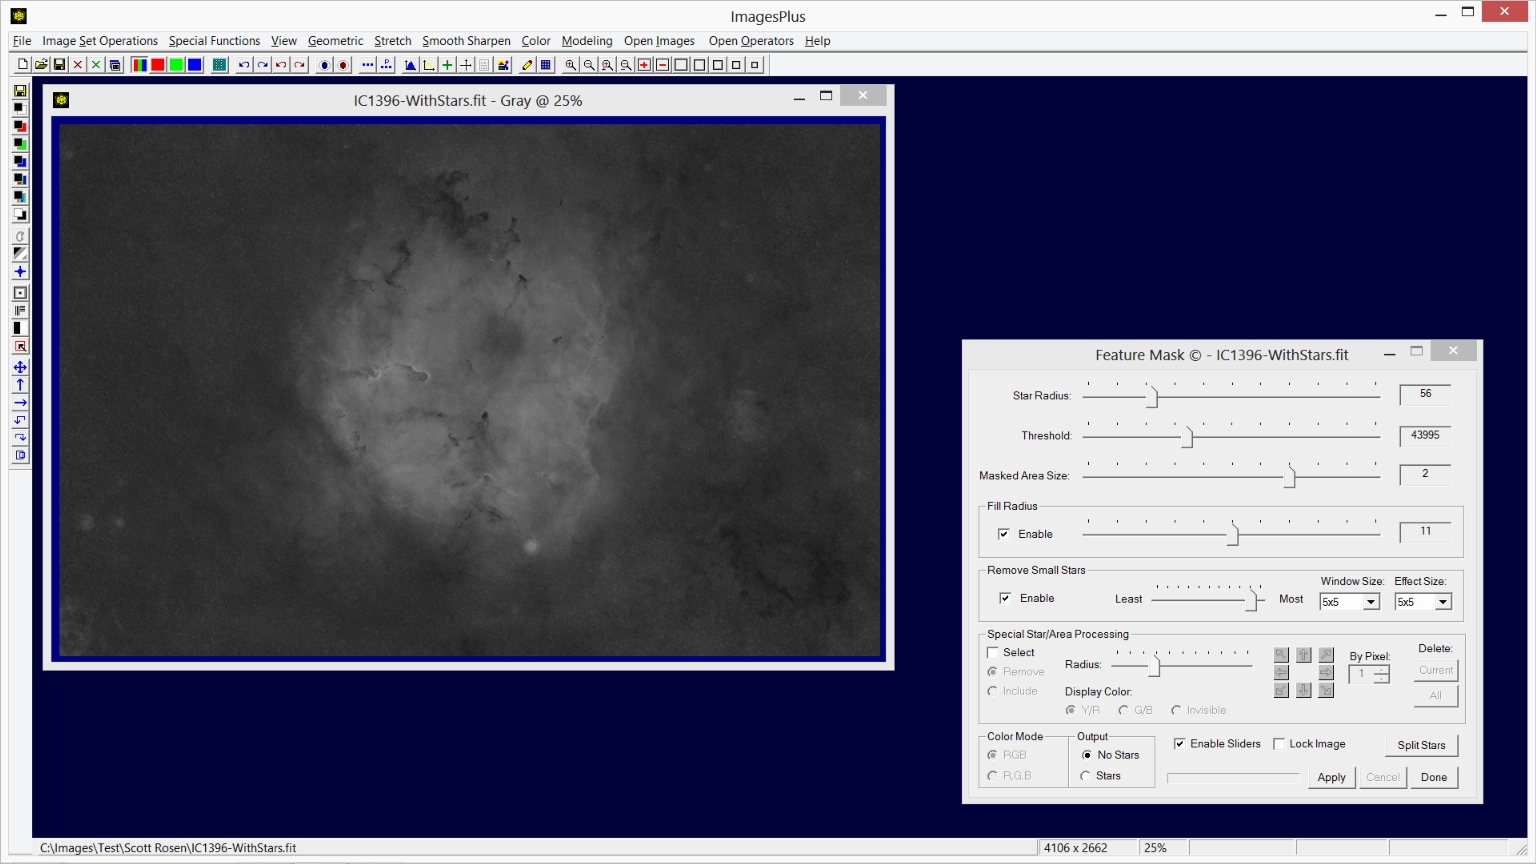 |
Step 6)
Use the Special Star/Area processing controls to remove the few bright halos that remain.
Check the Select box on the Feature Mask tool in the special processing section then left click on the bright halos. Adjust the position and size of the circles. Press Apply to update the image.
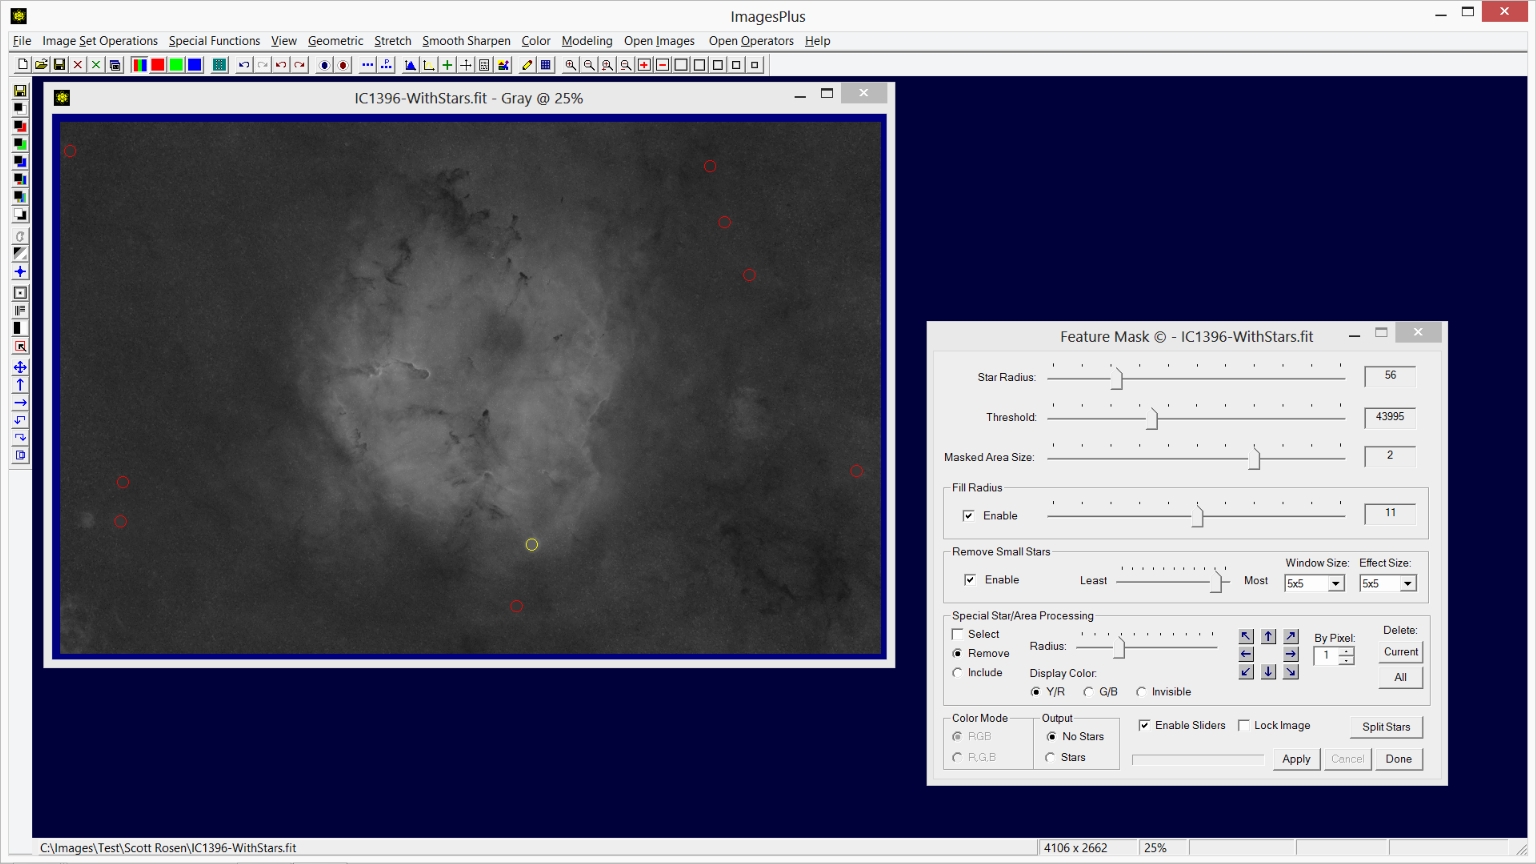 |
Check the final image without stars by selecting the Invisible option in the special processing section so that the circles are not shown.
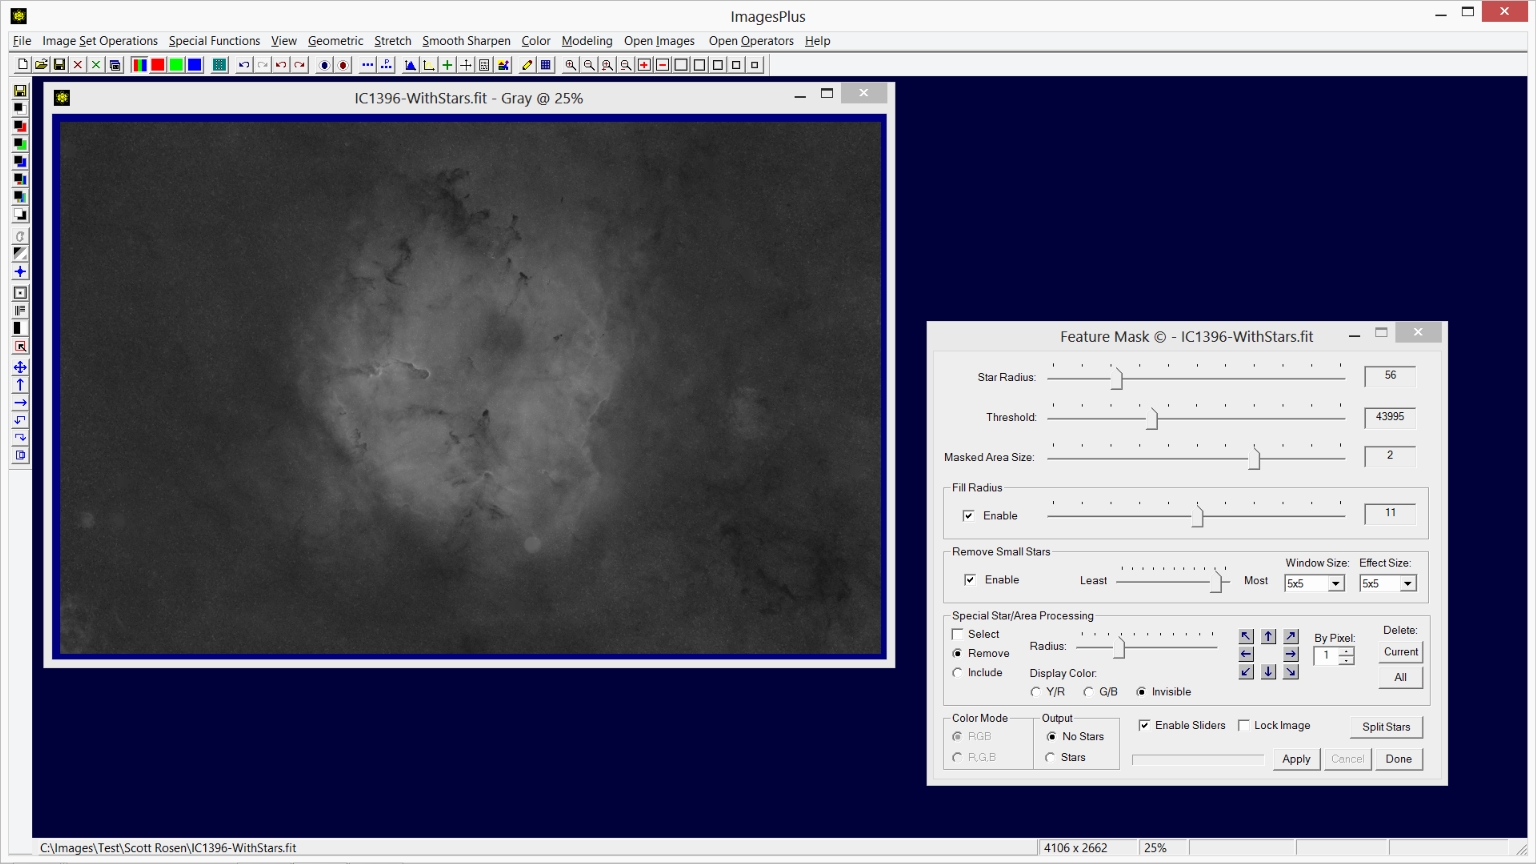 |
Step 7)
Step 8)
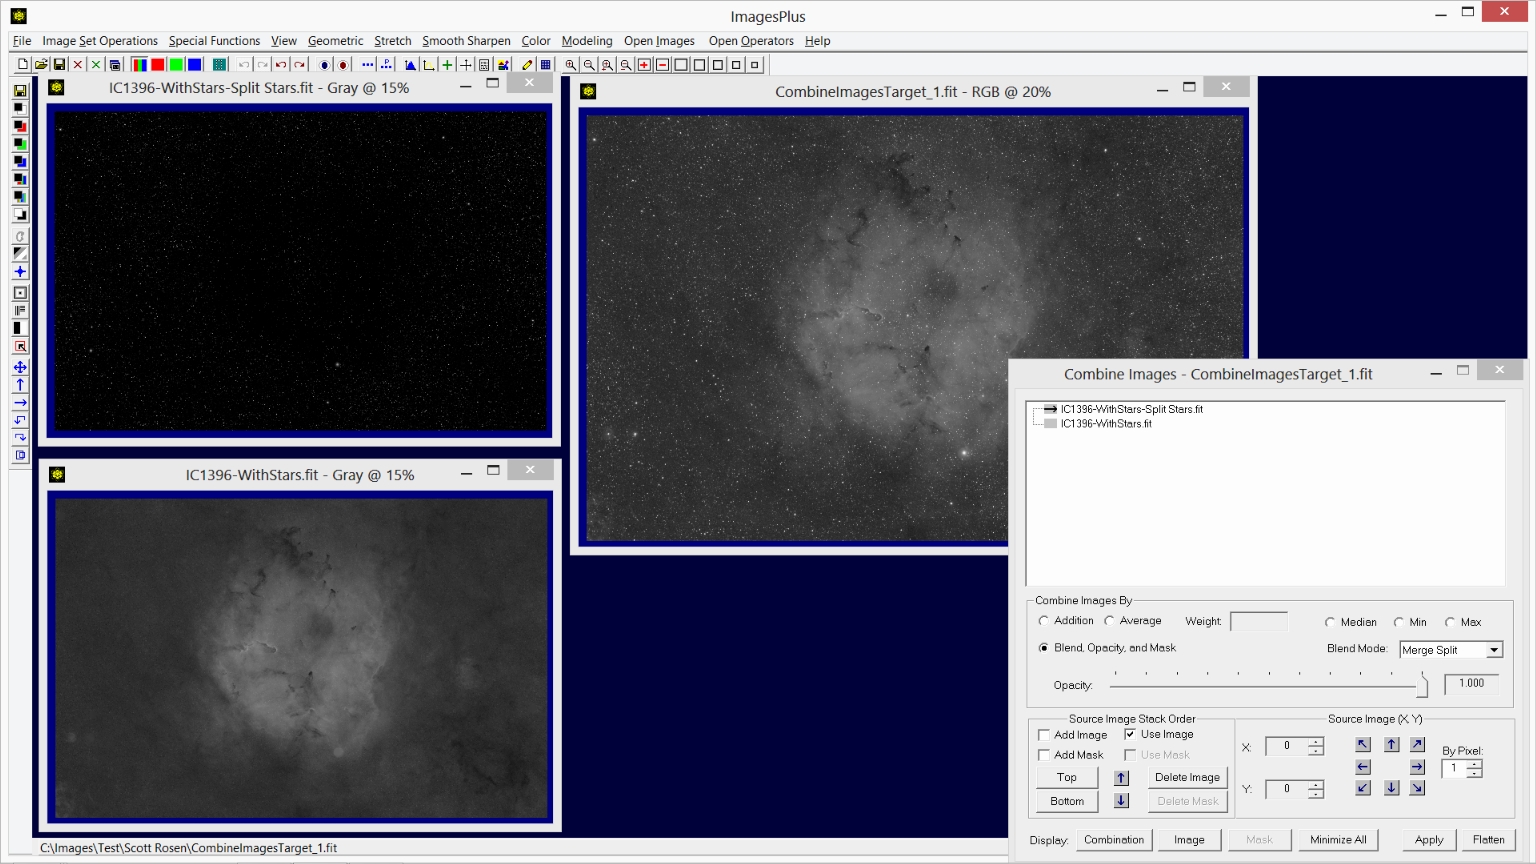
The star and object image can be merged using Special Functions | Combine Images | Using Blend Mode, Opacity, and Masks with merge split blend mode as shown above.
The star image is the top layer with merge split blend mode. The bottom layer is the object image with normal blend mode.
With ImagesPlus x64 on x64 Windows merge split is lossless so no data is lost. The next few steps demonstrate direct processing of the star and object images.
 |
Step 9)
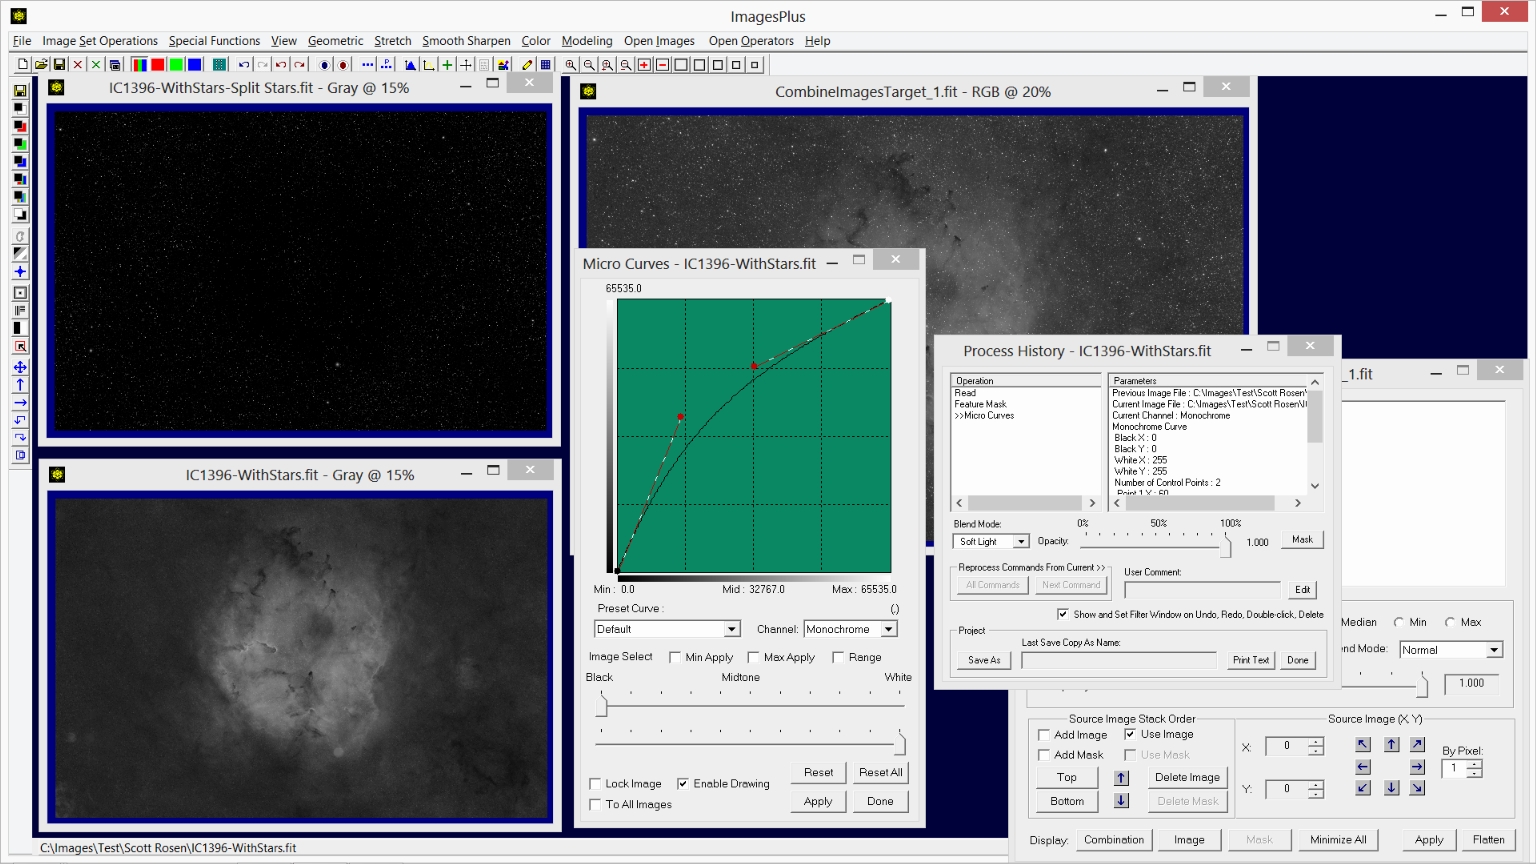
Apply processing to the star and nebula images. Since the stars are already small with smooth background no processing is applied to the star image but you could smooth background, sharpen, or apply other filters.
Stretch | Micro Curves is used with soft light blend mode to stretch the nebula image. A mask could also be used with Micro Curves to stretch the object image.
 |
Step 10)
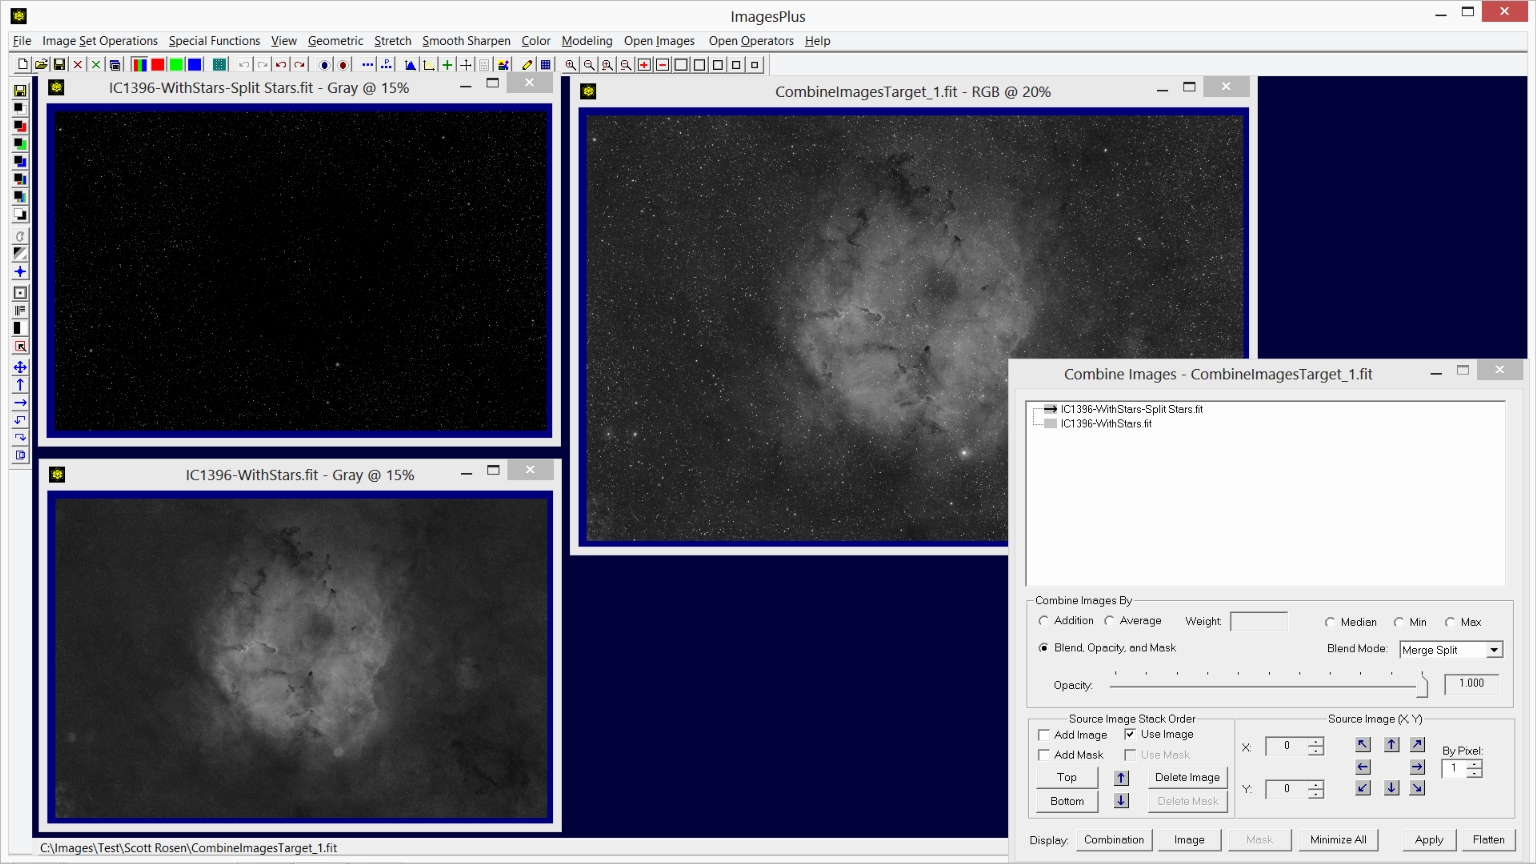
Press Apply on Combine Images to merge the stretched nebula image with the star image.
 |
Initial H-alpha image before processing with the Feature Mask© tool.
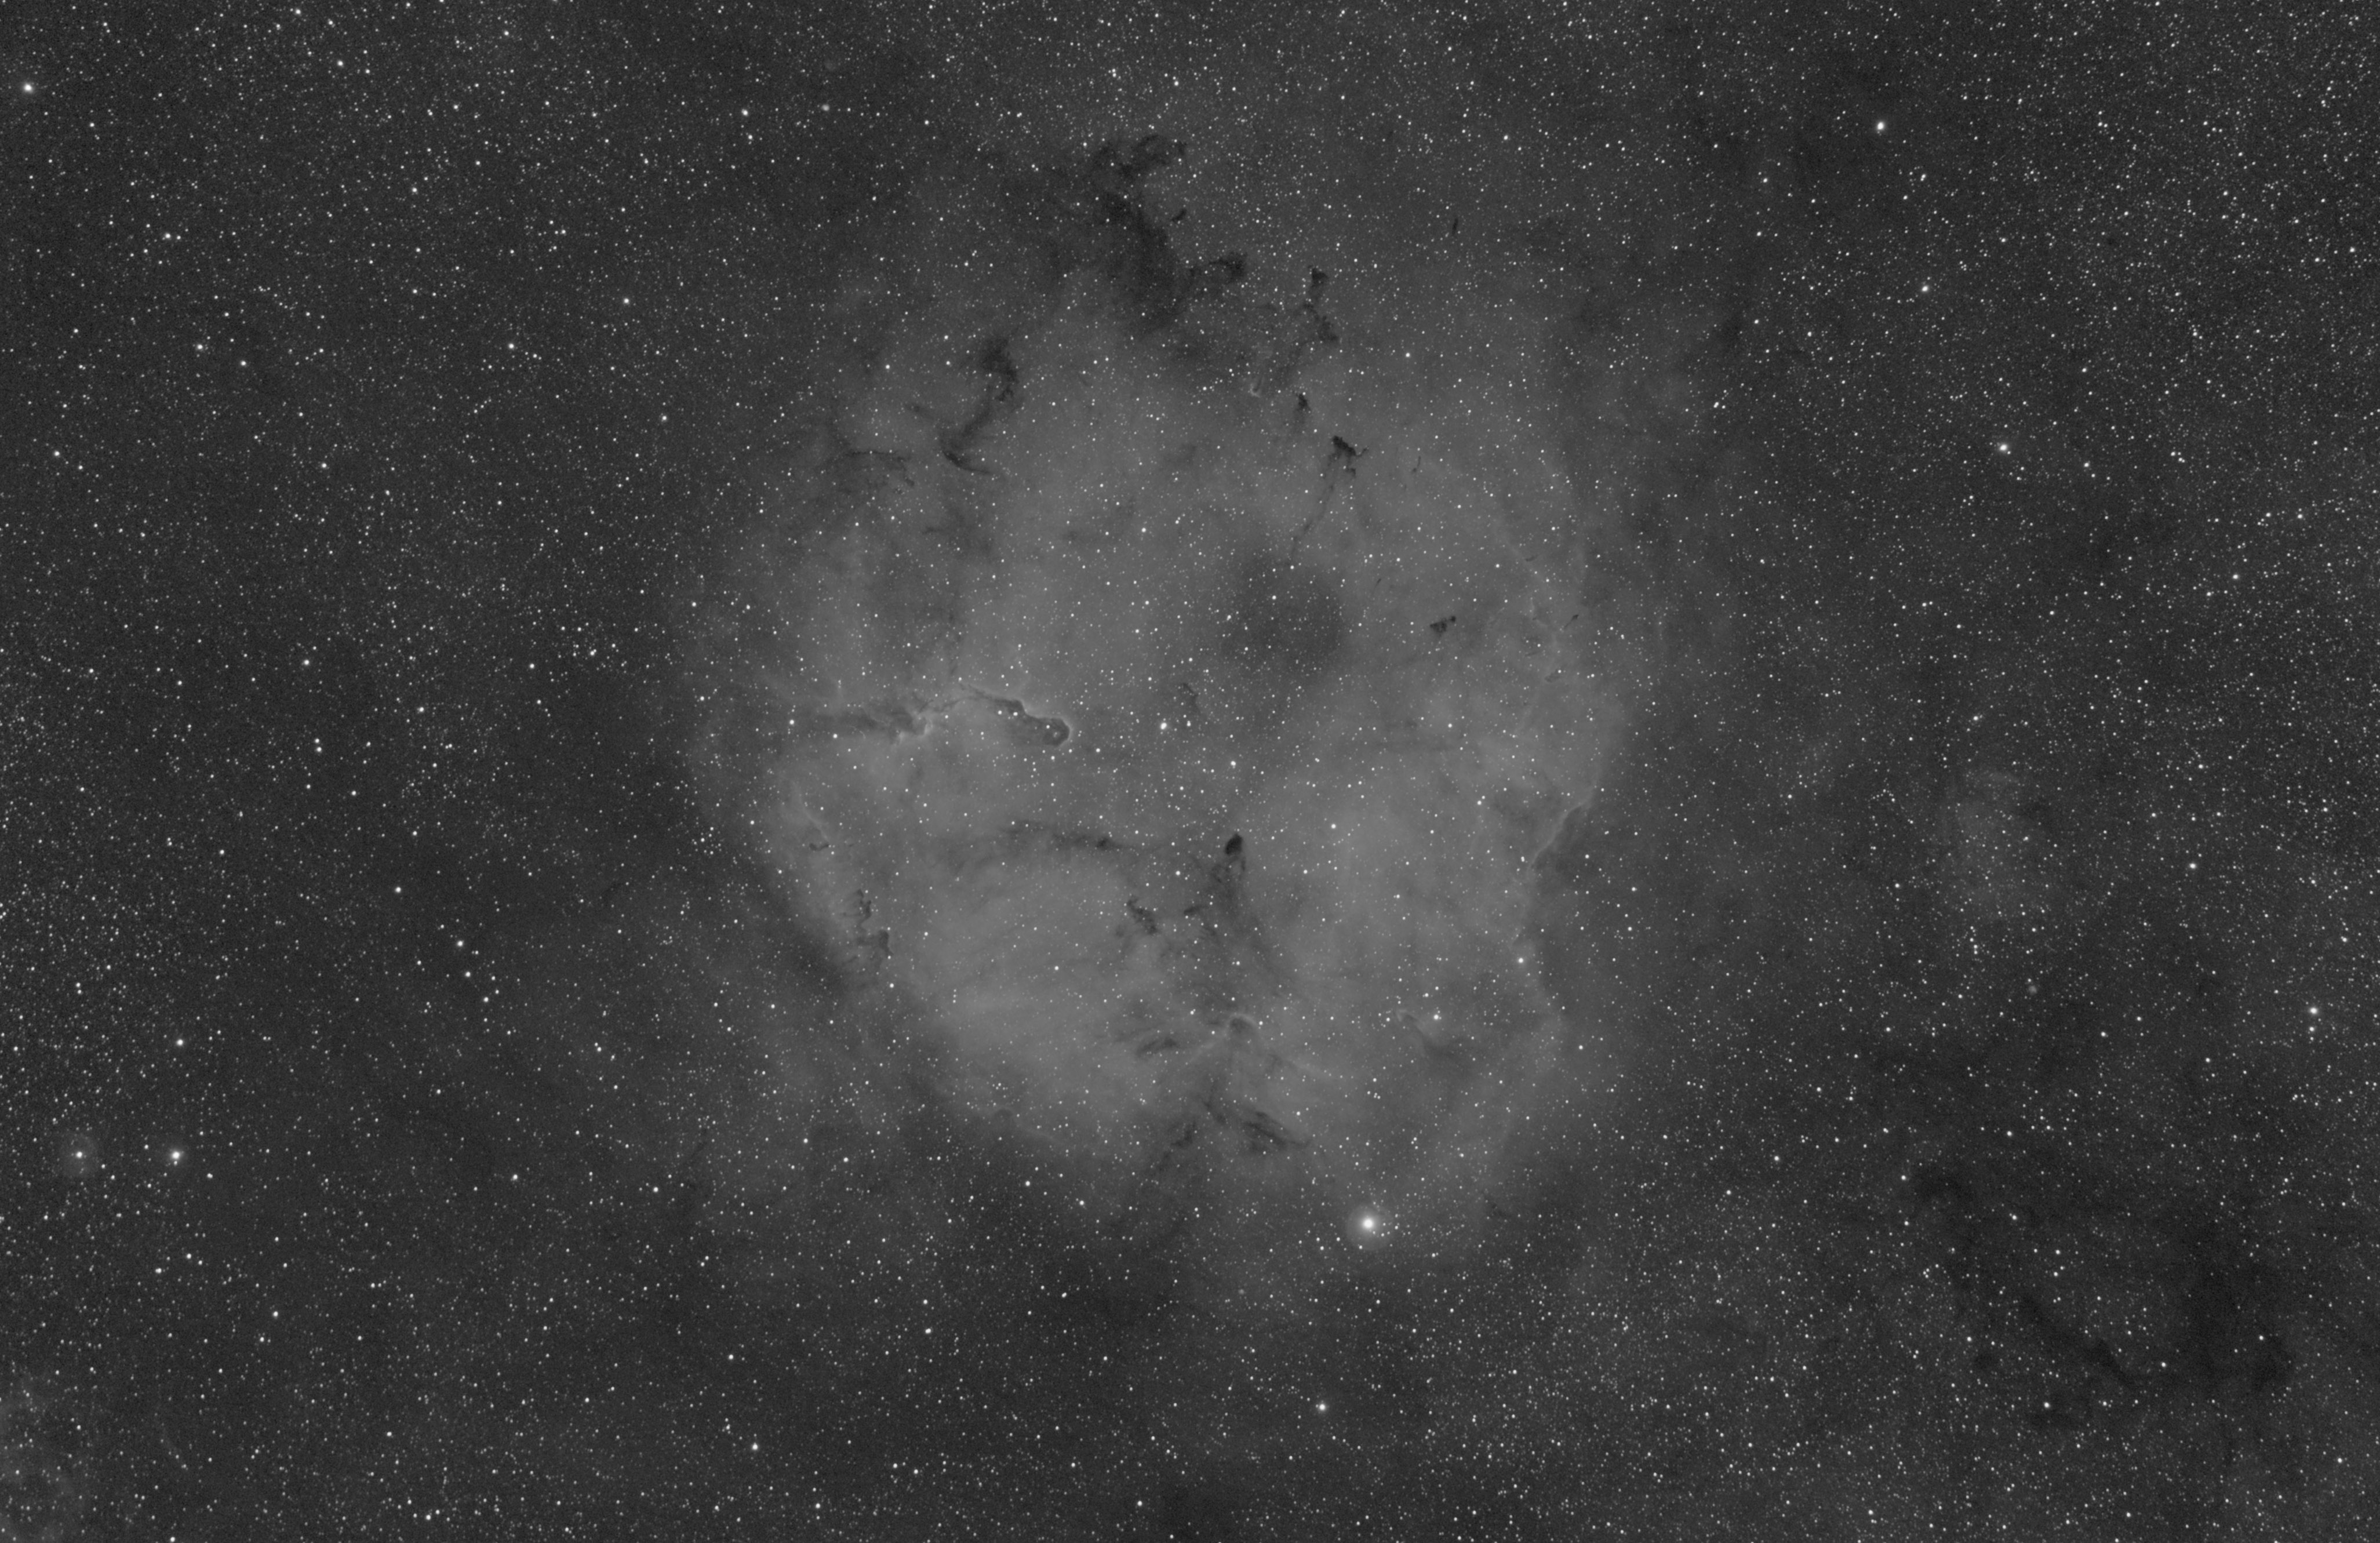 |
Final H-alpha image processed using the Feature Mask© tool.
 |
Copyright © November 18, 2013 MLUnsold Digital Imaging. All Rights Reserved.


