Fixing Elongated Stars Using Layers
The work flow shown below demonstrates the use of layers with darken or minimum blend mode to fix egg shaped or elongated stars. The image used for this tutorial is the CH21 Leo Trio RGB data by Blair MacDonald of the DSLR_Astro_Image_Processing Yahoo Group .
Processing Summary:
- Open initial image with elongated stars.
- Use Feature Mask© to remove stars.
- Duplicate star image then shift stars in direction of elongation.
- Combine the star and shifted star image to make stars round.
- Merge object and round star image.
Each step is used with normal blend mode and 100% opacity unless otherwise noted. See ImagesPlus 5.0 Processing Tutorials for a list of all tutorials by function.
Processing Detail:
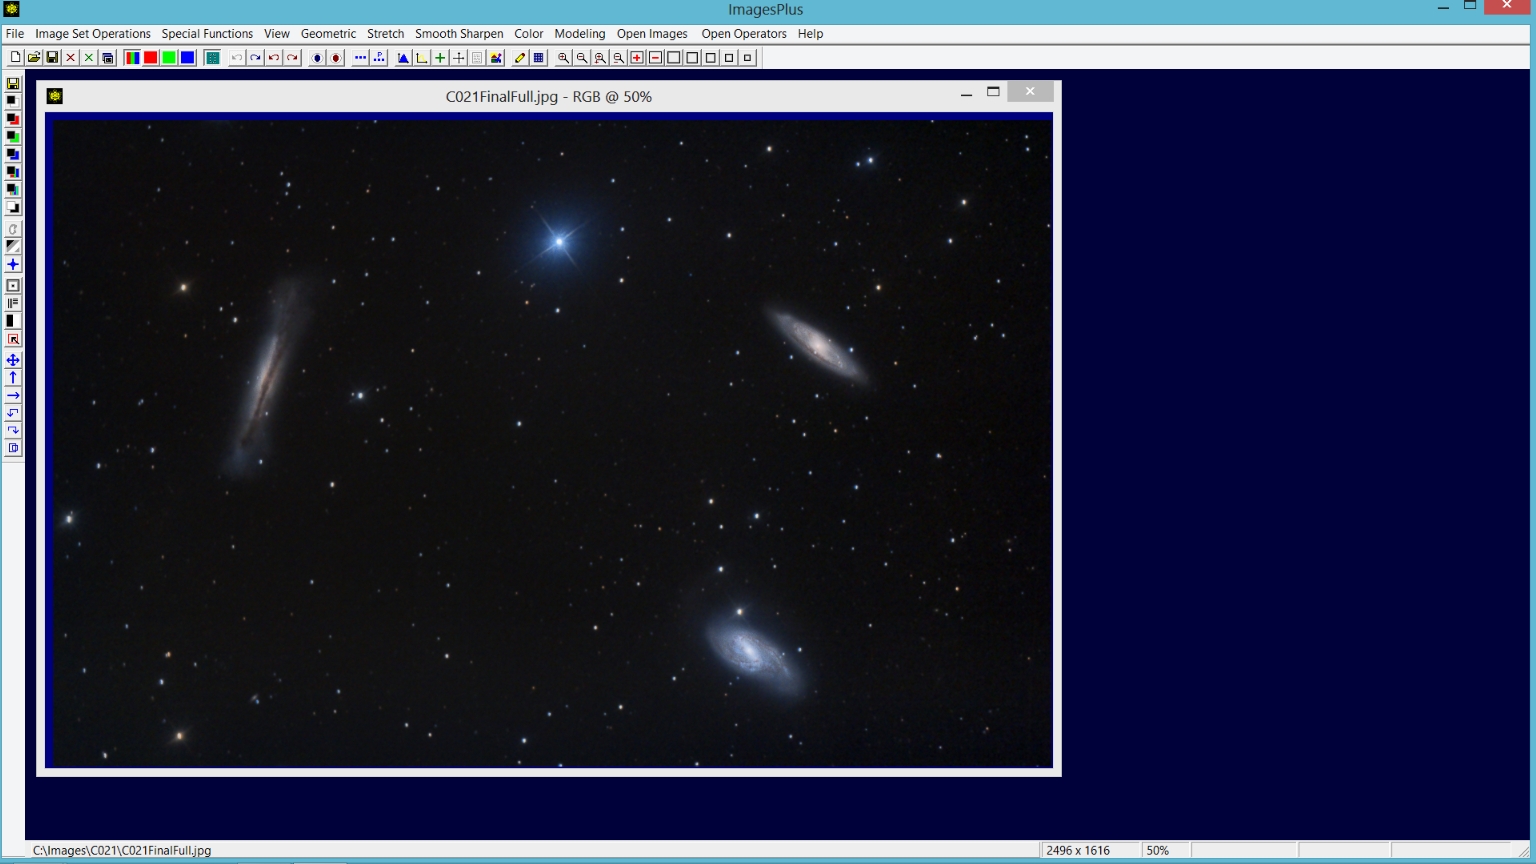
Step 1) Open initial image with elongated stars.
Use File | Open to open an image with elongated stars.
 |
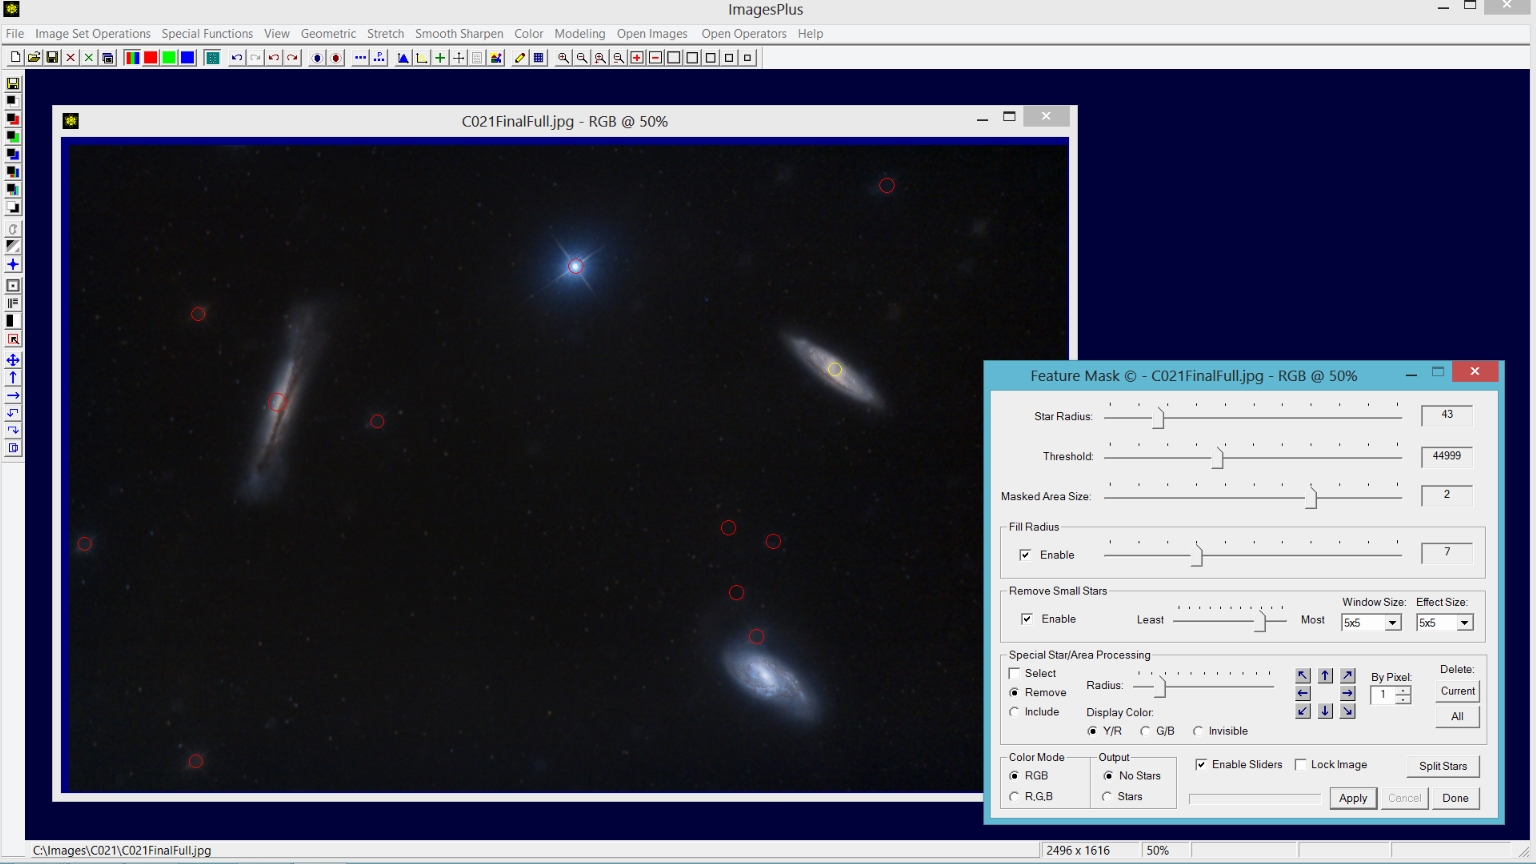
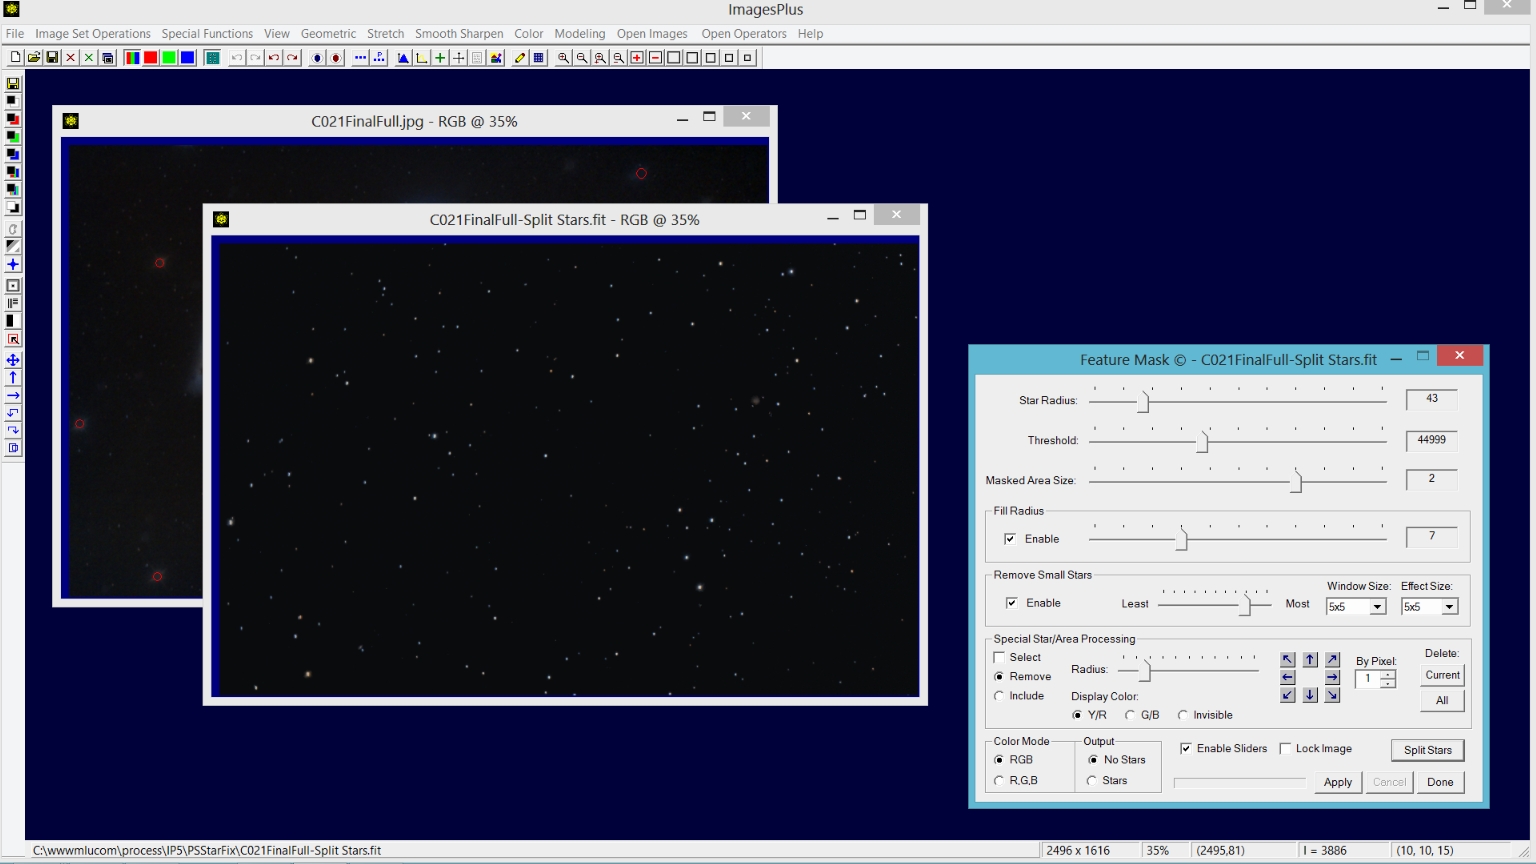
Step 2) Use Feature Mask© to remove stars.
After Feature Mask parameters are adjusted to remove stars press the Split Stars button to create the matching star only image.
 |
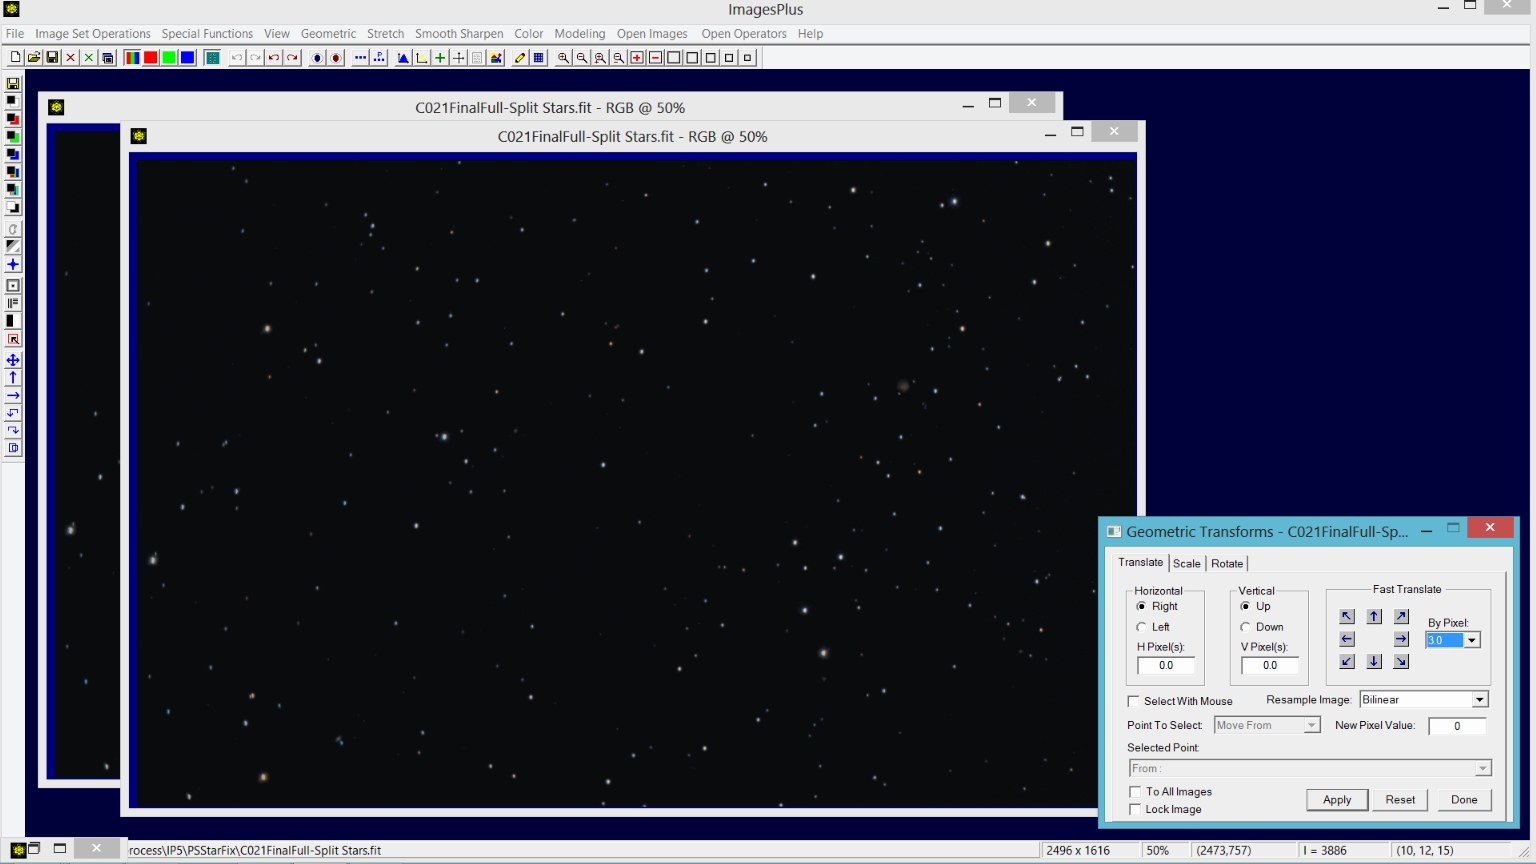
Step 3) Duplicate star image then shift stars in direction of elongation.
Minimize the background and galaxy image with no stars. Press ... on the top horizontal toolbar menu to duplicate the star only image. Use Geometric | Geometric Transforms | Translate to shift the stars in the duplicate image in the direction of the elongation.
Use a Fast Translate arrow button to shift in the direction of the arrow by the selected pixel amount. In this case the down or up arrow could be used to shift stars a few pixels since the elongation is vertical.
 |
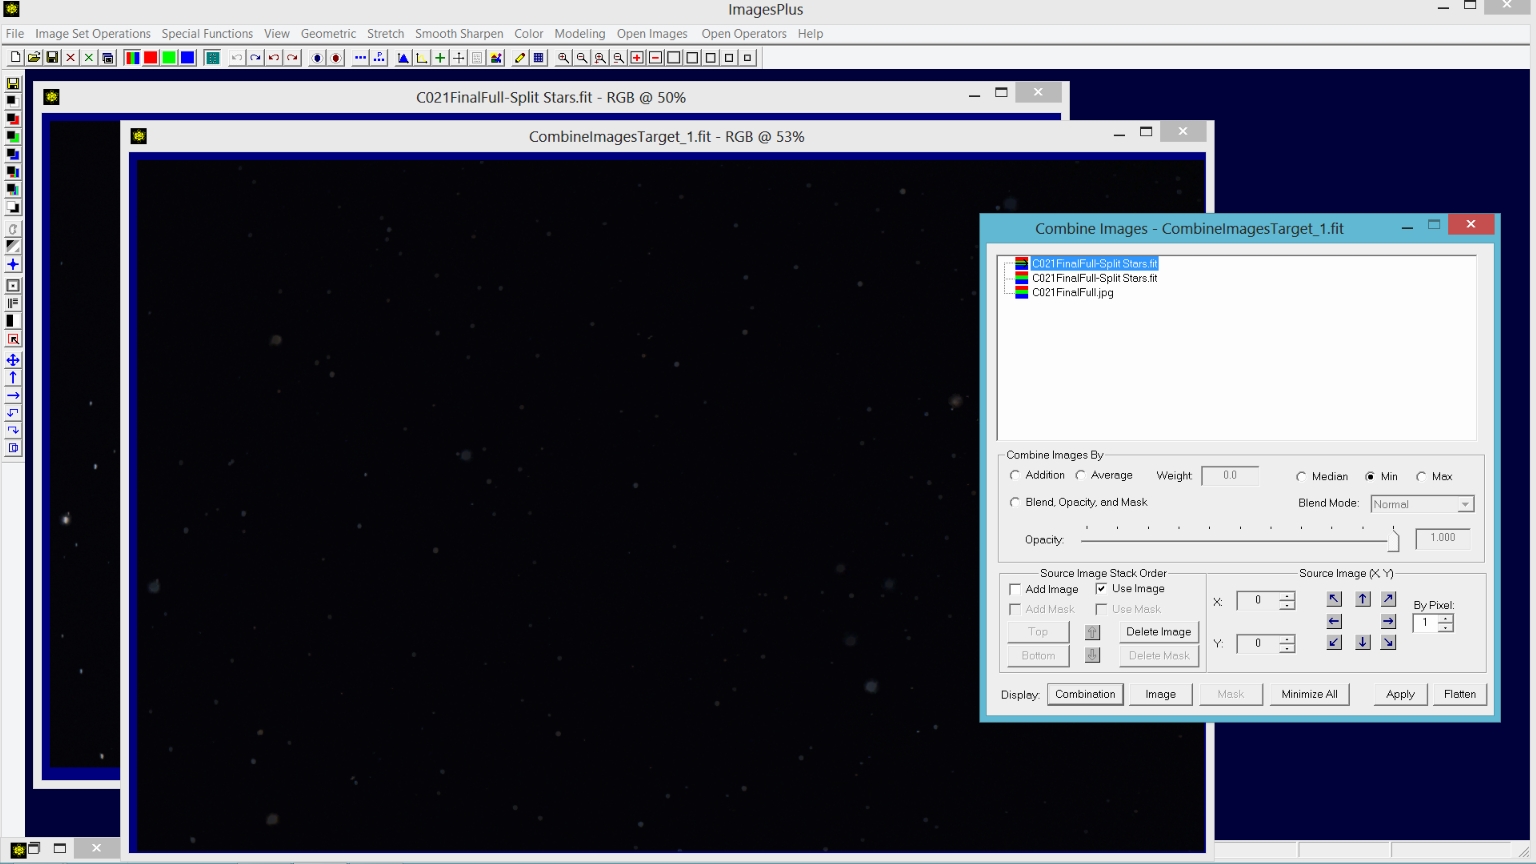
Step 4) Combine the star and shifted star image to make stars round.
Use Special Functions | Combine Images Using | Minimum to blend the star images. Since the galaxy and background image is minimized it is also included in the combination layers as the first or bottom layer. Left-click on the bottom layer called CH021FinalFull.jpg to select then press then
Delete button on Combine Images to remove the image from the layers tree as shown by the screen shot below.
 |
The star and shifted star only images are combined used minimum blend mode which is the same as darken mode. Stars in the star only image are now much more round. Press Flatten on Combine Images then close the two star only images but keep the combination star image with round stars.
 |
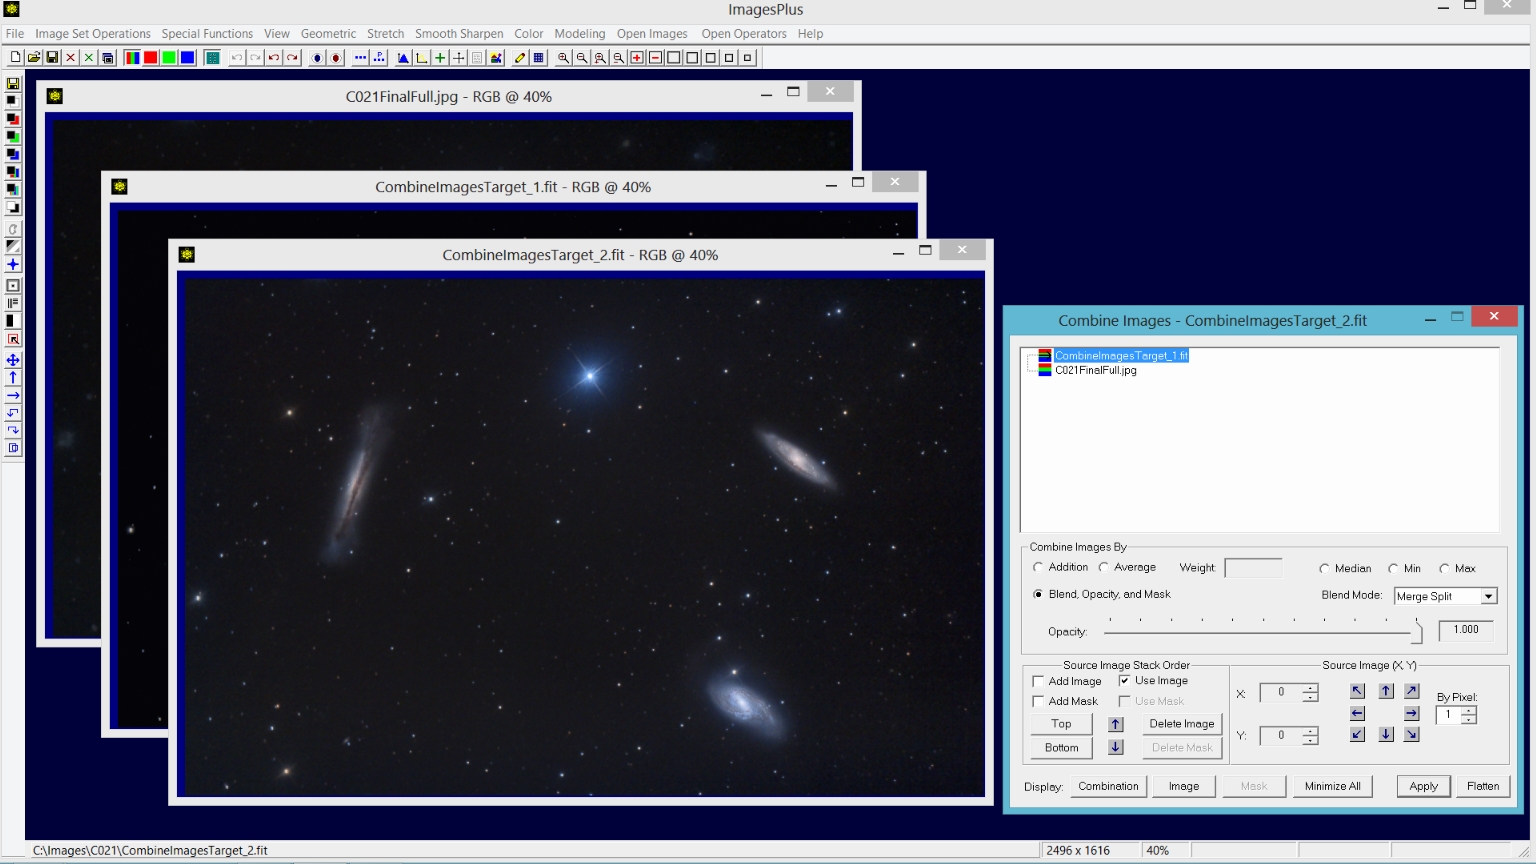
Step 5) Merge object and round star images.
Restore the minimized galaxy and background image. Use Special Functions | Combine Images Using | Blend Mode, Opacity, & Masks to blend the round star and galaxy background image. Left-click on the top layer in the layer tree then set its blend mode to merge split. Press Flatten then close all images except the final combination image shown below.
 |
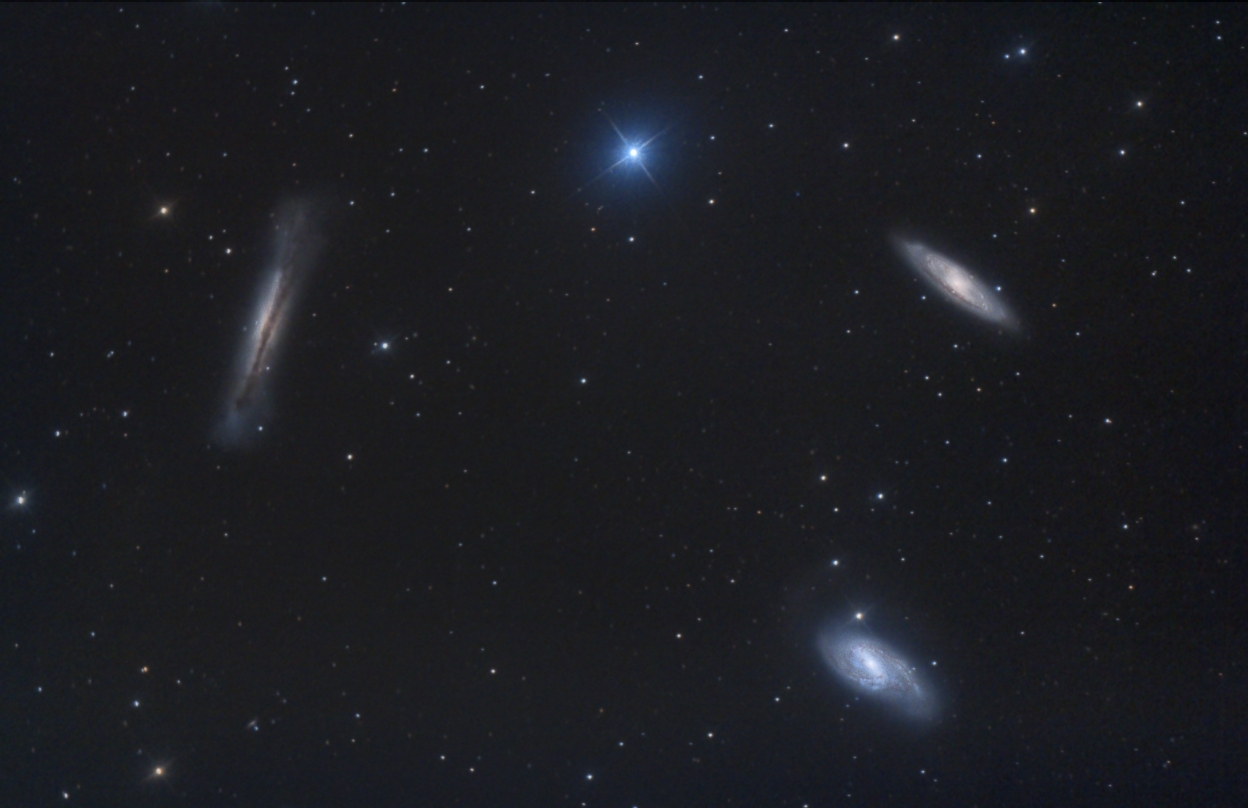
Leo Trio with elongated stars made more round.
 |
Copyright © 2013 MLUnsold Digital Imaging. All Rights Reserved.