A set of 10 light frames of Omega Centauri along with flat and bias frames from a Starlight SXV-H9C were collected using a C 11 at f/2 with Hyperstar. Single master flat and bias frames were built during a previous run of auto image set processing by selecting several flat and bias frames on the flat and bias tabs, respectively. After master calibration frames are built they can be used as in this example without rebuilding from the individual files. No dark frames were used becuase of the very low dark noise of the SXV-H9C. But dark frames could be selected on the Dark Frame tab and used for hot pixel reduction with or without dark subtraction. Thanks to Admilson Pinto for supplying the image set.
The goal is to automatically process the set of images and create a single color image ready to enhance.
Detailed processing instructions of the stacked image can be found at
OSC CCD Image Enhancement - Omega Centauri
Step 1
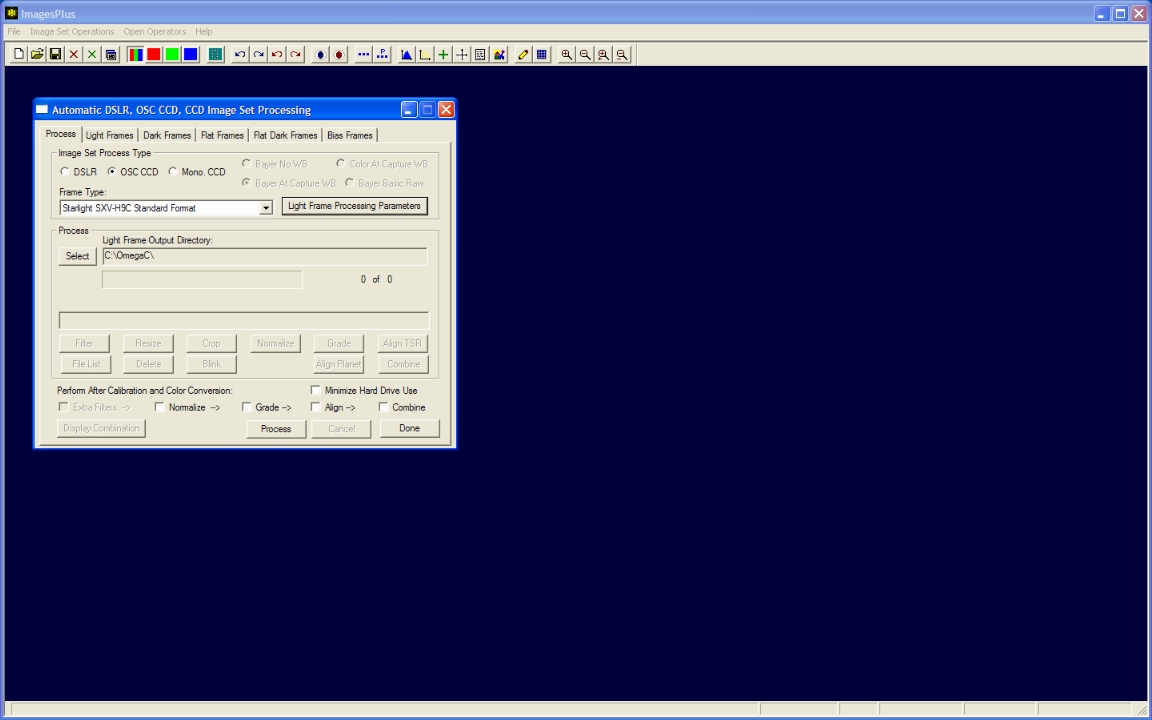
- From the main ImagesPlus menu open Image Set Operations | Automatic DSLR, OSC CCD, and CCD Image Set Processing.
- Select the raw Bayer light, dark, flat, flat dark, and bias frames on their tab windows. If more than one dark, flat, flat dark, or bias frames are selected then a master frame will be built and used for calibration. If only one dark, flat, flat dark, or bias frame is selected then it will be used as the master frame during calibration. The width, height, and color type of all selected light and calibration frames must be the same. This will be the case if all the frames are raw Bayer data with 1x1 bin.
- Select OSC CCD as the image set process type and select the frame type that matches your camera. Standard or inverted format is used depending on the capture software used to control the camera. After calibration the Bayer format light frames will be converted to color using the Bayer option selected on the Light Frame Processing Parameter window shown in step 2 below.
Standard Process tab for OSC CCD light frame processing.
 |
Step 2
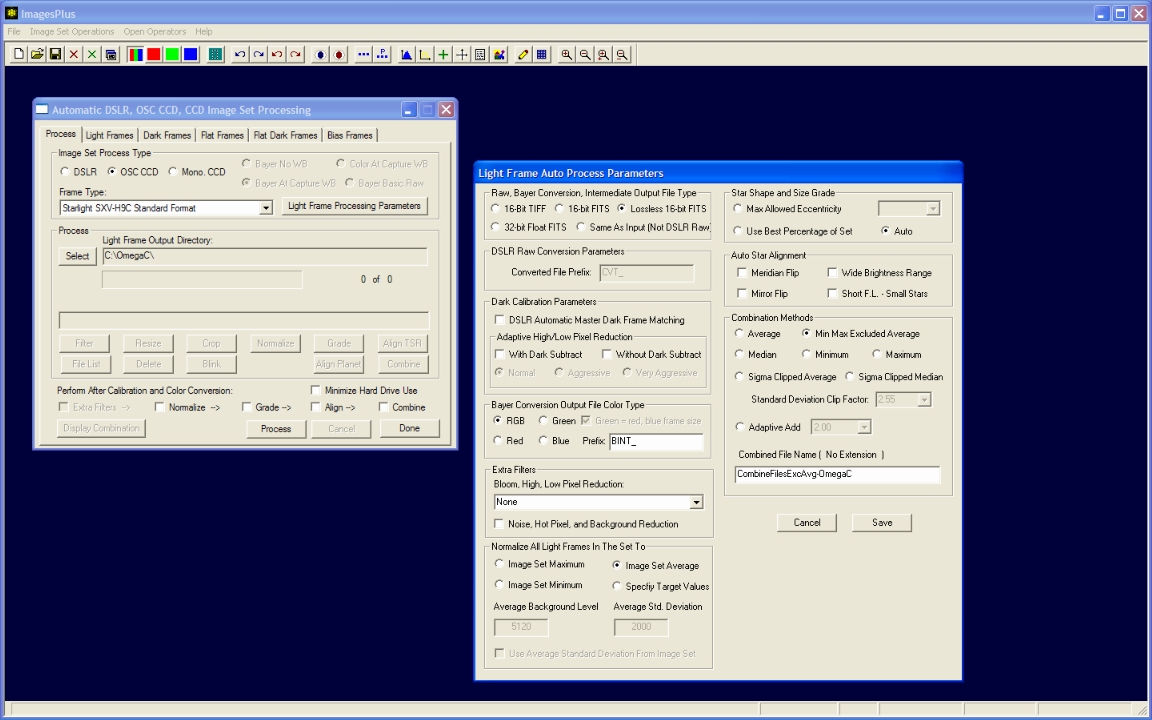
- Press the Light Frame Processing Parameters button on the Process tab of Auto Image Set Processing to display the light frame processing parameters window.
- Raw, Bayer Conversion, Intermediate Output File Type : Specifies the output file type for raw conversion and Bayer conversion to color. 16 bit compressed FITS is the default.
- Dark Calibration Parameters : DSLR Automatic Dark Frame Matching is NOT used with OSC CCD or CCD light frames. Normal adaptive high/low pixel reduction with dark subtraction can be performed with or without dark subtraction to remove fixed problem pixels.
- Bayer Conversion Output File Color Type : The RGB option is used to convert calibrated Bayer format light frames to color images before further processing.
- Extra Filters : Not used in this example but you could do additional high and low pixel reduction after the dark calibration options. You can customize and save the extra filter parameters using the Local | Reduce High, Low, Bloom Pixel command. See CCD image set processing with bloom removal for an example of using bloom removal.
- Normalize All Light Frames In the Set To : Image Set Average. This can improve qaility grading and stacking.
- Star Shape and Size Grade : Auto is used to select all frames with star size within one standard deviaton of the average star size in the set.
- Auto Star Align : Standard auto star alignment is used to align the star shape graded images.
- Combination Methods : Aligned color images are stacked using excluded min/max average and saved in a file called CombineFilesExcAvg-OmegaC.fits
- The Normalize -> Grade -> Align -> Combine boxes are checked to automate processing. Automatic processing will stop after the last checked option. Customized processing is available from any step.
Standard OSC CCD light frame processing parameters.
 |
Step 3
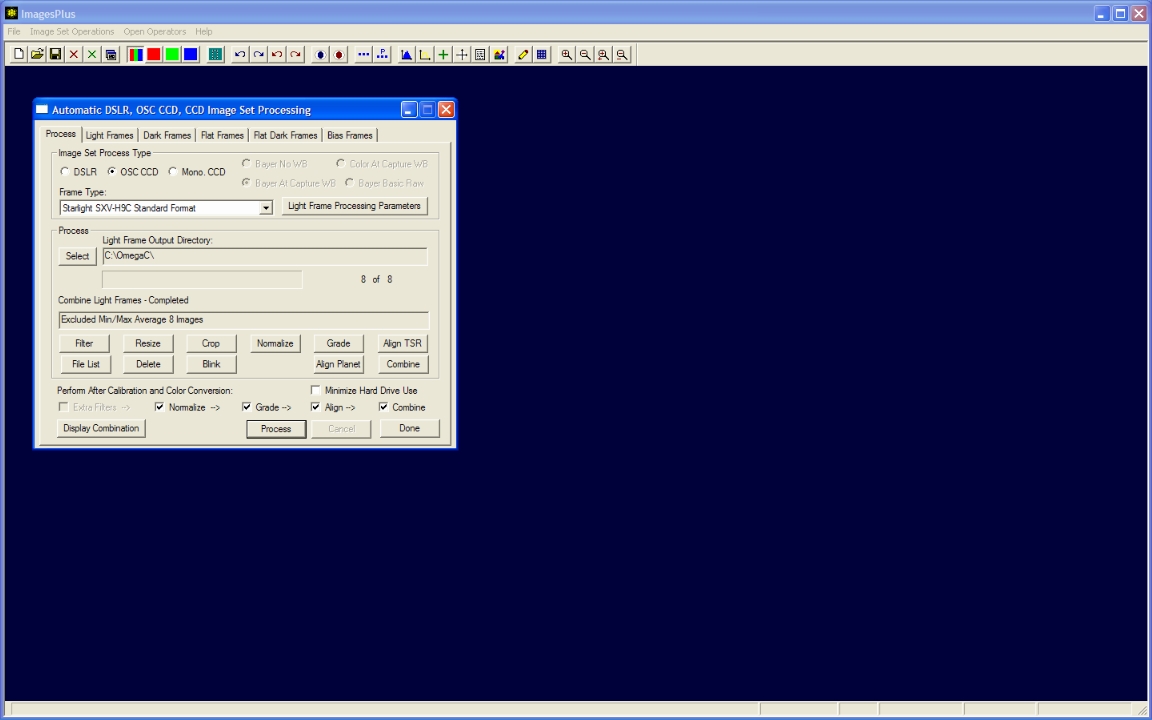
- Press the Process button on the Process tab to start the specified automatic processing.
- After Auto Image Set Processing is finished the Process buttons are enabled to allow inspection and reprocessing if desired. 8 of the 10 light frames were selected by auto star shape grade for alignment and stacking.
- Press the Display Combination button to display the final stacked image created from the best 8 light frames.
Auto image set completed with 8 of the 10 ligth frames since auto star shape grading eliminated 2 images with star size greater than one standard deviation from the average star size. Press the Display Combination button to display the final stacked image created from the best 8 light frames.
 |
Step 4
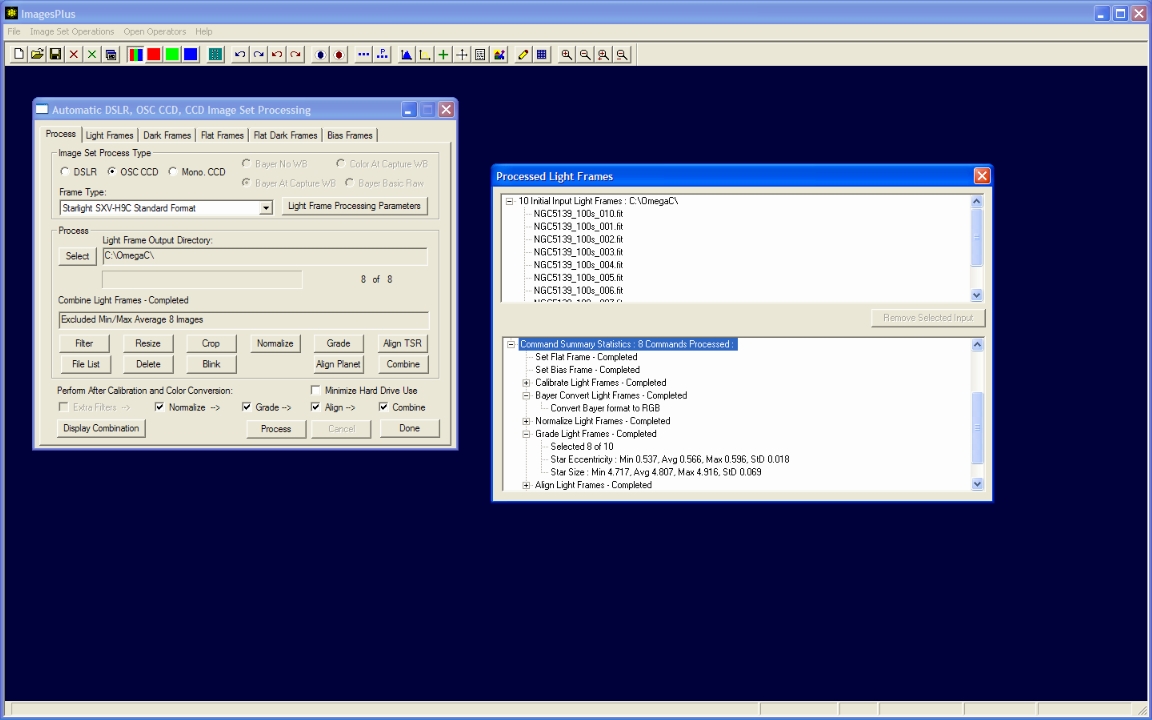
- A summary of all commands performed along with statistics is displayed by pressing the File List button.
- Double-click on an image in the list to display it.
- The Blink option can be used with any of the intermediate image sets for visual inspection and to redo processing. Step 5 below demonstrates the use of Blink Files to further refine the aligned image set before stacking.
Auto image set process summary.
 |
Step 5
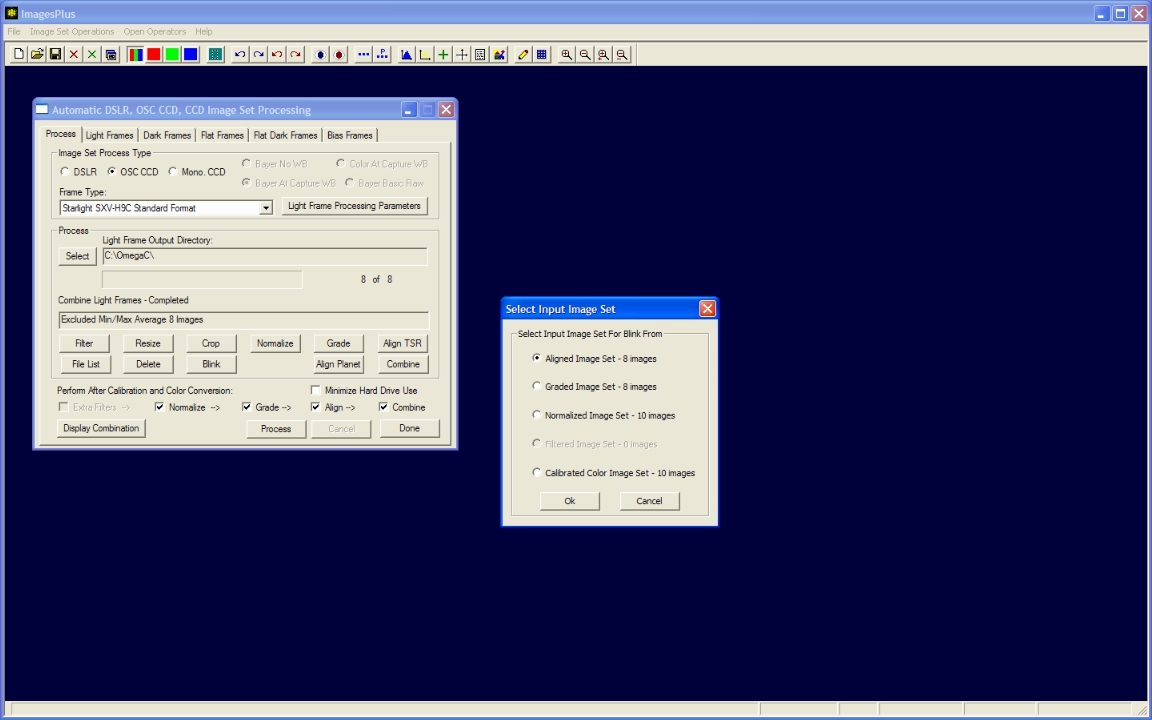
- Press the Blink button on auto image set process to display the input file list for Blink Files.
- Since normalize, grade, and align were selected as process options a complete set of intermediate image sets are available for input into Blink Files.
- Select aligned image set as the input set for Blink Files.
The 8 aligned images are used as input to Blink Files.
 |
Step 6
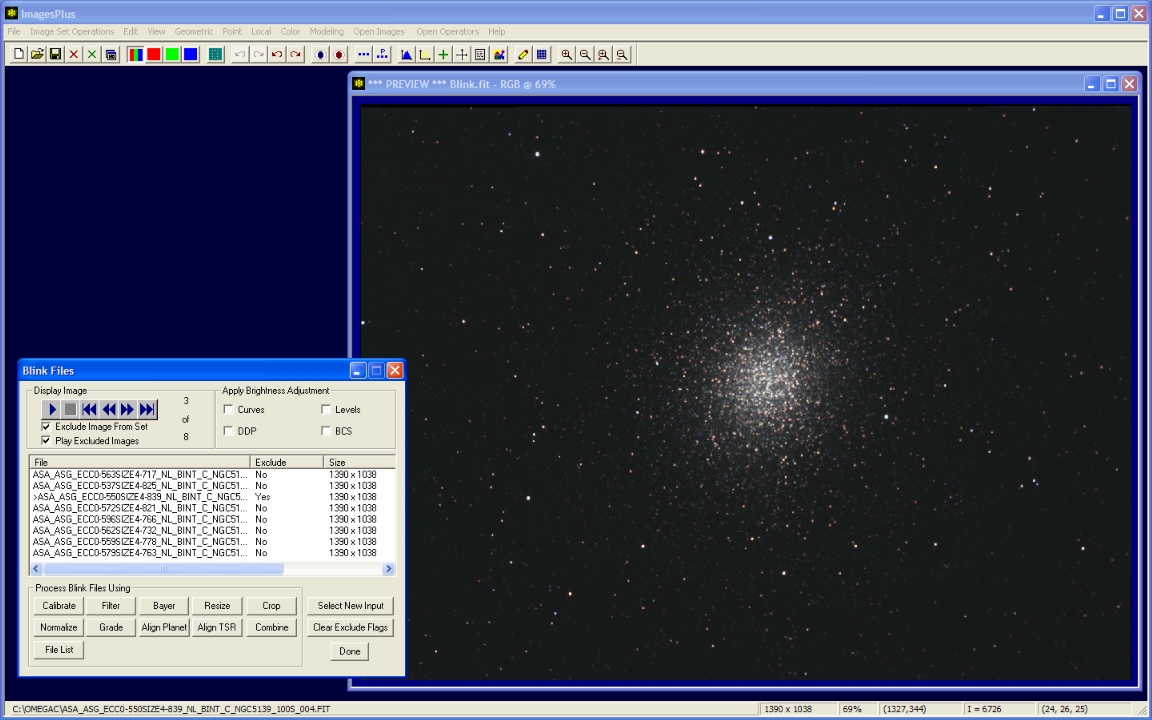
- Press the Play button on Blink Files to blink the 8 aligned images.
- Note that the third image has oval stars due to a tracking error.
- Press the Stop button then exclude the third image from the set.
- Play only the 7 images that are not excluded to verify the image set quality.
- Press the Combine button on Blink Files to stack the best 7 out of 8 images.
The third image is excluded from the set.
 |
Step 7
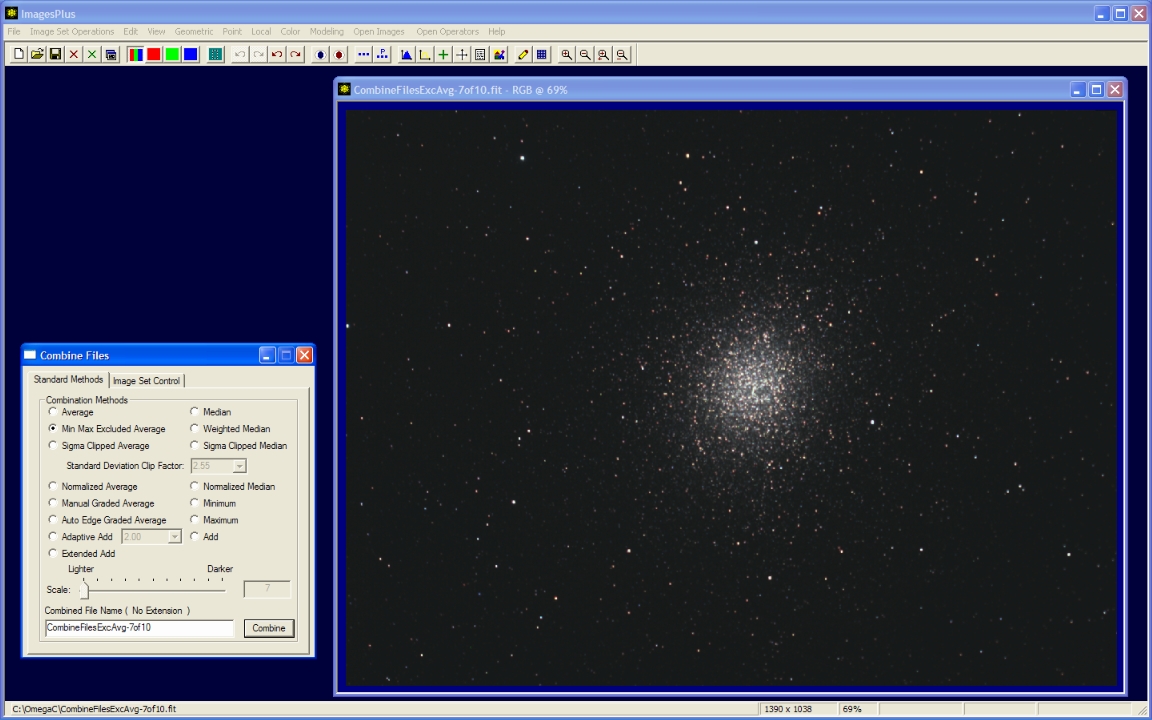
- Excluded min/max average is used to stack the 7 images.
- The stacked image appears automatically since Auto Display is checked on the Image Set Control tab.
Stack of 7 calibrated, normalized, and aligned color images of Omega Centauri. The stacked image is often very dark since no brightness increase is applied before display. In this case the 3.9 magnitude cluster is very bright.
Detailed processing instructions of the stacked image can be found at OSC CCD Image Enhancement - Omega Centauri
 |
Step 8
- Press the Delete button on Automatic DSLR, OSC CCD, and CCD Image Set Processing to delete the intermediate files before closing the command. The original files, master calibration frames, and stacked image will remain.
Copyright © 2009 MLUnsold Digital Imaging. All Rights Reserved.


