Star Halo Reduction using a Selective Color Mask
This tutorial explains how to select a star halo color range from an image and modify the color range to reduce or eliminate the halo. The Selective Color Mask tool is used to build the star halo mask. The halo mask is used with the Micro Curve tool to reduce or eliminate the halo. The halo mask is also used with the Hue-Saturaion-Luminance tool to increase color saturation of the star.
Similar steps can be used to select a color range for any stretch, contrast, deconvolution, or color adjustment filter with optional blend mode, opacity, and mask.
Step 1) Create Selective Color Mask of Bright Yellow Star
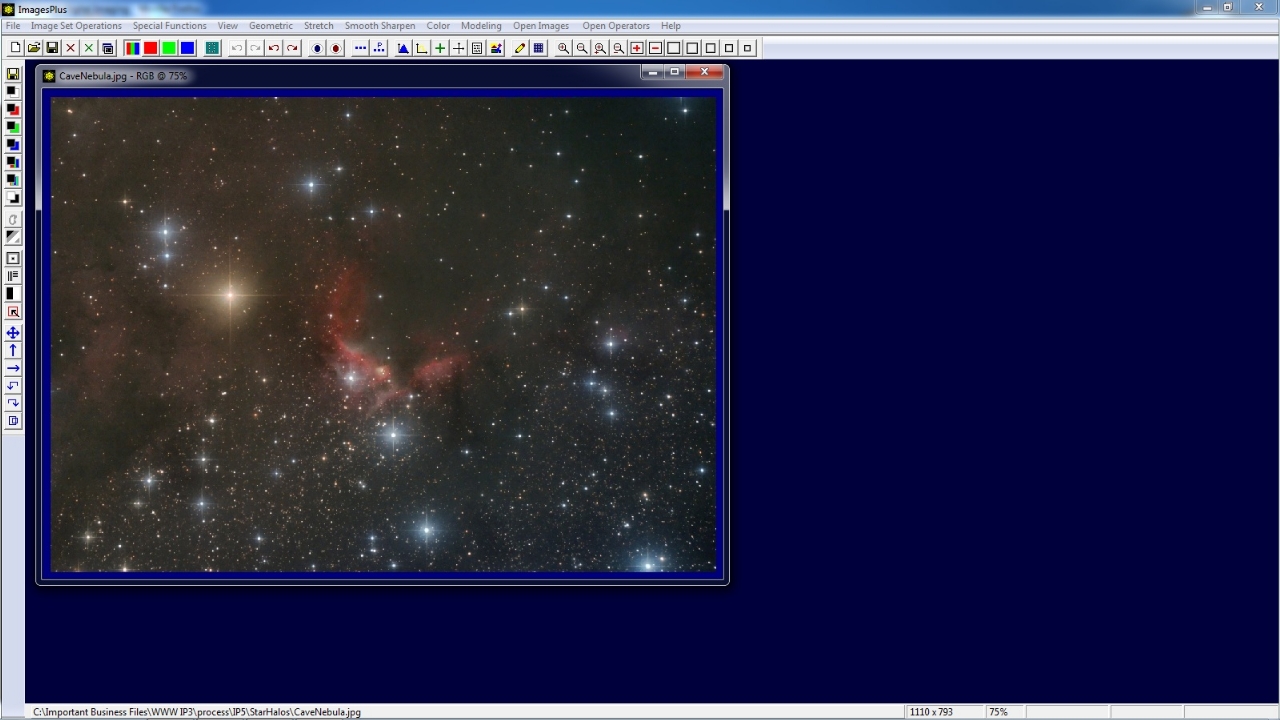
Initial image with bright yellow star left center and very large halo.
 |
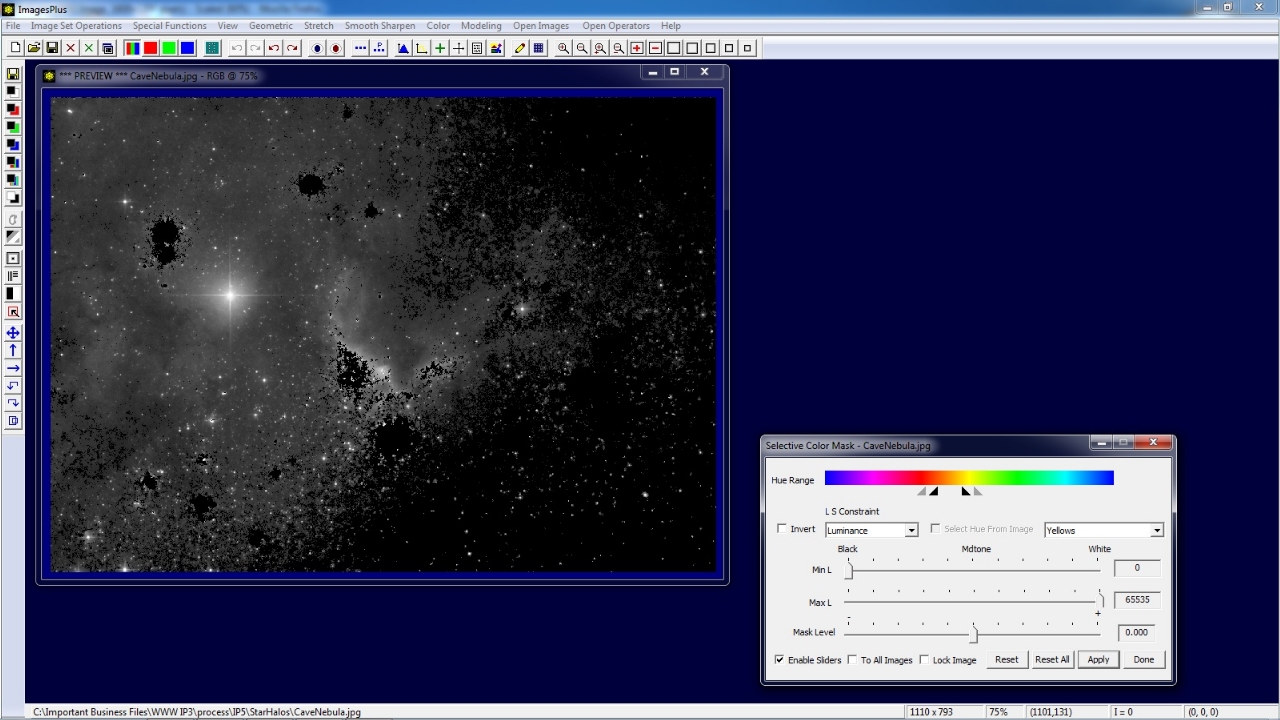
Open the Selective Color Mask tool using the left vertical toolbar button. Check the Select Hue From Image box then left-click on the bright yellow star halo left of center. The left and right hue range and feather triangles are set on Selective Color Mask tool with the selected hue in the center of the range.
Fine tune the hue range using a left click on the hue range triangles to move or between two triangles to move as a group.
 |
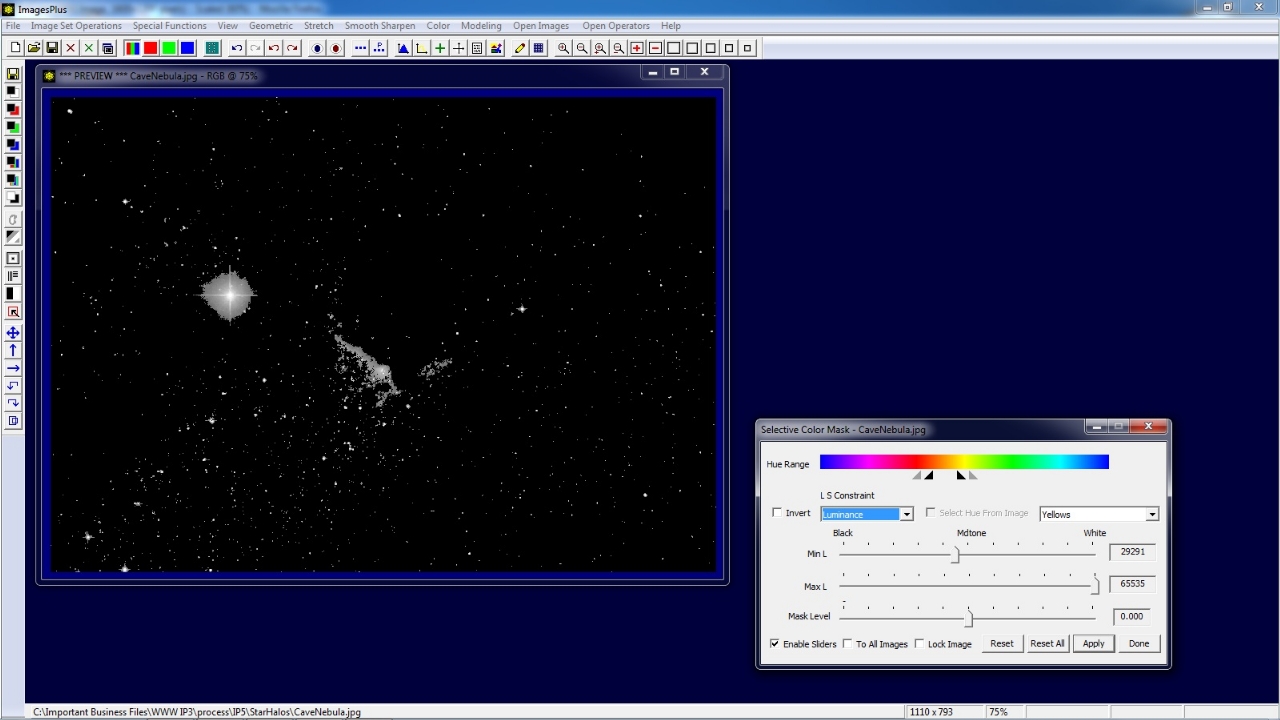
Adjust the luminance minimum slider towards the right to select only the brighter image area in the selected hue range. Note that the dark yellow background is now excluded from the mask.
 |
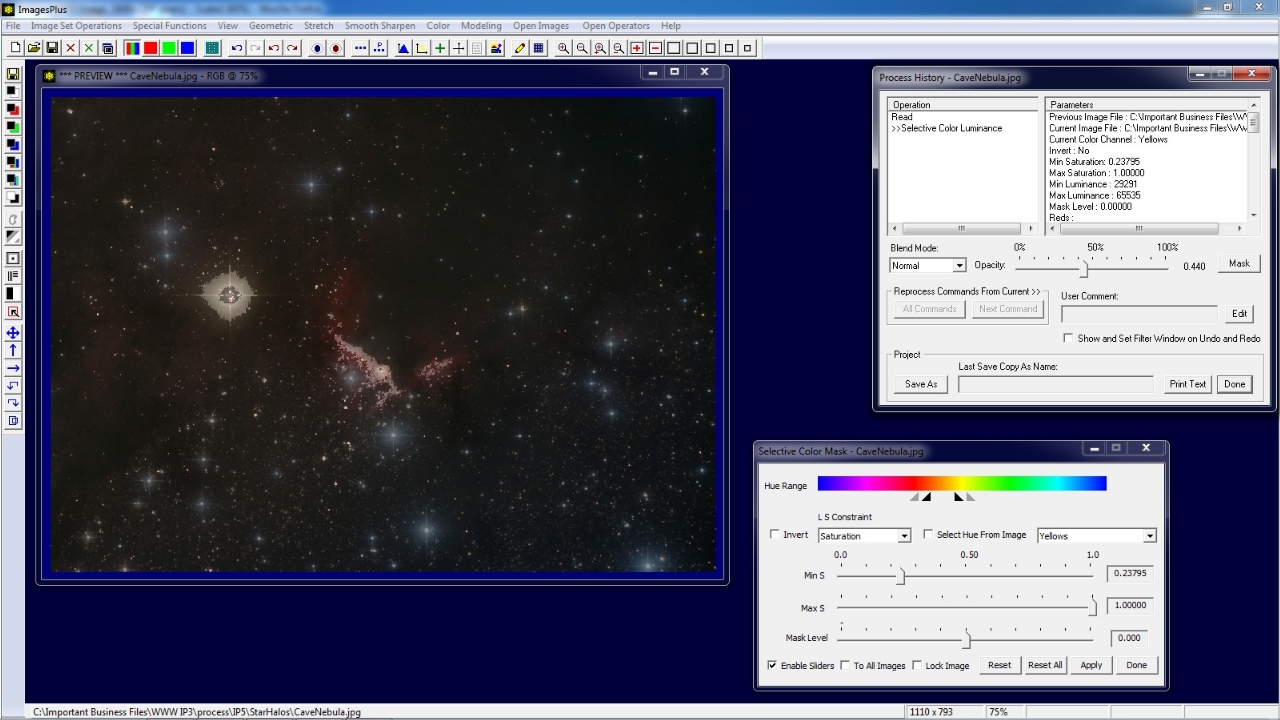
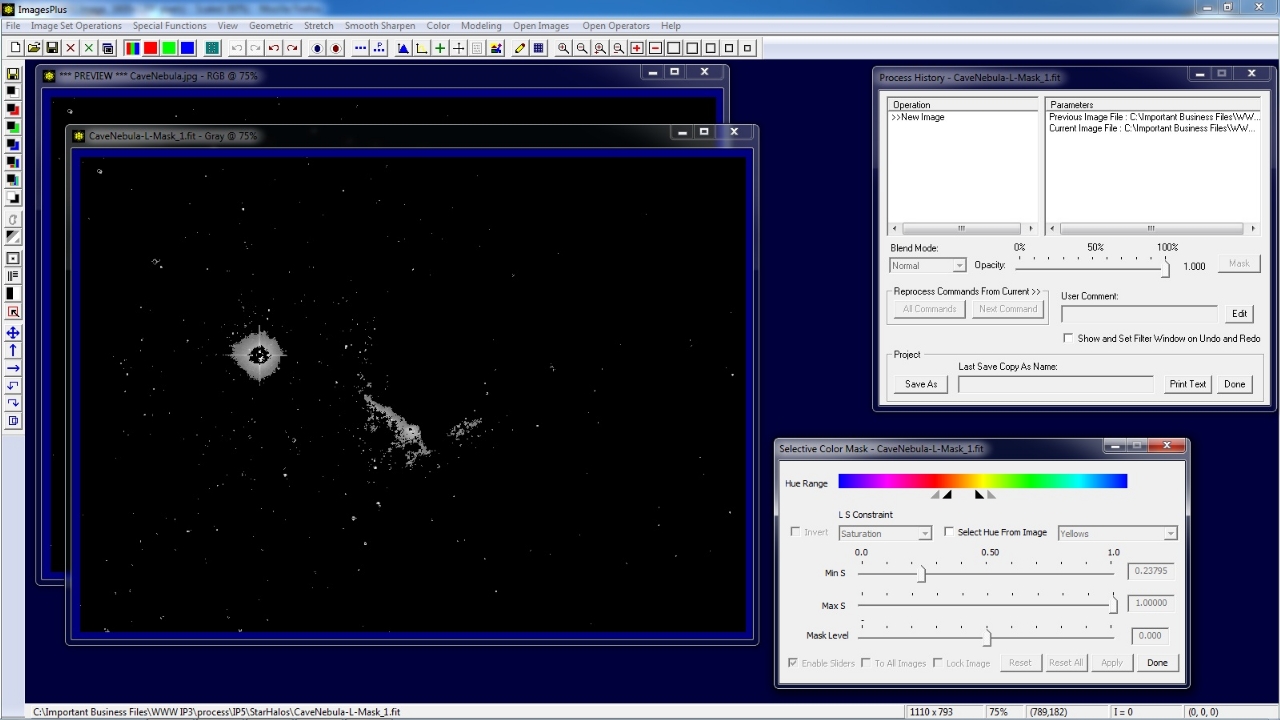
Set L S Constraint on the Selective Color Mask tool to Saturation. Adjust the saturation minimum slider towards the right to select only the more saturated image area in the selected hue range. Note that the center of the star halo is now excluded from the mask so that the star center remains unchanged.
 |
To compare the selective color mask with the image open the Process History window and set normal blend mode with opacity ~= 0.50.
 |
Use the Luminance Mask button on the left vertical toolbar to create a single channel gray scale mask with Gray in its top window caption bar.
 |
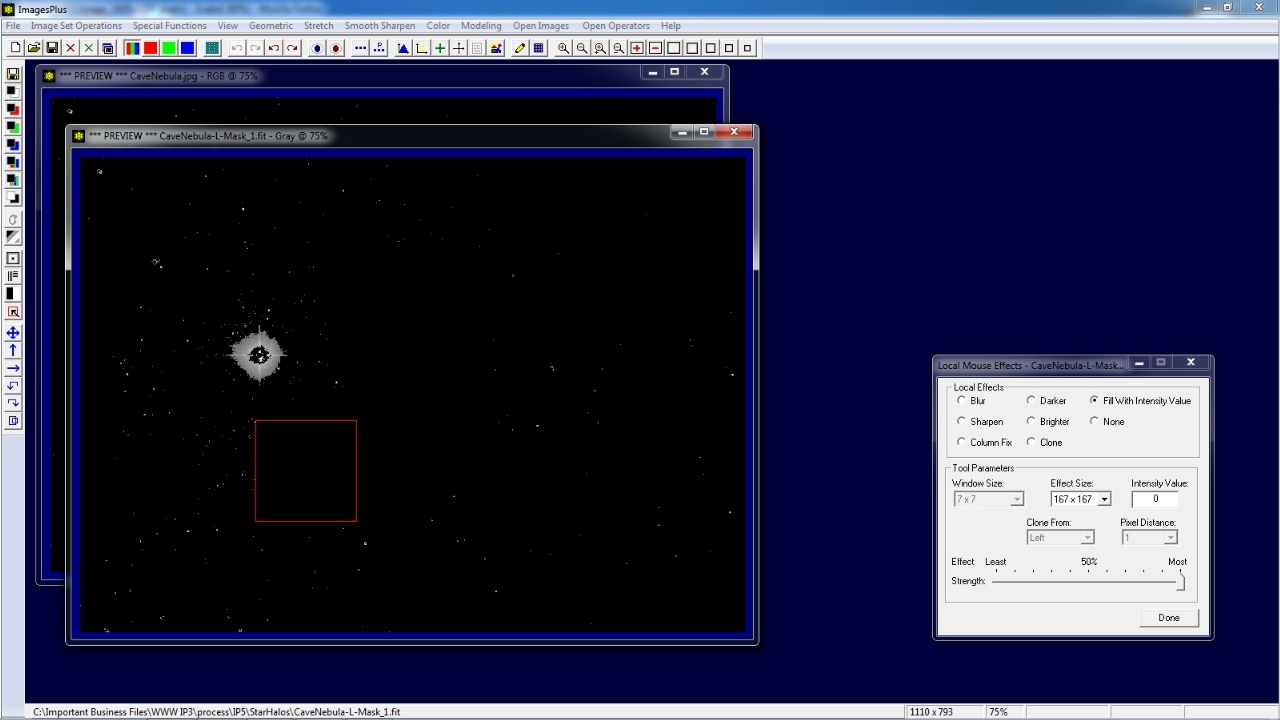
Open the Local Smooth, Sharpen, & Paint tool using the button on the left vertical toolbar. Select the Fill With Intensity Value option and set effect size = 167 x 167 and intensity value = 0 for black. Use the left mouse button to move the red square around and remove all white areas of the mask except the halo. Black mask areas conceal the filter that the mask is used with and reveal the image without the filter applied.
 |
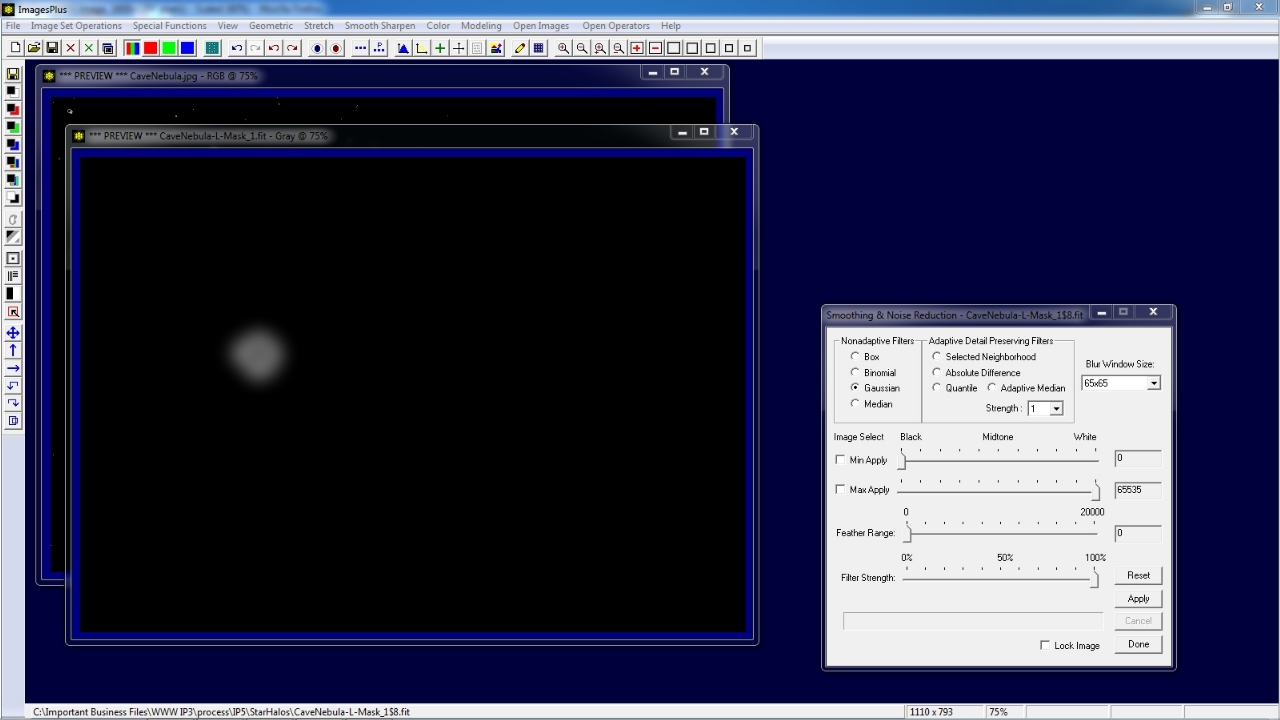
Use the Smoothing Filters button on the left vertical toolbar to open the Smoothing & Noise Reduction tool. Select Gaussian blur and apply a moderate blur window size of 65 x 65 to smooth the halo mask and help with blending.
 |
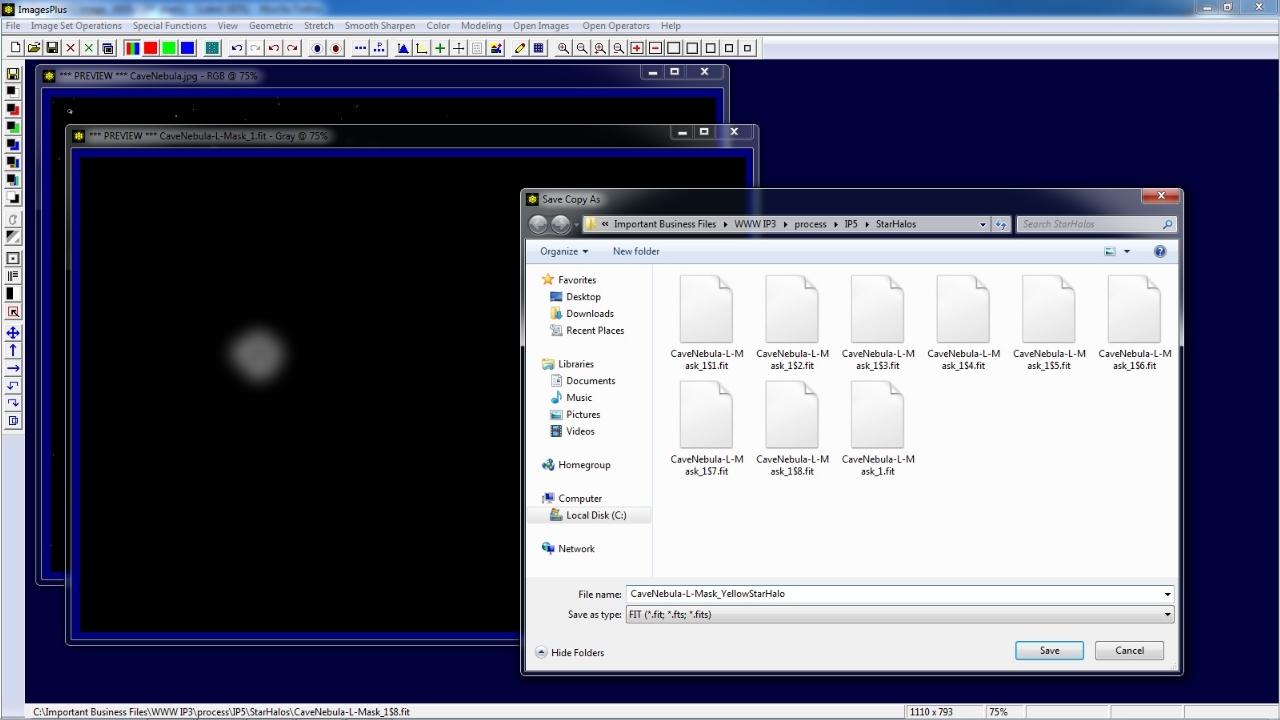
Use the Save As then Copy Mask toolbar button on the left vertical toolbar to name and save the modified selective color mask. The mask is now ready to be assigned to a filter using the Process History or Combine Image & Mosaic layers.
 |
Step 2) Use Selective Color Mask to Reduce or Remove Star Halo
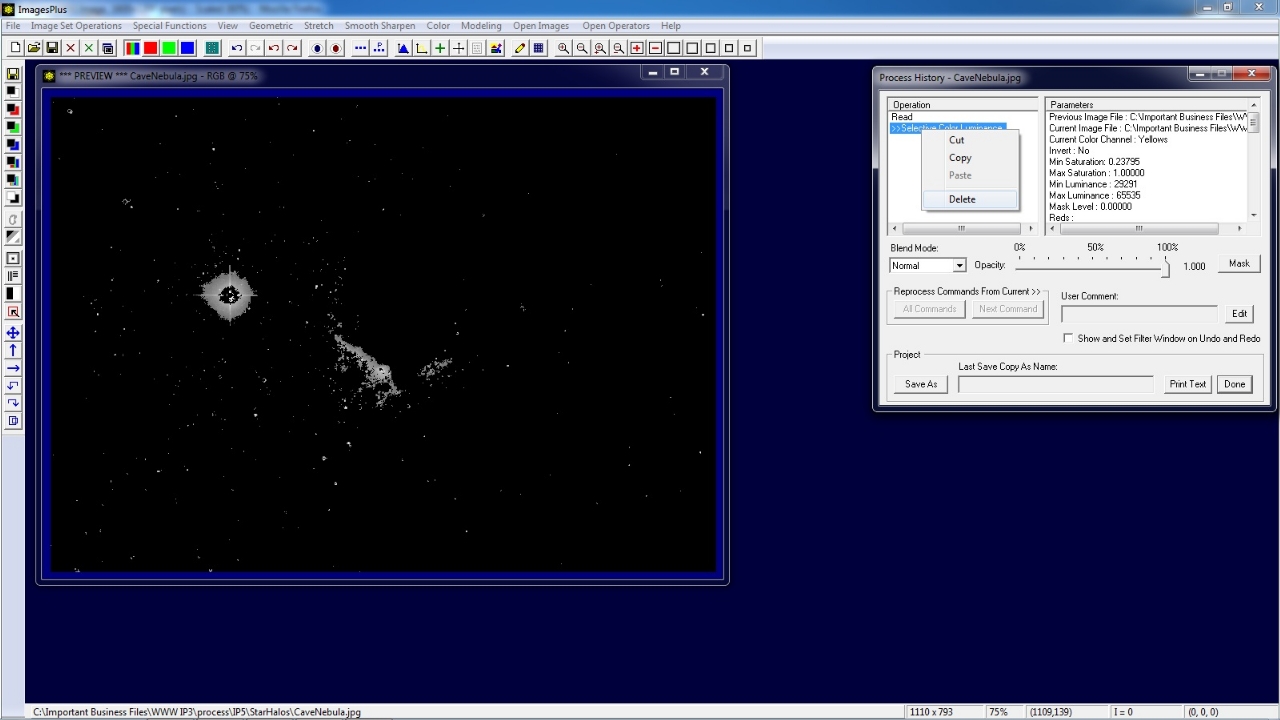
Open the Process History window and select Selective Color Mask from the Operation list. Right click on the selection and use Delete. The star mask functions are deleted and the initial image is restored as shown below.
 |
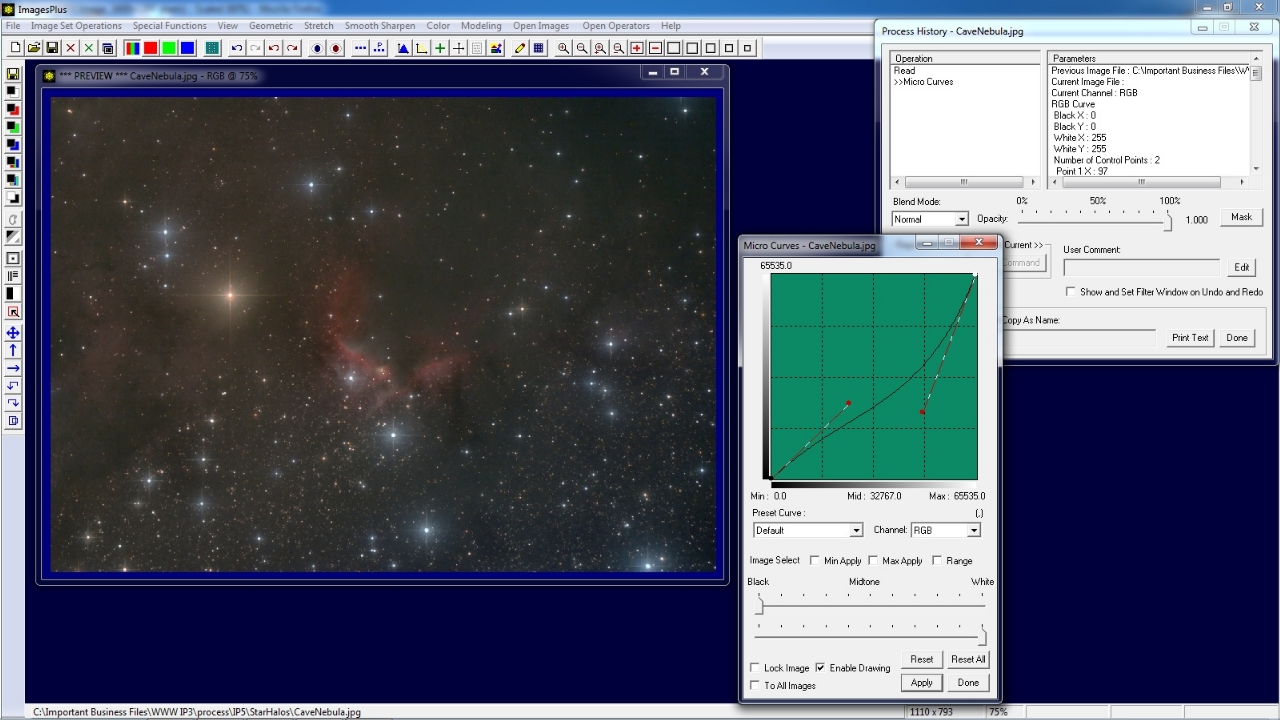
Open the Stretch | Micro Curve tool and reduce the star halo. Without a mask to restrict Micro Curves to the star halo the entire image is reduced in brightness.
 |
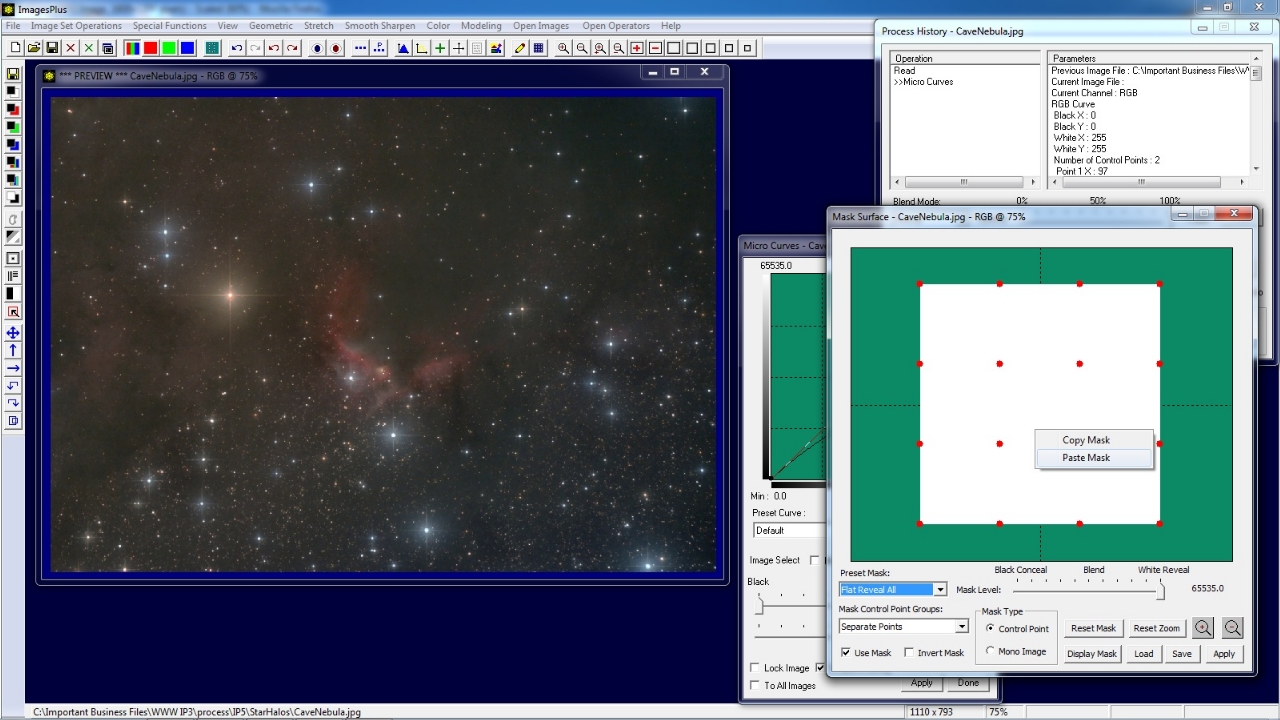
Open the Process Histiory window and with Micro Curve as the current command pointed to by >> in the Operation list press the Mask button.
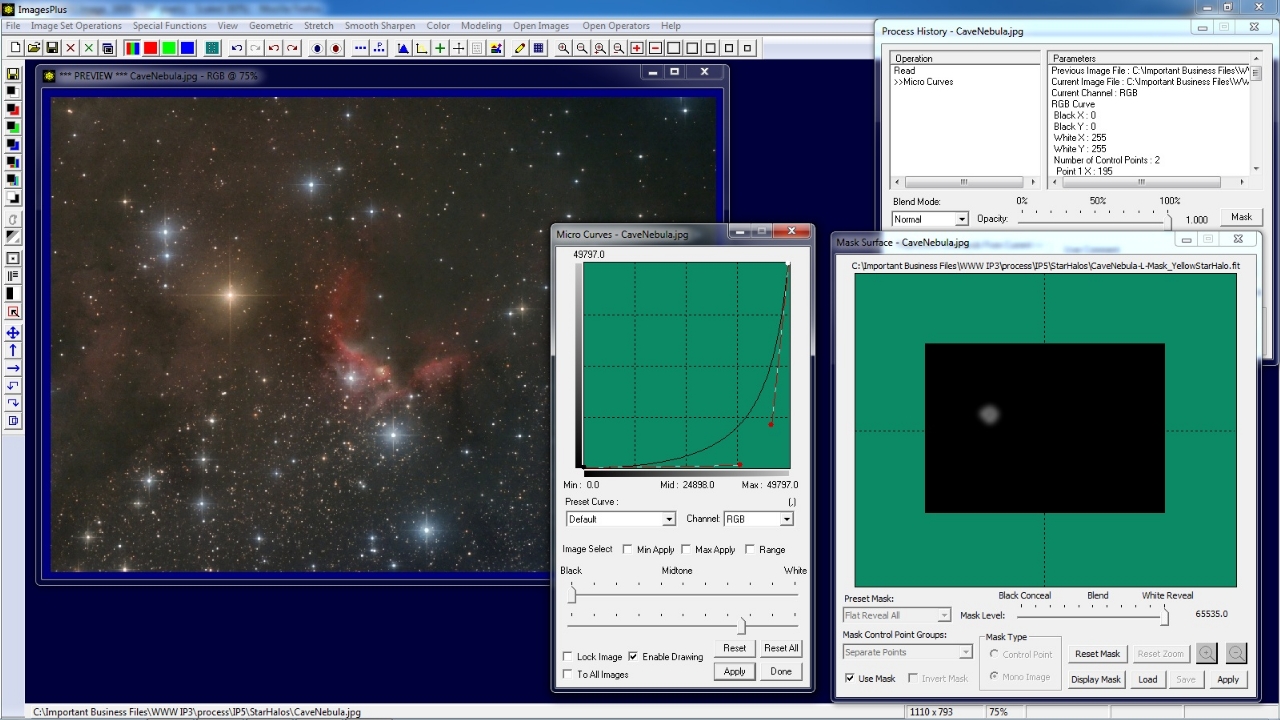
The Mask Surface window is displayed and set to the default all white control point mask. Right click on the white mask area and select Paste. Since the last mask saved was the yellow star halo mask it is assigned to the Micro Curve tool. Note that you can also right click on the mask area and select Copy to copy a mask to a different filter of the same image or different image.
 |
The star halo mask restricts Micro Curve adjustment to only the brighter areas of the mask which is the yellow star halo only. Black mask areas block Micro Curve adjustment and show the layer or image before adjustment with Micro Curve. Opacity could be used to blend the Micro Curve adjustment with the previous layer but in the case opacity = 1.0 or 100% to use the full effect of masked micro curve adjustment.
 |
Step 3) Use Halo Mask to Increase Star Color Saturation
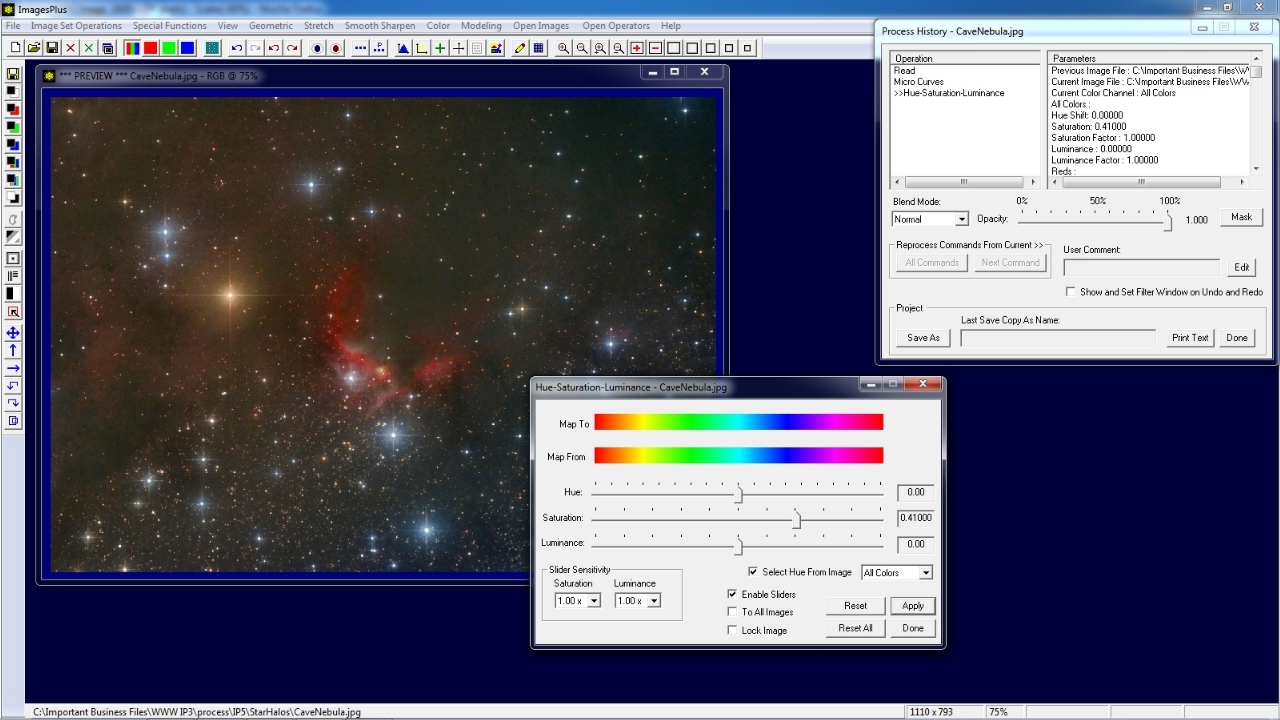
Open Color | Hue-Saturtion-Luminance and increase saturation. The saturation of the bright yellow star is increased but so is the saturation of the entire image.
 |
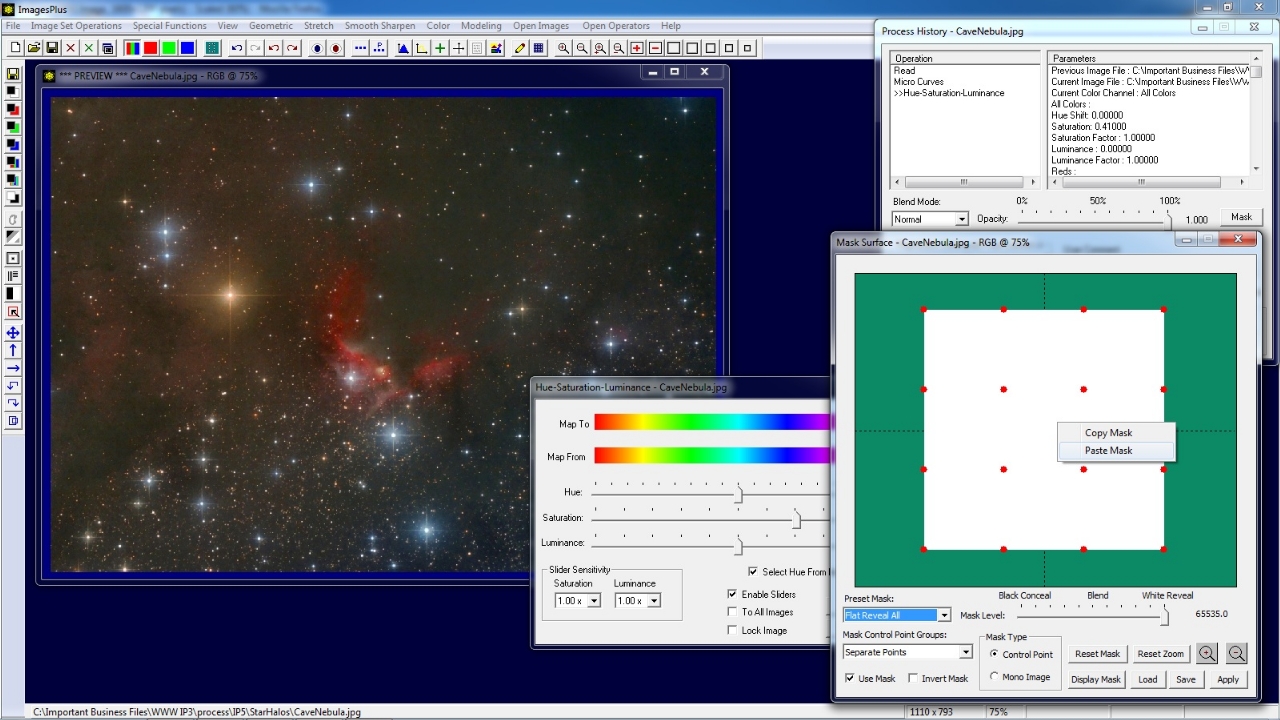
Open the Process Histiory window and with Hue-Saturtion-Luminance as the current command pointed to by >> in the Operation list press the Mask button.
The Mask Surface window is displayed and set to the default all white control point mask. Right click on the white mask area and select Paste. Since the last mask saved was the yellow star halo mask it is assigned to the Hue-Saturation-Luminance tool. Note that you can also right click on the mask area and select Copy to copy a mask to a different filter of the same image or different image.
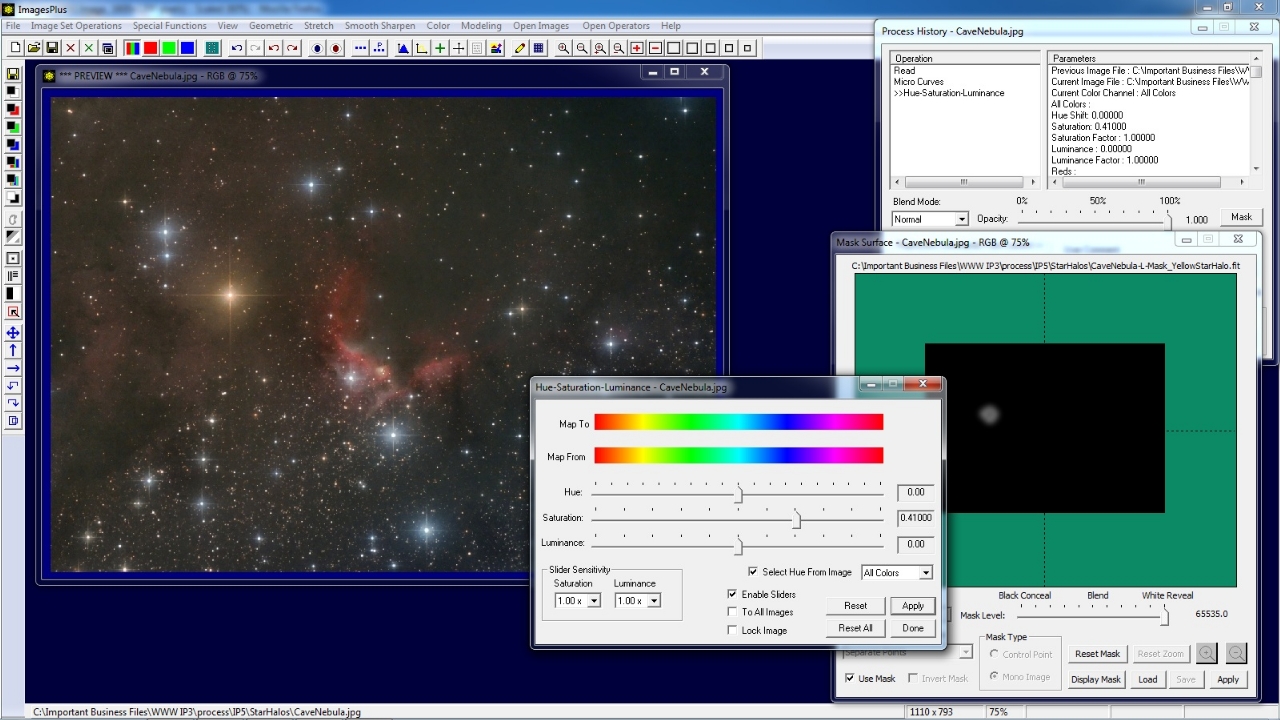
 |
With the star halo mask saturation is increased only in the brighter areas of the mask or just the star halo. Brighter mask areas increase saturation more than darker mask areas.
 |
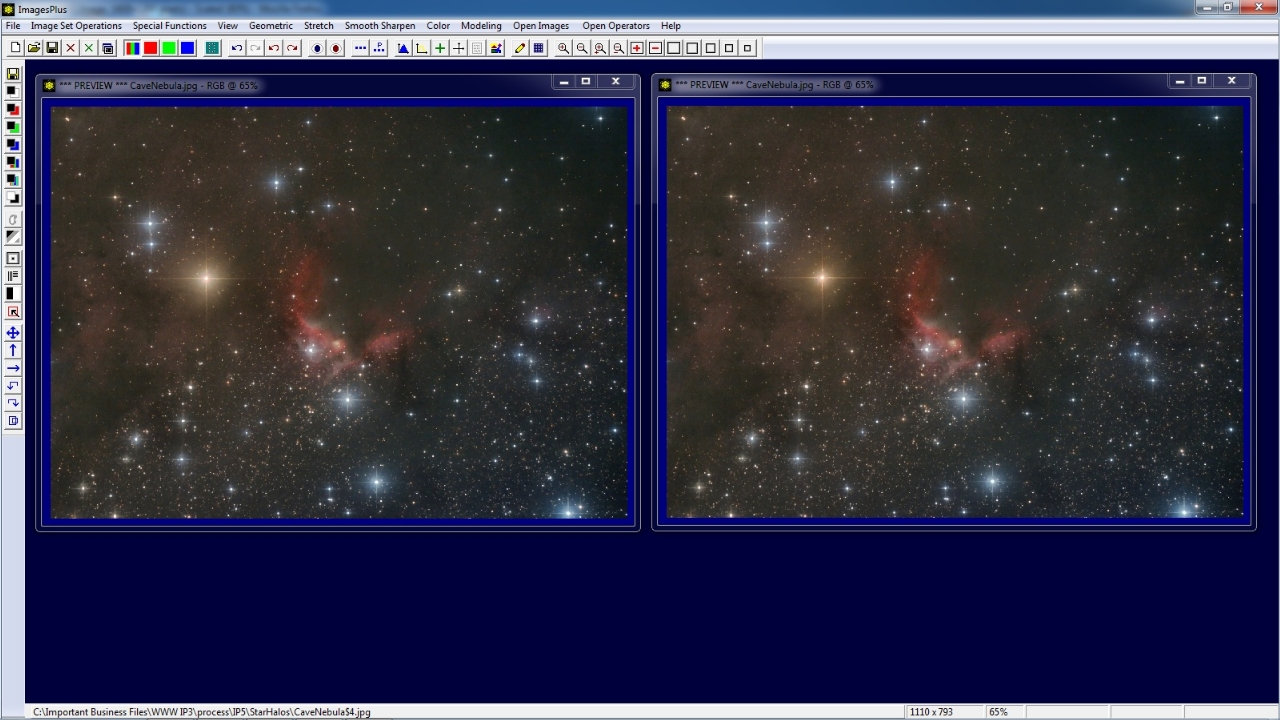
Initial image on left with bright halo around left center yellow star. Yellow halo reduced with increased color saturation shown by image on right.
The same technique can be used to create a blue star halo mask and reduce the halos of all blue stars and increase their saturation.
 |
Copyright © 2012 MLUnsold Digital Imaging. All Rights Reserved.
