Star Size Reduction Using a Star Mask
This tutorial explains how to create a star mask from a color or monochrome image.
The star mask is used with the Special Functions | Star Size & Halo Reduction tool to reduce star size and leave other areas of an image unchanged.
Similar steps can be used to apply any stretch, contrast, deconvolution, or color adjustment filter with blend mode, opacity, and mask.
Step 1) Create Star Mask
Use the High Pass Filter button on the left vertical toolbar to open the High Pass Filter tool. Set a small filter radius of about 2 or 5x5 and apply to the M76 image.
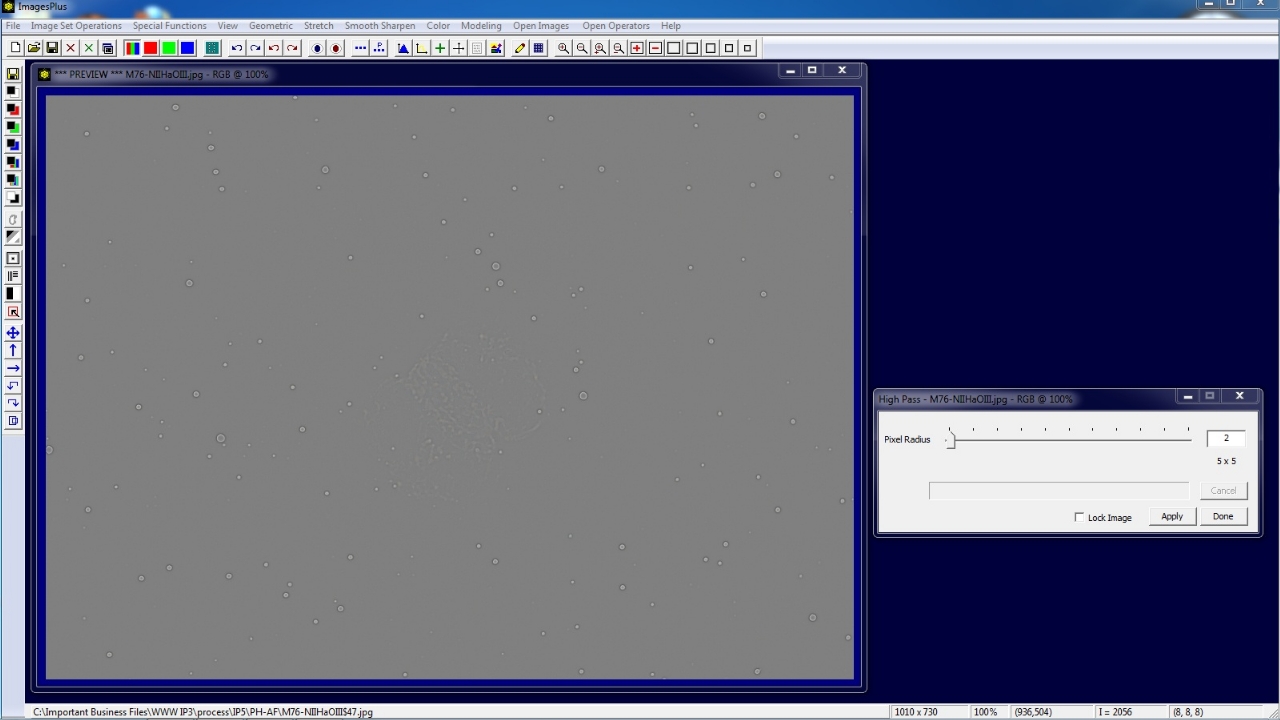 |
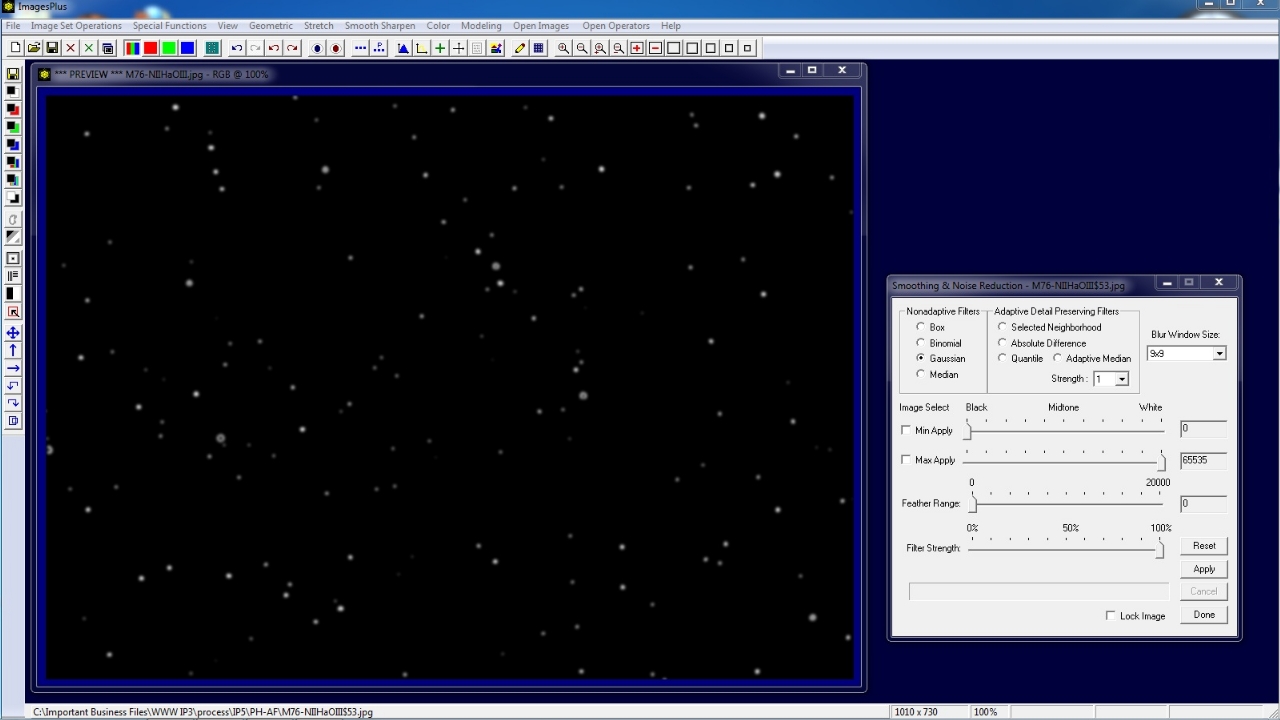
Use the Smoothing Filters button on the left vertical toolbar to open the Smoothing & Noise Reduction tool. Select Gaussian blur and apply the same pixel radius or blur window size of 5x5 that was used with the High Pass Filter to the M76 image.
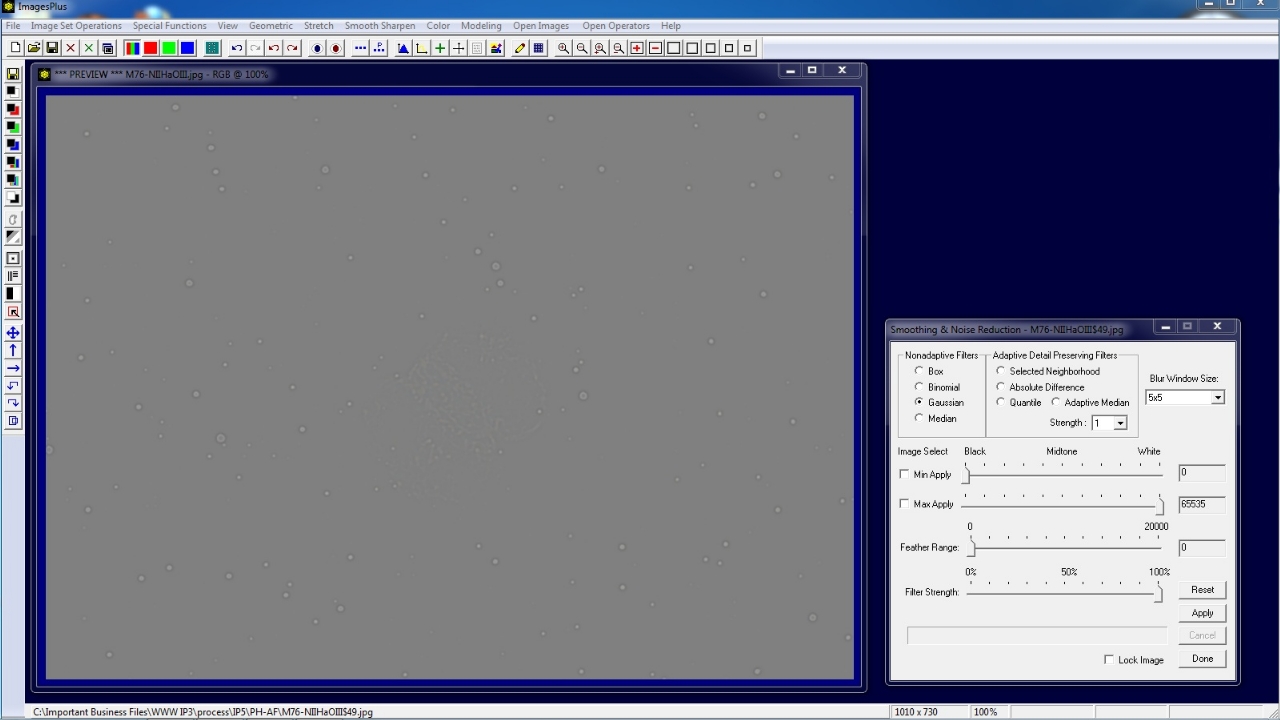 |
Use the Threshold button on the left vertical toolbar to open the Threshold tool. Adjust the threshold level so that only stars are white and everything else is black.
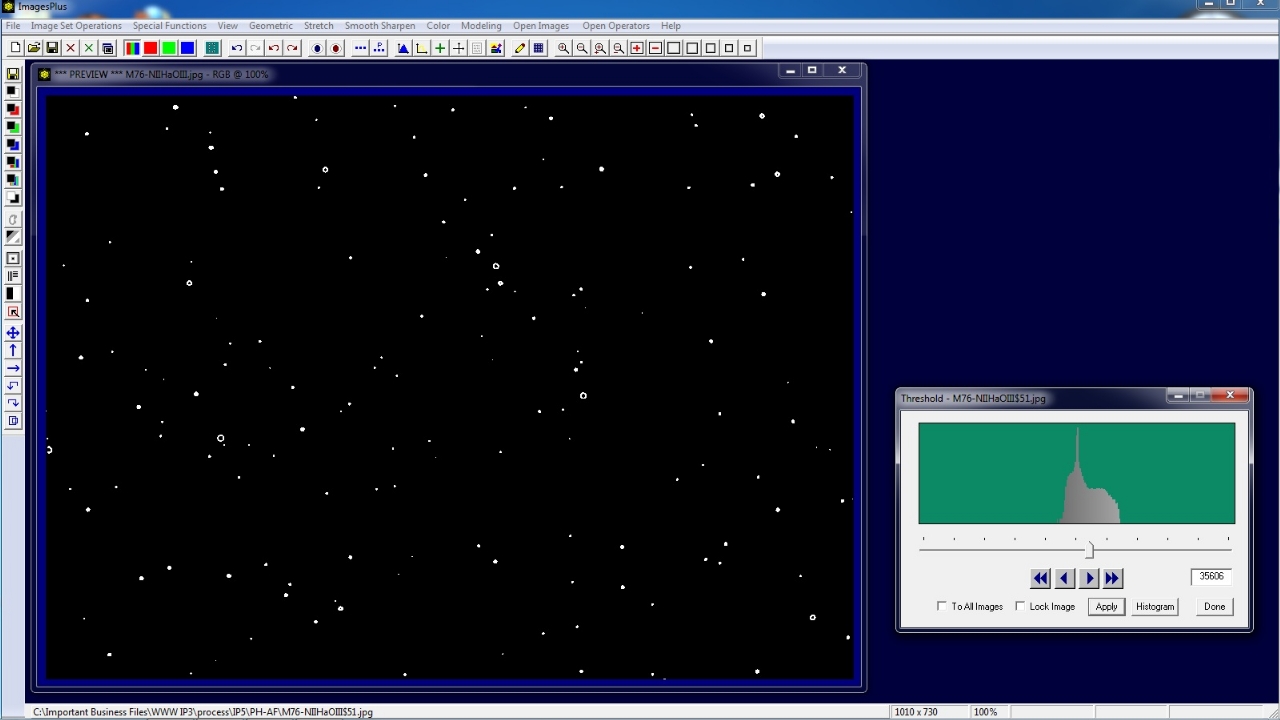 |
Smooth the edges of the stars in the star mask using a Gaussian blur. In this case the blur window size is set to 9x9. Smoothed star edges blend star size reduction into the background when the mask is applied.
 |
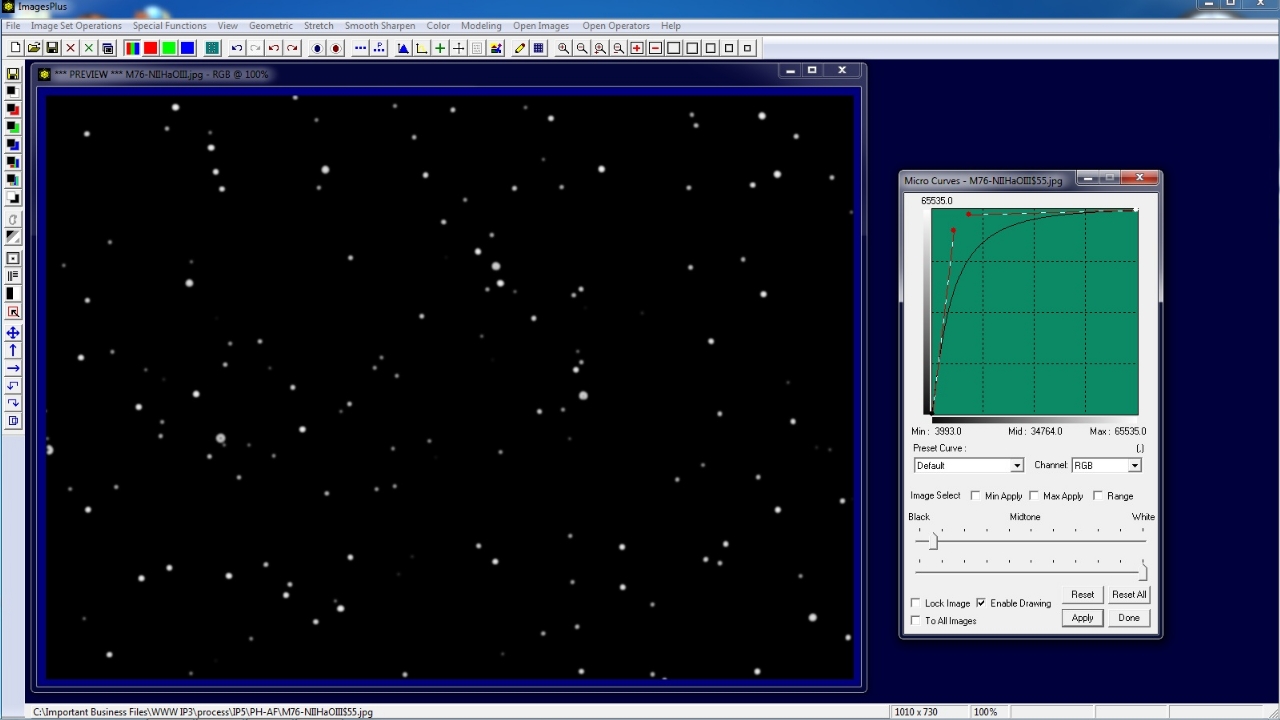
Use Stretch | Micro Curves to increase the brightness of the stars and leave the black background unchanged. Brighter stars allow more star size reduction to be applied than darker stars in the mask.
 |
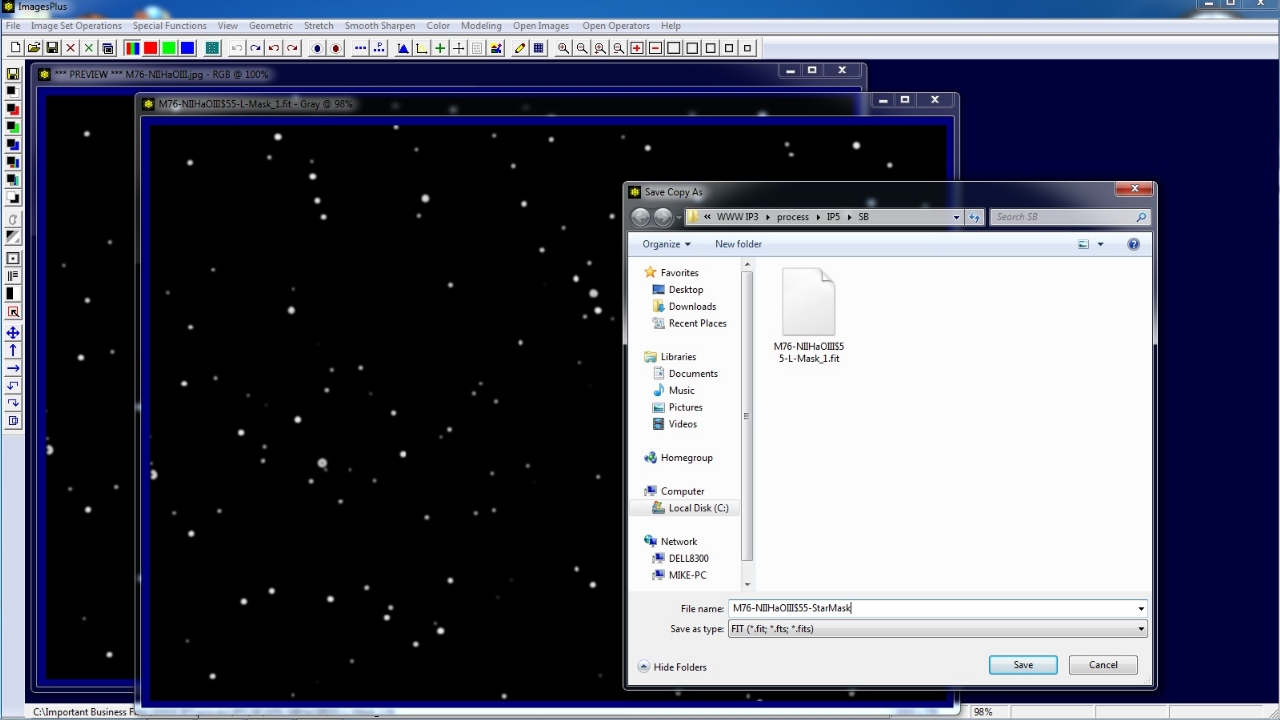
Use the Luminance Mask button on the left vertical toolbar to convert to a single channel star mask with Gray in its top window caption bar. Use the Save As then Copy Mask toolbar button on the left vertical toolbar to name and save the star mask. The mask is now ready to be assigned to a filter using the Process History window.
 |
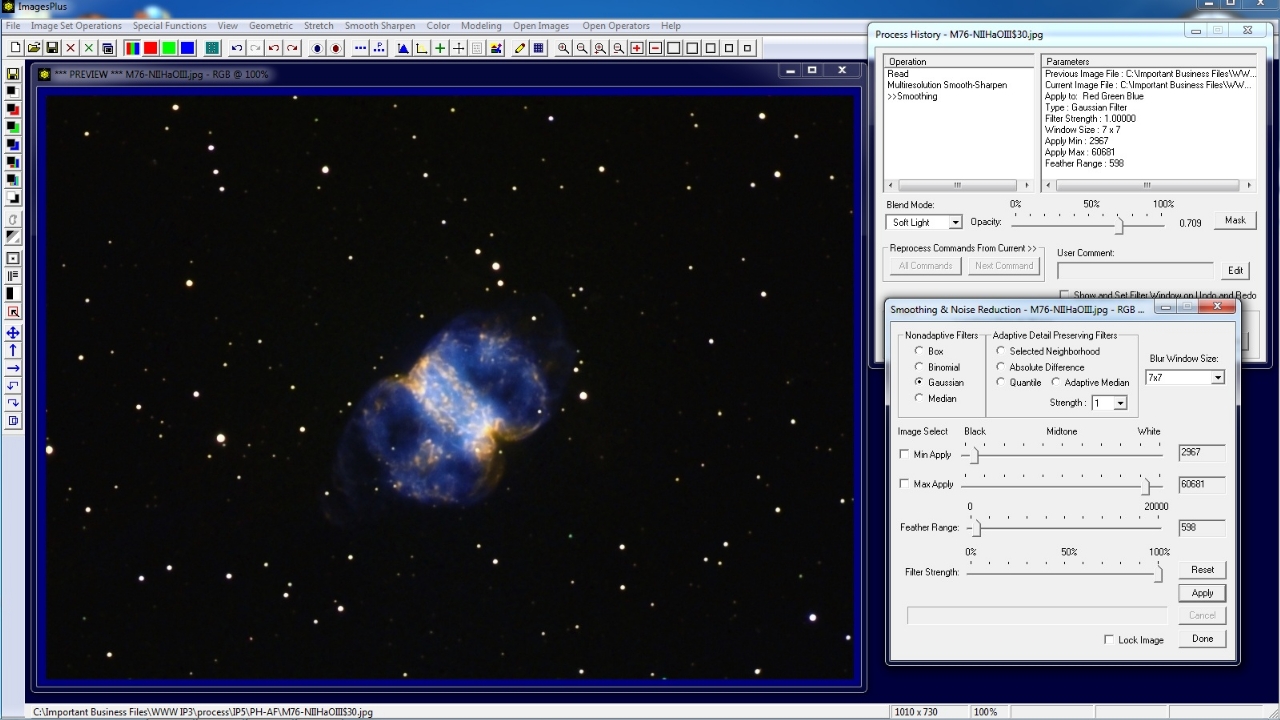
Since the star mask was create from the initial M76 image rather than a duplicate of the image the star mask function need to be removed from the initial M76 image. Open the Process History window and select High Pass, Smoothing, Threshold, and Micro Curve from the Operation list.
Right click on the selection and use Delete. The star mask functions are deleted and the initial M76 image is restored as shown below.
 |
Initial M76 image after star mask filters are deleted from its process history operations. The star mask is now ready to assign to a filter.
 |
Step 2) Reduce Star Size
Open the Special Functions | Star Size & Halo tool and apply it to the image. Since a mask is not assigned to the Star Size & Halo tool the entire image is effected.
 |
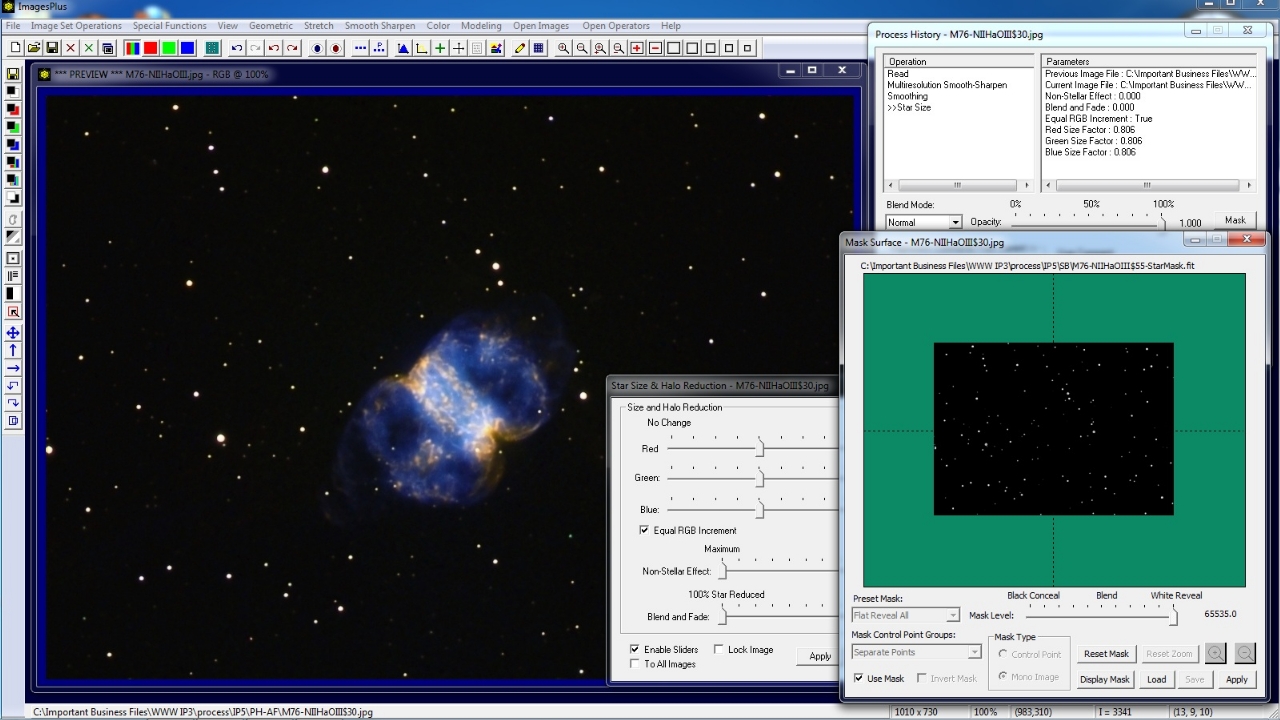
Open the Process Histiory window and with Star Size as the current command pointed to by >> in the Operation list press the Mask button. The Mask Surface window is displayed and set to the default all white control point mask. Right click on the white mask area and select Paste. Since the last mask saved was the star mask created in step 1 above it is assigned to the Star Size tool. Note that you can also right click on the mask area and select Copy to copy a mask to a different filter of the same image or different image.
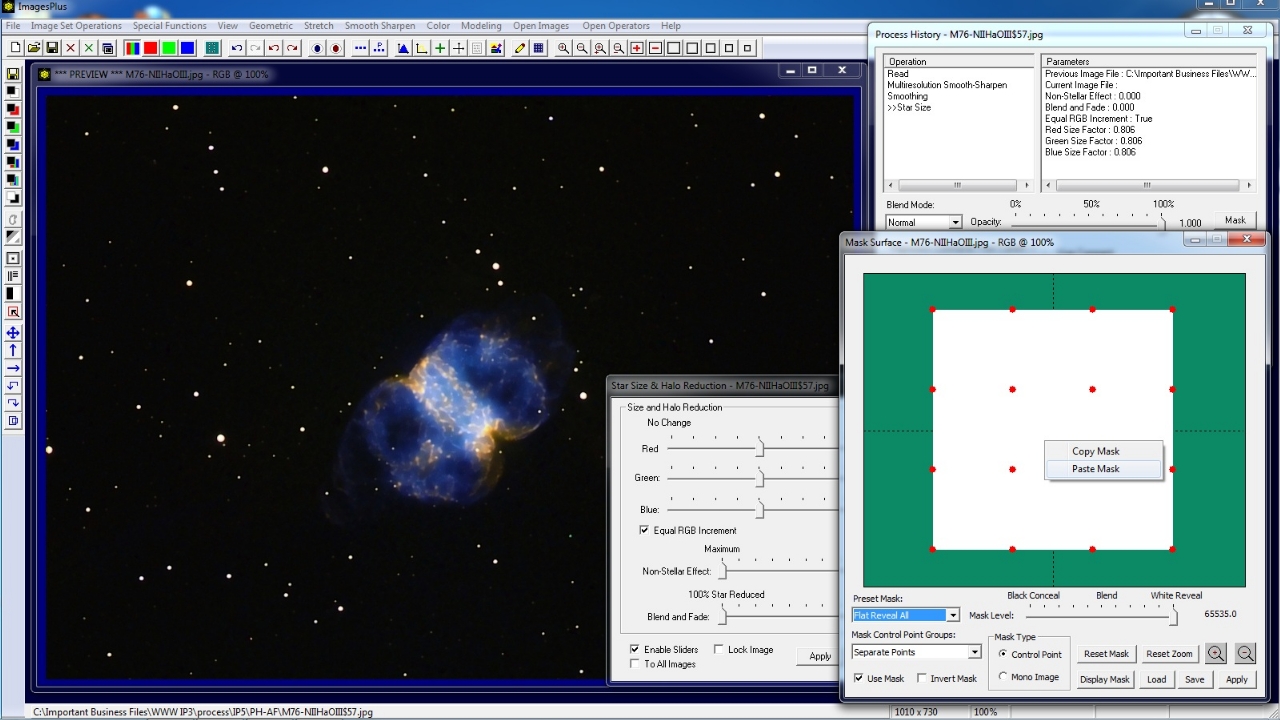 |
The star mask is assigned to Star Size & Halo tool and controls where star reduction is applied. Brighter mask areas (stars only) have size reduction applied while darker mask areas remain unchanged.
 |
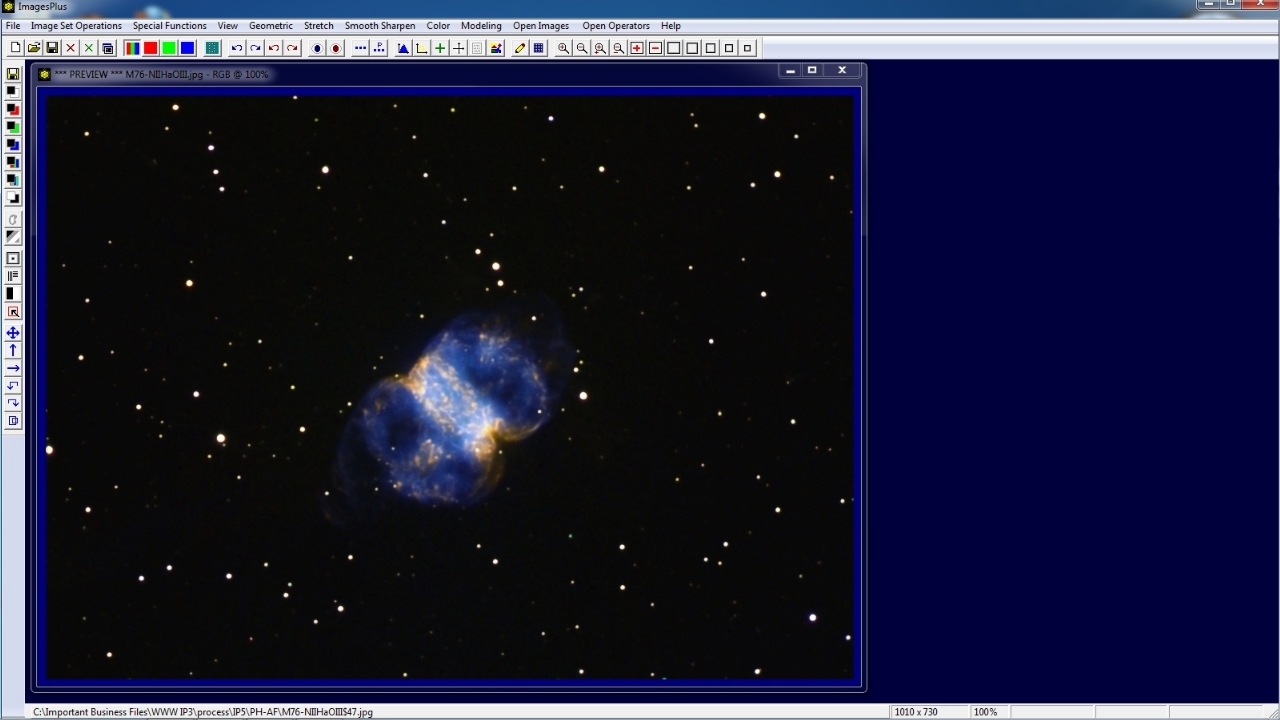
M76 before star mask controlled star size reduction.
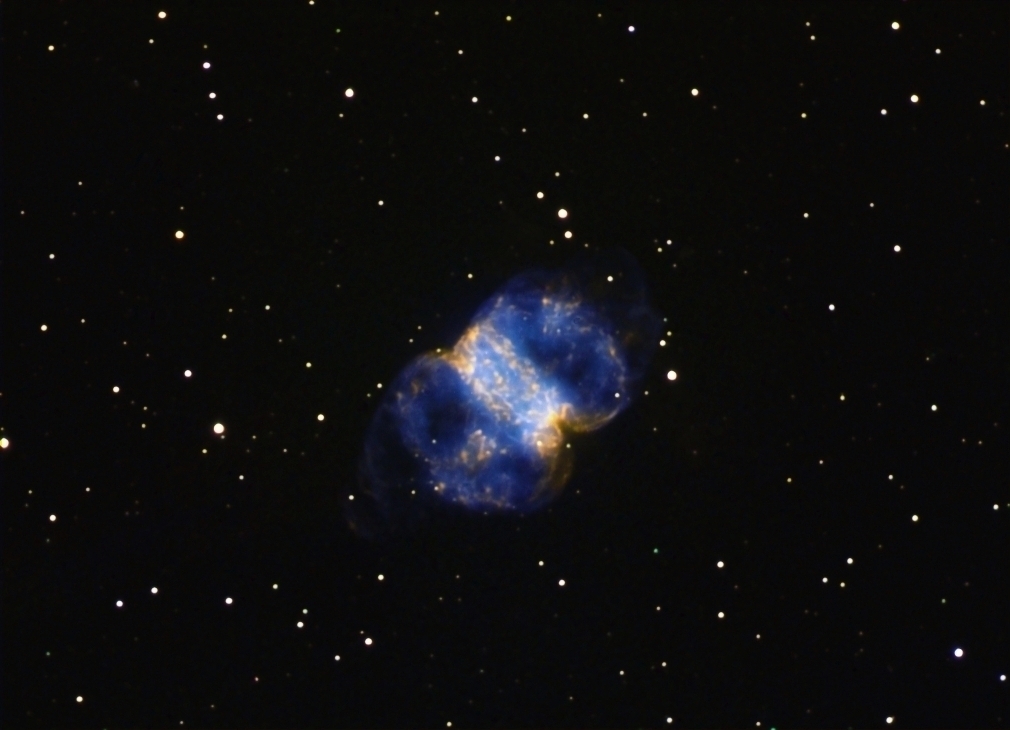 |
M76 after star mask controlled star size reduction..
 |
Copyright © 2012 MLUnsold Digital Imaging. All Rights Reserved.