Each open image has a processing history list maintained by the Process History window.
Stretch, smoothing, sharpening, deconvolution, color adjustment, and geometric operations along with their blend moodes, opacity and masks are inserted into the process history list as they are applied to an image.
Operations can be modified, inserted, copied, and deleted. The processing list can be saved or loaded from a folder as a project file.
Process History List Operations
Insert an Operation
- Use the Undo or Redo toolbar buttons to position the current operation pointer >> in the Operation list of the Process History window to the operation that you want to insert a new operation after.
- The current operation can also be set using a double-click on the operation in the list. The operation will then be marked with the current operation pointer >>.
- If the current operation >> is the same as the operation to be inserted then press the Set View toolbar button otherwise ImagesPlus will assume that you want to modify the operation.
- If the current operation >> is different than the operation to be inserted then there is no need to use the the Set View toolbar button.
- Apply the operation to the image. The operation will be inserted into the process history list after the previous current operation and marked with the current operation pointer >>.
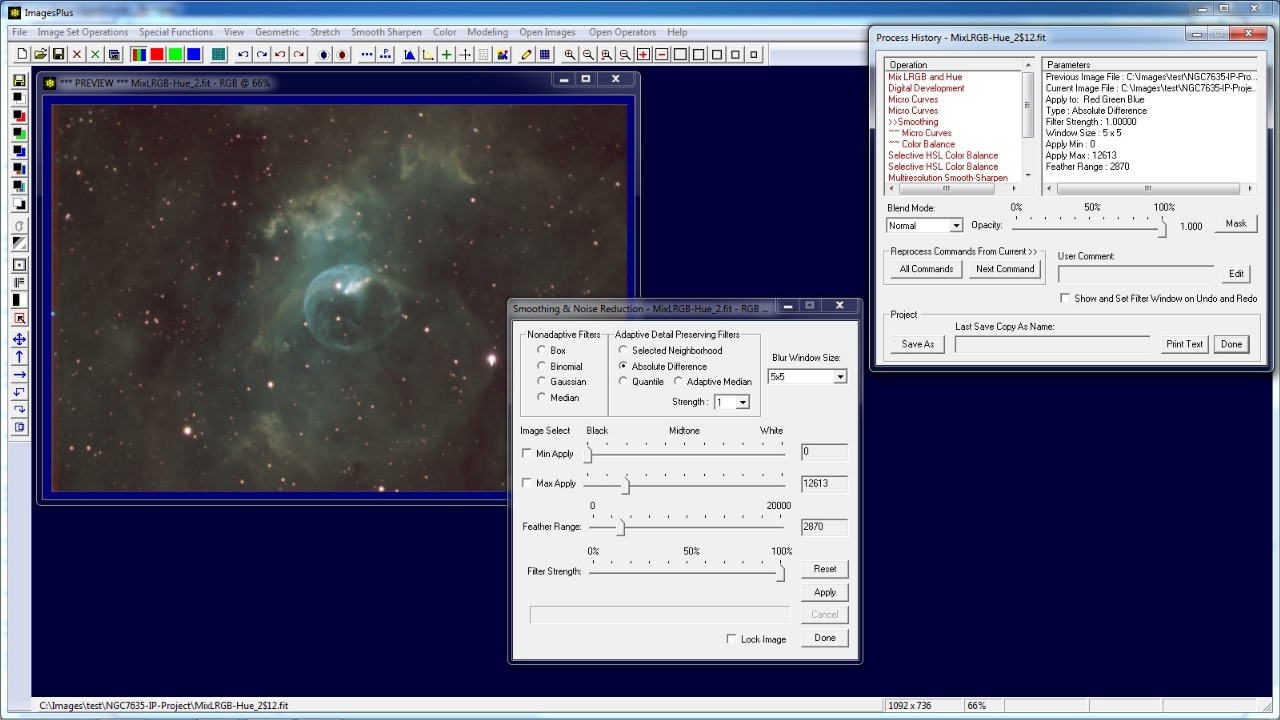
Micro Curves is set as the current >> operation using a double click so that an operation can be inserted after it.
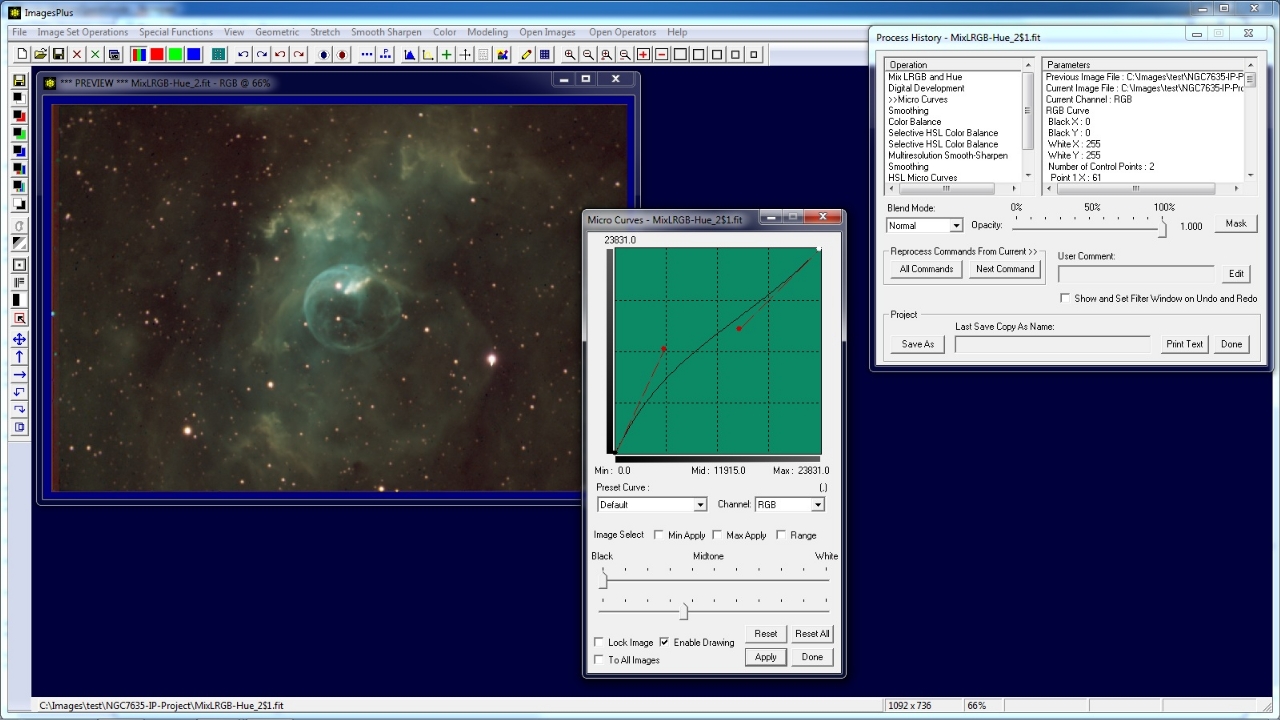 |
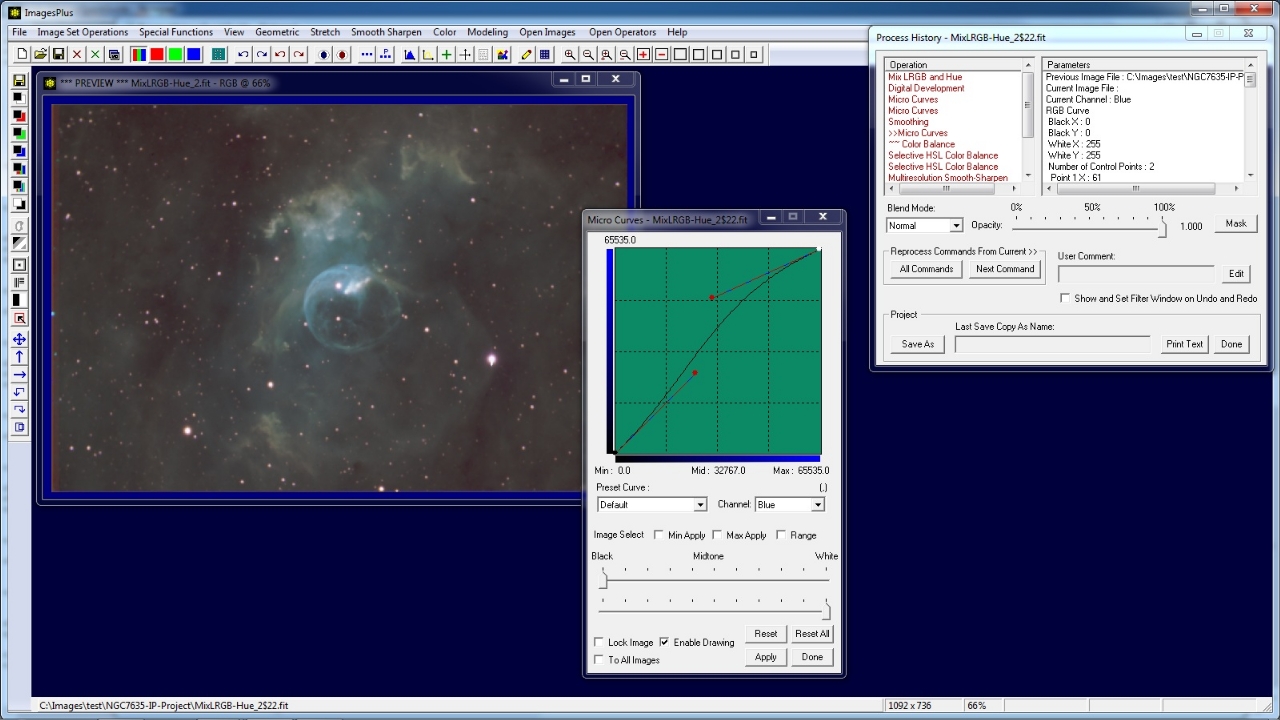
A blue Micro Curve is to be appled after the RGB Micro Curve of the current operation. The Set View toolbar
button is pressed before the blue micro curve is applied. If an operation other than Micro Curve is to be inserted then there is no need to use the Set View toolbar button.
The red text in the Operation list of the Process History window after the inserted blue Micro Curve operation indicates that all of the operations after the inserted operation need to be applied or deleted.
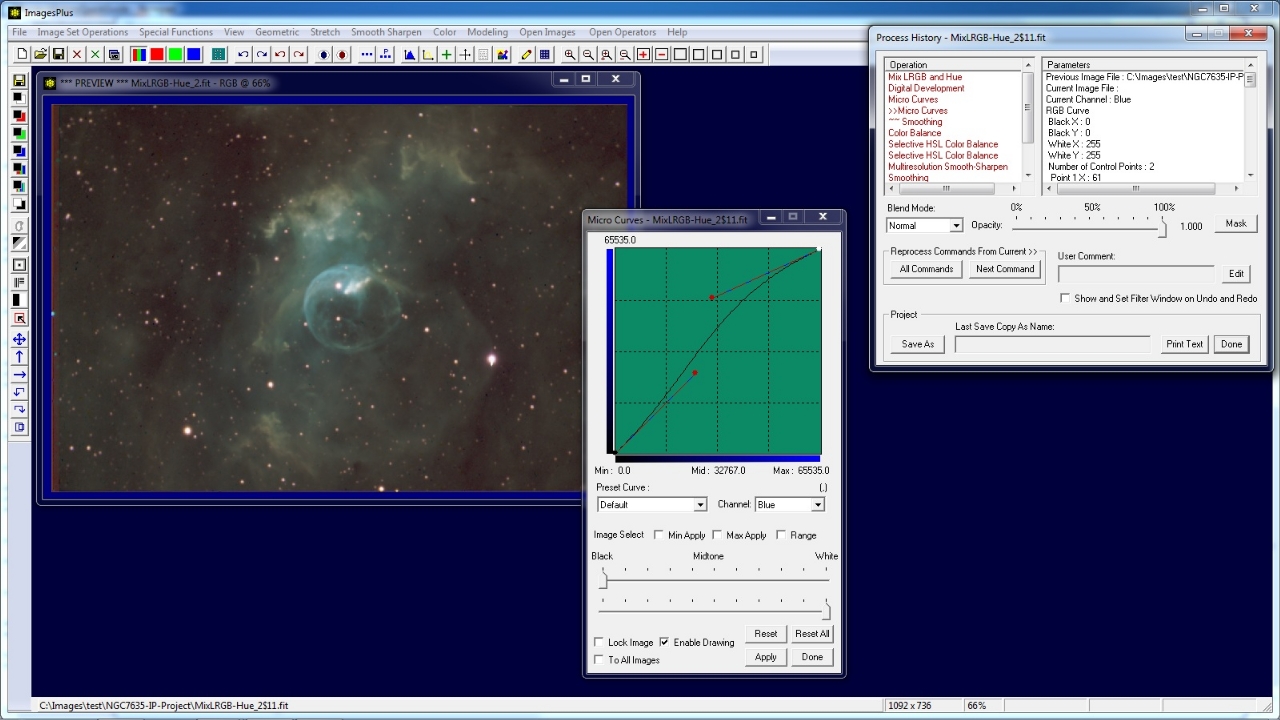 |
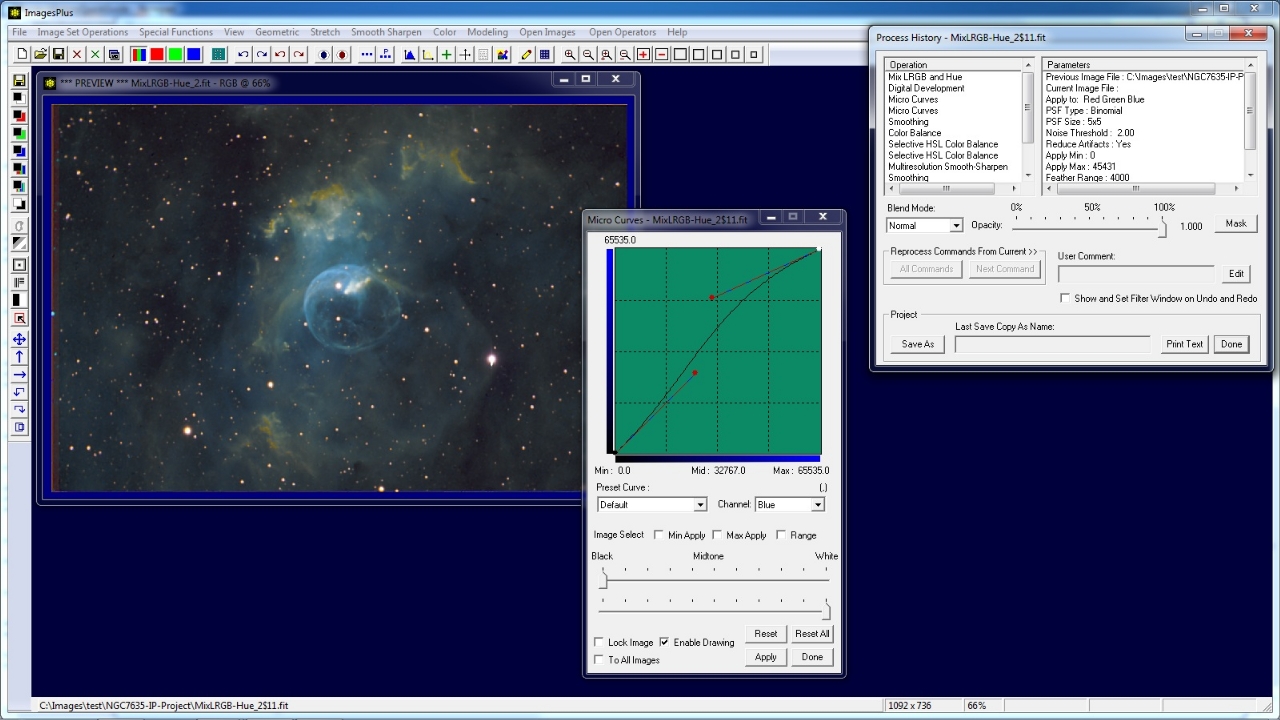
The All Commands or Next Command buttons on the Process History window are used to apply all or some of the operation after the inserted blue Micro Curve operation.
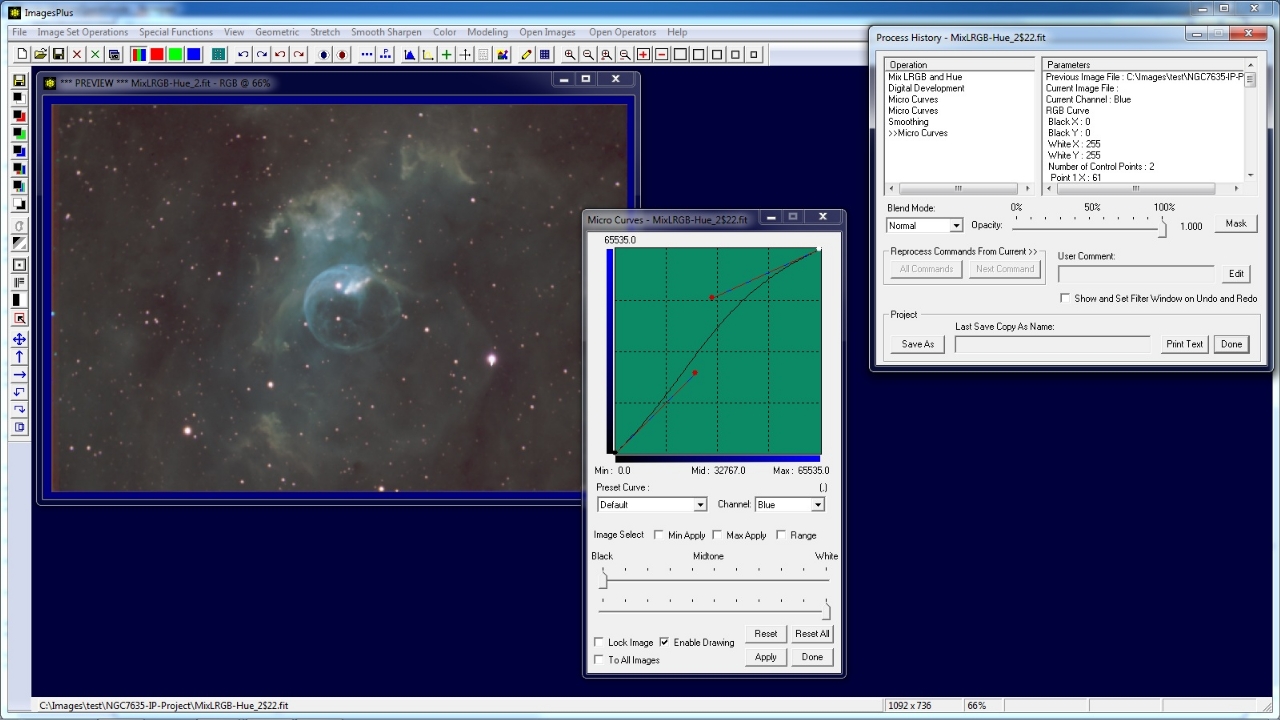
The Operation list text is now all black.
 |
Modify an Operation
- Double-click on the operation in the Process History list that you want to modify. The operation window will be displayed with the last used parameters and set as the current operation .
- Modify the parameters and apply.
- The Undo and Redo toolbar buttons can also be used to select the operation to modify. Check the Show and Set Filter Window on Undo and Redo box on the Process History window to display and set last used parameters of each operation (filter) as you use the Undo and Redo buttons.
A double-click on the Smooting operation in the Process History window was used to set the Smoothing as the current >> operation.
The Smoothing window was displayed and set to the last used parameters. Now modify the smoothing parameters. The process list text will remain black as long as Micro Curve parameters are being modified.
The process list text will turn red after a different operation is set as the current >> operation. The red text with ~~ indicated that all operations after the modified smoothing operation need to be applied or deleted.
 |
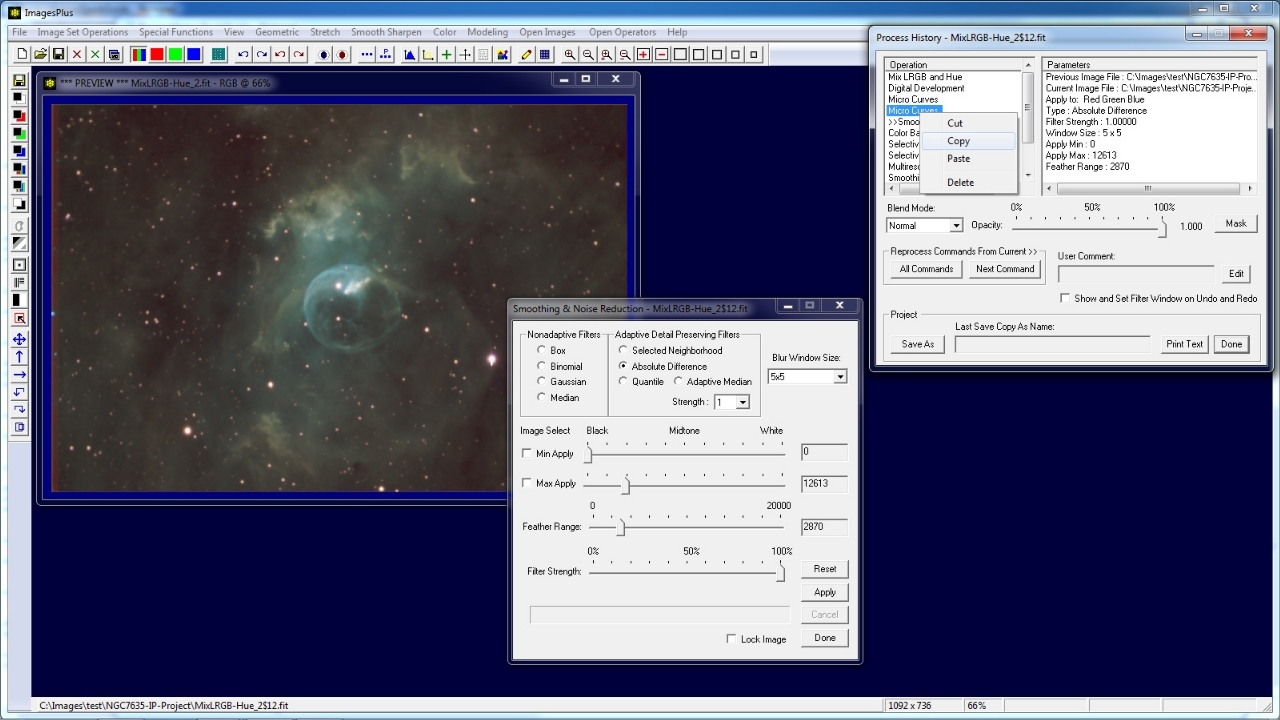
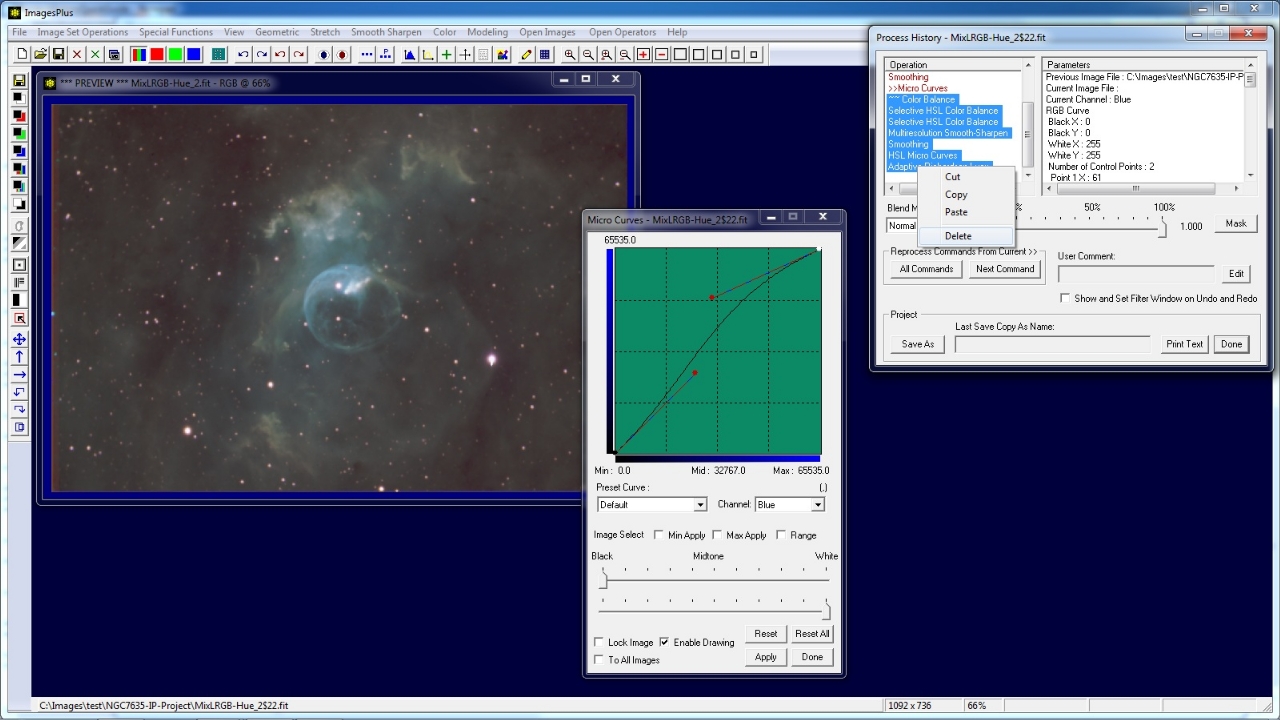
Copy Operations
- Select the operations in the Operation list of the Process History window.
- Right-click on the selected operations and select Copy.
Select one or more operation in the Process History window then right-click on the selected items and choose Copy.
In this case only the blue Micro Curve operation is copied.
 |
Paste Operations
- Select the operation in the Operation list of the Process History window tha you want to paste operation after.
- Right-click on the selected operation and select Paste.
- The copied operations are pasted after the selected operation.
- The red text and ~~ indicate that the pasted operations and following operations need to be applied to update the image display.
- Use the All Commands button on Process History to apply all operations after the current operation pointer >>.
- Use the Next Command button On Process History to apply operations on at a time.
- The Operation list text will appear black when all operations have beed applied and the list is consistent.
The copied operations will be pasted after the smoothing operation.
 |
Only Micro Curve was copied from the step above. So only Micro Curve is inserted after the selected Smoothing operation.
The list text turns red and operations that need to be applied are marked with ~~ .
 |
The Next Command button is used to apply only the blue Micro Curve since all operations that follow will be deleted.
 |
Delete Operations
- Select the operations to be deleted in the Operation list of the Process History window.
- Right-click on the selected operations then select Delete.
All of the operations after the Micro Curve operation are selected for deletion.
 |
The operations are deleted and the list text turns black indicating a consistent list.
 |
Save Processed Image and Operations, Blend Modes, Opacity, and Masks in a Project File
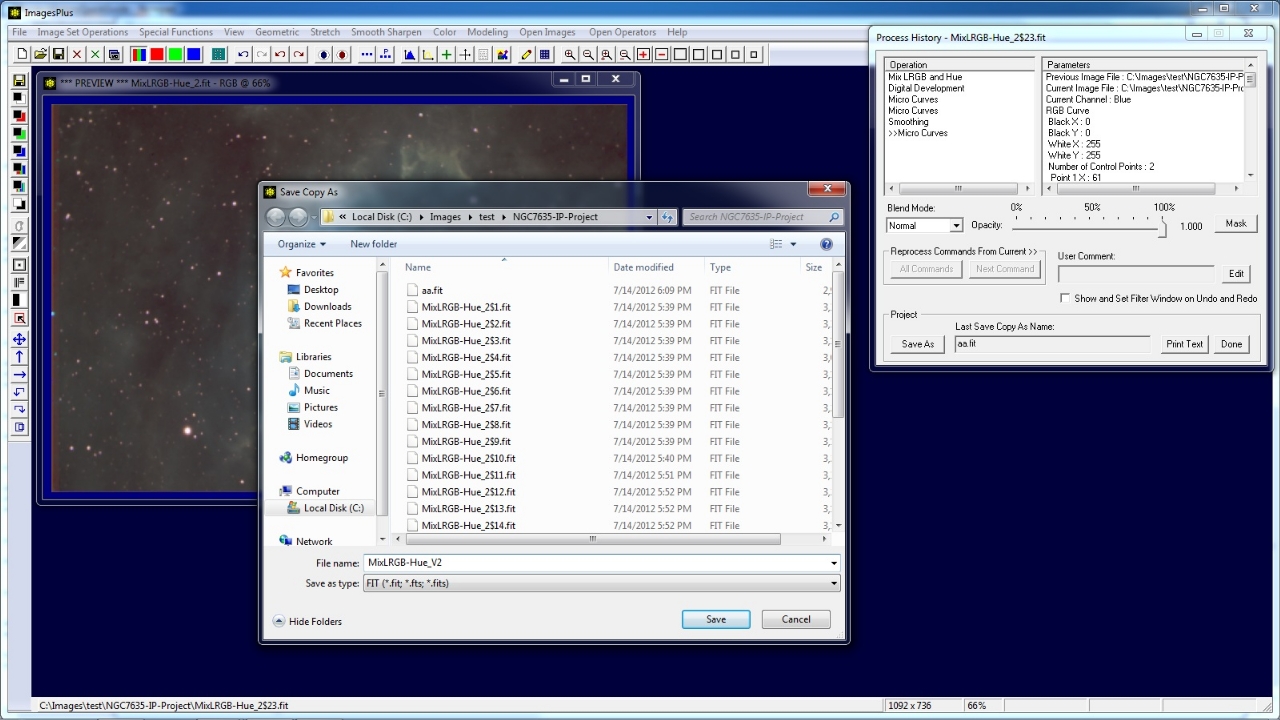
- Use the Save As button on Process History to save the processed image and each operation with its blend mode, opacity, and mask.
- First a window is displayed that allows you to name and also select a folder for the initial image, processed image, masks, and operations. Operations with their blend mode and opacity are saved in a project file.
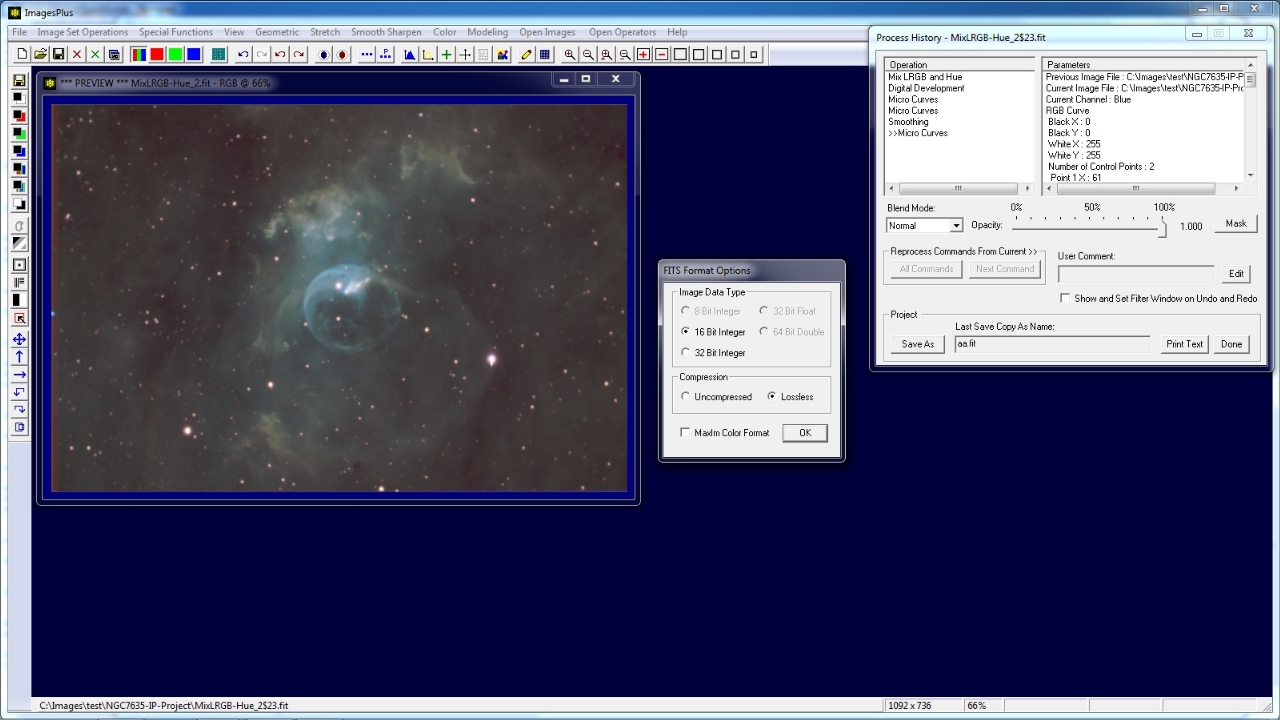
- Next image file save options will be displayed depending on the image file type.
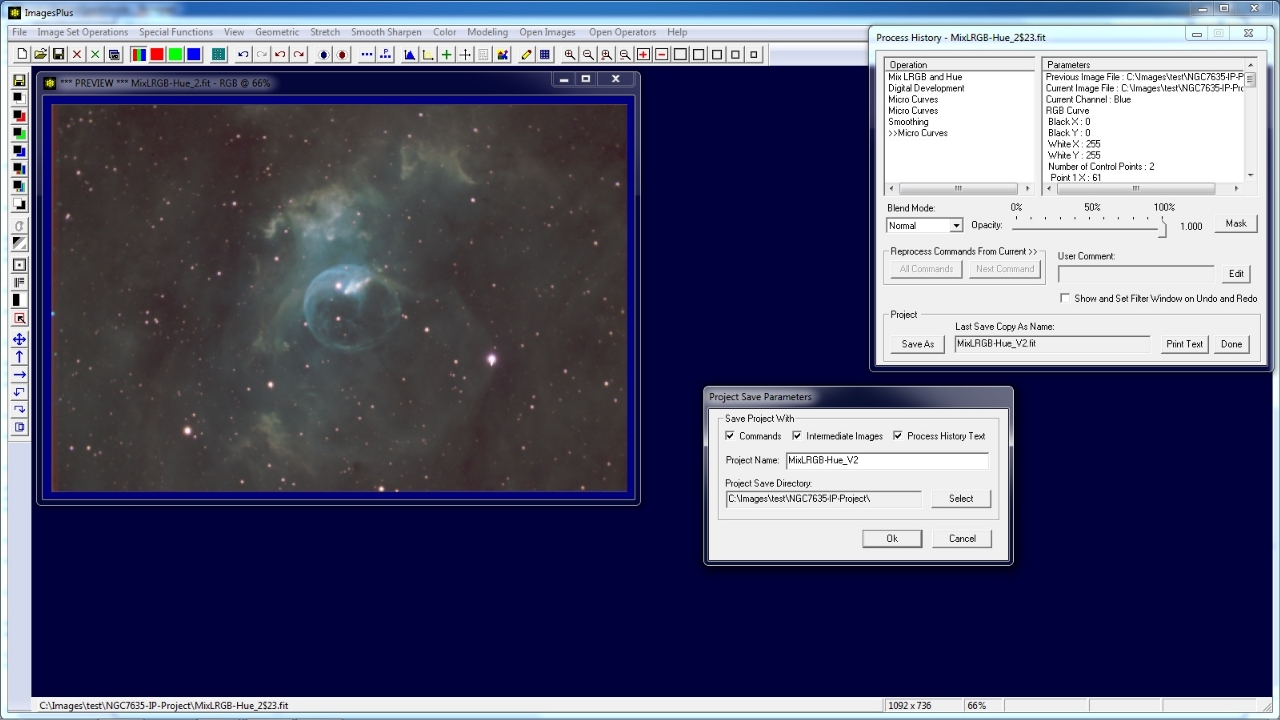
- Project file save options are displayed next. Use the default options that appear to save all images, masks, and operation to the folder select by the Save As window.
- Note 1: Always use Save As to copy or backup a processed image completely with all images, masks, and operations to a different folder.
- Note 2: Do not use Windows to copy projects between folders. To copy a project load the project into ImagesPlus then use Save As on the Process History window to move to a different foler.
- Note 3: Save a project to a backup folder to isolate the initial, intermediate, final, and mask image files along with operations.
Use the Save As window to select a folder and name for the final processed image.
 |
Select image file format options.
 |
The default options shown above will save the initial and processed image along with all operations and masks to the folder selected by the Save As window.
 |
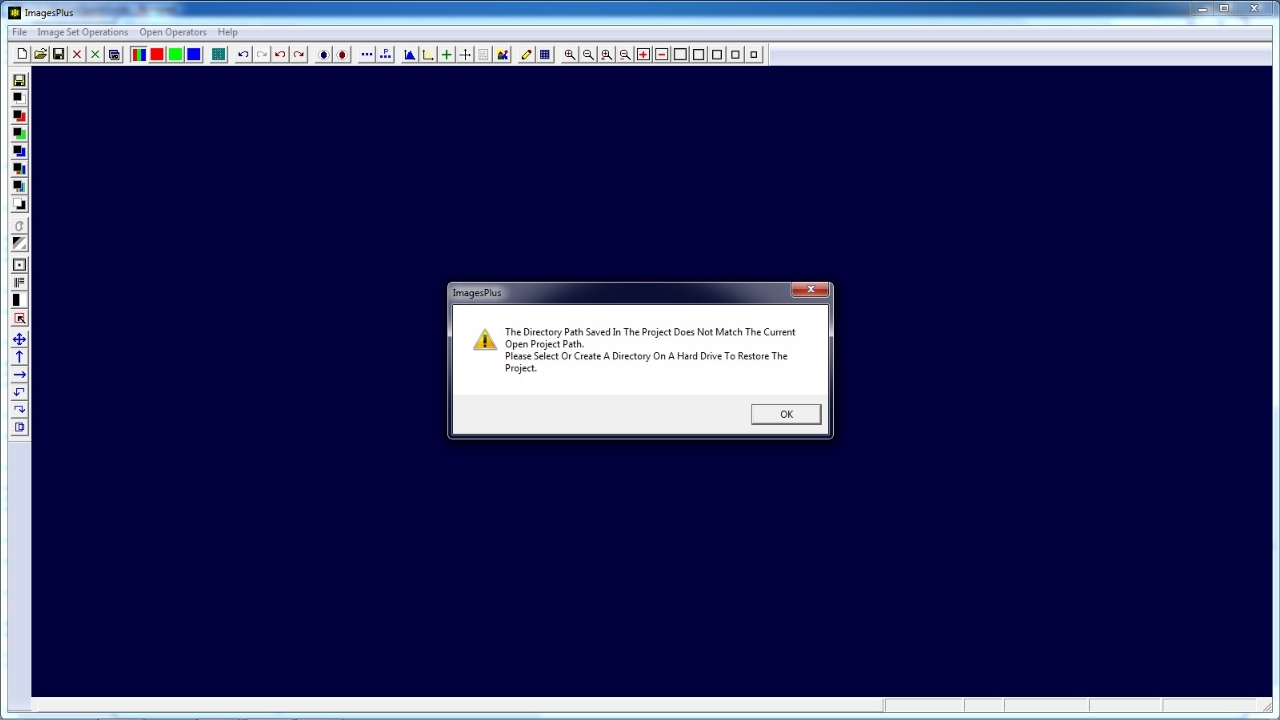
Load Processed Image, Operations, Blend Modes, Opacity, and Masks from a Project File
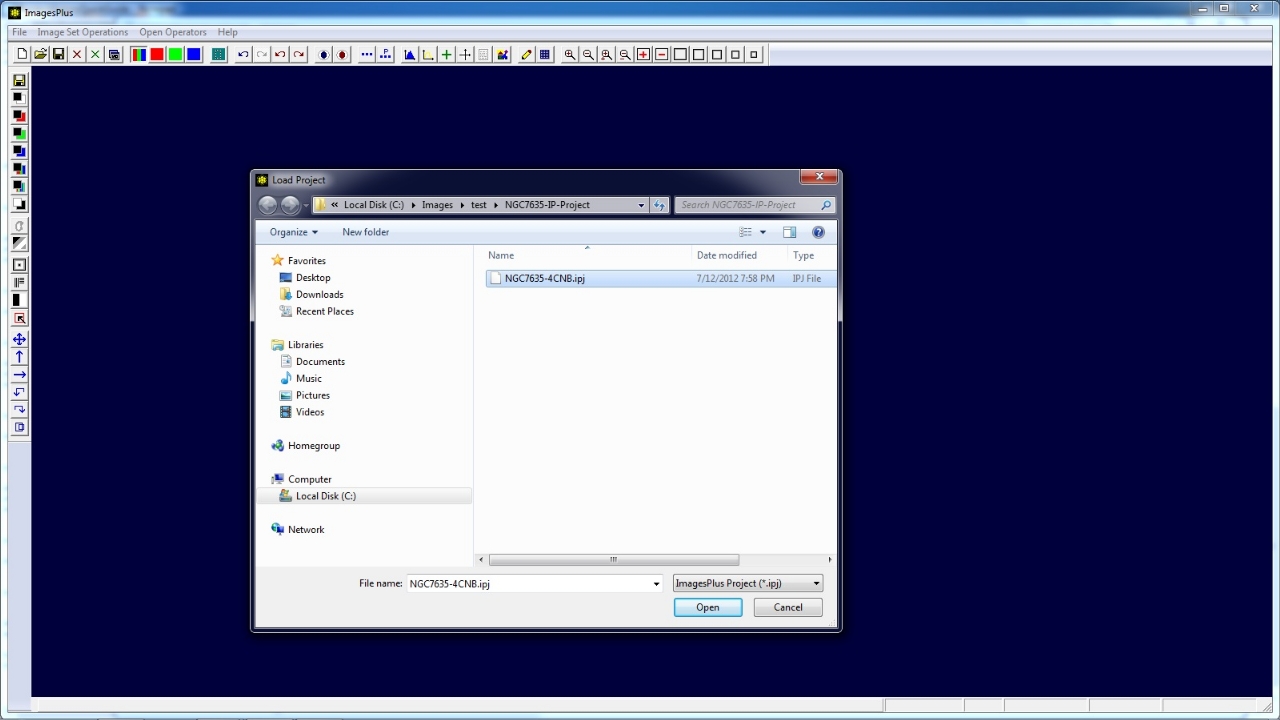
- Use File | Load Project to load a project into ImagesPlus. The initial image is displayed along with the complete process history.
- If some image or mask files are missing or the project was moved to a different folder without using ImagesPlus to copy then operations can still be loaded.
- Note 1: Always use Save As to copy or backup a processed image completely with all images, masks, and operations to a different folder.
- Note 2: Do not use Windows to copy projects between folders. To copy a project load the project into ImagesPlus then use Save As on the Process History window to move to a different foler.
- Note 3: Save a project to a backup folder to isolate the initial, intermediate, final, and mask image files along with operations.
Use File | Load Project and select a project file.
 |
If some image or mask files are missing or the project was moved to a different folder without using ImagesPlus to copy then operations can still be loaded. In this case the above message is displayed. Press OK to continue.
 |
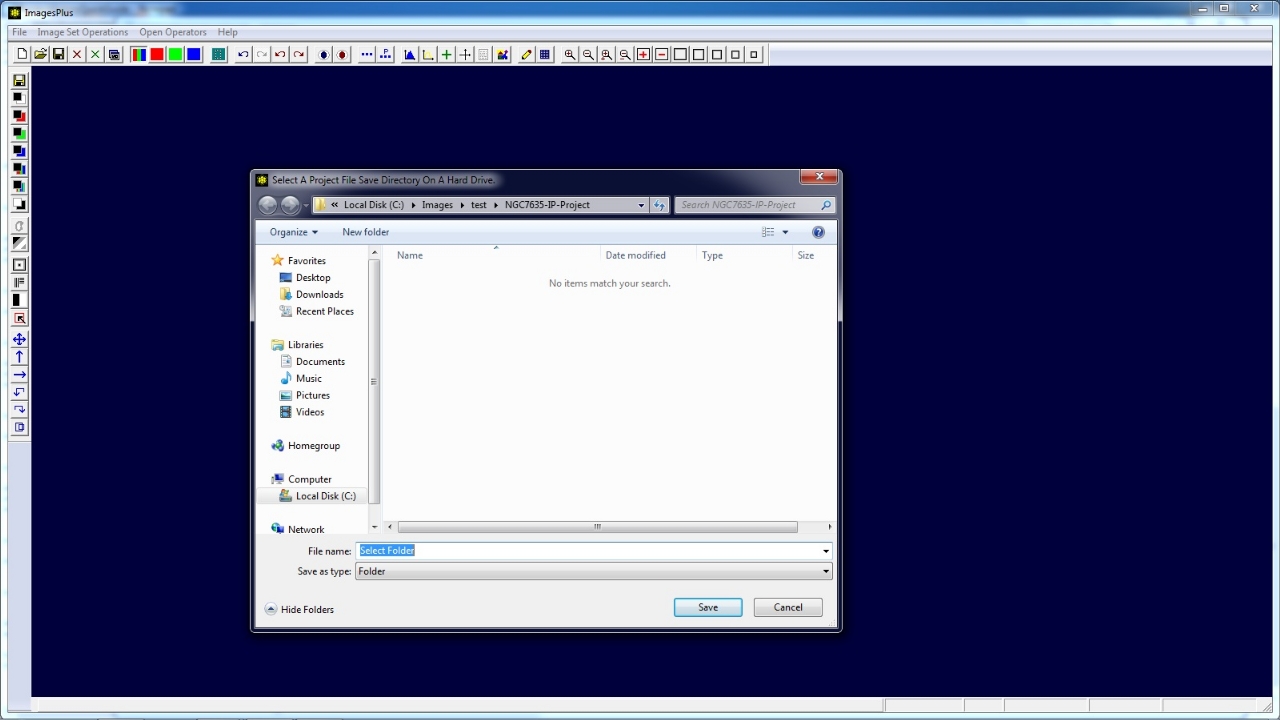
Press Save to select the current project folder.
 |
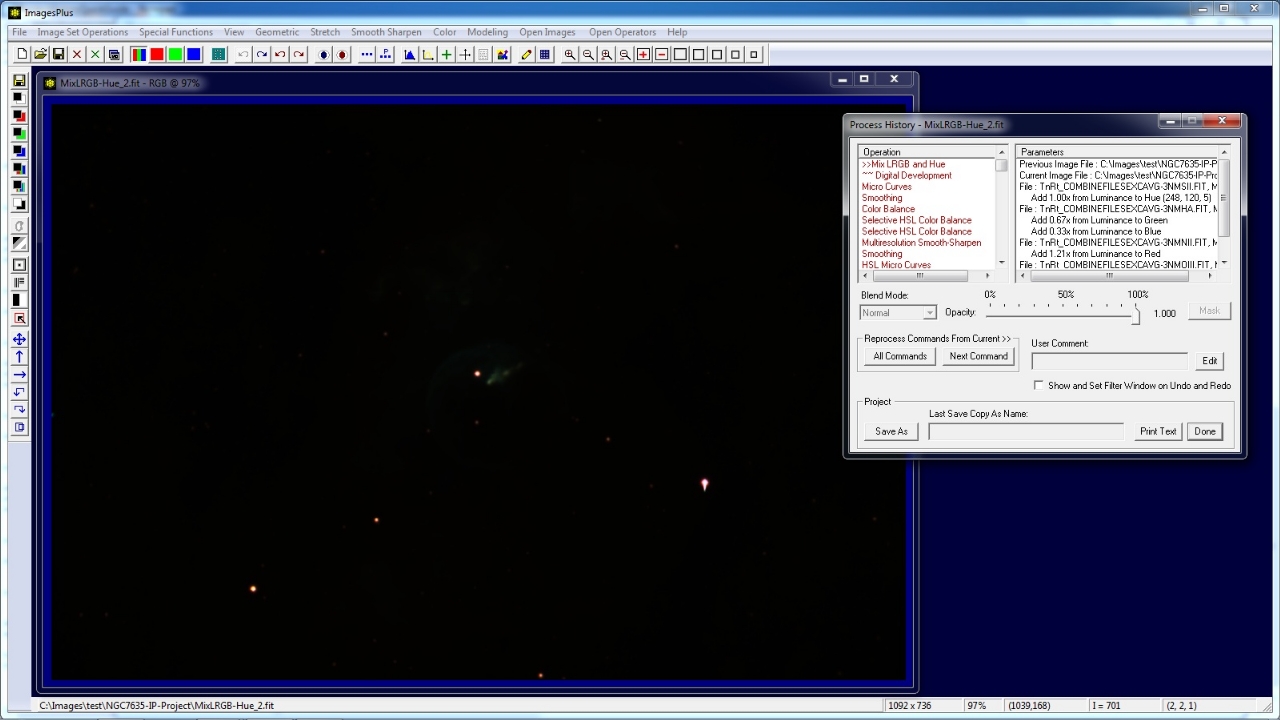
Initial image if present and operations are loaded. Use the All Commands or Next Command button on Process history to rebuild the project as much as possible.
 |
Copyright © 2012 MLUnsold Digital Imaging. All Rights Reserved.