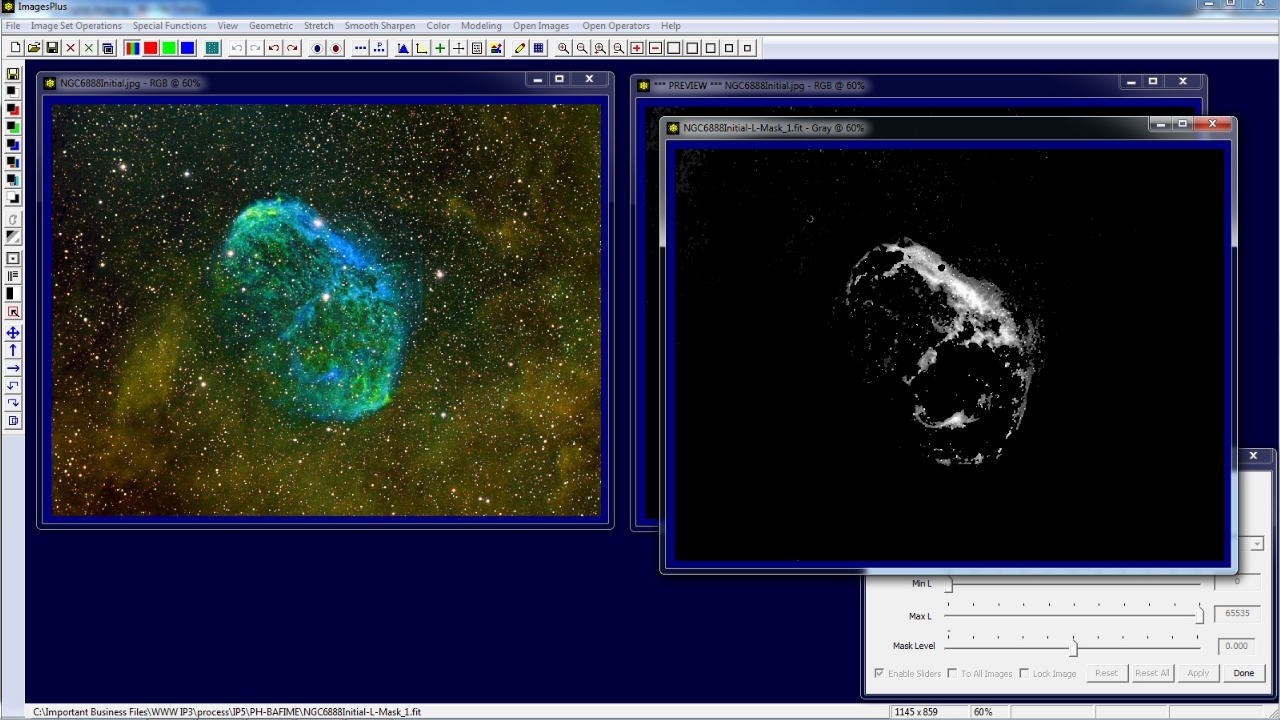
A mask is a single channel grayscale image that defines how two images are blended to form a single composite image. The two images are usually considered as a previous image layer A and a current modified or filtered image layer B.
If M is mask then the composite image C is given by
C(p) = (1-M(p)) * A(p) + M(p) * B(p)
where M(p) is the mask value at pixel p normalized to black 0.0 <= M(p) <= 1.0 white.
Image layer B is weighted more then image layer A in the composite C where the mask is lighter and B is weighted less than A where the mask is darker. Simply stated lighter or white mask areas reveal the current image layer B while darker or black mask areas conceal the current image layer B and show more of the previous image layer A.
ImagesPlus has two different image layer tools that are used with filters, mask, blend modes, and opacity.
The steps shown below for creating a mask are the same for a Process History layer mask or Combine Images & Mosaic layer mask.
Creating Image Masks
-
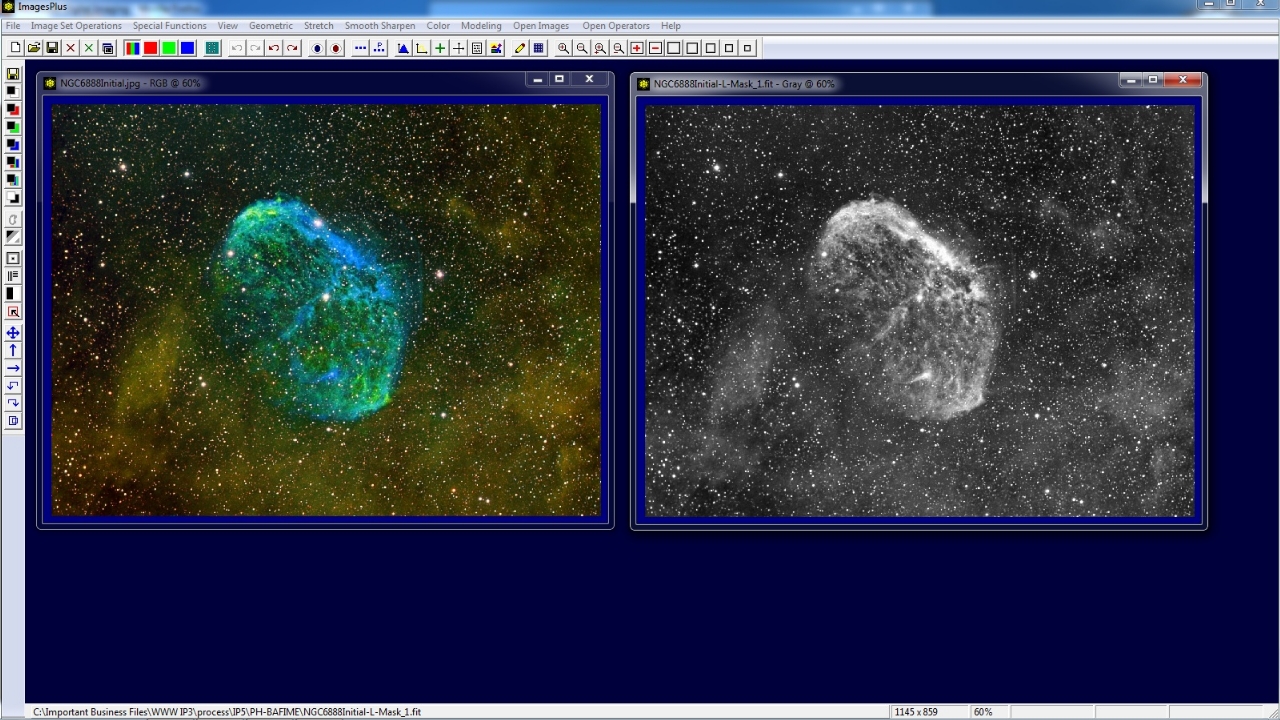
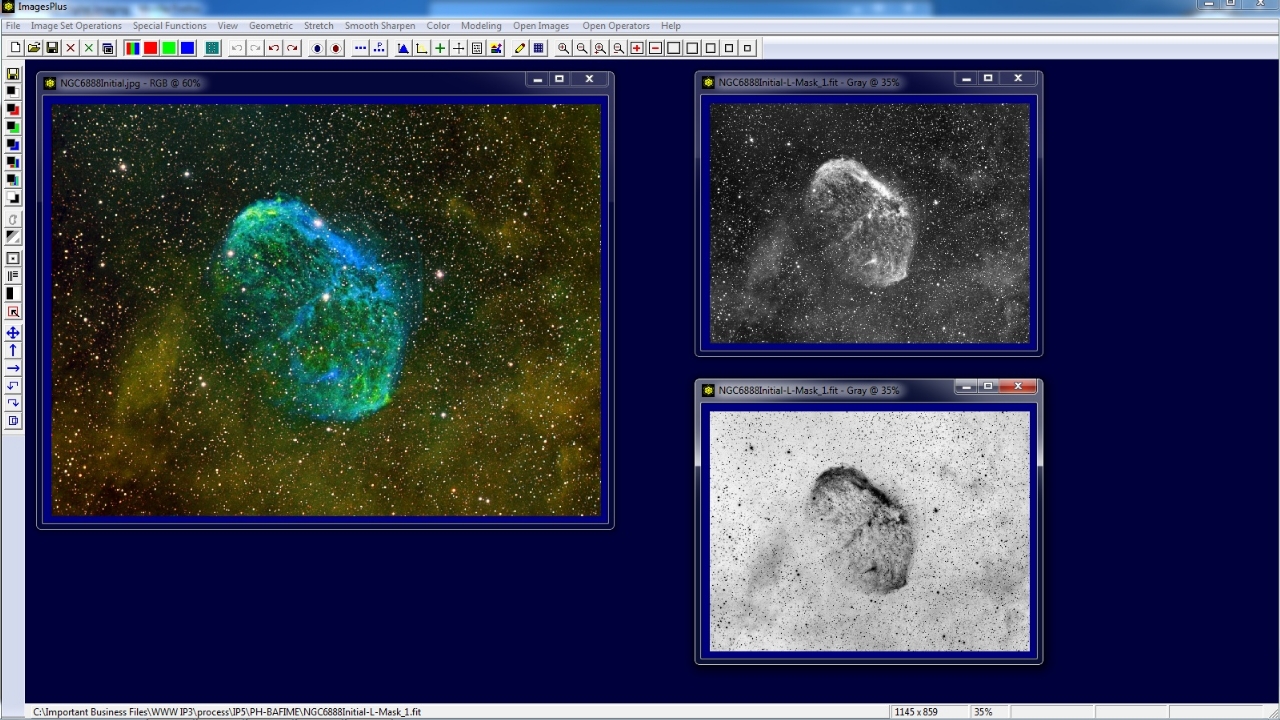
Luminance Mask
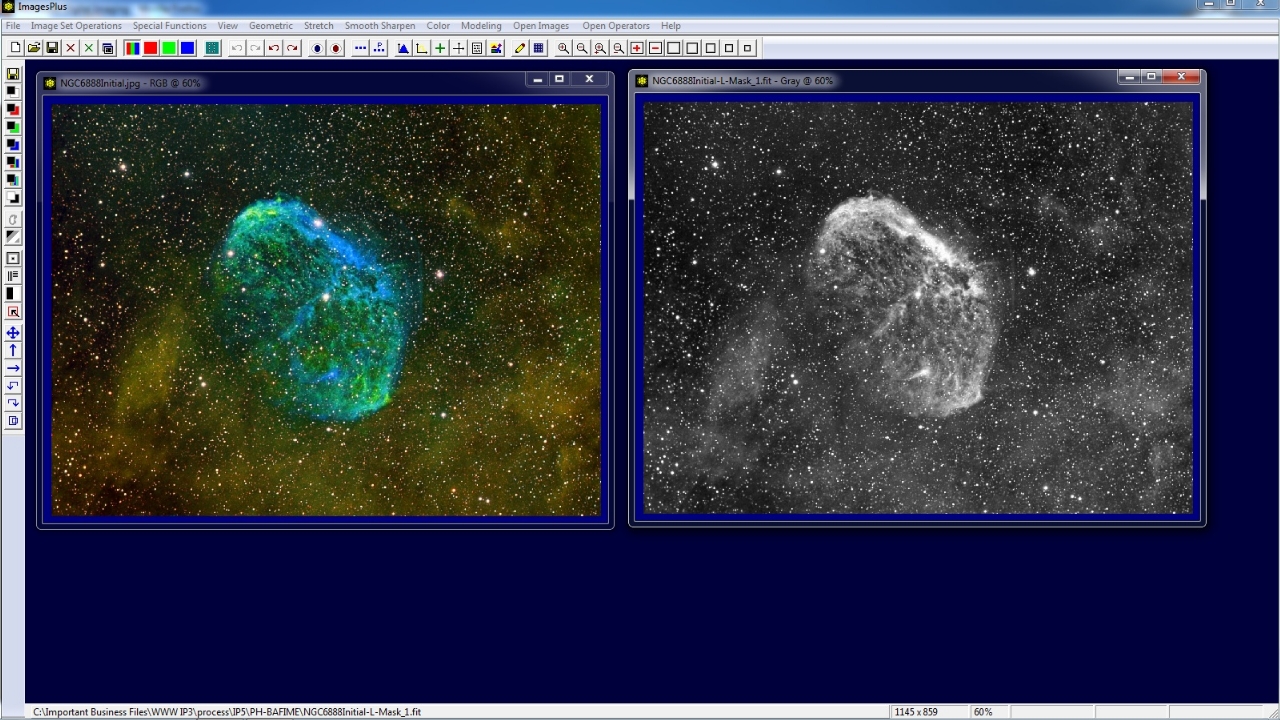
A luminance mask of a single channel monochrome image is just the image itself. For a color image a luminance mask is the maximum of the red, green, and blue values at each pixel. Use the Luminance Mask button 2nd from the top on the left vertical toolbar to create a luminance mask from a color or monochrome image.
 |
-
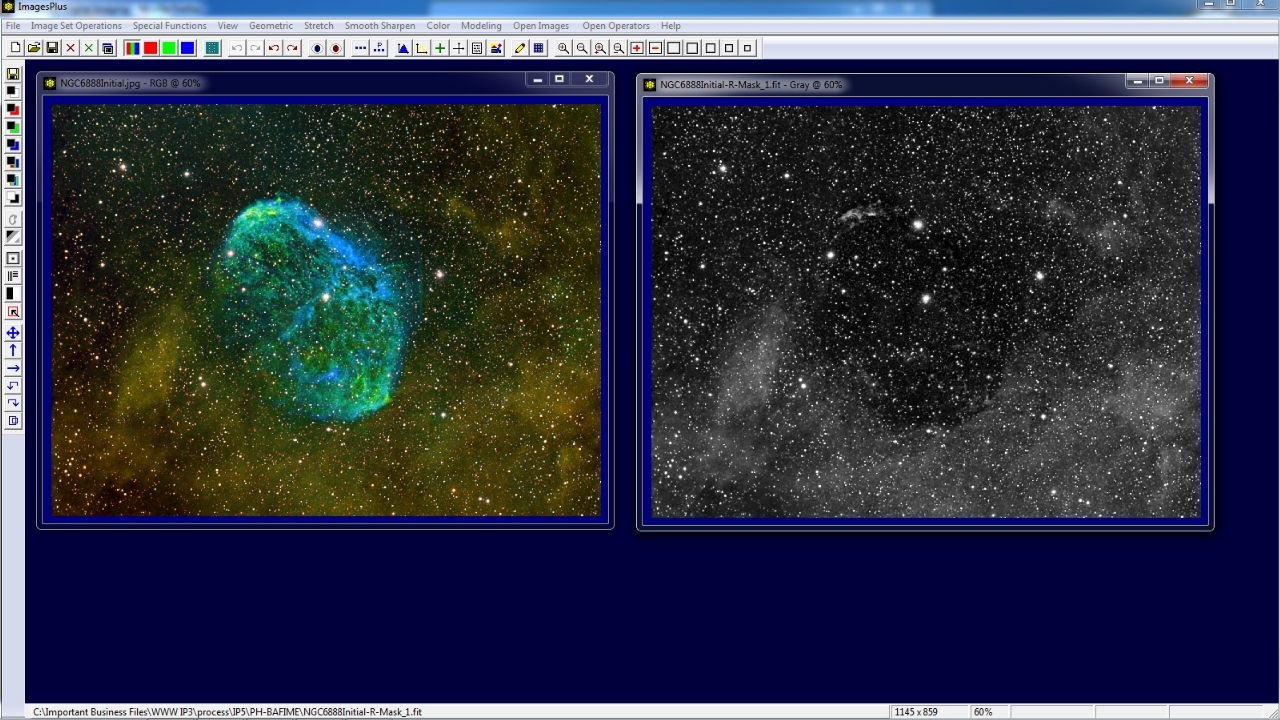
Red Luminance Mask
A red luminance mask is the red data of a color image displayed as a single channel monochrome grayscale image. Use the Red Channel Mask button 3rd from the top on the left vertical toolbar to create a red luminance mask from a color image.
 |
-
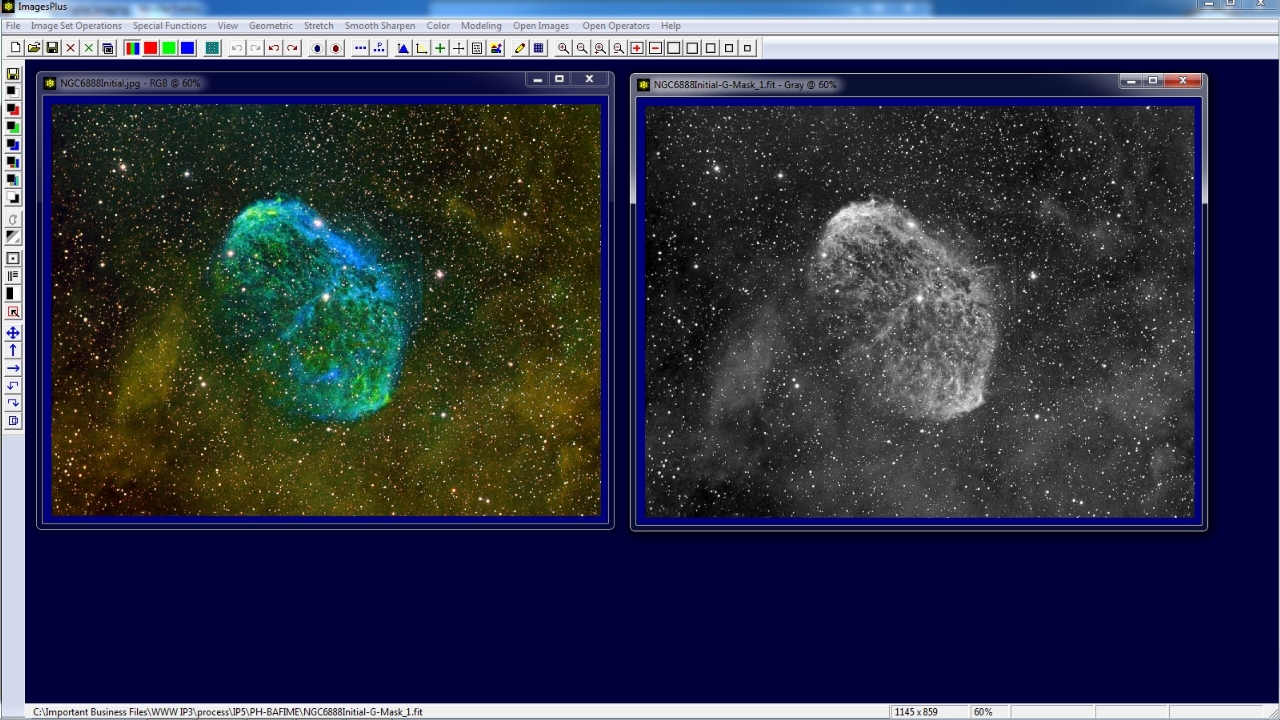
Green Luminance Mask
A green luminance mask is the green data of a color image displayed as a single channel monochrome grayscale image. Use the Green Channel Mask button 4th from the top on the left vertical toolbar to create a green luminance mask from a color image.
 |
-
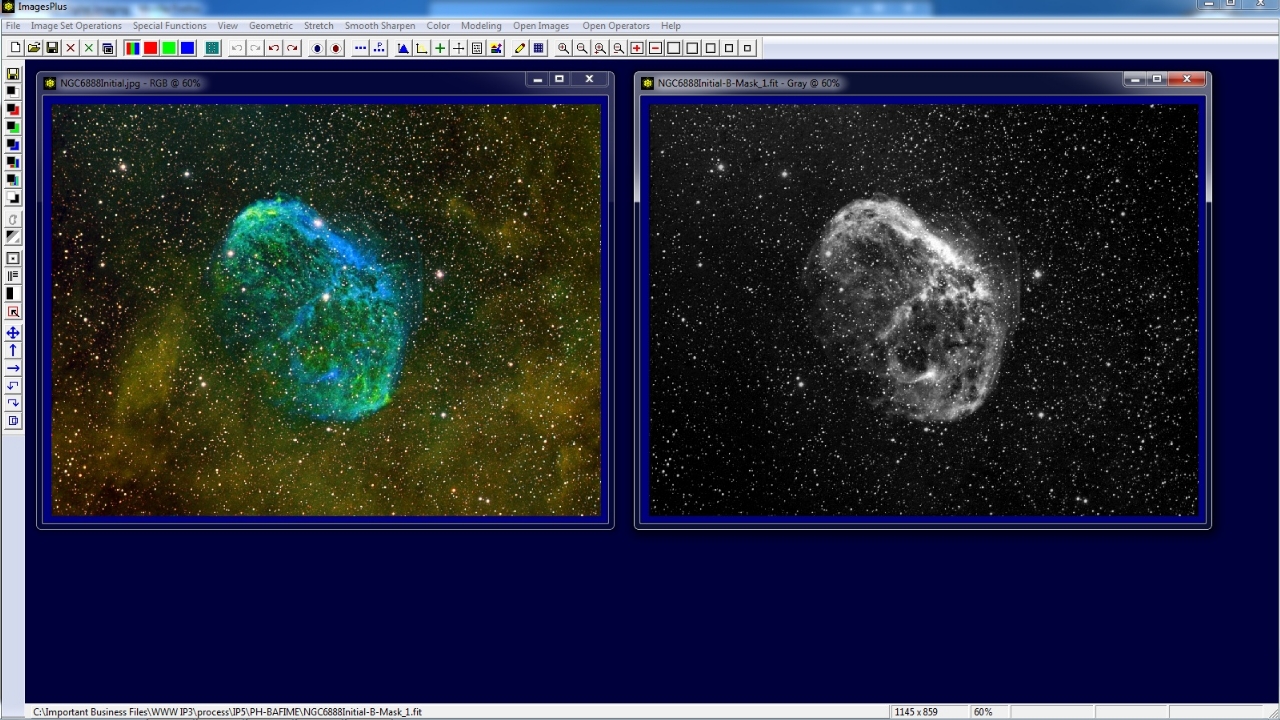
Blue Luminance Mask
A blue luminance mask is the blue data of a color image displayed as a single channel monochrome grayscale image. Use the Blue Channel Mask button 5th from the top on the left vertical toolbar to create a blue luminance mask from a color image.
 |
-
Custom Luminance Mask
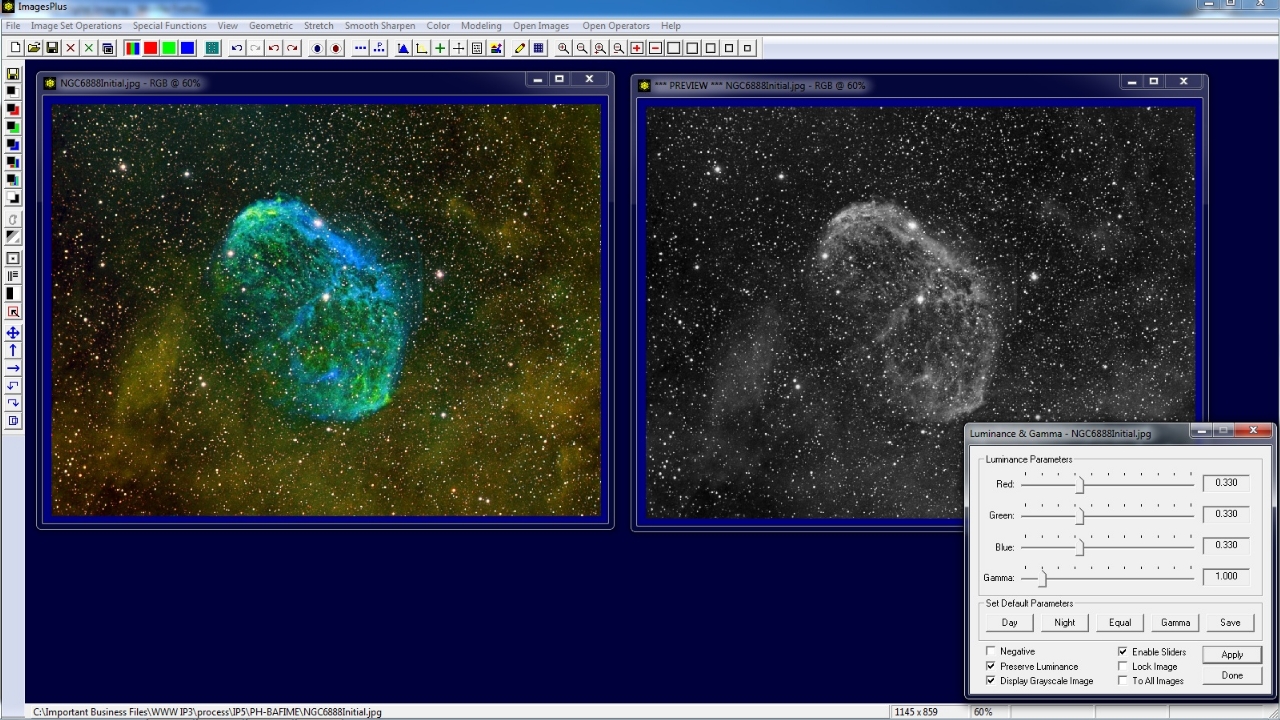
A custom luminance mask is created from a color image using a weighted average of the red, green, and blue values at each pixel. Luminance L = wr * R + wg * G + wb * B where R,G, and B are the red, green, and blue values at a pixel and 0.0 <= wr, wg, wb <= 1.0 are the red, green, and blue weights. Use the Custom Luminance button 6th from the top on the left vertical toolbar to create a custom luminance mask from a color image and display the Luminance & Gamma tool. Adjust the Red, Green, and Blue sliders on the Luminance & Gamma tool to adjust the weights wr, wg, and wb.
 |
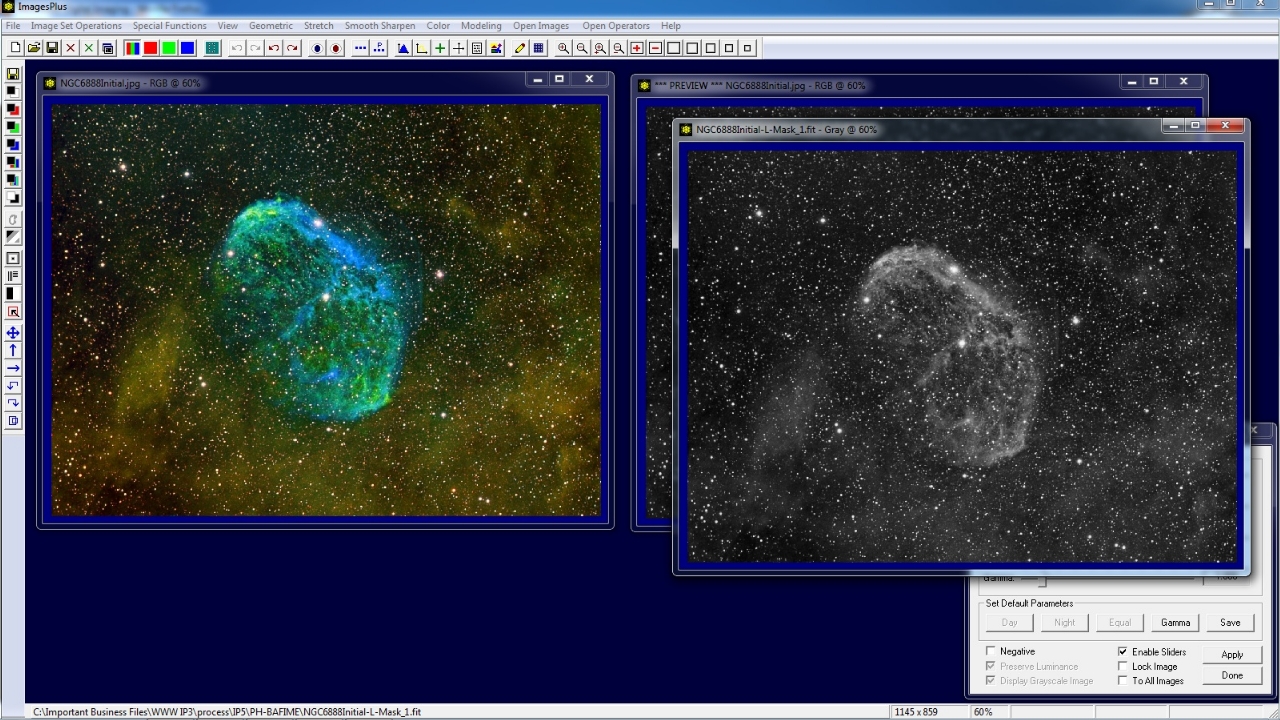
Apply the Luminance Mask button on the left vertical toolbar to convert the 3 channel RGB grayscale custom luminance mask to a single channel grayscale image mask that can be used with Process History layers or Combine Images & Mosaic layers.
 |
-
Selective Color Luminance Mask
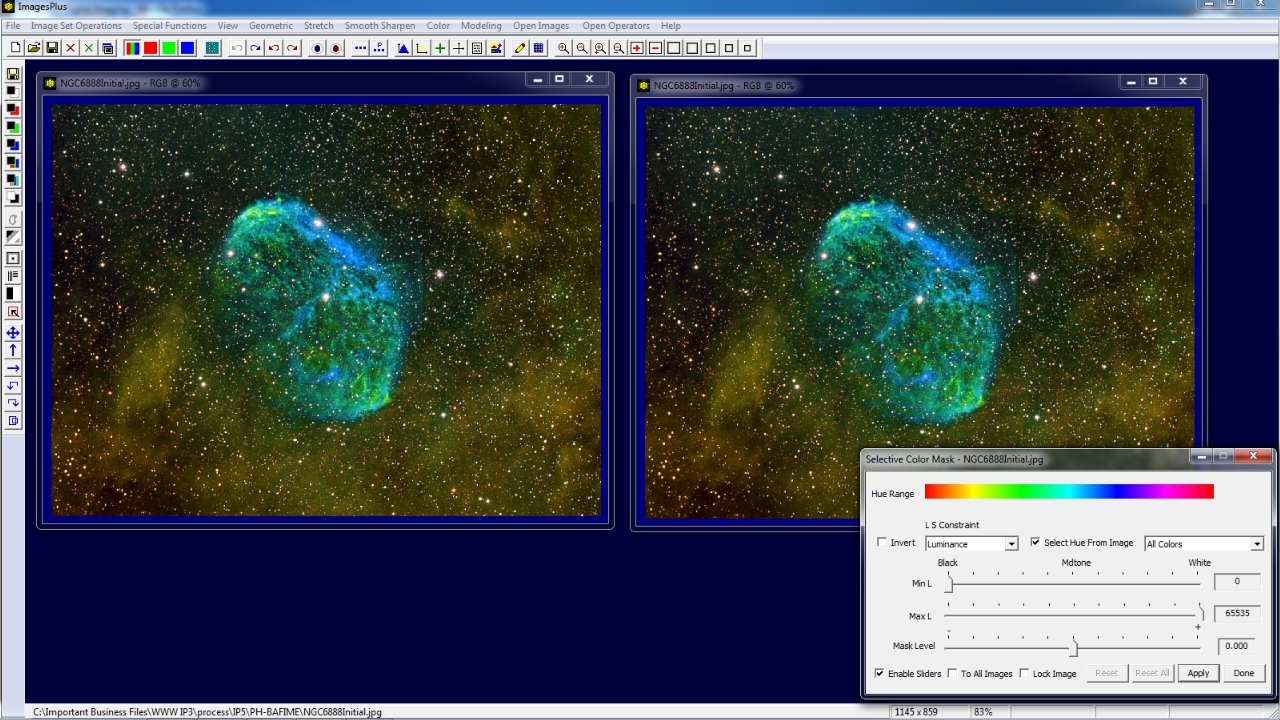
A seletive color mask is created from a color image by specifing a hue, saturation, and luminance range. To select a hue range from an image use the ... button on the top horzontal toolbar to duplicate the image. Open the Selective Color Mask tool using the 7th button from the top of the left vertical toolbar and check the Select Hue From Image box. Left click on a hue in the image.
 |
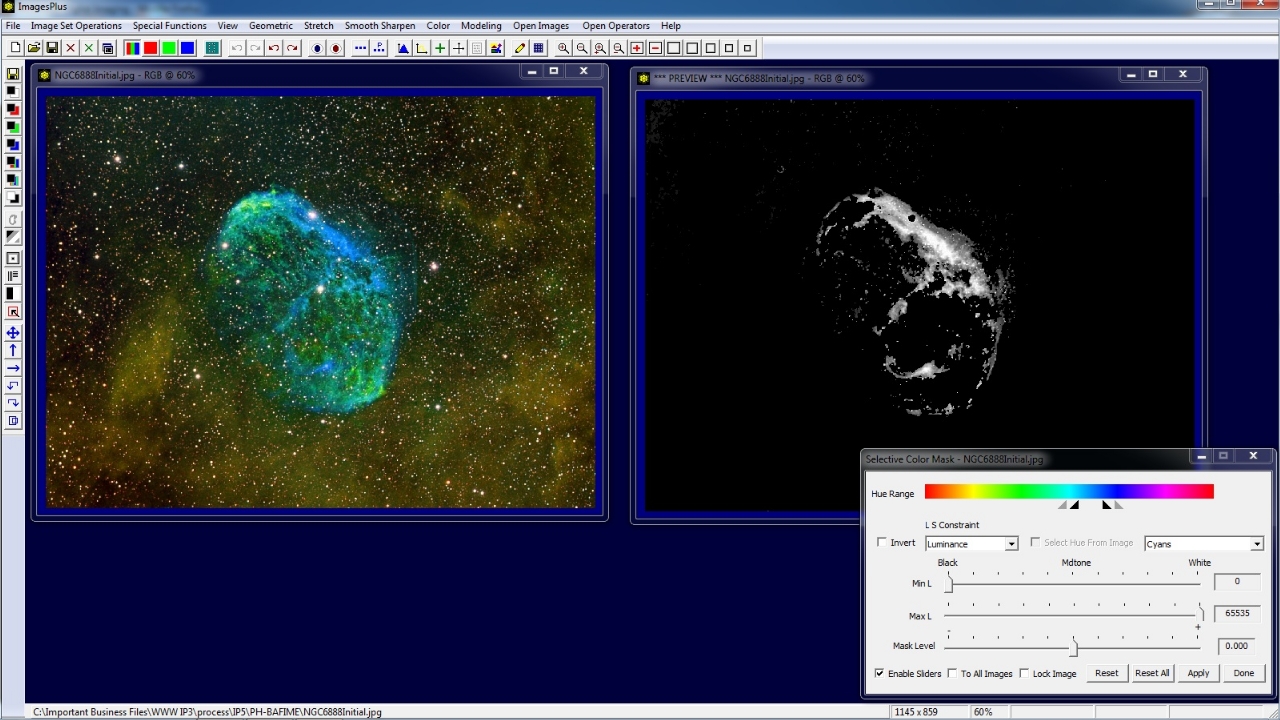
A left-click on a hue in the image sets the hue range triangles and default all luminance and all saturation range. Left click on a hue range triangle or between two trinagles to modify the hue range. Use the min and max apply luminance and saturation sliders to modify the luminance and saturation range of the selection.
 |
Apply the Luminance Mask button on the left vertical toolbar to convert the 3 channel RGB grayscale selective color mask to a single channel grayscale image mask that can be used with Process History layers or Combine Images & Mosaic layers..
 |
-
Inverse Luminance Mask
The inverse of a luminance mask is the negative of the mask. Use the Invert Mask button 8th from the top on the left vertical toolbar to invert a mask.
 |
-
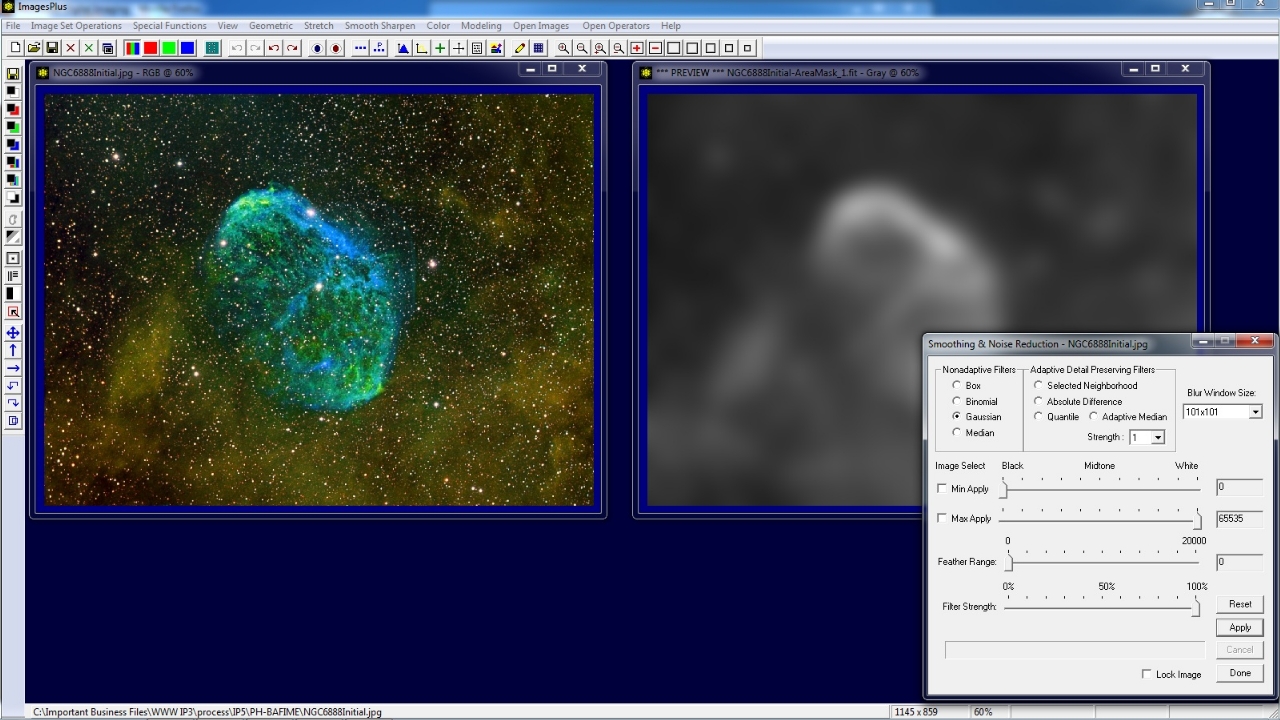
Area Mask
Area masks are created by applying a very strong Gaussian smoothing filter to remove all detail from an image. Use the Area Mask button 9th from the top on the left vertical toolbar to create an area mask.
 |
-
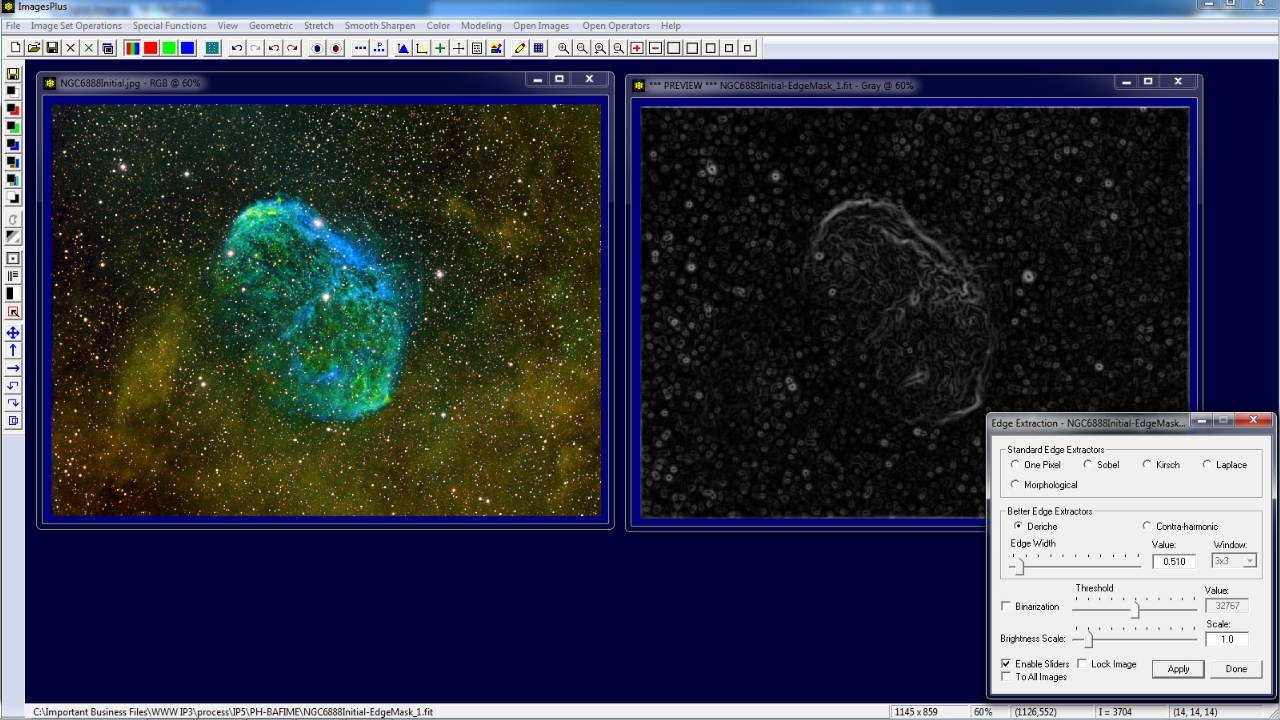
Edge Mask
Edge masks are created by applying an edge extraction filter with variable edge width to an image. Use the Edge Mask button 10th from the top on the left vertical toolbar to create an edge mask.
 |
-
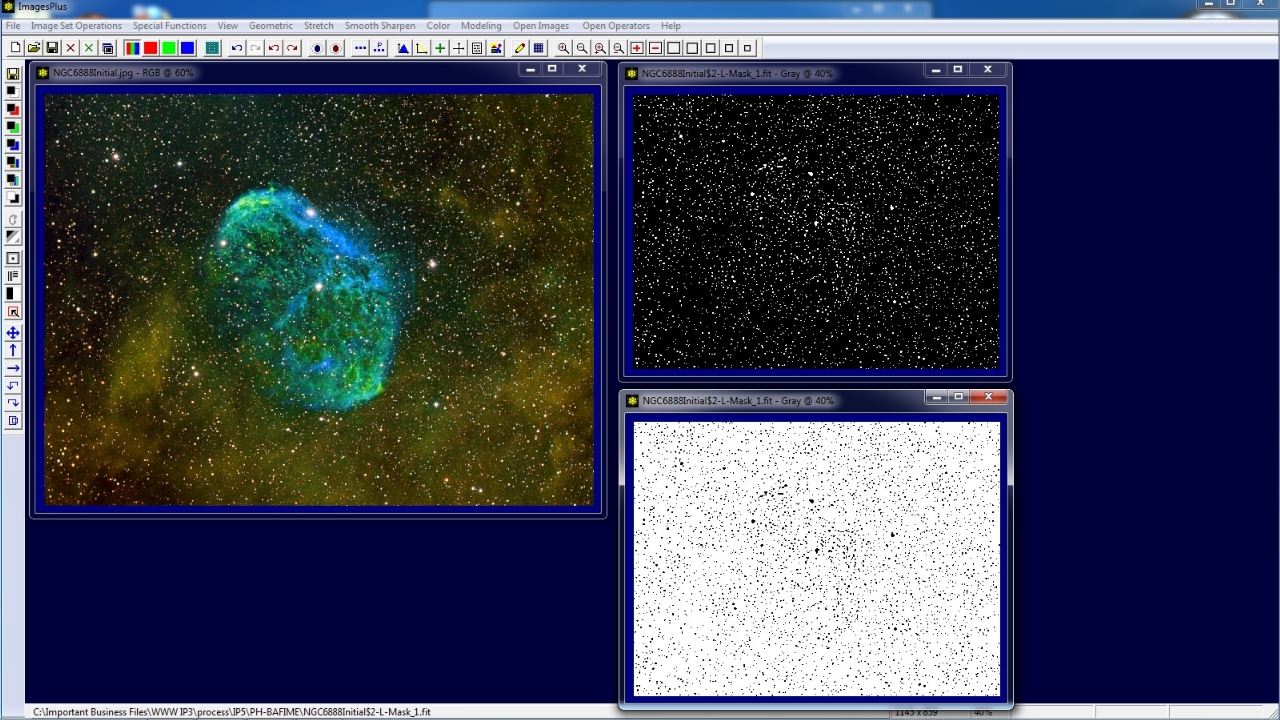
Star Mask
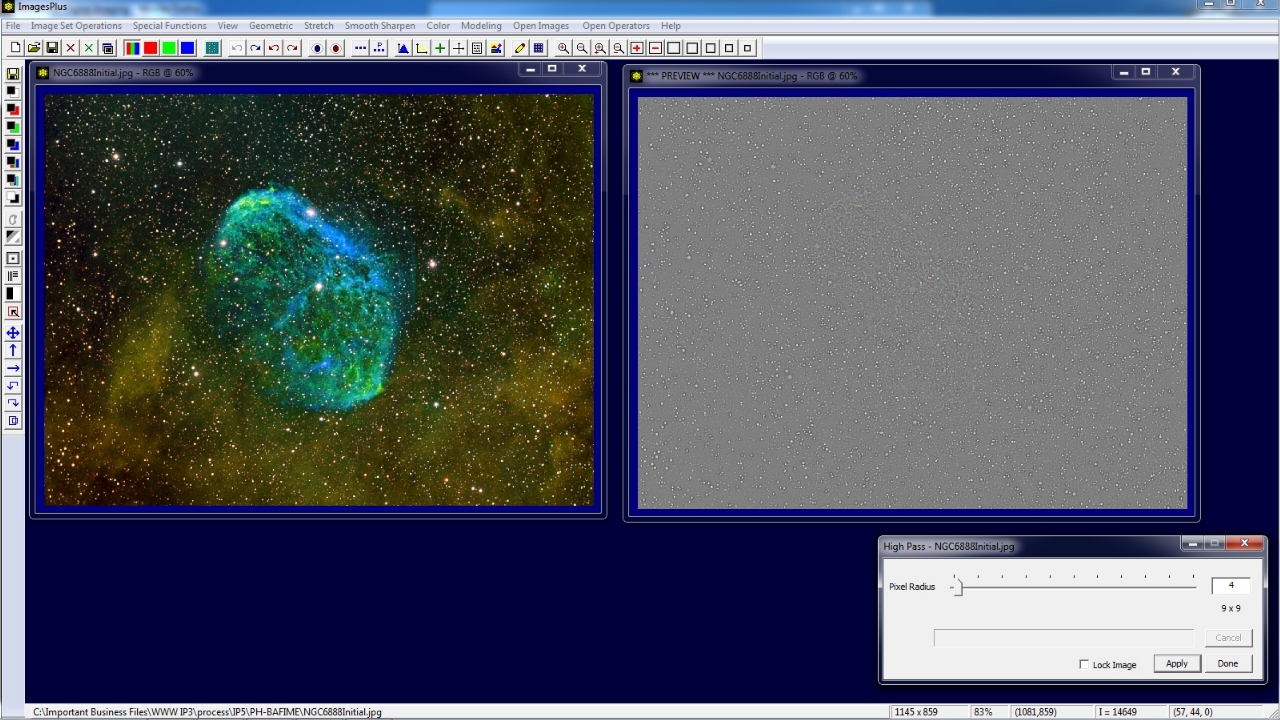
Duplicate the image using the ... button on the top horizontal toolbar. Open the High Pass Filter tool using the 12th button from the top of the left vertical toolbar. Apply the High Pass Filter to the duplicate image with a small radius. In this case a radius of 4 or 9 x 9 is used.
 |
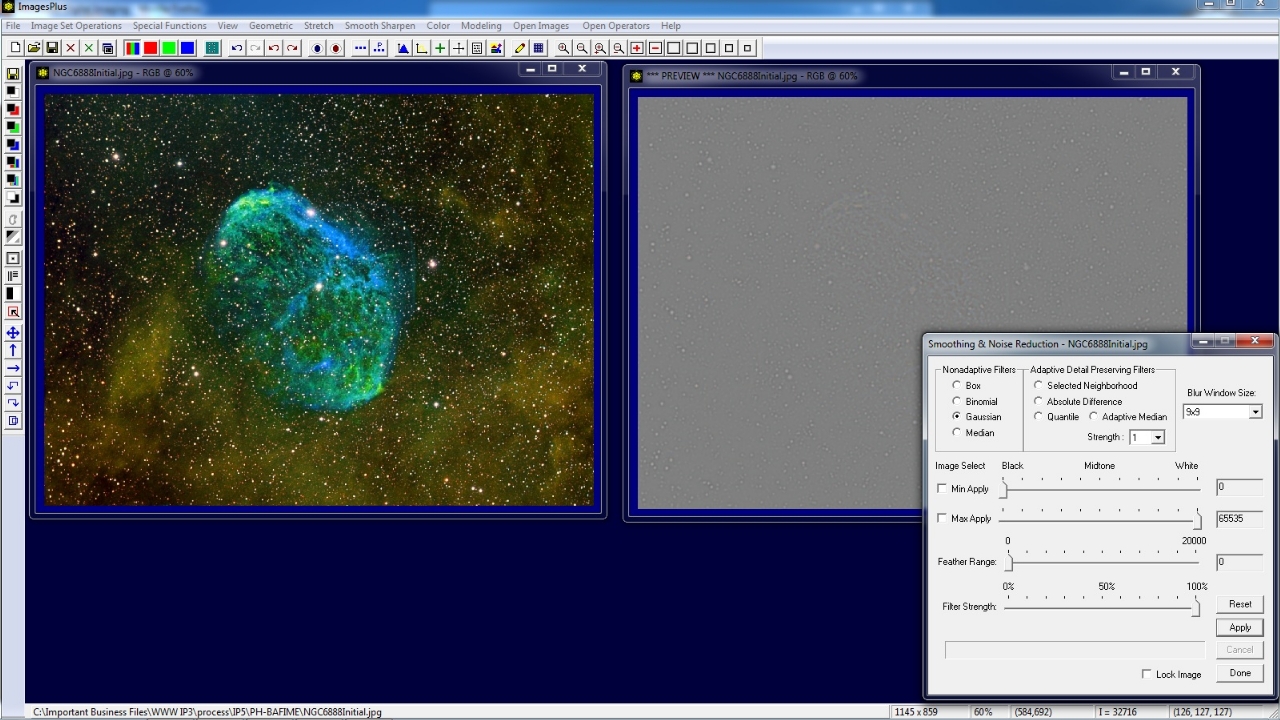
Open the Smoothing tool using the 11th button from the top of the left vertical toolbar. Apply a Gaussian blur to the high pass filter image using the same radius. In this case the Gaussian blur window size is 9 x 9.
 |
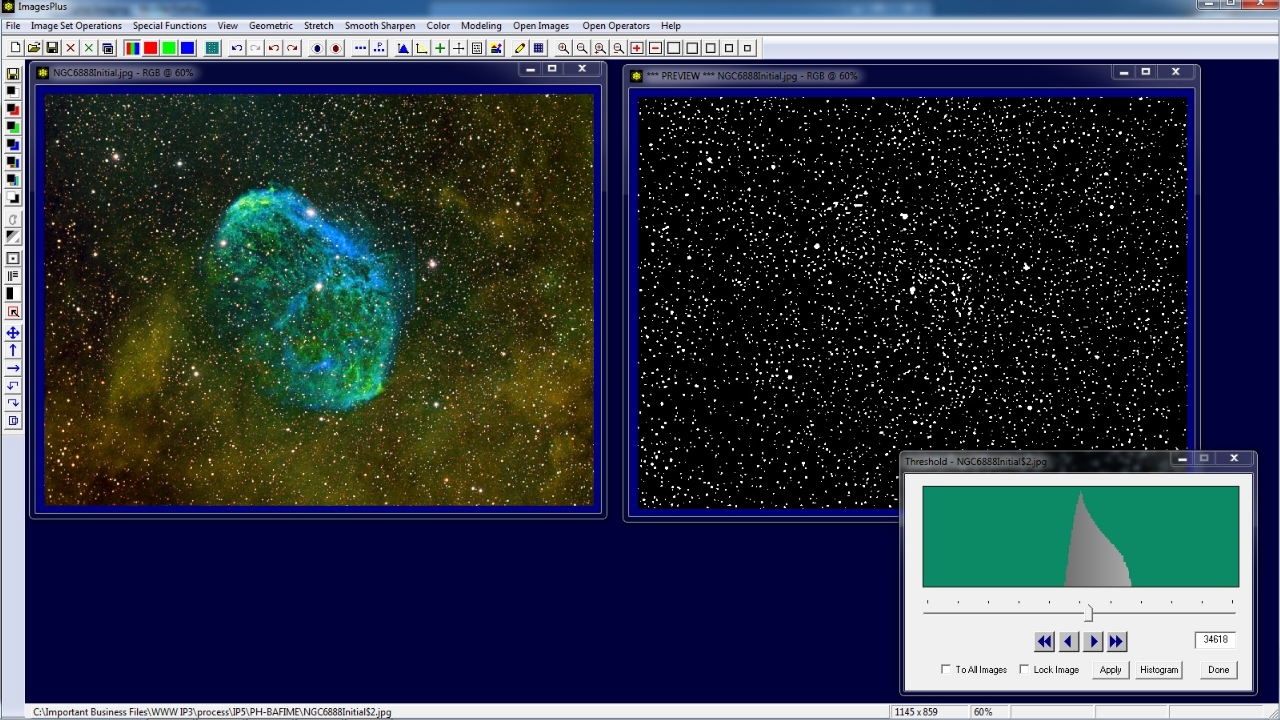
Open the Threshold tool using the 13th button from the top of the left vertical toolbar. Adjust threshold so that only stars are shown as white.
 |
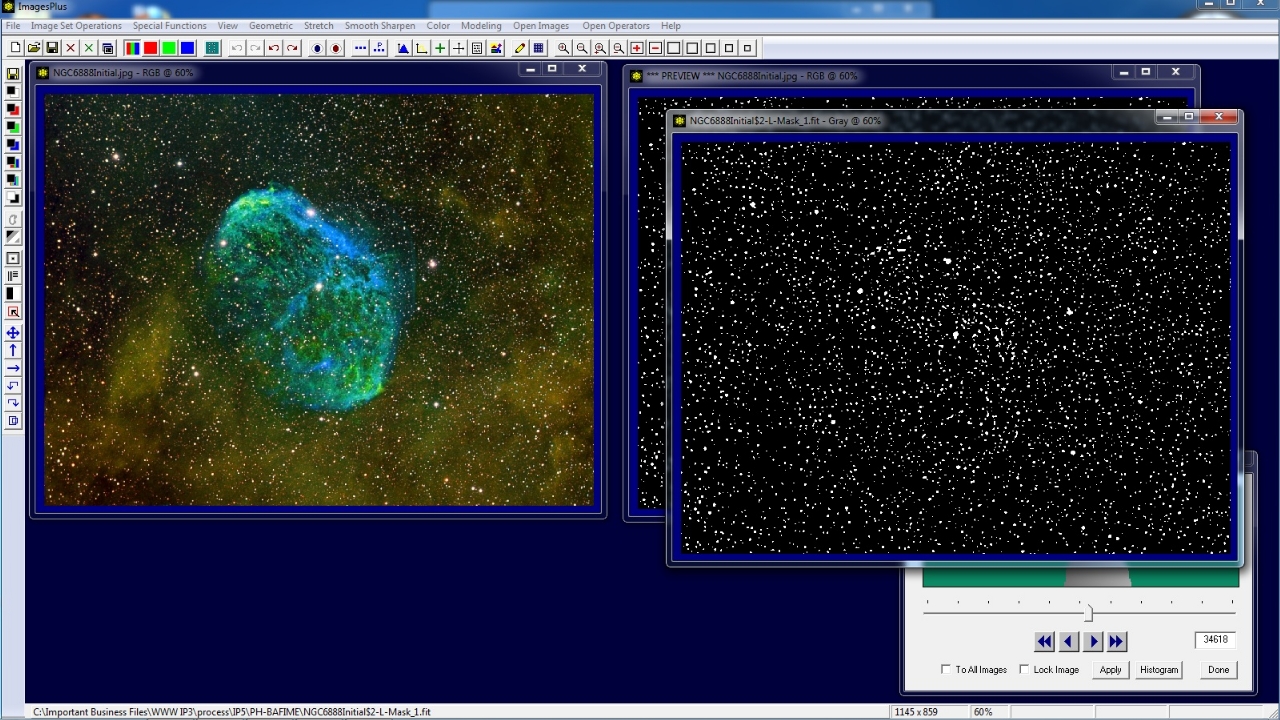
Apply the Luminance Mask button on the left vertical toolbar to convert the 3 channel RGB grayscale star mask to a single channel grayscale image mask that can be used with Process History layers or Combine Images & Mosaic layers..
 |
Apply the Invert Mask toolbar button to the star mask to create an inverse star mask.
 |
-
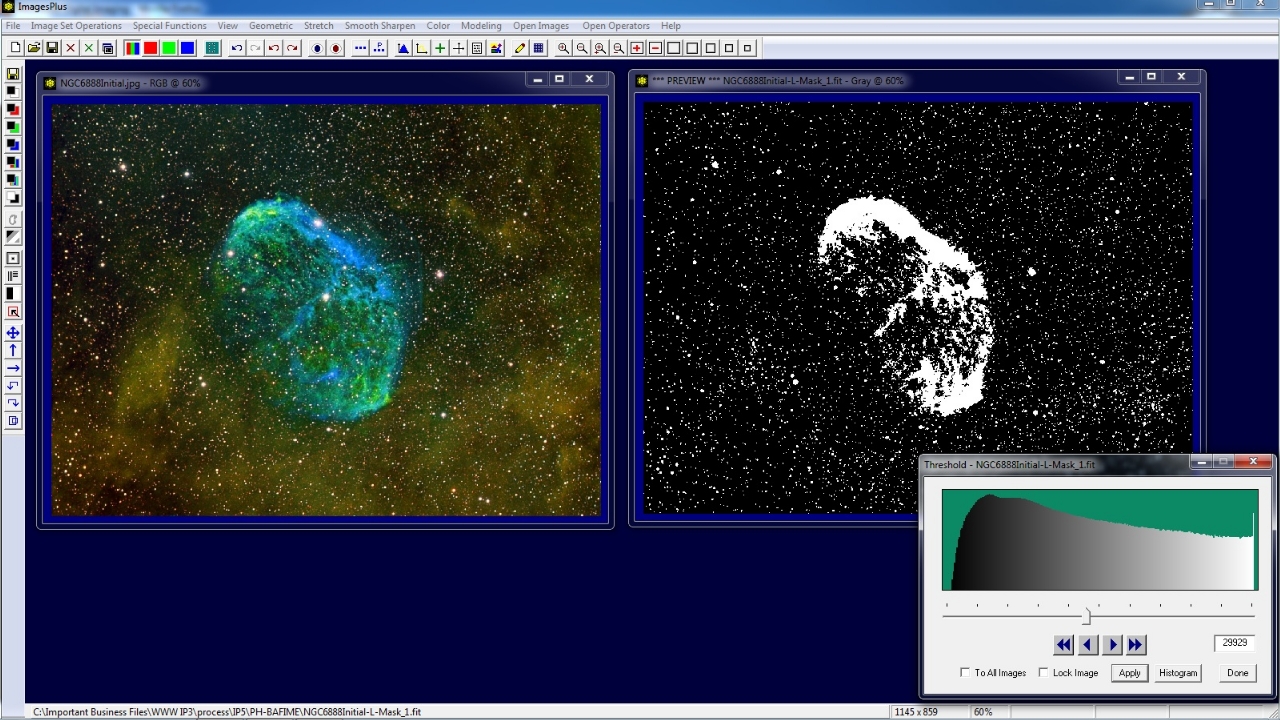
Threshold Mask
Create a single channel luminance mask using one of the methods shown by the options above.
 |
Open the Threshold tool using the 13th button from the top of the left vertical toolbar. Adjust threshold to show the objects of interest as white.
 |
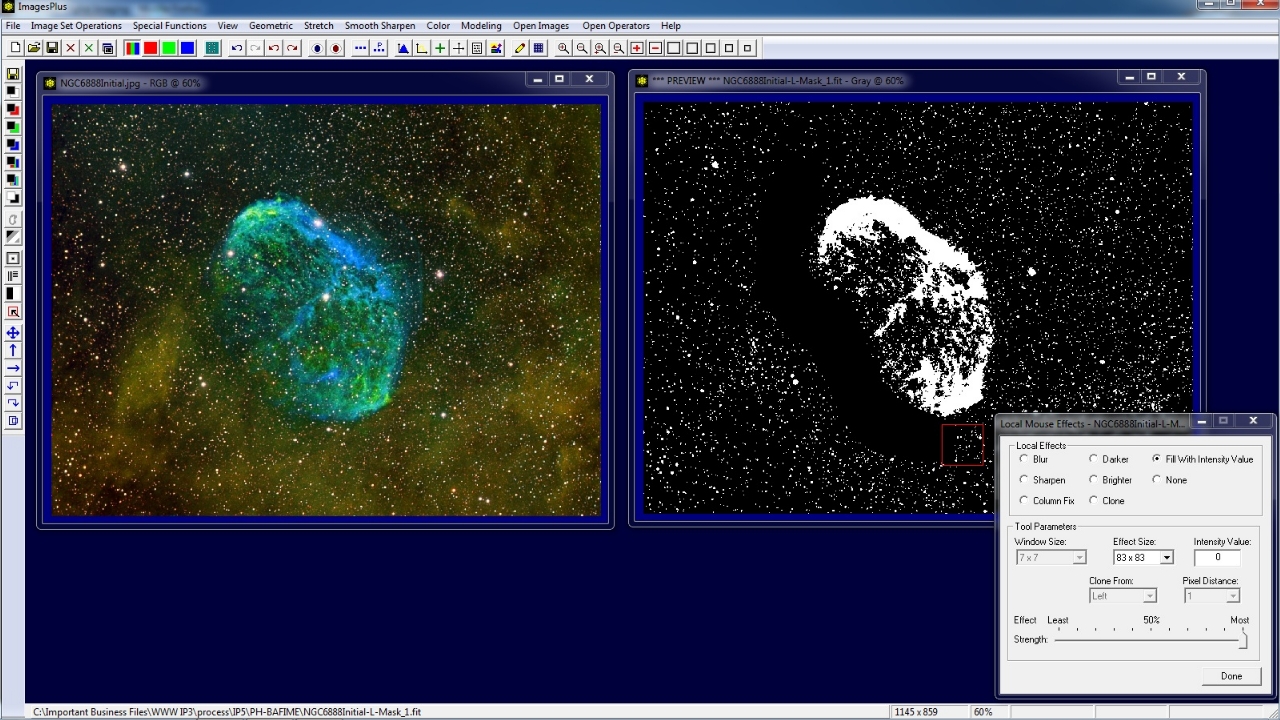
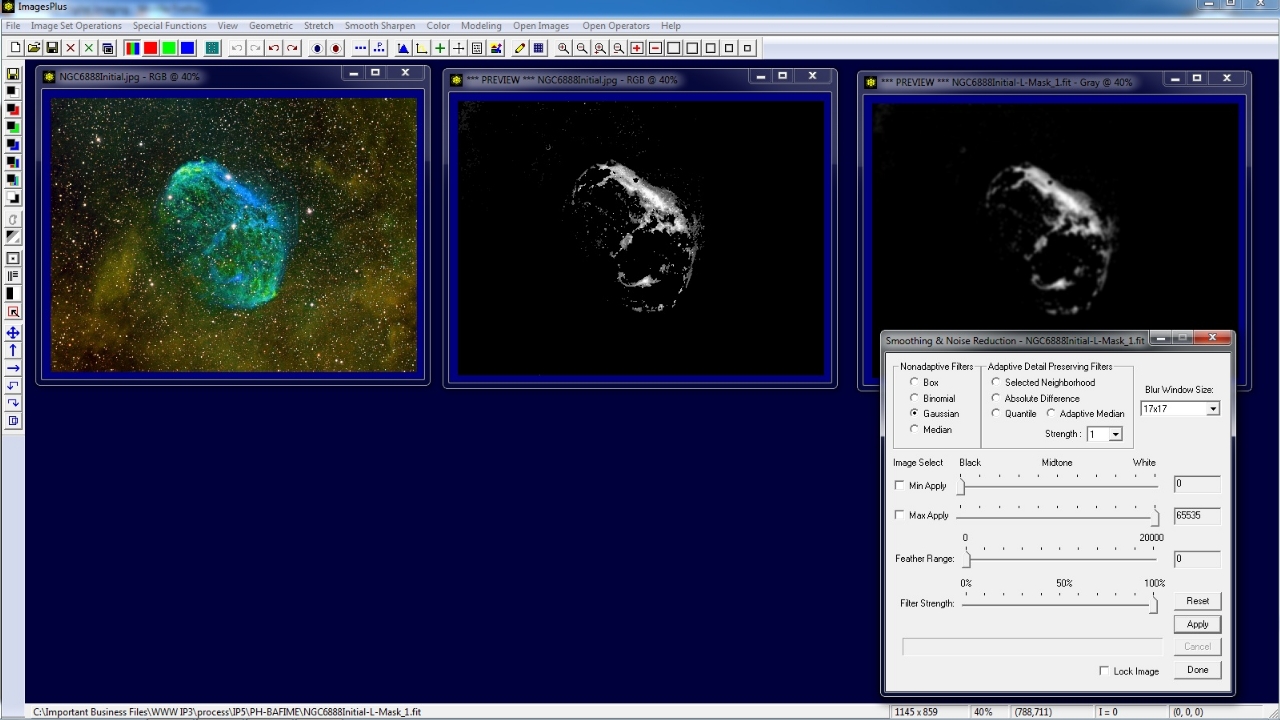
Open the paint tool using the 14th button from the top of the left vertical toolbar. Use the paint tool to remove unwanted objects then apply a Gaussian blur to the mask to smooth edges.
 |
Modified Masks
-
Smoothing
Any of the smoothing tools from the main Smooth & Sharpen menu can be used to smooth a mask for improved blending.
 |
-
Brightness & Contrast
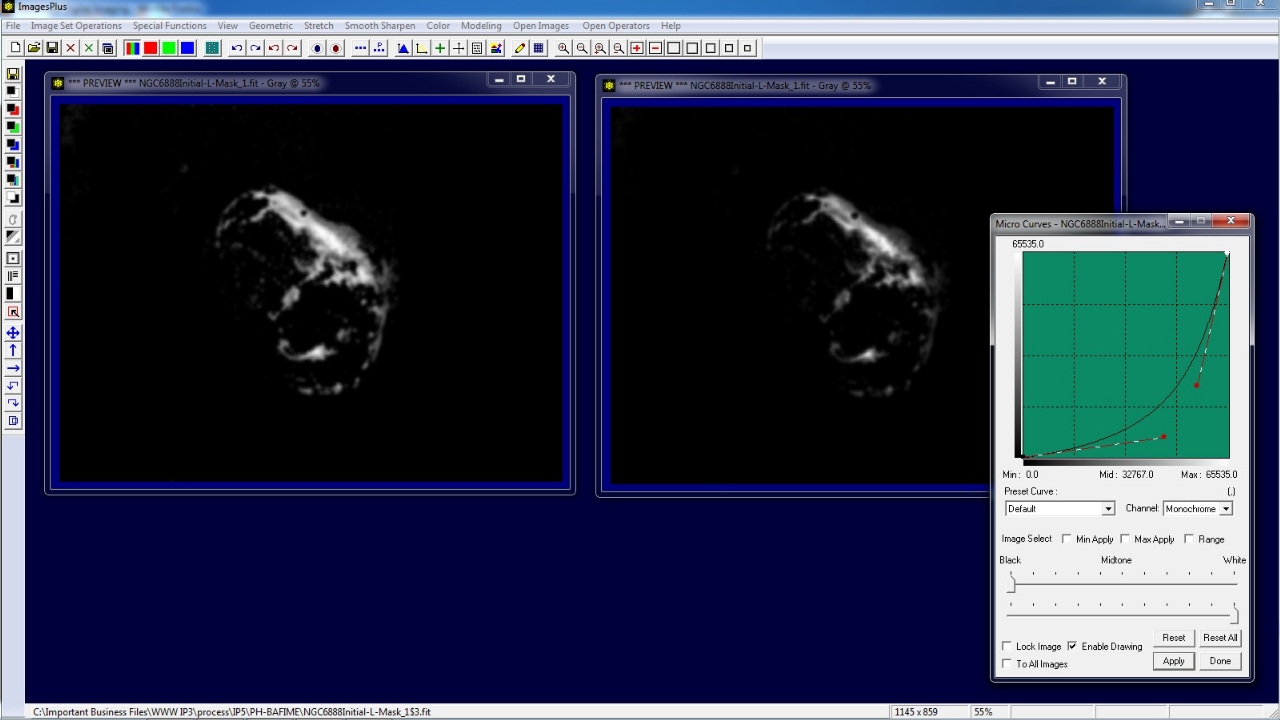
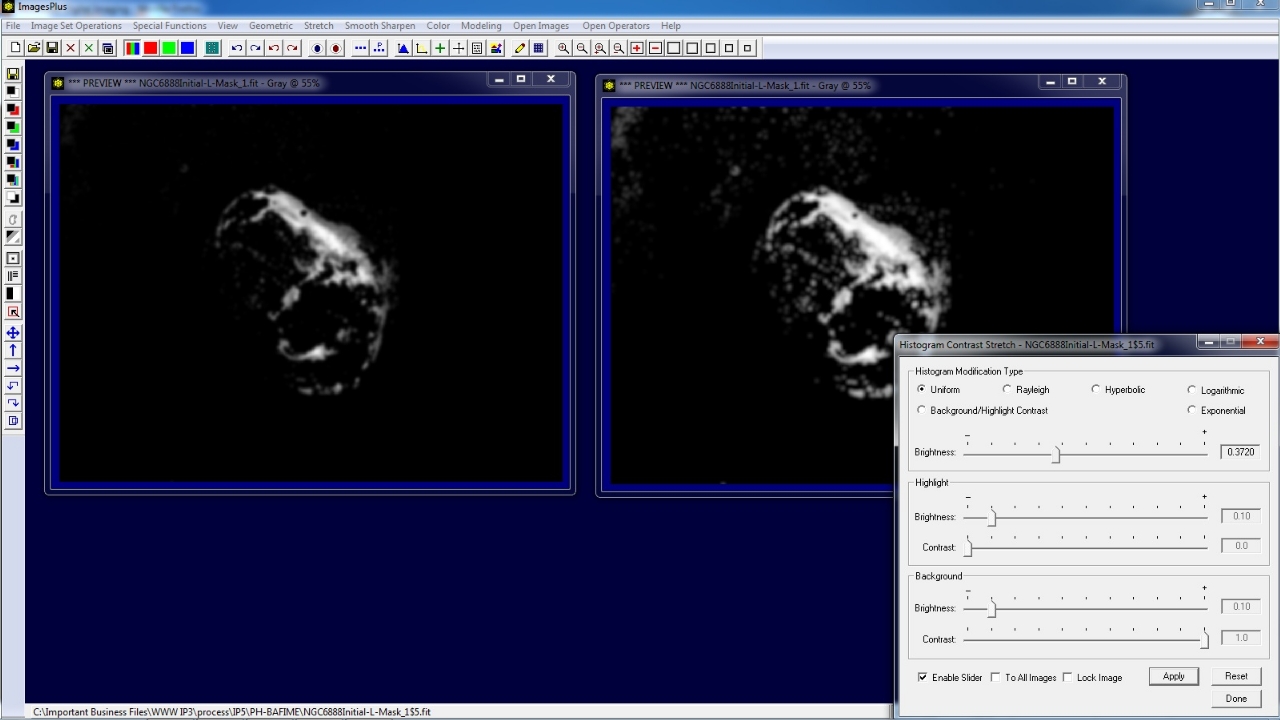
Brightness and contrast tools from the Stretch main menu are used to change the mask strength. Brighter mask areas reveal more of the current layer while darker mask areas reveal more of the previous layer.
In this case Stretch | Micro Curves is used to soften the current image layer and reveal more of the previous layer.
 |
Stretch | Histogram Contrast Stretch is used to reveal more of the current layer.
 |
-
Localized Painting
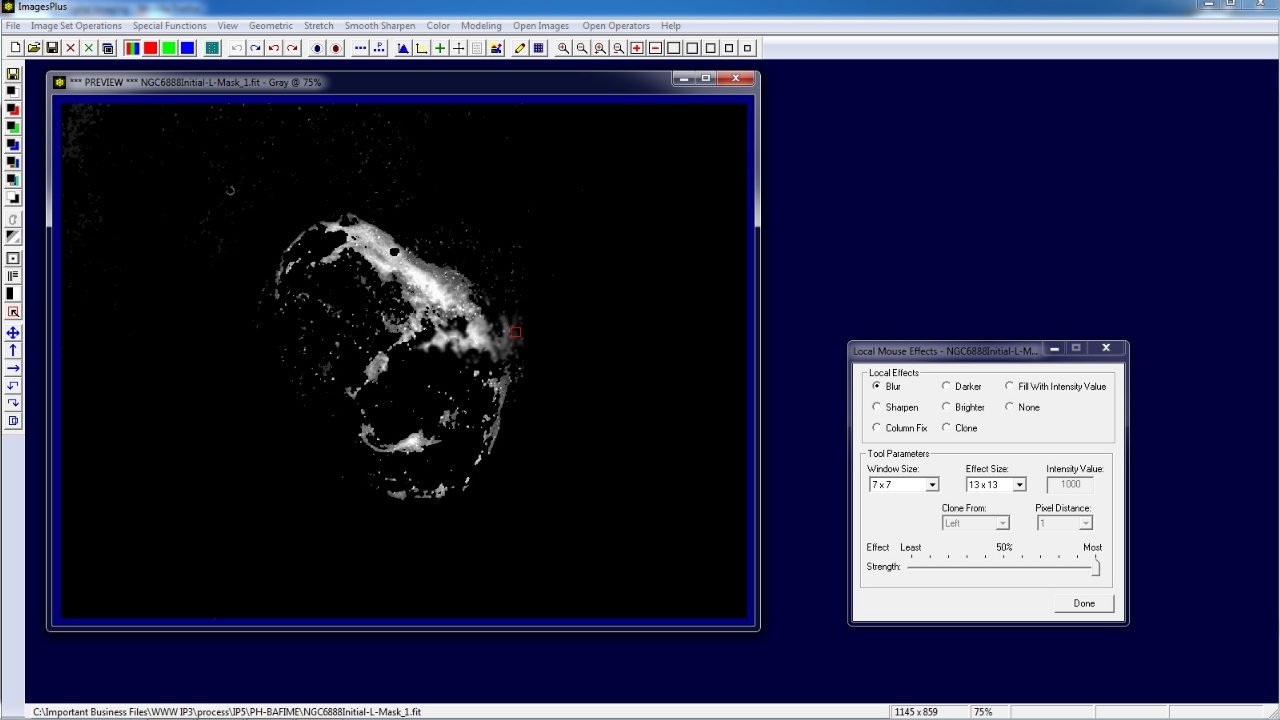
The local paint tool is used for localized smooth, sharpen, brighter, darker, clone, or removal. In this case the paint tool is used to smooth an area of a mask.
 |
Copyright © 2012 MLUnsold Digital Imaging. All Rights Reserved.
