Processing MOV, AVI, and SID (sequential image data) Planetary Video

Color, monochrome, and Bayer format MOV, SID, and AVI video files from Canon, Nikon, Imaging Source, and many other cameras can be calibrated, graded, aligned, and stacked. AVI video file formats that are not supported by the Image Set Operations | Video Processing tool can also be converted in many cases to SID video format for processing.


Step 1) Convert MOV and Problem AVI Files to SID Video Format. (Start at step 2 if you have SID or supported AVI video format.)


Use Image Set Operations | Convert MOV and AVI to SID to reformat MOV and unsupported AVI formats to SID format for processing. Select one or more video files for conversion to SID.


Press the Convert button on Convert MOV and AVI to SID to start converting the selected video files.


Use the Cancel button on Convert MOV and AVI to SID to stop conversion.


After coversion is complete press the File List button on Convert MOV and AVI to SID to display a list of files converted to SID format.


Left click on one of the SID files in the output list to display the video file using the video processing tool.


The Display and Save Files tab of the Video Processing tool is used to play a video and also to save all frames or the current displayed frame as an image file. After the video file is graded using the Grade, Calibrate, Align, and Combine tab only the frames selected by the grade constraint are played, saved as separate images, or aligned and stacked.


Step 2) Grade, Calibrate, Align, and Combine


The Grade, Calibrate, Align, and Combine tab is used to process a video file. The Planet-Lunar-Solar Disk align option is used when each frame of the video file contains the complete full or partial disk of the object. For lunar and solar closeup video files use the Lunar - Solar Region align method and select a well defined point of interest such as a small crater or sunspot.


Check a grade box to include the grade range in the set of frames to calibrate, align, and stack. Check only the grade A box to process only the best frames from the video file. Use the Edit Grades button on the Video Processing tool to set each grade range. Frames with the best edge sharpness are graded 100%. Grade percent decreases as edge sharpness decreases. In the example above the range of grade A is changed from the default 90%-100% to 91%-100%. Grades B, C, D, and F would then have ranges 80%-91%, 70%-80%, 60%-70%, and 0%-60%, respectively.


Average combination is the default. Excluded min max and sigma clip average offer good noise reduction. Graded average performs an edge sharpness weighted average of the selected grade frames. If calibration is to be performed then first combine the dark, flat, and bias video files to make master calibration frames. Select the master calibration frames using the Image Set Operations | Calibration Setup window. Check the Grade, Calibrate, Align, and Combine box in the Process Group to enable each option. In this case grade then align and combine are performed.


Press the Apply button on the Video Processing tool to start processing the video file.


Processing finished with 1175 of 6175 frames aligned and stacked from the grade A range. Press the Display Combination button to display the grade, aligned, and stacked image.


The grade A range is increased from 91%-100% to 93%-100% to include only frames with higher edge sharpness.


Press Apply to align and stack using the higher quality grade A range. Now 464 of 6046 frames in the edge sharpness range of 93% - 100% are aligned and combined.


Press the Display Combination button on the Video Processing tool to display the aligned and stacked image of Jupiter.


Step 3) Check Color Alignment


The Video Processing tool is closed and the combination image is moved to the top right corner.


Use the Zoom 400% button 3rd from the right on the top horizontal toolbar to zoom the combination image. Inspect the edge of Jupiter and its moons for a color fringe. In this case the moon has a red fring along its bottom edge.


To shift the red channel up so that it matches the green and blue channels open the Geometric | Geometric Transforms | Translate tool. Press the Apply Operator to Red Channel Only button on the top horizontal toolbar so that the translate tool only shifts the red channel. Use the Fast Translate arrow buttons and By Pixel value to shift the red channel. In this case the up arrow is used to shift the red channel up one pixel.


Close the Translate tool. Use the Zoom 100% button 2rd from the right on the top horizontal toolbar to zoom the combination back to full size.


Step 4) Sharpen


On the Smooth Sharpen main menu Multiresolution and the Statistical Difference method on the Sharpening tool are the best for planetary images. Here the Statistical Difference tool is used for the initial sharpening of Jupiter. Adjust the Deviation Factor slider towards the right and window size to increase the sharpening effect. The Edge / Background and Gain Factor sliders are used to adjust contrast.


On the Range tab min luminance apply is set to 9144 with a feather range of 2791 so that only Jupiter is sharpened and the dark background is not sharpened. Filter strength is set to 50% to soften the sharpened image.


Step 5) Mild Multiresolution Wavelet Sharpen


Smooth Sharpen | Multiresolution is used to increase finest detail.


Step 6) Set White Point


Stretch | Levels is used to set white point to the right side of the histogram.


Step 7) Micro Curve Contrast Increase


Mild contrast increase using Stretch | Micro Curve.


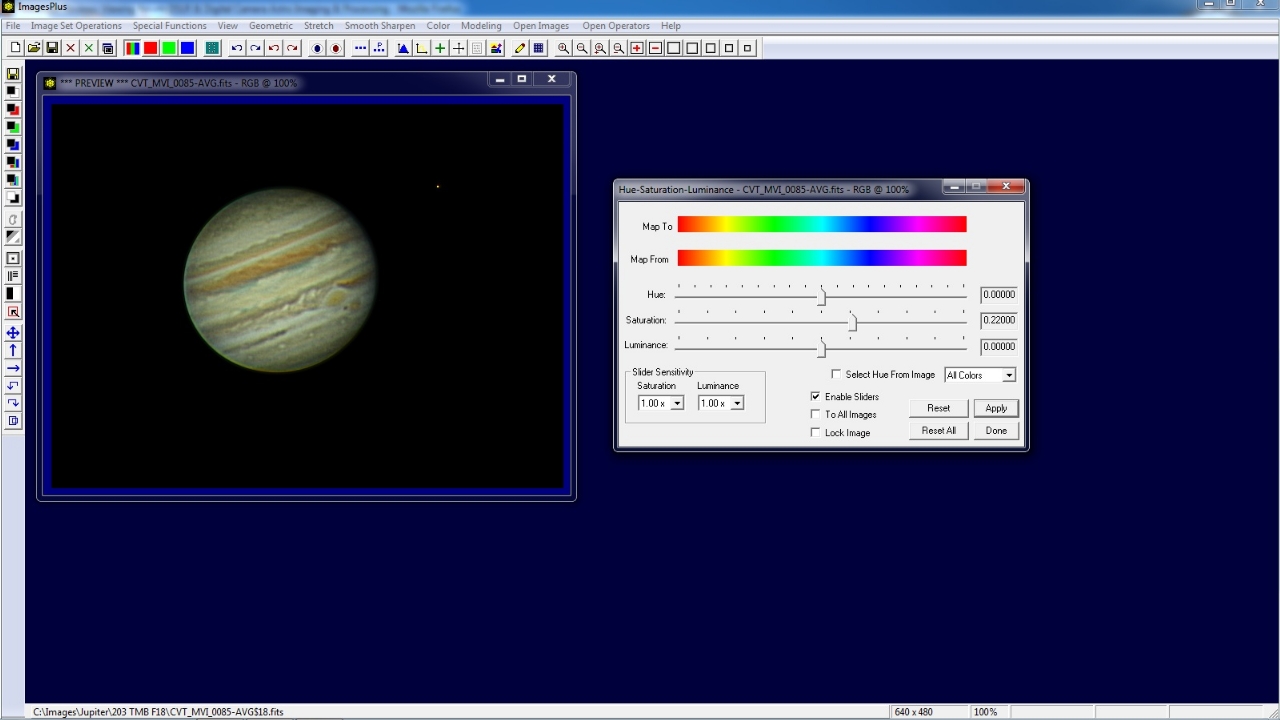
Step 8) Increase Saturation


Color | Hue-Saturation-Luminance is used to increase color saturation.


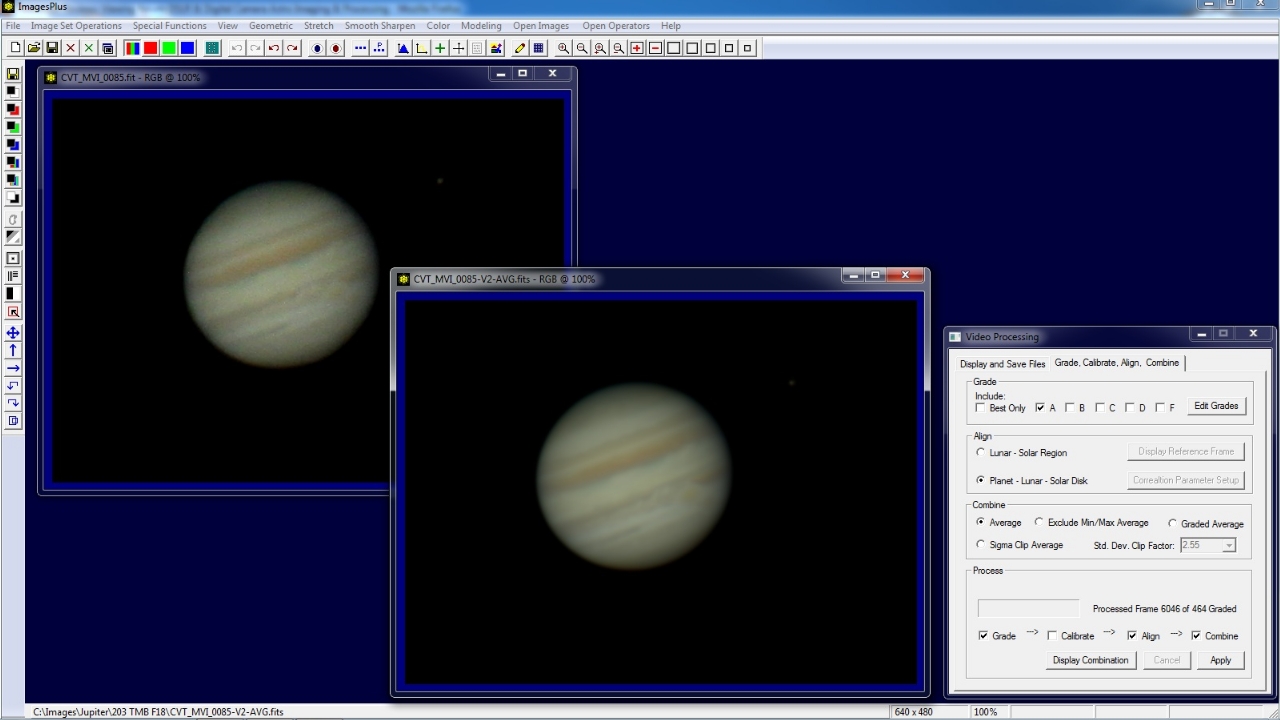
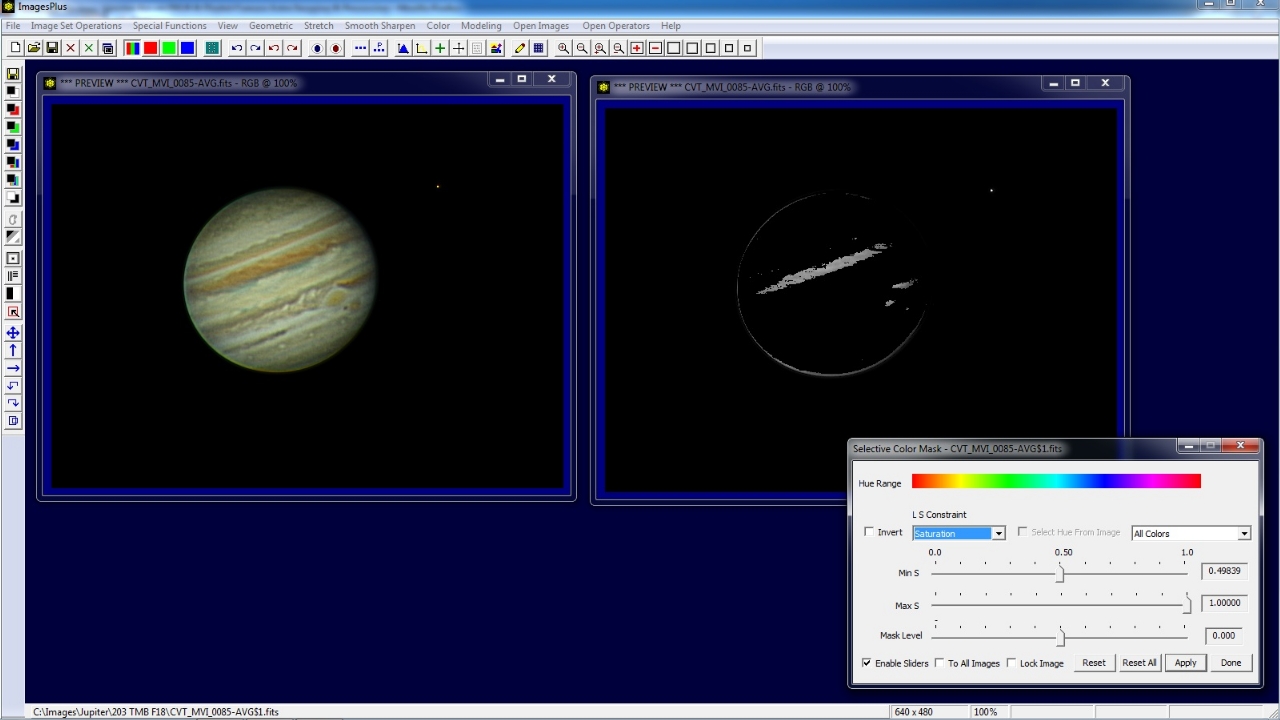
Step 9) Create Limb Mask


Note that the lower left limb of Jupiter is brighter than the top right limb. A mask will be created and used to reduce the brightness of the lower left limb of Jupiter. First duplicate the image of Jupiter using the ... button on the top horizontal toolbar. Open the Selective Color Luminance Mask tool using the left vertical toolbar.


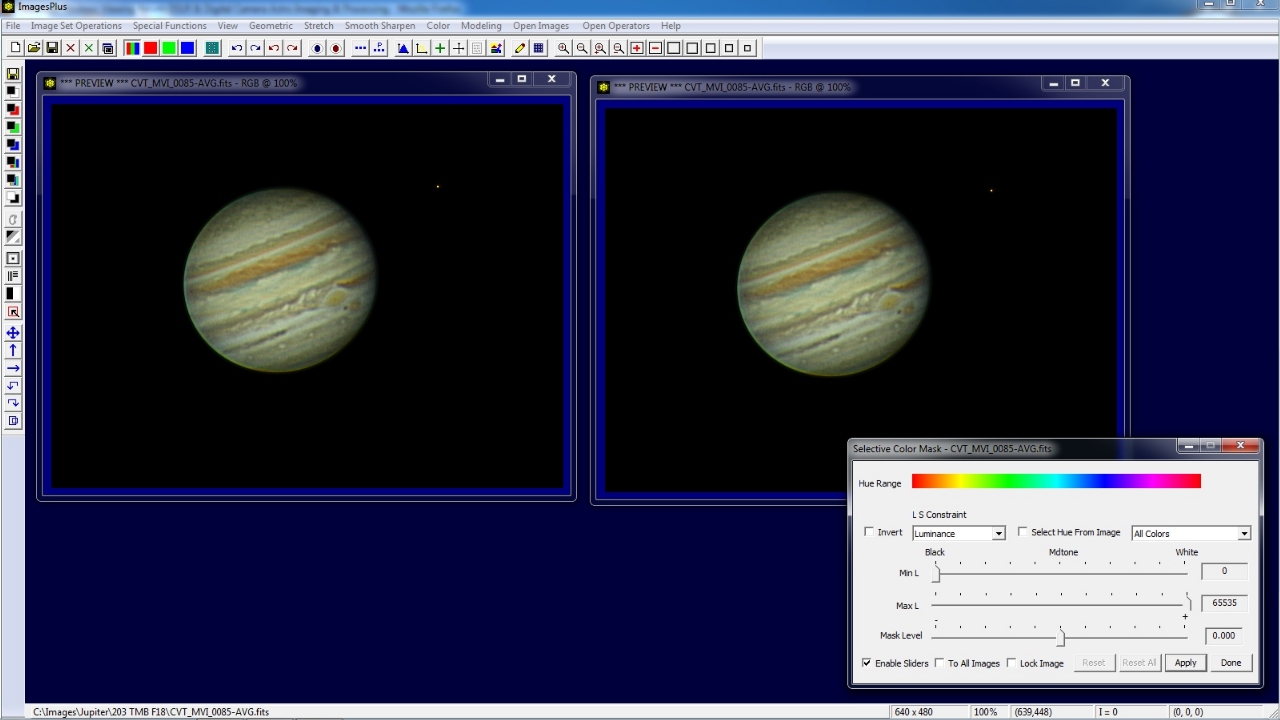
Press Apply on the Selective Color Mask to convert the image of Jupiter to a graysacle image. Note that all hues are used since a hue range was not selected from the image. Also all luminance and saturation values for each hue are selected since the min and max apply values for the luminance and saturation constraints are set to their default values.


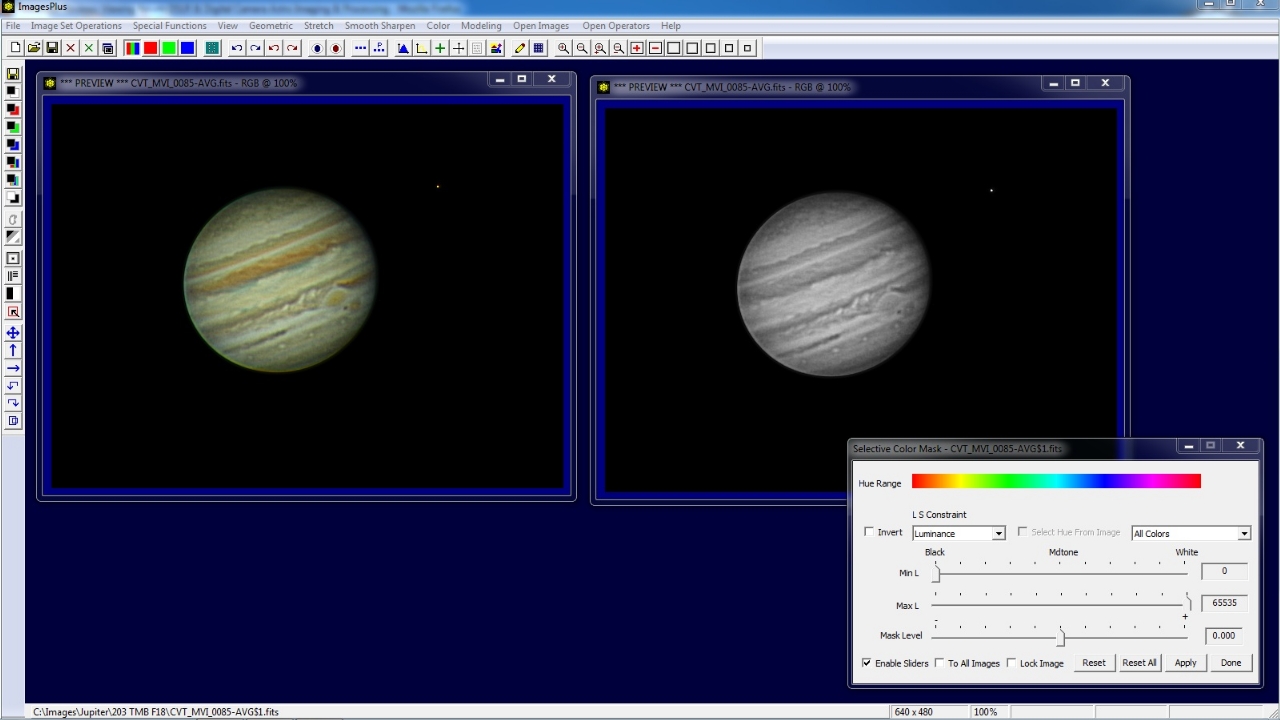
Select Saturation in the L S Constraint list. Increase the min saturation constraint to ~0.50 so that most of Jupiter disappears and the bright lower left limb of Jupiter appears.


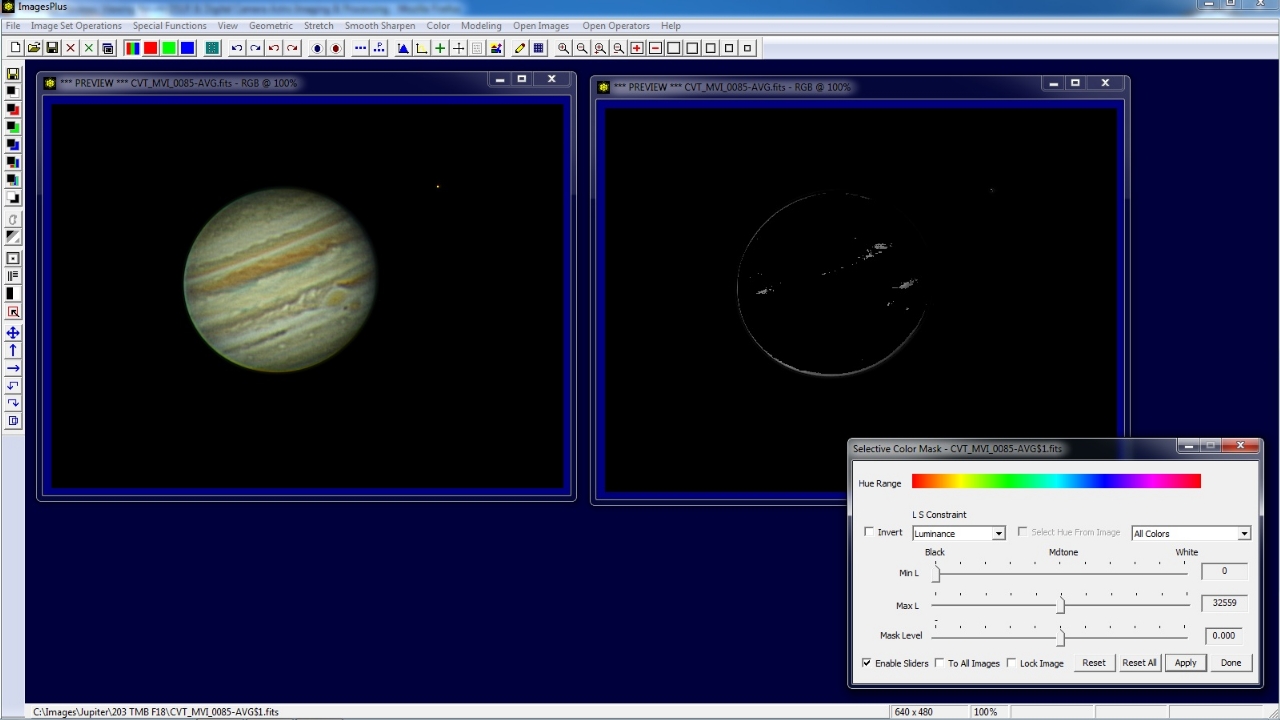
Select Luminance in the L S Constraint list. Decrease the max luminance constraint to ~32559 to remove the brighter parts of Jupiter and the moon.


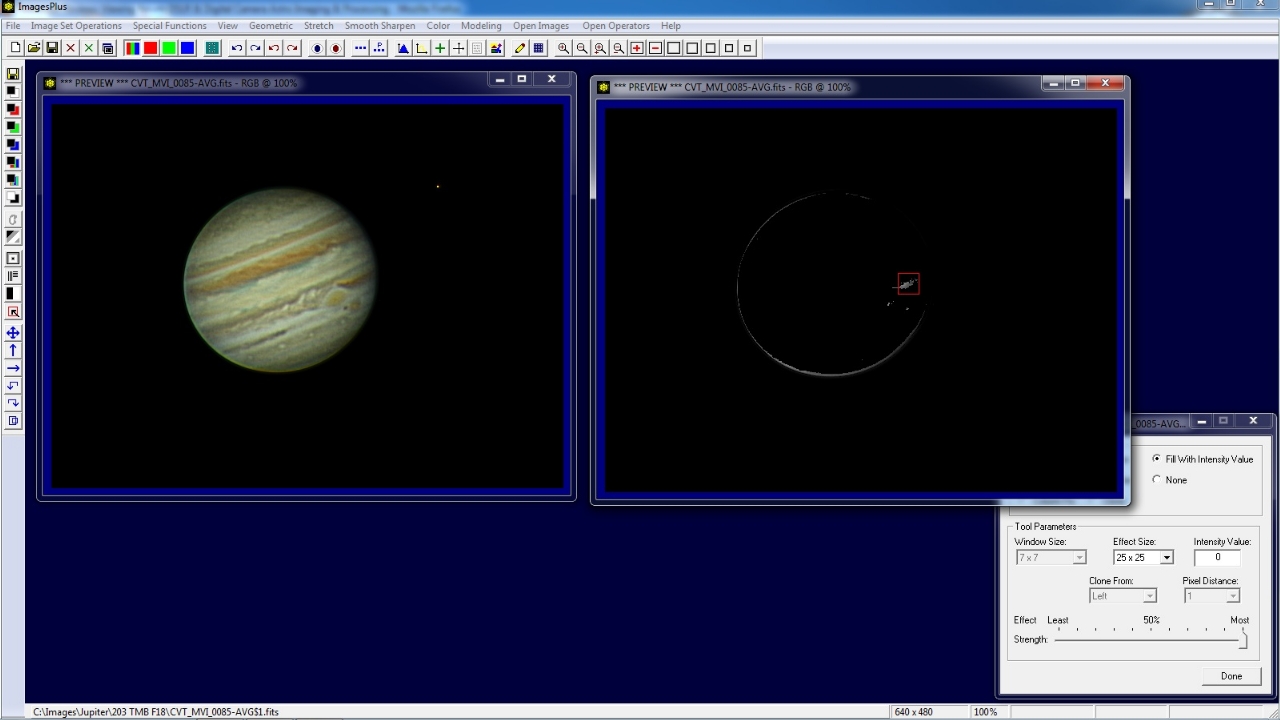
Use the left vertical toolbar to open the Local Smooth, Sharpen, and Paint tool. On the paint tool select Fill With Intensity Value and set the value to 0. Select an effect size of about 25 x 25. Use the mouse to move the red square and remove all bright areas not part of the bright limb of Jupiter.


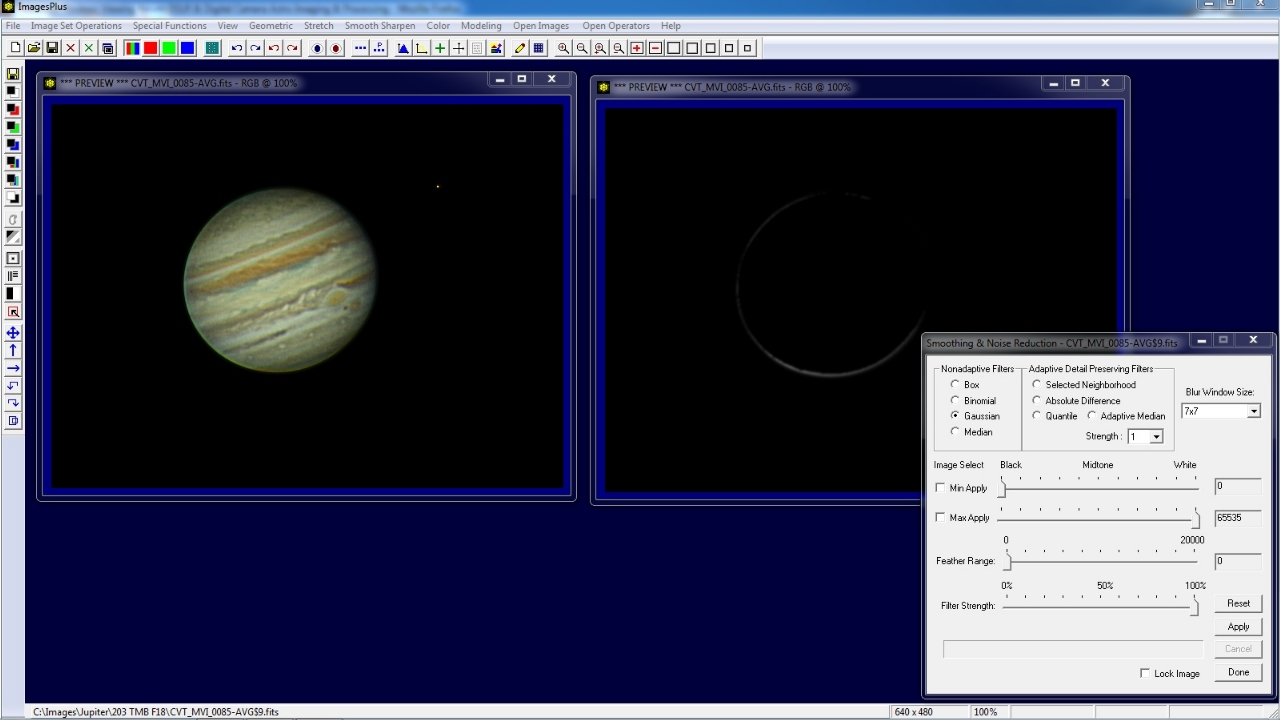
Open the Smoothing & Noise Reduction tool using the left vertical toolbar or Smooth Sharpen main menu. Apply a mild Gaussian blur to the graysacle image to improve blending.


Use the Luminance Mask button on the left vertical toolbar to convert the 3 channel RGB grayscale image to a single channel mask with Gray in its top window caption bar.


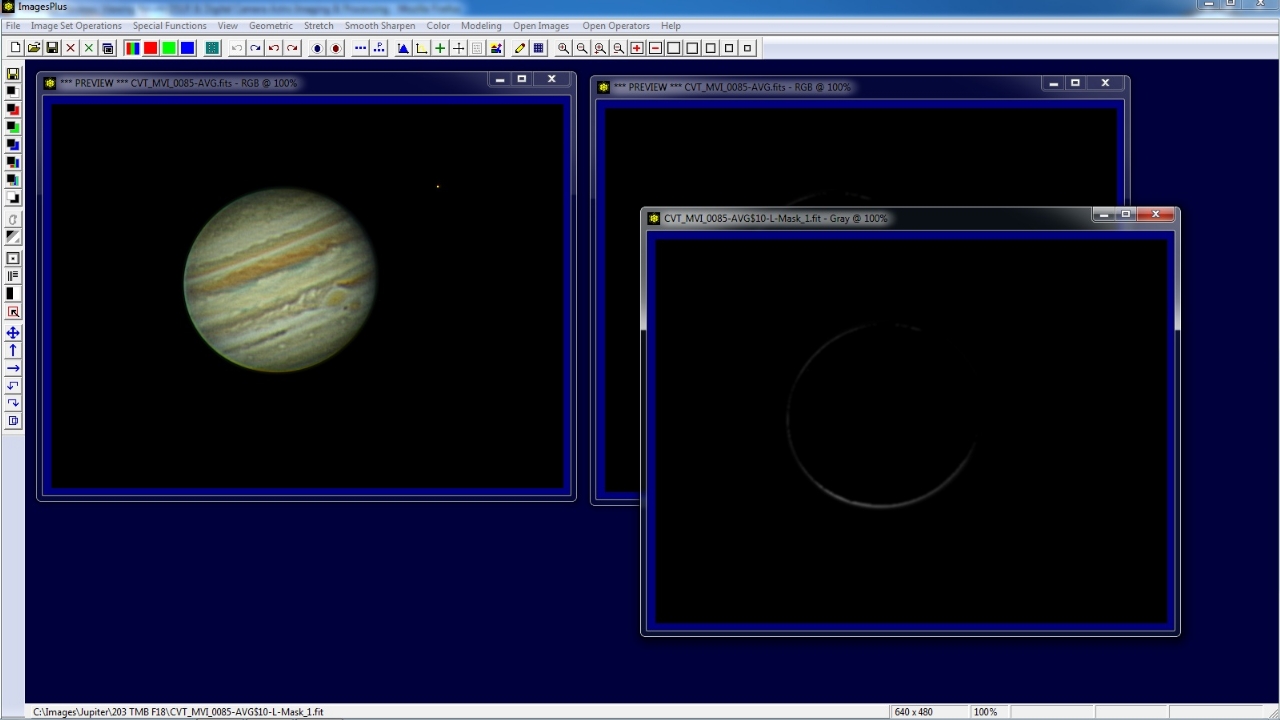
To name and save the luminance mask use the Save As Then Copy Mask button or top button on the left vertical toolbar. After the image mask is saved it can be assigned to a filter in the Process History layer list.


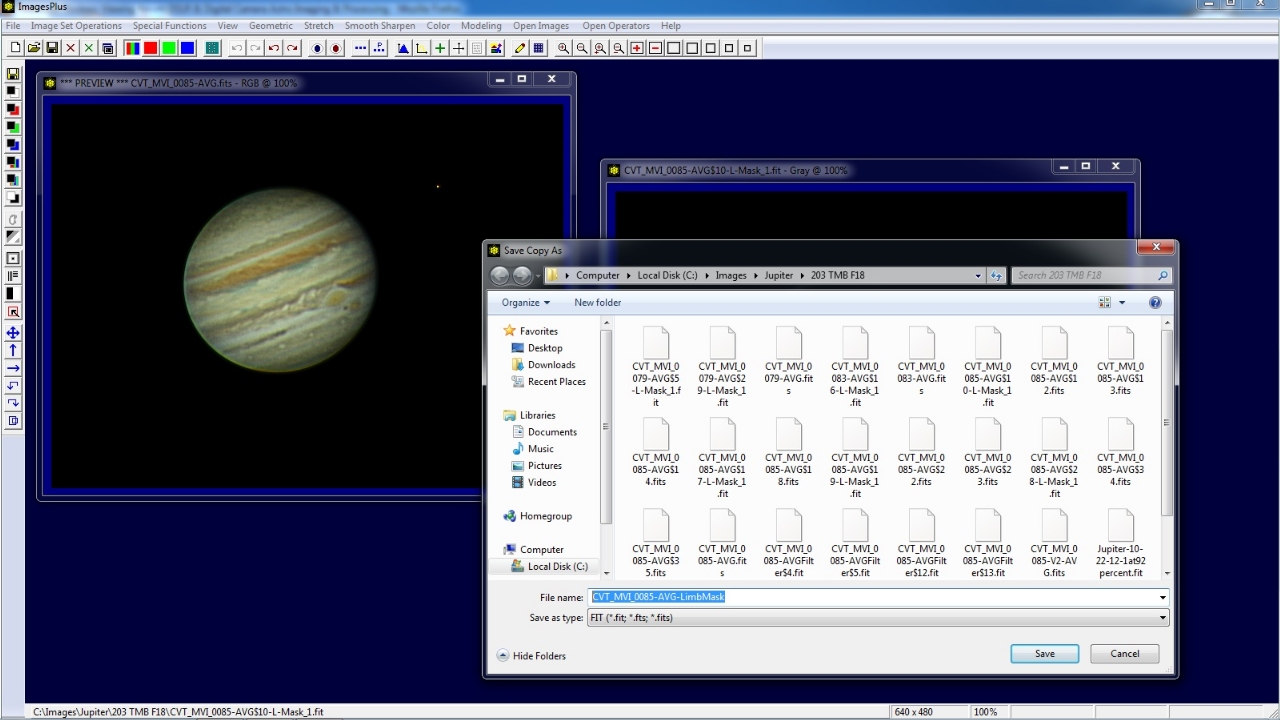
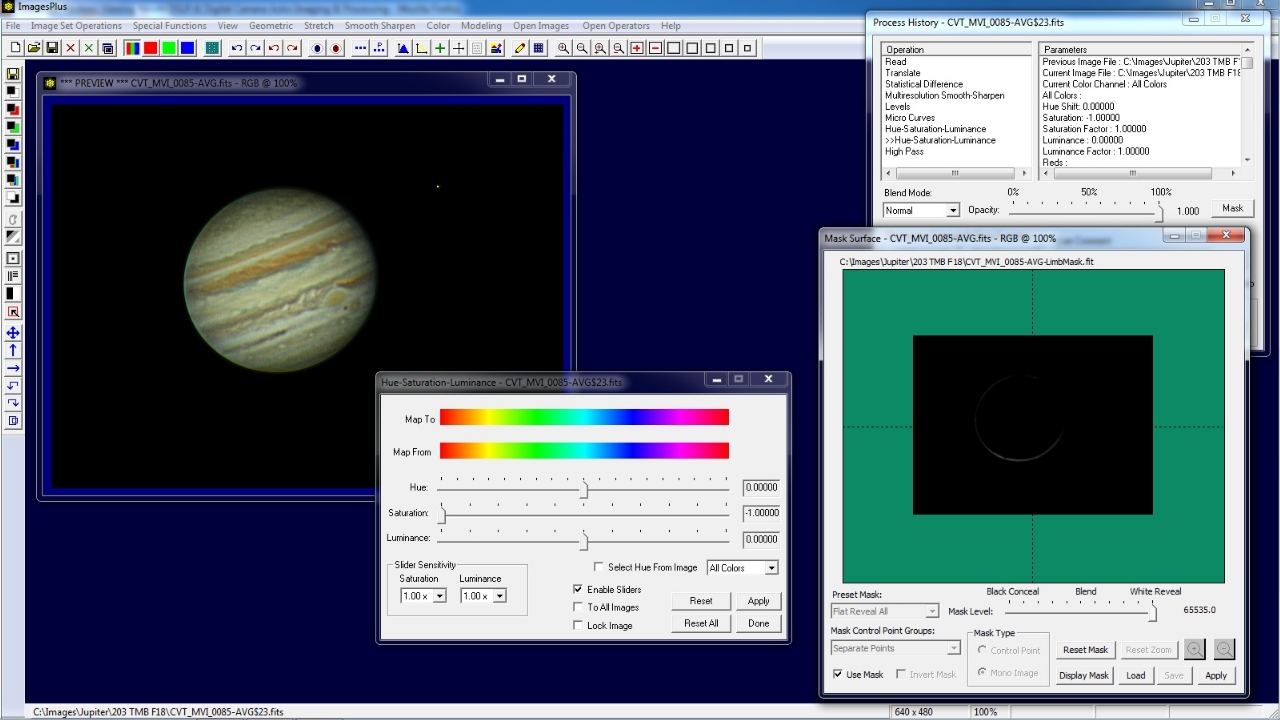
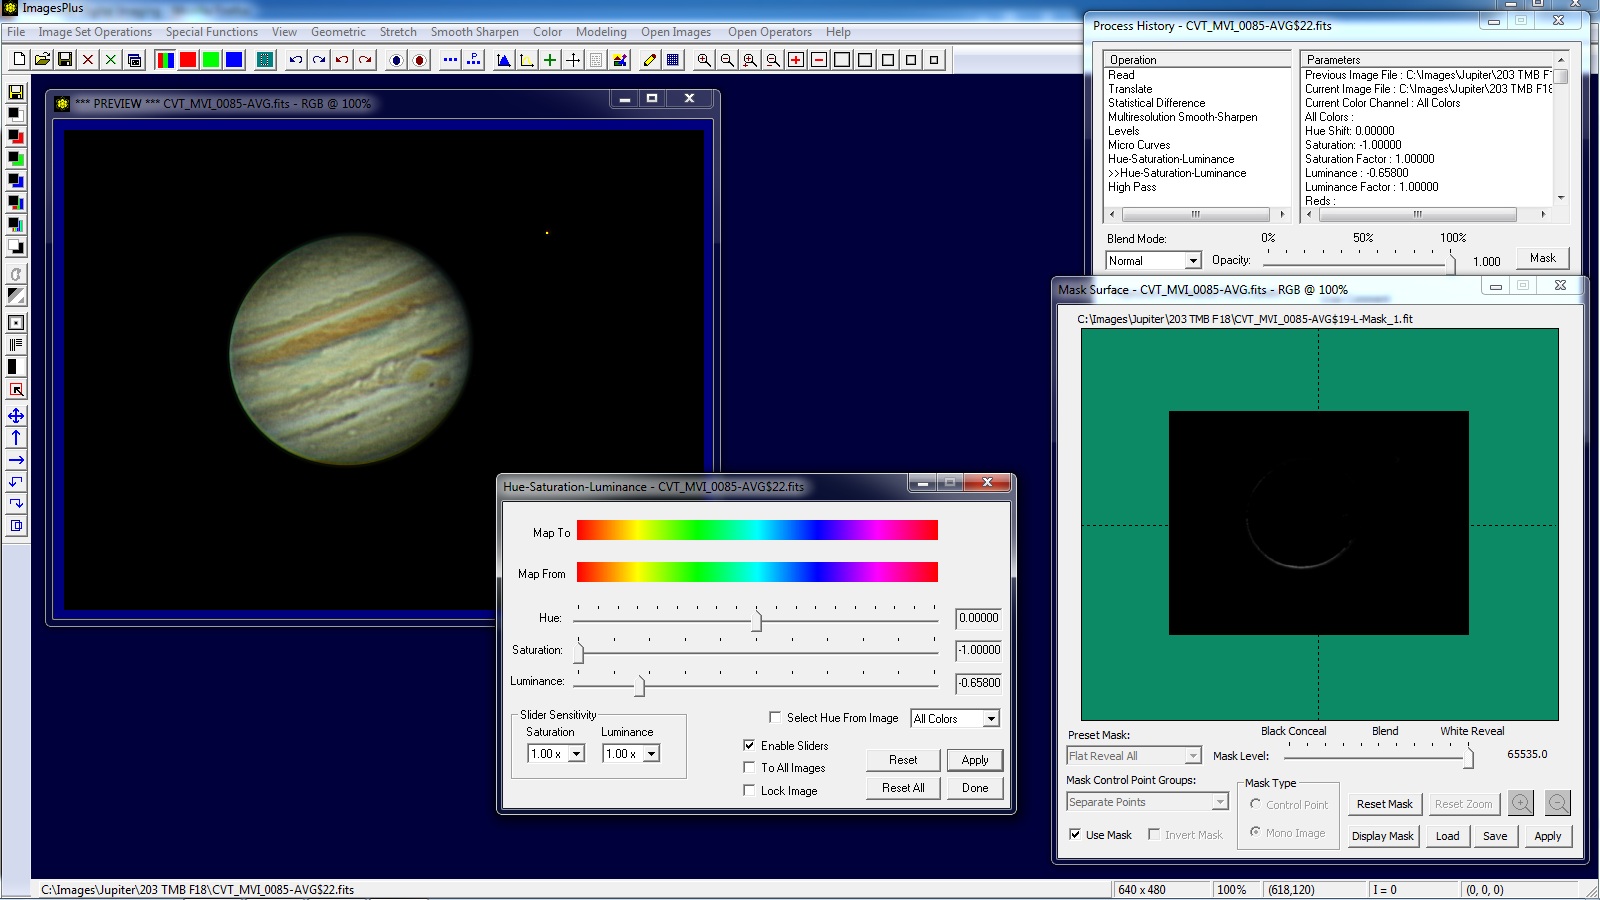
Step 10) Apply Limb Mask


Open the Color | Hue-Saturation-Luminance tool. To remove all color from the Jupiter image apply Hue-Saturation-Luminance with saturation set to -1.0. The limb mask created in the previous step will be assigned to Hue-Saturation-Luminance so that color is removed only from the lower left limb of Jupiter.


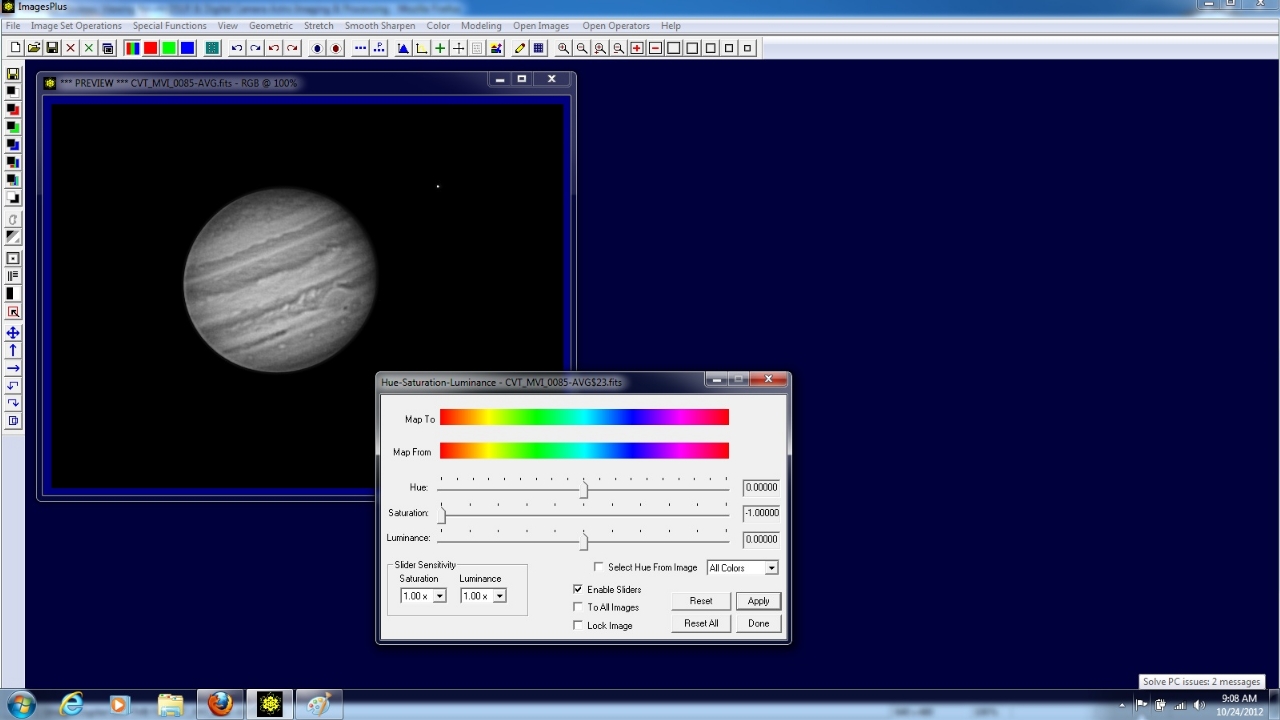
To assign the limb mask to Hue-Saturation-Luminance first open the Process History window using the top horizontal toolbar. Press Mask on the Process History window to display the Mask Surface window. Right click on the white mask on the Mask Surface winodw and select Paste. Since the limb mask is the current mask that was just saved using the Save As Then Copy Mask toolbar button the limb mask is assigned to Hue-Saturation-Luminance.


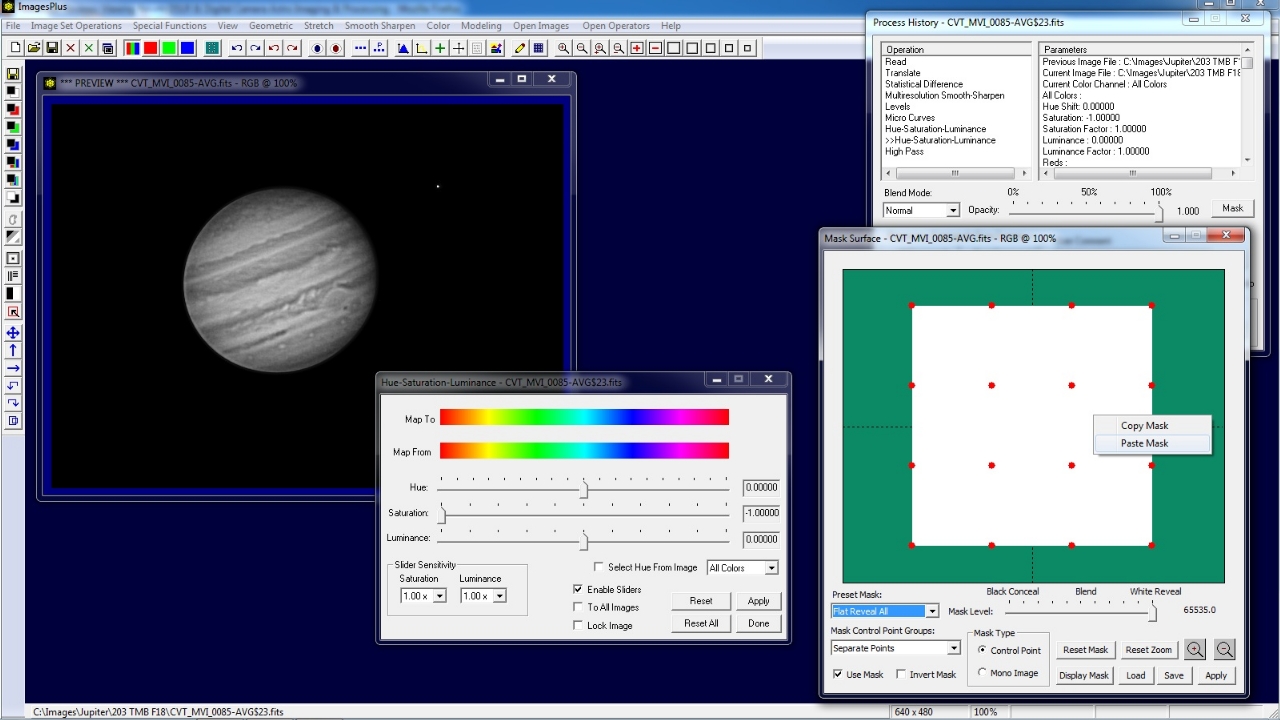
The limb mask is assiged to the Hue-Saturation-Luminance tool.


Adjust the saturation and luminance sliders on Hue-Saturation-Luminance to blend and soften the bright lower left limb of Jupiter.


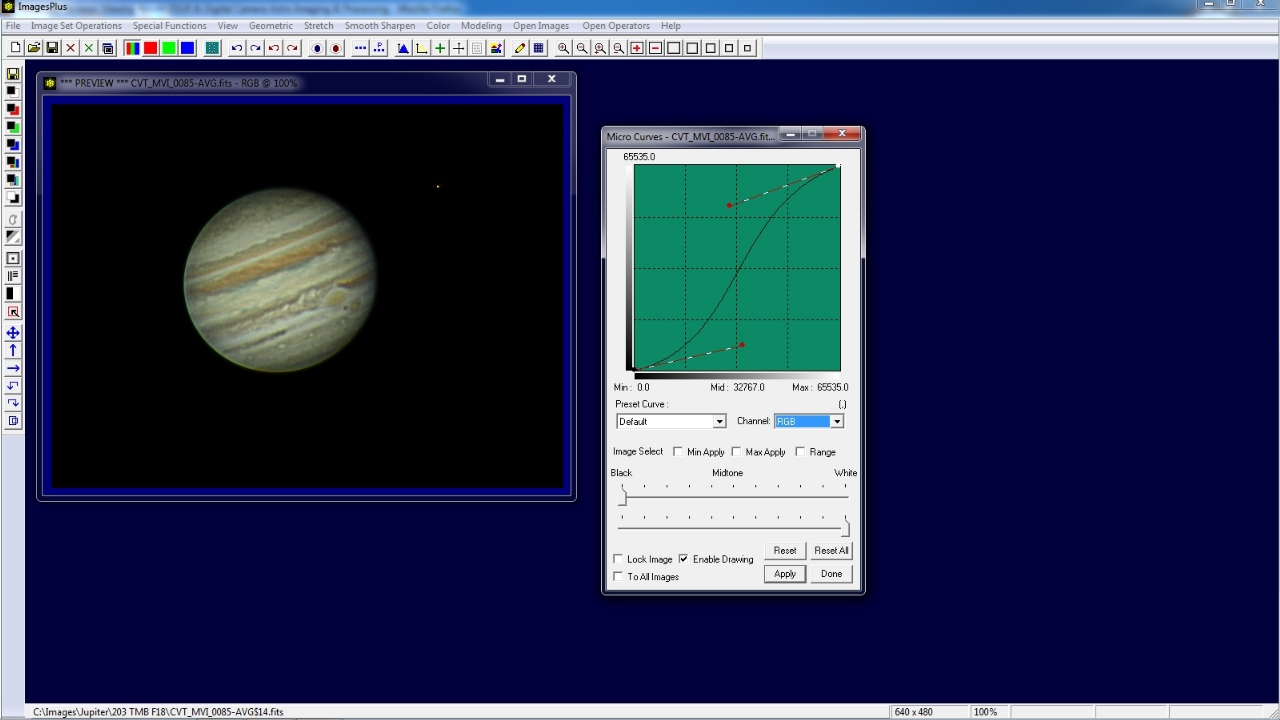
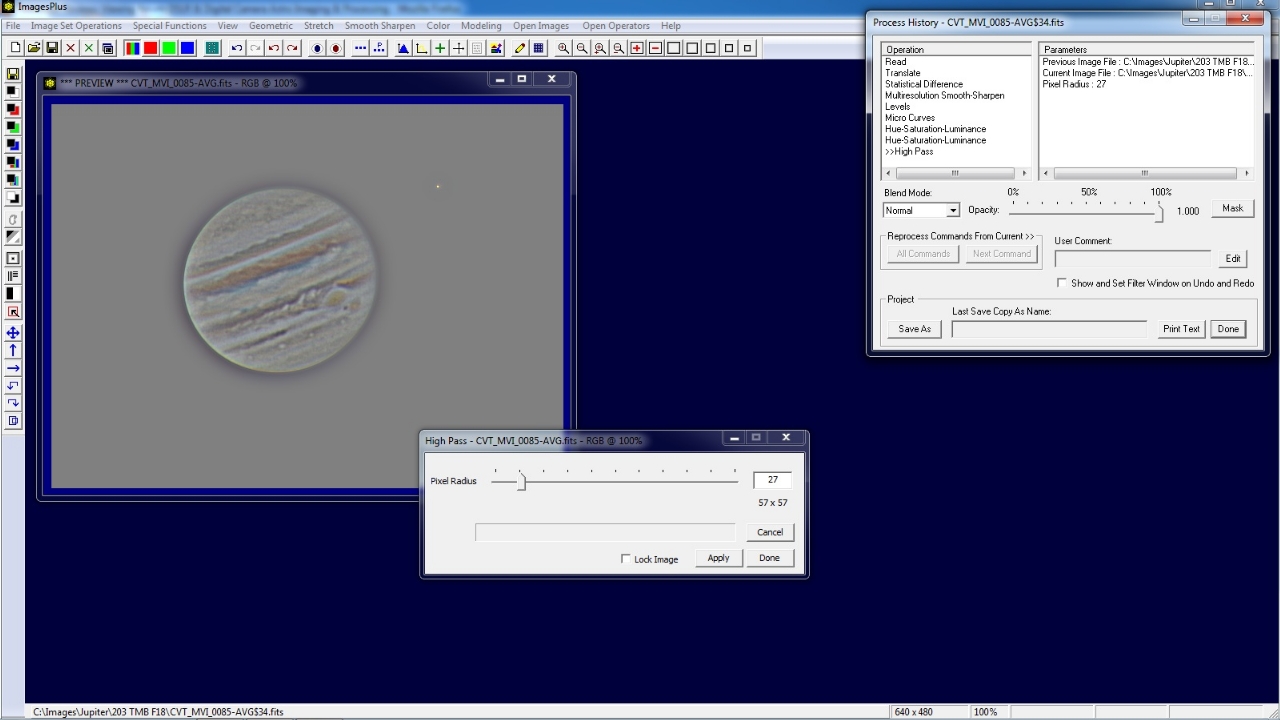
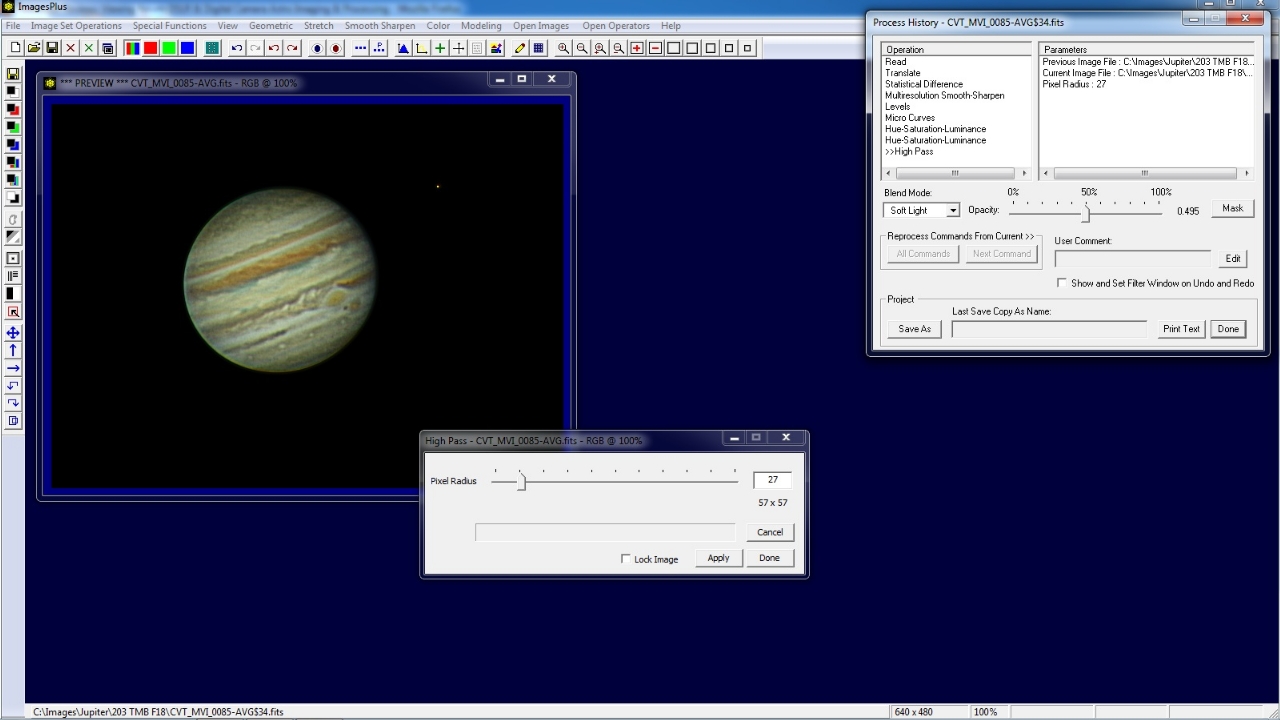
Step 11) High Pass Contrast Increase


Open the High Pass filter using the left vertical toolbar. Apply High Pass to the Jupiter image using a large pixel radius. The image has a gray background after High Pass is applied since normal blend mode is set on the Process History window.


Set Softlight as the blend mode on the Process History window. Adjust pixel radius on High Pass and Opacity on the Process History window to adjust the contrast increase applied to Jupiter.


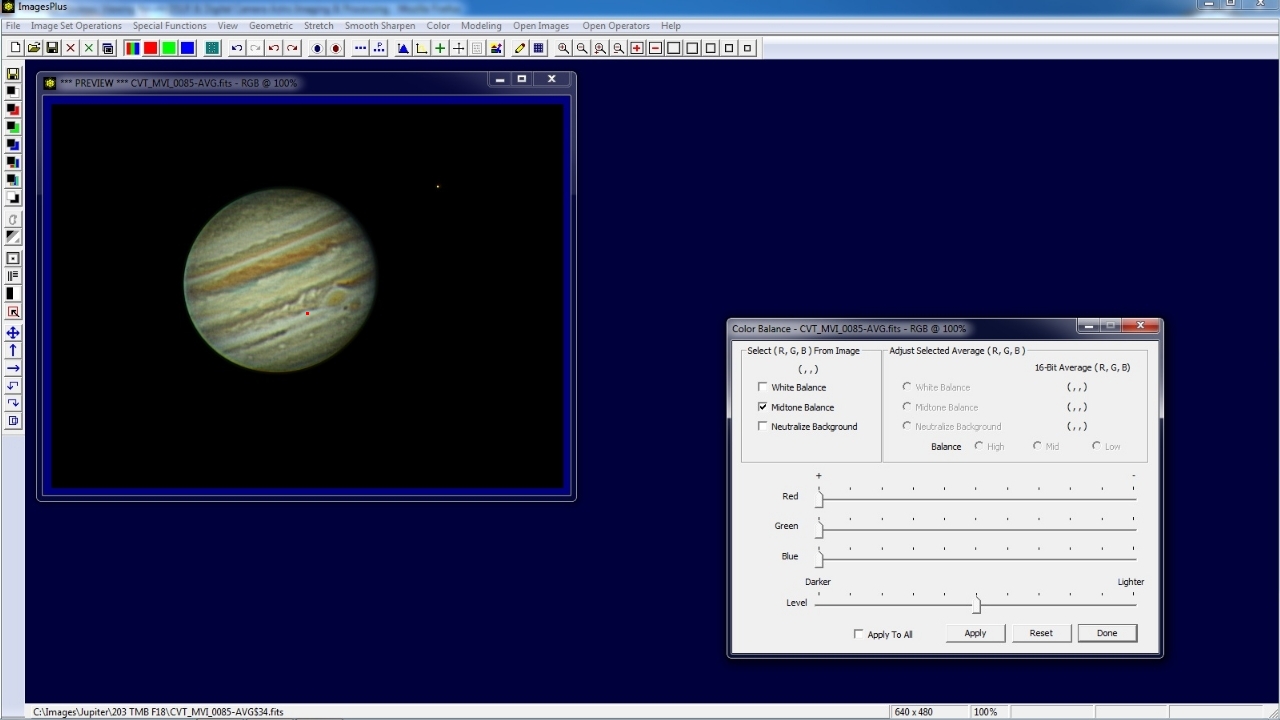
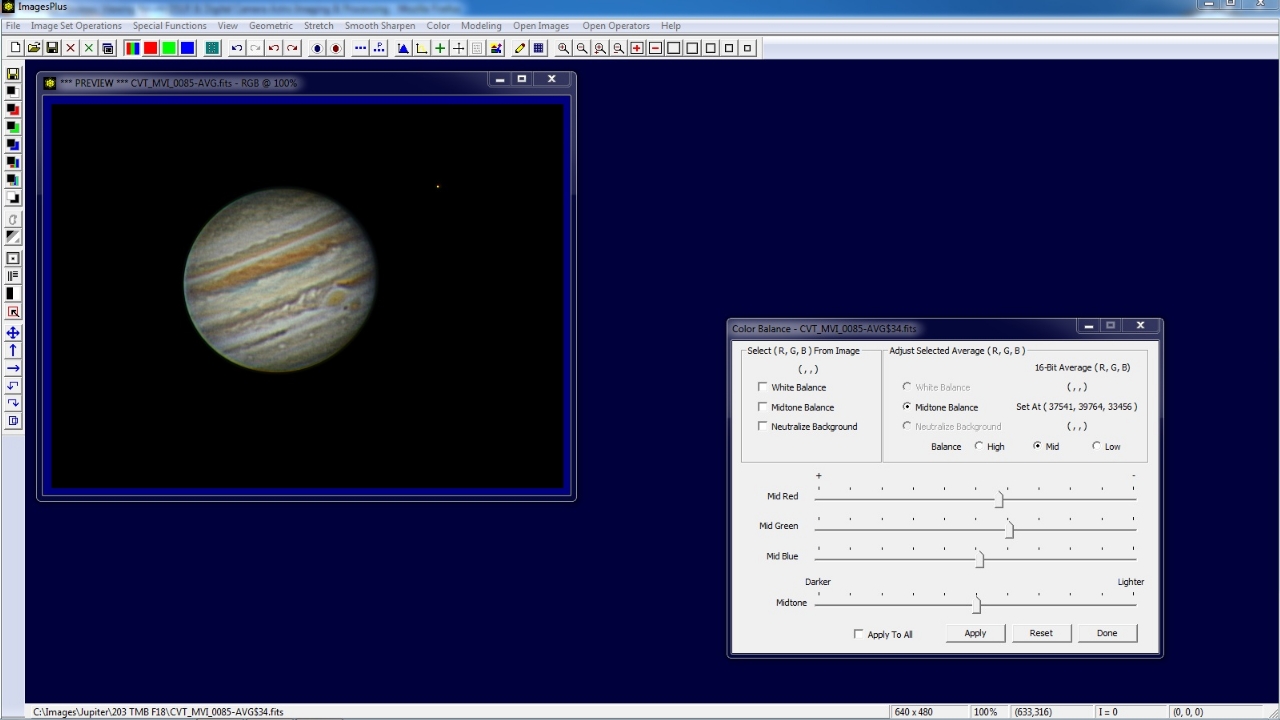
Step 12) Color Balance


To correct the slight overall yellow of Jupiter open the Color | Color Balance tool and check the Midtone Balance box. Left click on the red square shown on Jupiter to set midtone color balance.


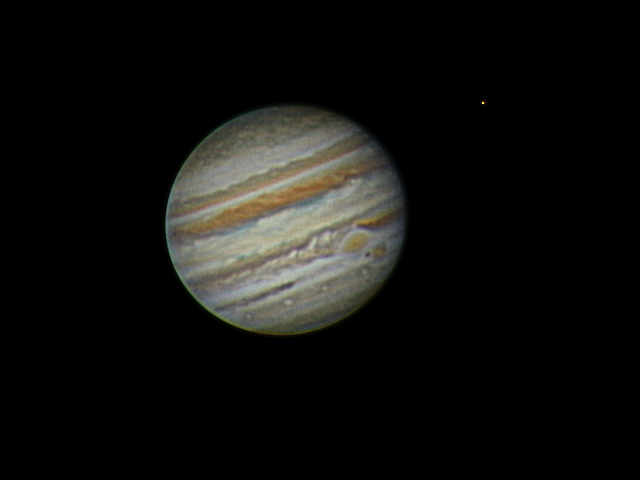
Jupiter with corrected color balance.


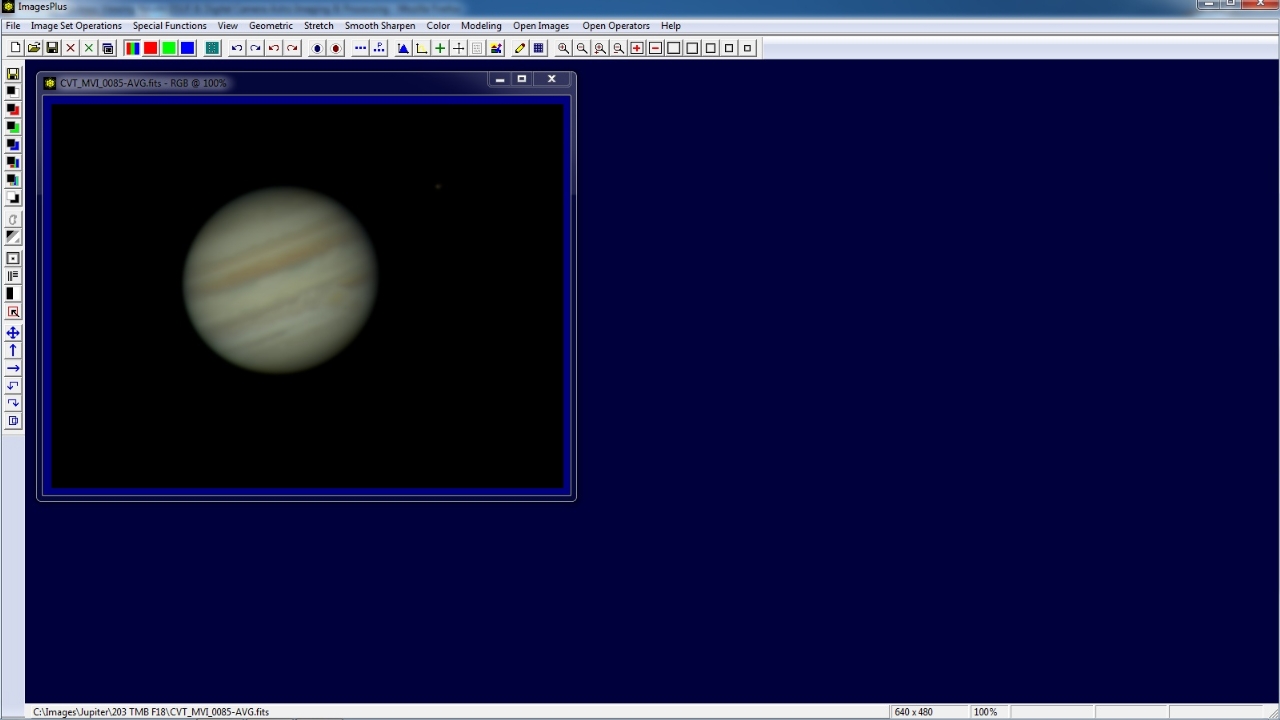
Jupiter 10-22-2012. Final processed image using Canon 60Da 640 x 480 crop movie mode with 203mm TMB and 2x Televue barlow for an effective F18.


Copyright © 2012 MLUnsold Digital Imaging. All Rights Reserved.