The Combine Image & Mosaic tool on the Special Functions main menu of ImagesPlus is used to build a composite image from one or more images. Each image is called a layer
and the Combine Image & Mosaic tool maintains an image layer tree. The first image layer is the bottom element in the tree. Each new image layer is added on top of the previous image layer in the layer tree.
A mask, blend mode, or opacity can be assigned to each image layer using the Combine Image & Mosaic tool. Image layer tree order is important since the composite image is built by combining each image layer
with its mask, blend mode, and opacity from bottom to top tree layer.
Difference Between Process History Image Layers & Combine Image & Mosaic Image Layers
- Process History layers
are a simple and direct way to apply a smoothing, sharpening, stretch, deconvolution, or
color adjustment filter with optional blend, opacity, and mask to the same image. For example, smooth the background with an inverse luminance mask then sharpen the highlights using a luminance mask or
adjusting color with a selective color mask.
- Combine Image & Mosaic layers are used to build a single composite image by layering different images using blend modes, opacity, and masks. For example, blending a long exposure of the faint outer area of M42
with a short exposure of just the bright core of M42. LRGB luminance layering would be another example.
- Combine Image & Mask tool image layers and their masks can be directly modified using Process History stretch, smoothing, sharpening, deconvolution, color adjustment, and mask tools.
- Process History layers and Combine Image & Mosaic layers both use the same blending modes, opacity,
and masks.
Combine Image & Mosaic Layer Rules
- The composite image can be built using a mix of color and monochrome images of different size.
- A mask assigned to an image layer must be a grayscale image with the same width and heigth as the image layer.
- Each image layer and mask can have its own unique Process History layer processing.
- The add, average, median, min, and max combination options do not use blend modes, opacity, and mask to stack the selected images. The image layer is added to the top of the tree. The mosaic example below uses maximum combination to build two images.
- Only the Blend, Opacity, and Mask combination option on the Combine Image & Mosaic tool has layers, blend, opacity, and masks enabled.
- Add an Image Layer - Check the Add Image box then left click on the image.
- Change Image Layer Order - Select the image layer in the tree then use the Up, Down, Bottom, and Top buttons of the Source Image Stack Order group of Combine Image & Mosaic.
- Assign Blend Mode & Opacity to an Image Layer - Select the image layer in the tree then use the Blend Mode and Opacity controls on the Combine Image & Mask tool.
- Assign a Mask to an Image Layer - Select the image layer in the tree then check the Add Mask box. Left-click on a grayscale single channel image to assign it as a mask.
- Delete an Image Layer or Mask - Select the image layer in the tree then use the Delete Image or Delete Mask button.
- Shift the Position of an Image Layer in the Composite Image - Select the image layer in the layer tree then right click and drag a point on the composite image or use the controls of the Source Image (X,Y) group.
- Manage Composite, Image Layer, & Mask Window Display - First use the Open Images | Stack main menu option to place the composite image, image layers, and mask windows on top of each other in the upper right corner of your computer screen.
Use the Display : Combination, Image, Mask, or Minimize All buttons to display a particular window and make it the active window for modification.
- Modify an Image Layer or its Mask - Select the image layer in the tree then use the Display : Image or Mask button to make the image the current active image. Open the Process History window and modify the image.
- Update the Composite Image - After a change is made to an image layer, mask, or image layer order use the Apply button on the Combine Image & Mosaic tool to rebuild the composite image.
- Release Or Finish the Composite Image - Use the Flatten button on Combine Image & Mosaic.
Combine Image & Mosaic Layer Examples
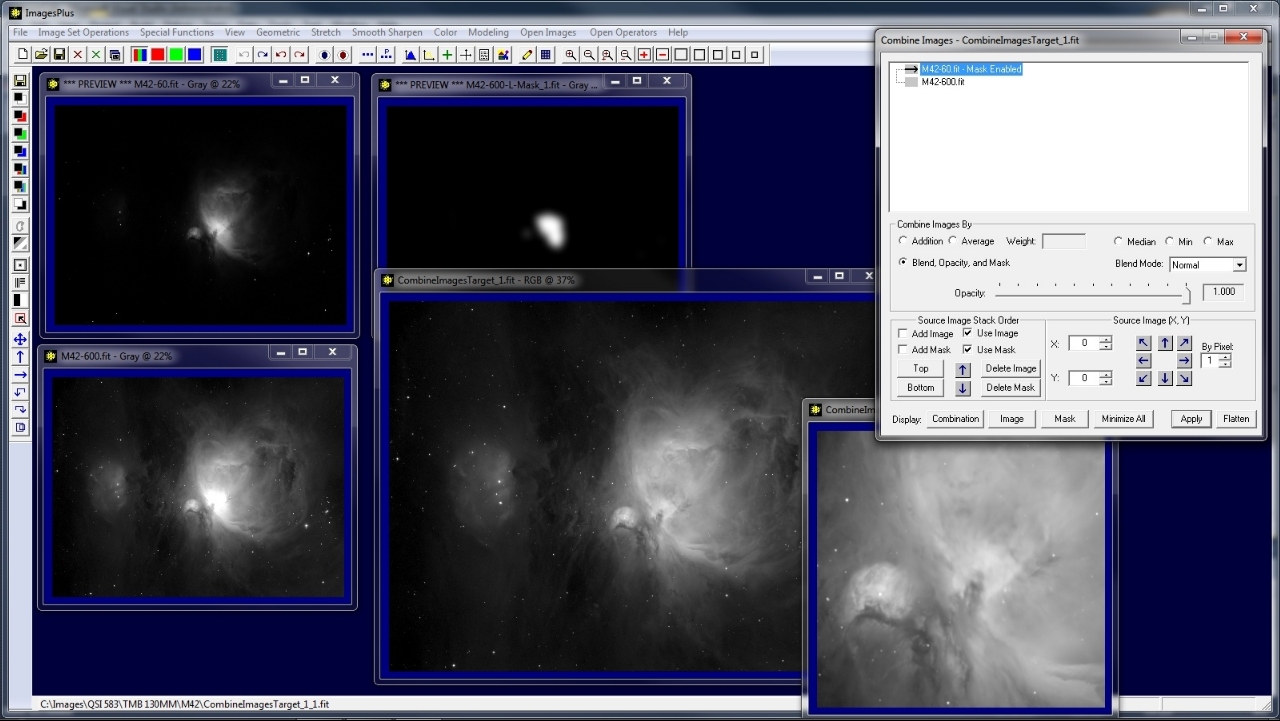
M42 Composite Image. Long 600 second exposure is used for the bottom layer. Short 60 second exposure with smoothed threshold mask used as top layer.
First the long exposure is brightened with HDR arcsin or digital development to show the faint outer area. The short exposure is brightened with arcsin or digital development so that its core will fill the overexposed core of the long exposure with detail.
After each modification to the image layers or mask the composite is rebuilt by pressing the Apply button on the Combine Image & Mosaic tool.
 |
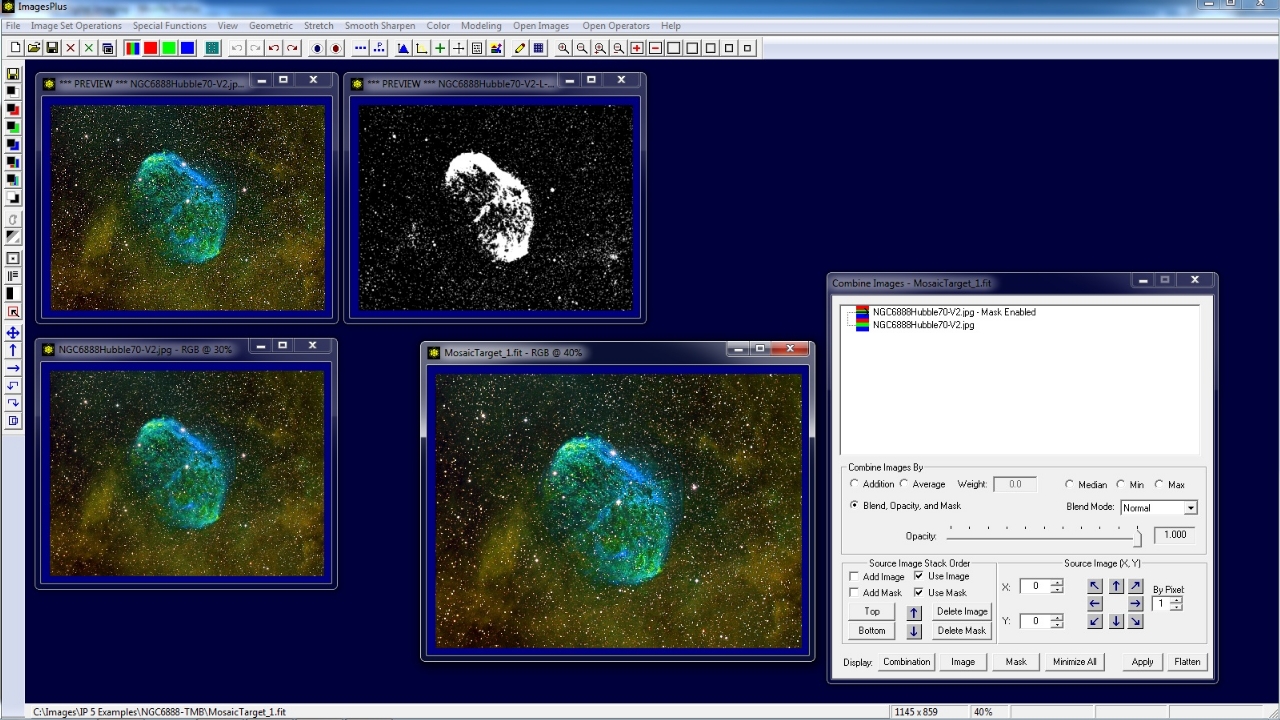
Apply a Filter With Mask. Initial image is set as the bottom layer. Duplicate of the initial image is set as the top layer. Smoothed threshold luminance mask is assigned to the top layer.
Top image layer is sharpened. Composite image at lower center. All stretch, smoothing, sharpening, deconvolution, and color adjustment filters with optional blend mode, opacity, and mask can be applied in this way.
 |
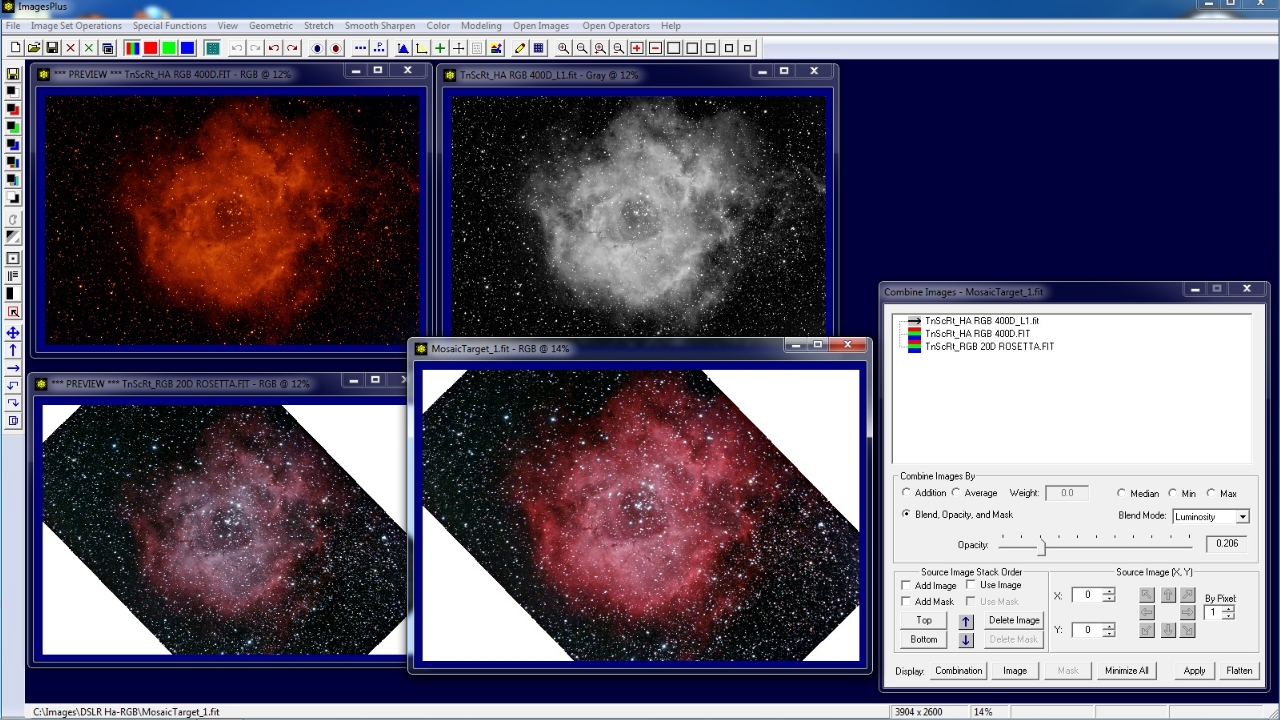
Blend H-alpha to Increase Detail and Preserve Color.First a Canon 20Da color image of the Rosette is aligned with a modified canon 400D H-alpha image of the Rosette using the Image Set Operations | Align TSR on Each option.
The aligned 20Da image is assigned to the bottom layer with add blend mode to add its RGB color to the composite. The aligned 400D H-alpha image is assigned to the second image layer with lighten (max) blend mode to blend H-alpha with the red data of the 20Da image layer below.
Both the 20Da RGB color image and 400D H-apha image are brightened using digital development and the composite rebuilt and checked. A luminace image is split from the 400D H-alpha image and assigned as the top layer with luminosity blend mode. The opacity of the top luminosity layer is adjusted to further blend the RGB and H-alpha data.
A similar setup will blend an H-alpha frame with the red frame and luminace frame of an LRGB image set from a CCD.
 |
Luminance Layering. Luminance layer on top with blend mode set to luminosity. Blue, green, and red layers have blend mode set to add. Composite image shown lower center has red, green, and blue added from the color components then the top layer is used as luminosity.
 |
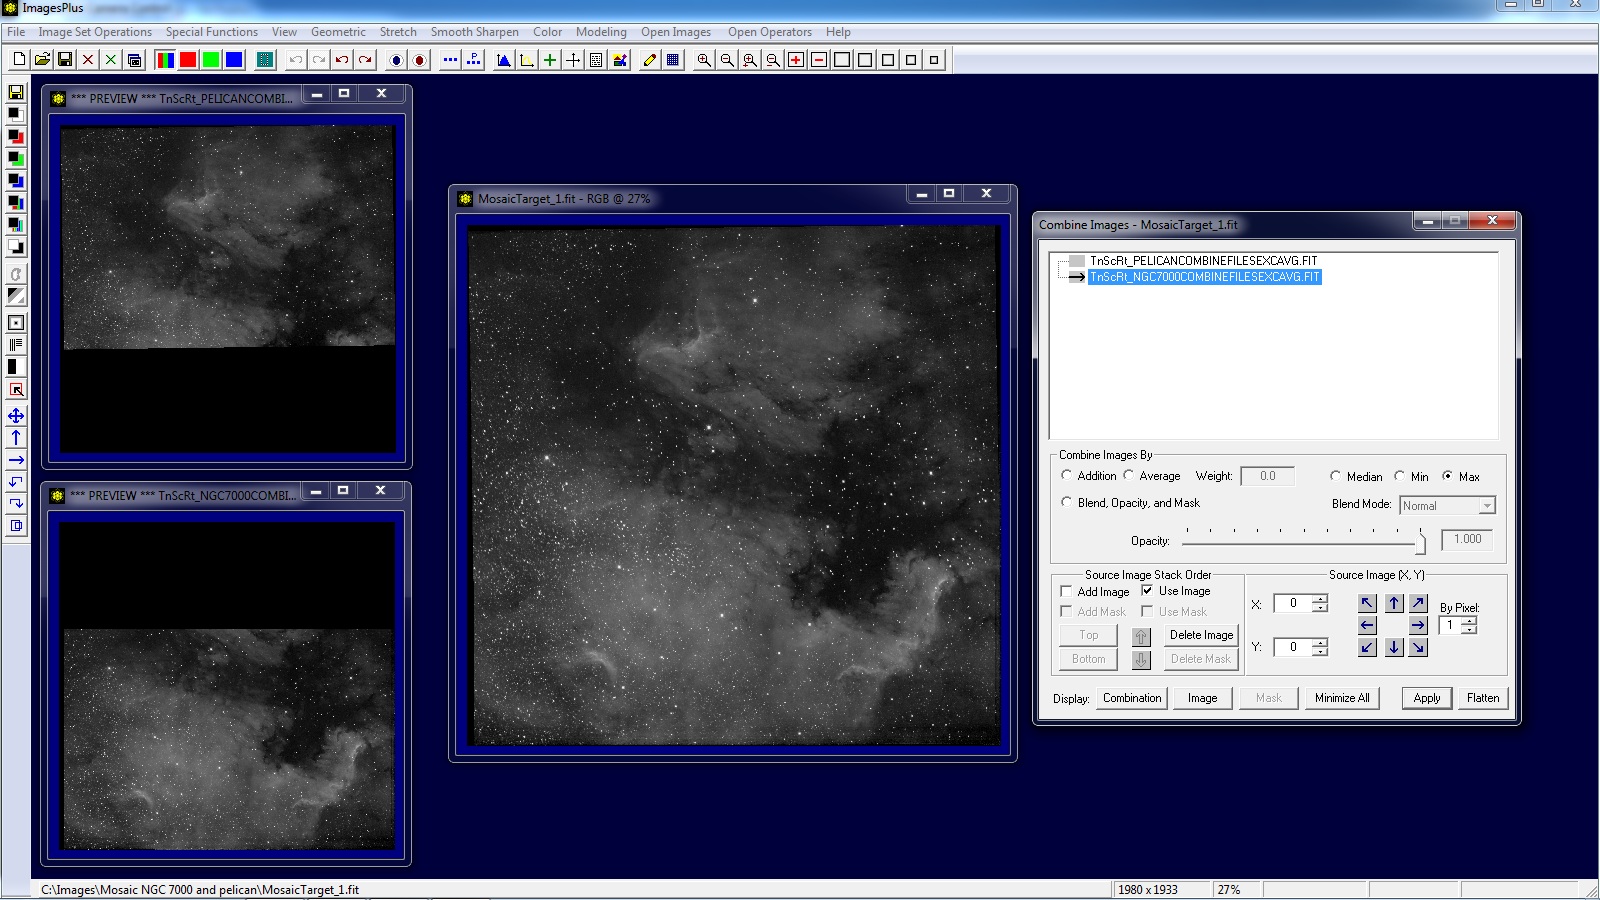
Building a Mosaic. First a two hour H-alpha exposure of NGC 7000 is aligned with a two hour H-alpha exposure of the Pelican nebula using the Image Set Operations | Align TSR tool with 3 star mosaic option.
NGC 7000 is assigned to the bottom image layer and the Pelican Nebula is assigned to the top layer. Each layer is then brightened using digital development. The Pelican Nebula is brightened a little more than NGC 7000 to get it to match.
Maximum combination is used on the Combine Image & Mosaic tool to build the composite image.
 |
Copyright © 2012 MLUnsold Digital Imaging. All Rights Reserved.