C013-M33 Complete ImagesPlus 5.0 Processing Example
A complete work flow for processing C013-M33 RGB data is shown below.
- Process Luminance Image
- Process RGB Image
- Layer Luminance Image On RGB Image
- Refine Layered RGB Combination Image
- Increase Color Saturation Using Layers
- Crop Final Image For DIsplay
Each step uses normal blend mode and 100% opacity unless otherwise noted. Many steps are explained in detail by links to additional tutorials. See ImagesPlus 5.0 Processing Tutorials for a list of all tutorials by function.
Step 1) Process Luminance Image
Initial stacked but otherwise unprocessed color RGB image from a DSLR or one shot color CCD camera. Start 3 screens below at digital development if you have a luminance component from a monochrome CCD.
 |
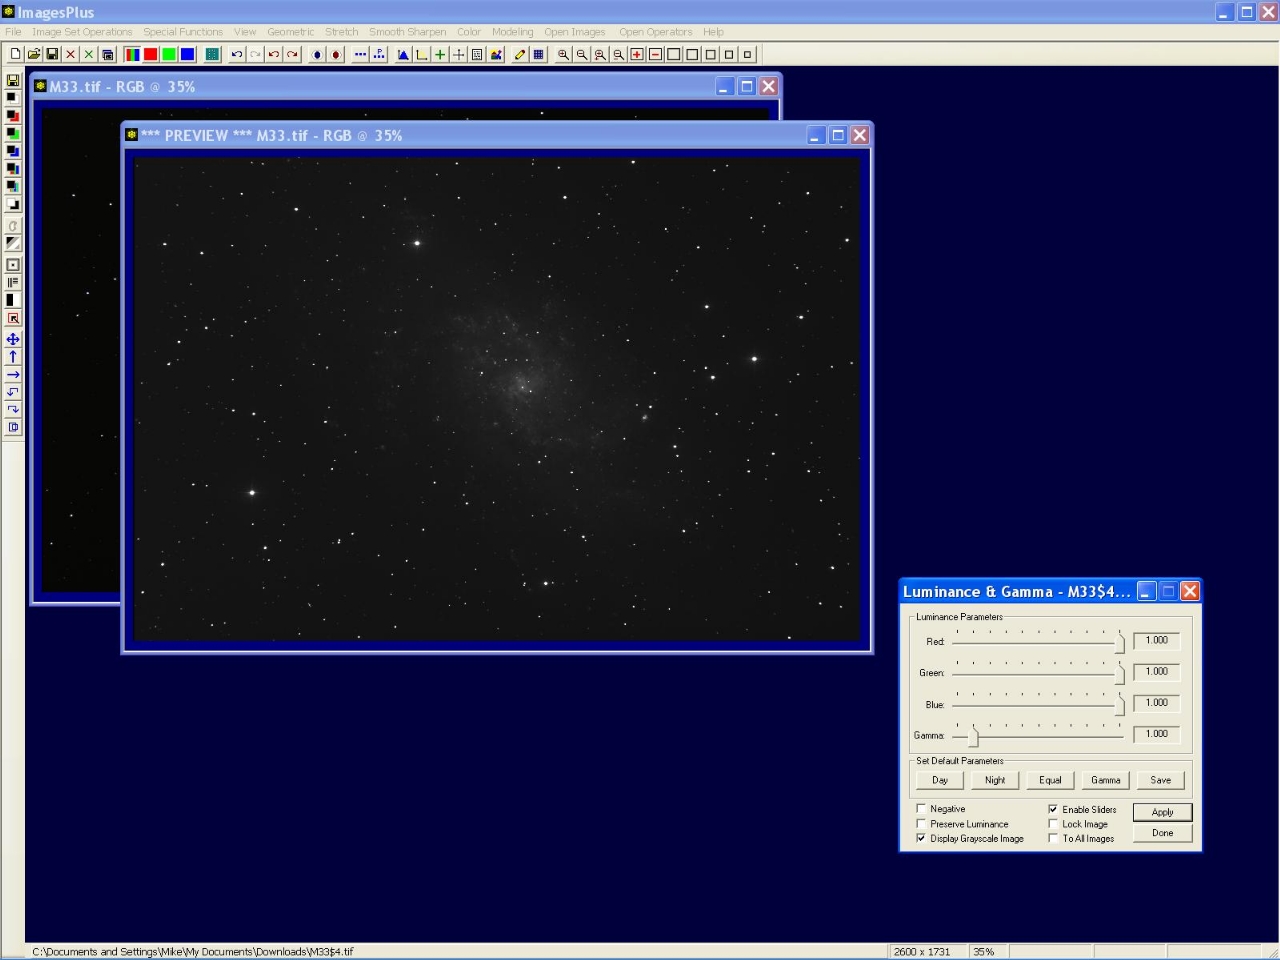
Color | Luminance and Gamma is applied to the initial satcked RGB image to create a custom luminance image. Uncheck the Preserve Luminance box then move the red, green, and blue sliders to 1.0 so that the luminance image is the sum of the three colors.
 |
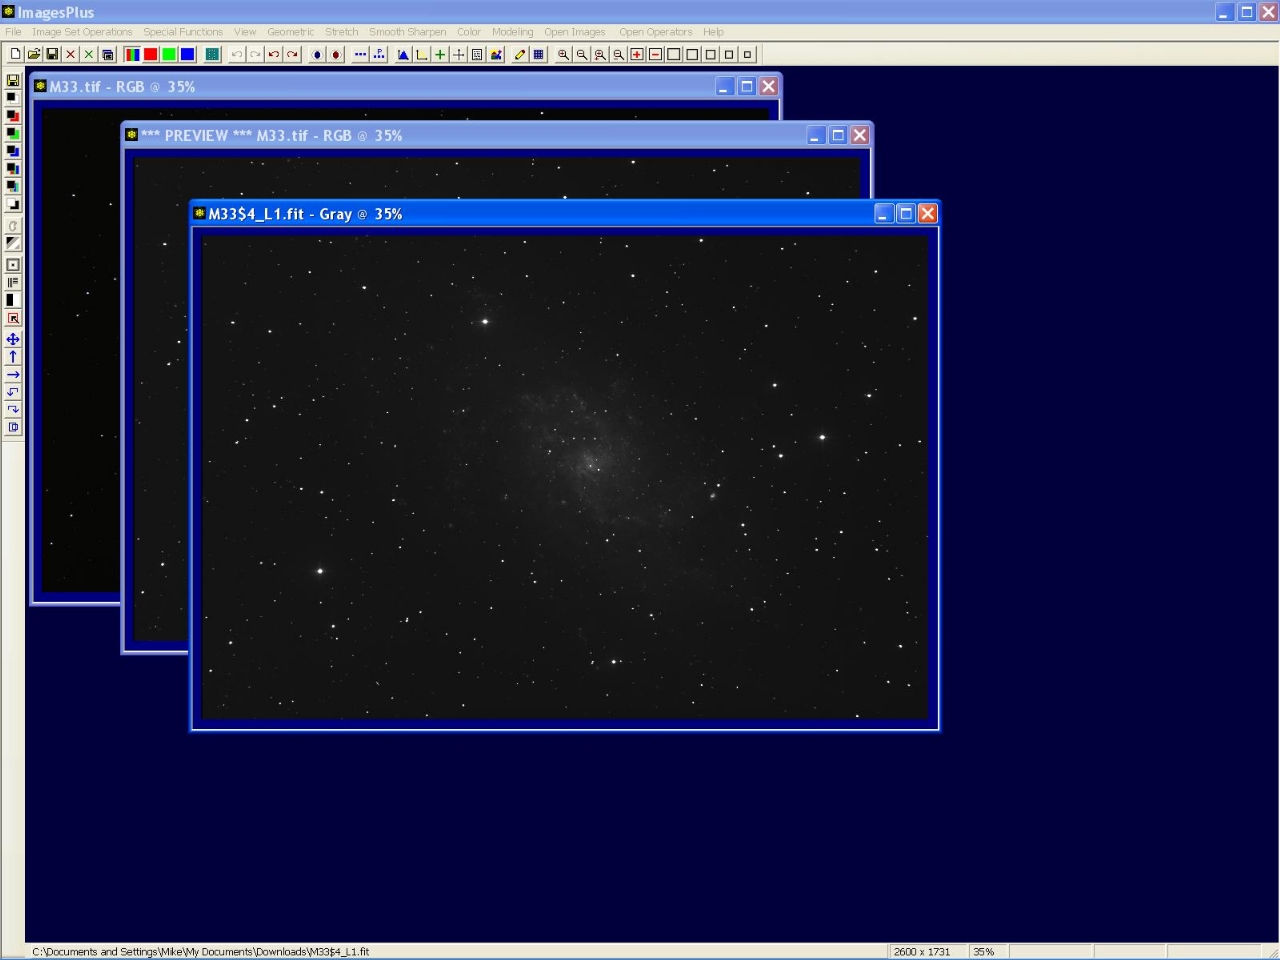
Color | Split Luminance is applied to the custom RGB grayscale image to create a single channel grayscale image with Gary in its top window caption bar. Close the grayscale RGB image.
 |
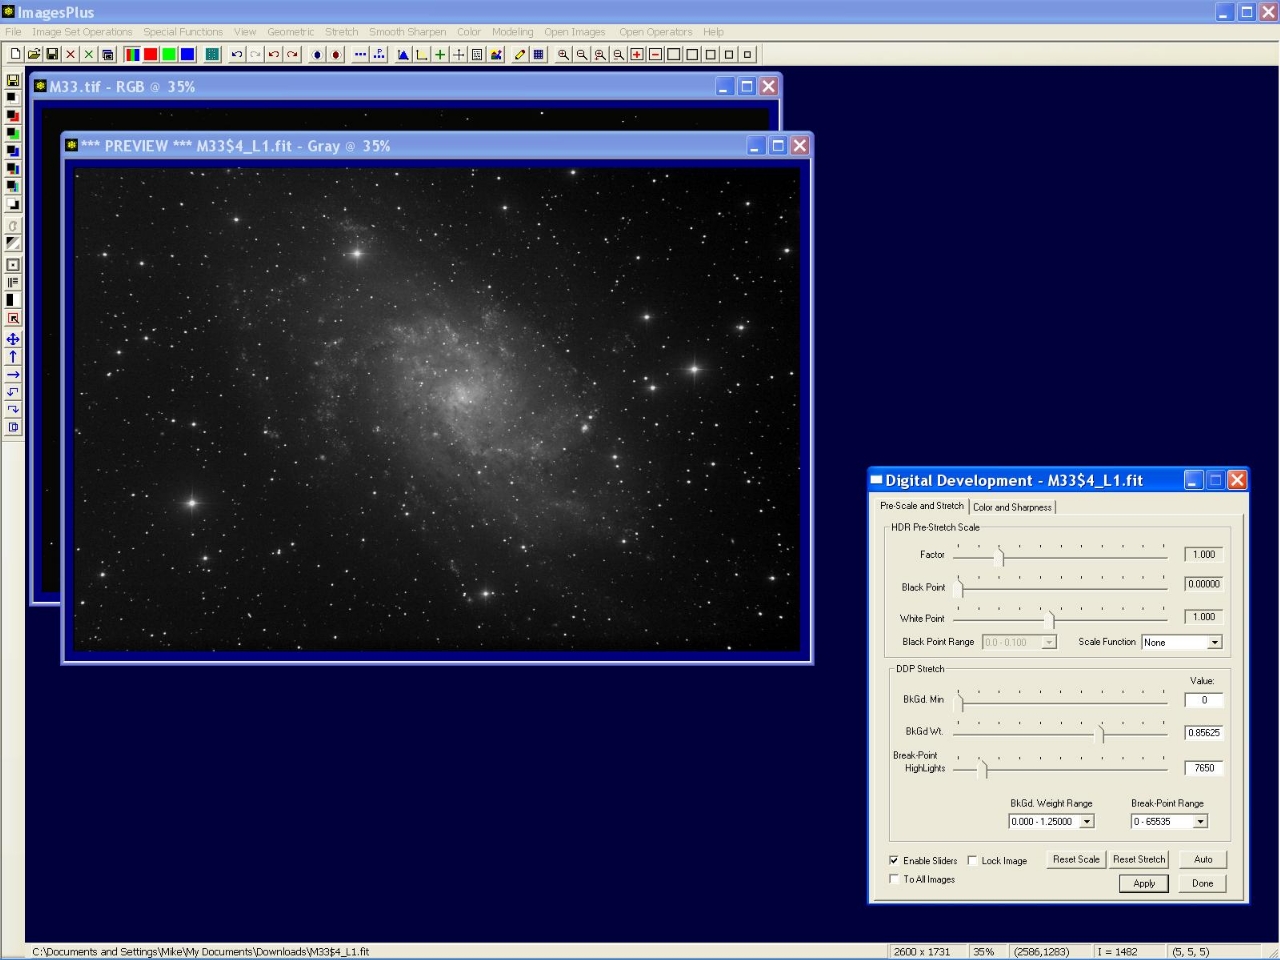
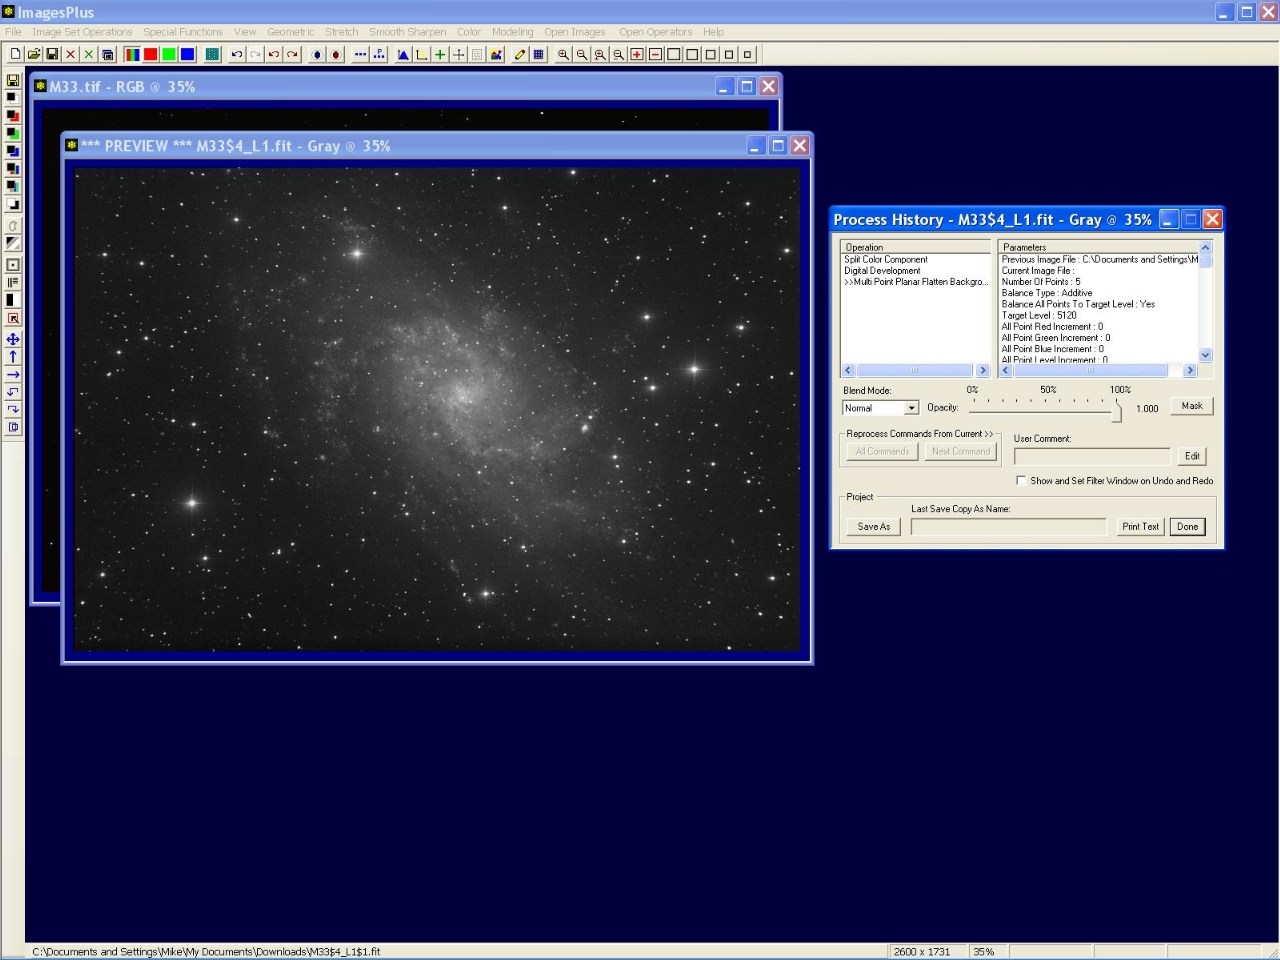
Stretch | Digital Development is used for the initial brightness increase. First the Break-Point Highlight slider is moved to the left to increase brightness. Next the Background Weight slider is moved to the left so that the background is dark gray and not black. The HDR pre-stretch scale function can be set to nth Root and the Root slider moved to the left to increase brightness of the faint areas without increasing brightness of the lighter areas of the image.
For details on using Digital Development see Initial Digital Development Stretch.
Other functions could be used to stretch the luminance image. For example,
 |
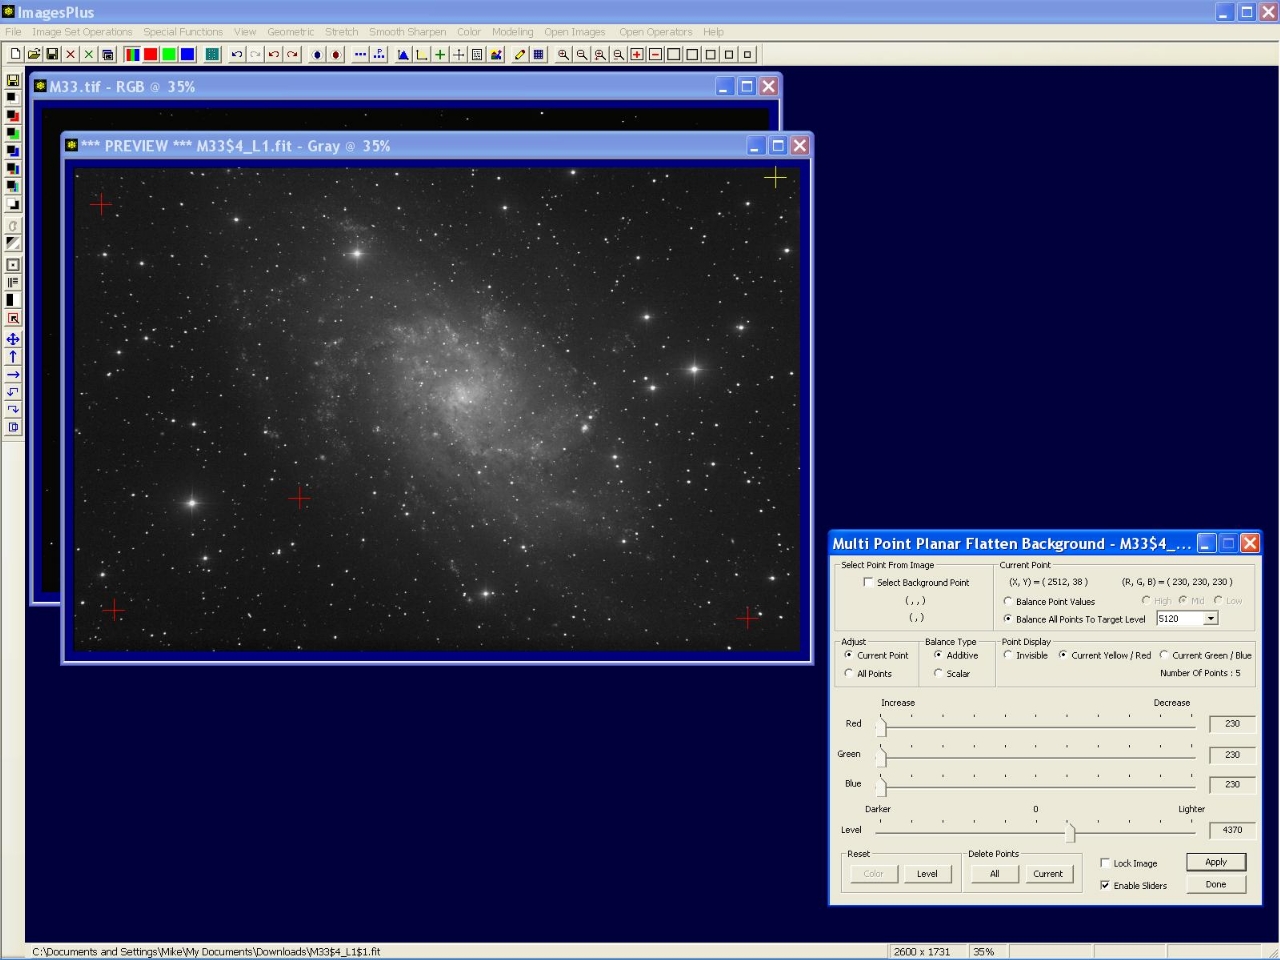
Special Functions | Multi-Point Flatten Background is used to flatten the background level and set it to dark gray. See Multiple Point Background Color Balance & Flatten Tool
for a tutorial. The dark top and lower right corners of the image will be made brighter in the next two steps.
 |
Left-click on the lower right control point marked by + to select then move the Level slider to the right to brighten the corner.
 |
Left-click on the top right control point marked by + to select then move the Level slider to the right to brighten the corner.
 |
Processed luminance image with processing steps shown by the Process History window.
 |
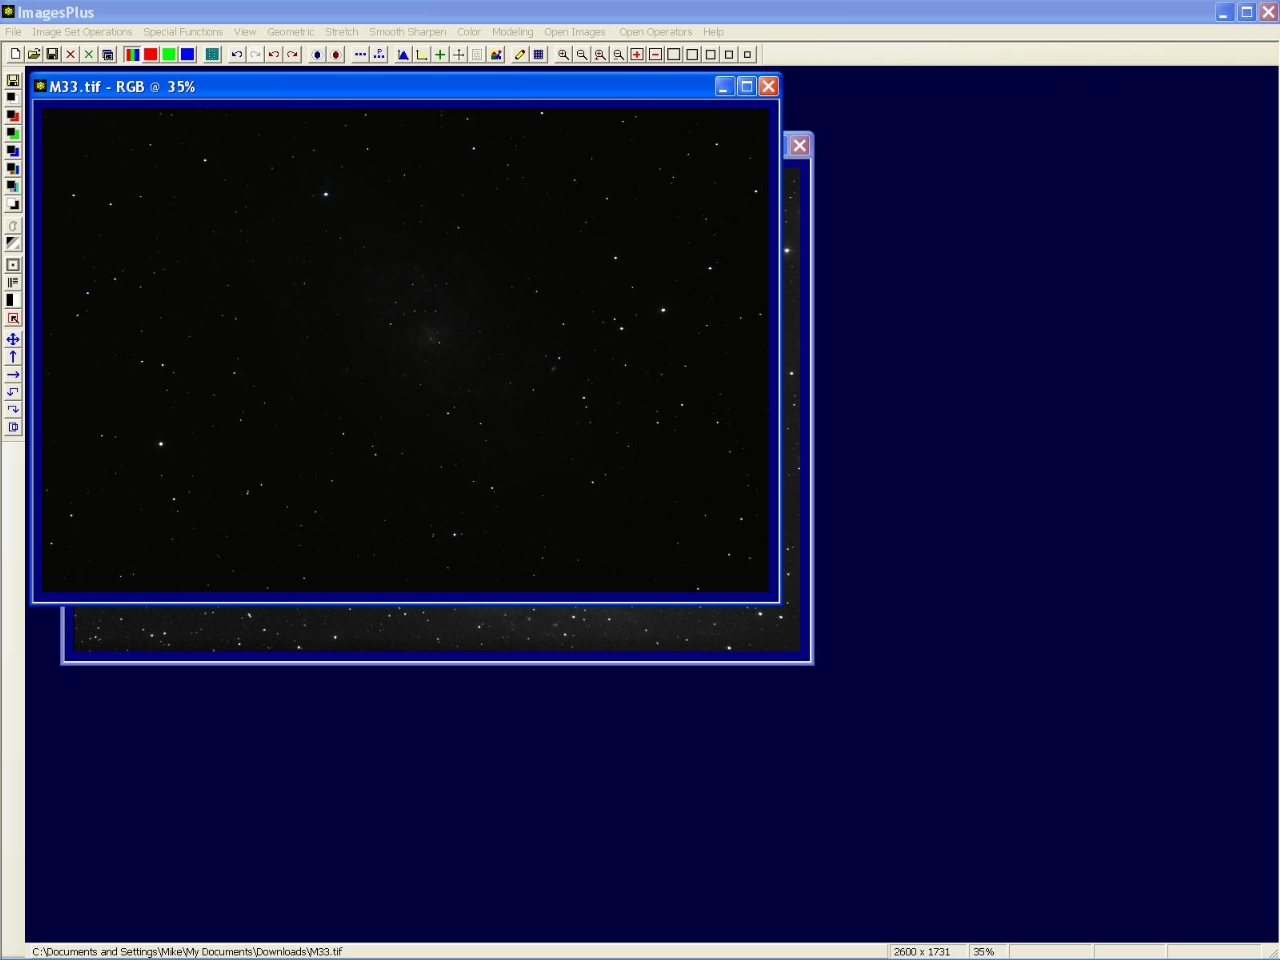
Step 2) Process RGB Image
Initial stacked but otherwise unprocessed color RGB image.
 |
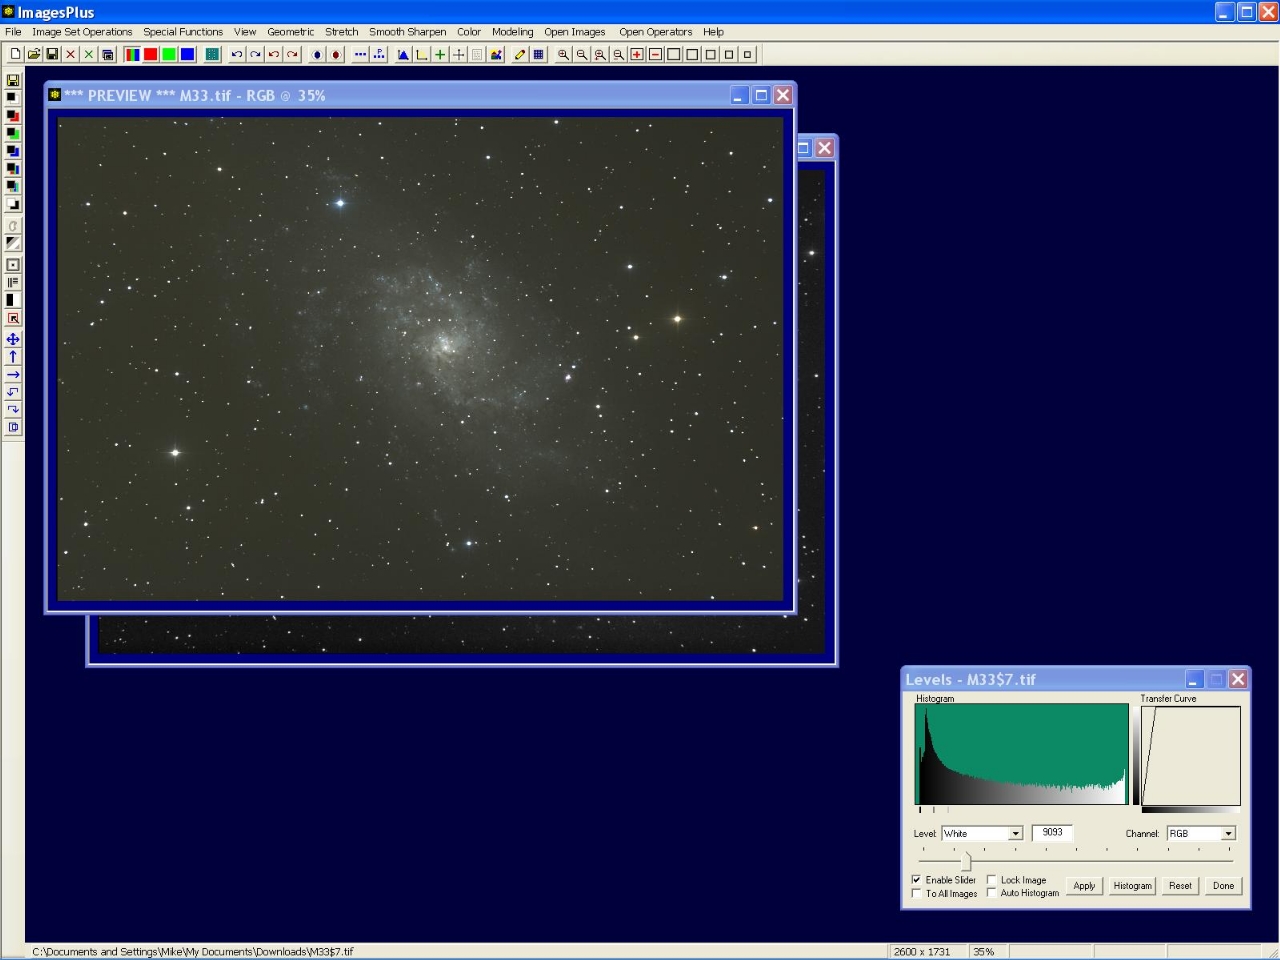
Stretch | Levels is used to set the white point near the right side of the spike in the histogram. The goal is to reveal color without compressing color.
 |
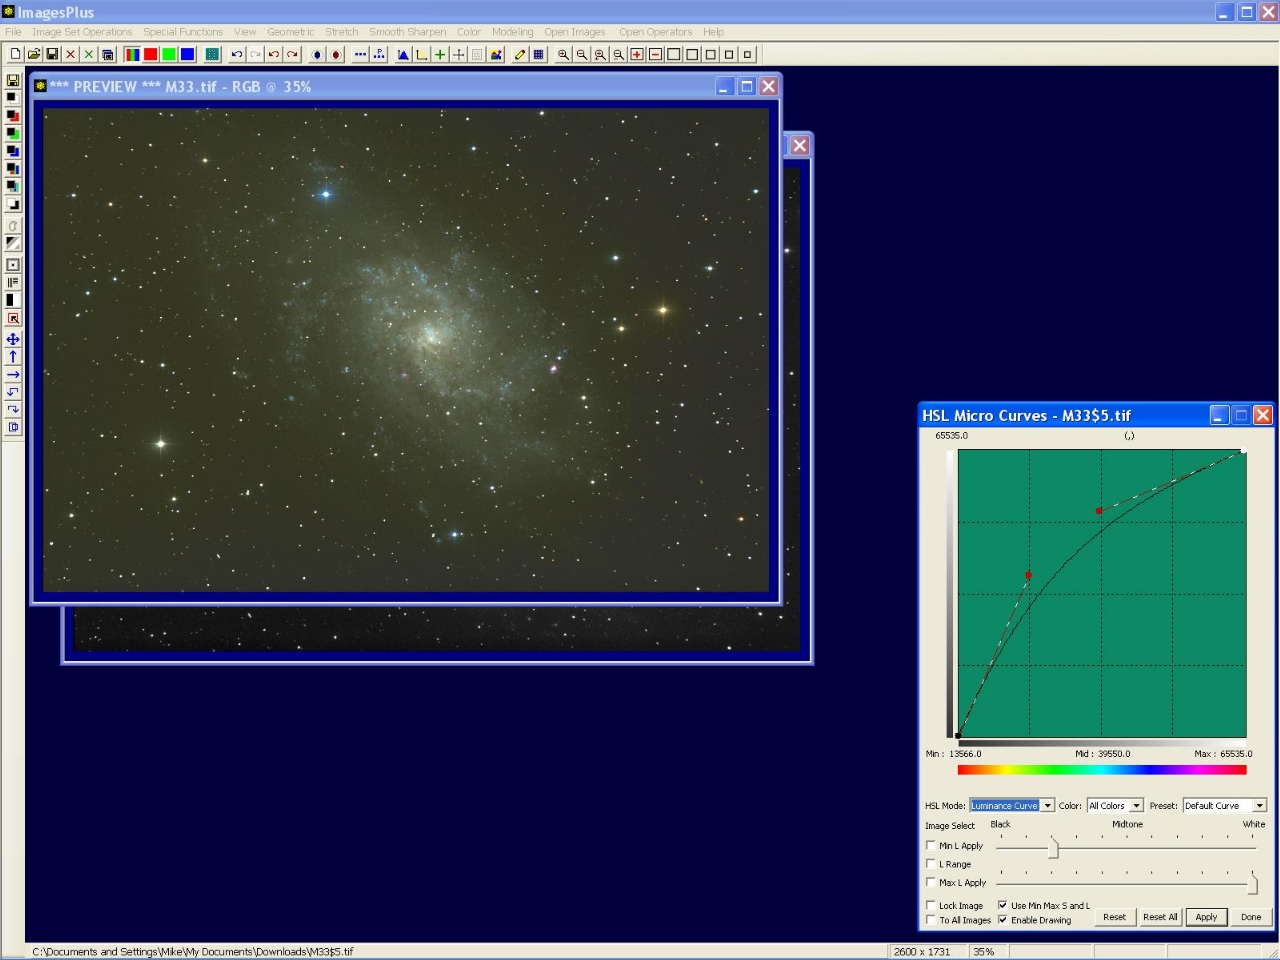
Increase saturation using Color | HSL Micro Curve with luminance curve adjustment as shown by the next step.
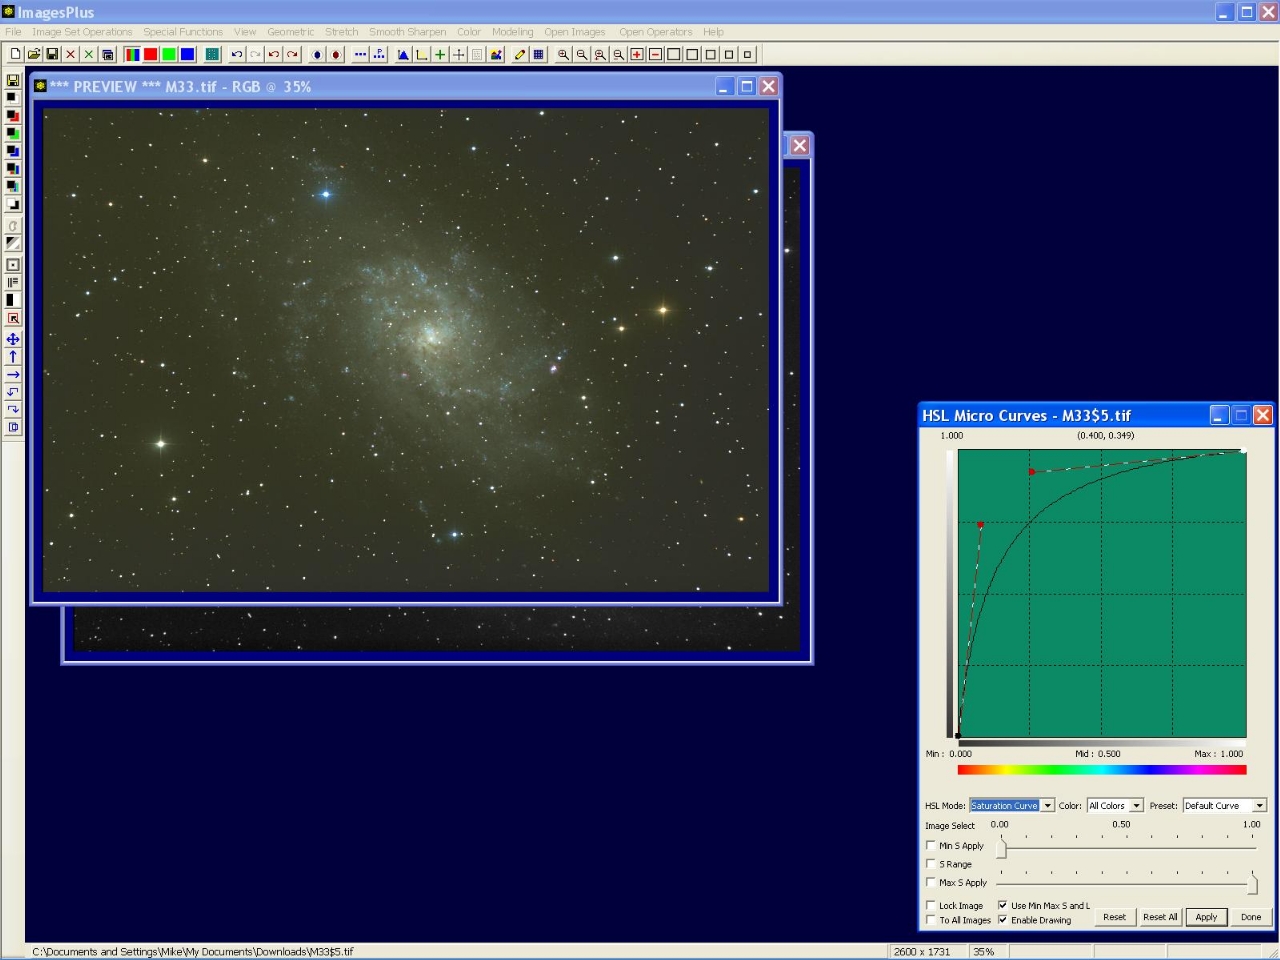 |
Mild luminance curve adjustment with HSL Micro Curve. Other color adjustment tools could be used. For example, a selective color mask could be used with feathered luminance range and micro curve to adjust a hue, saturation, and luminance range of the RGB image.
 |
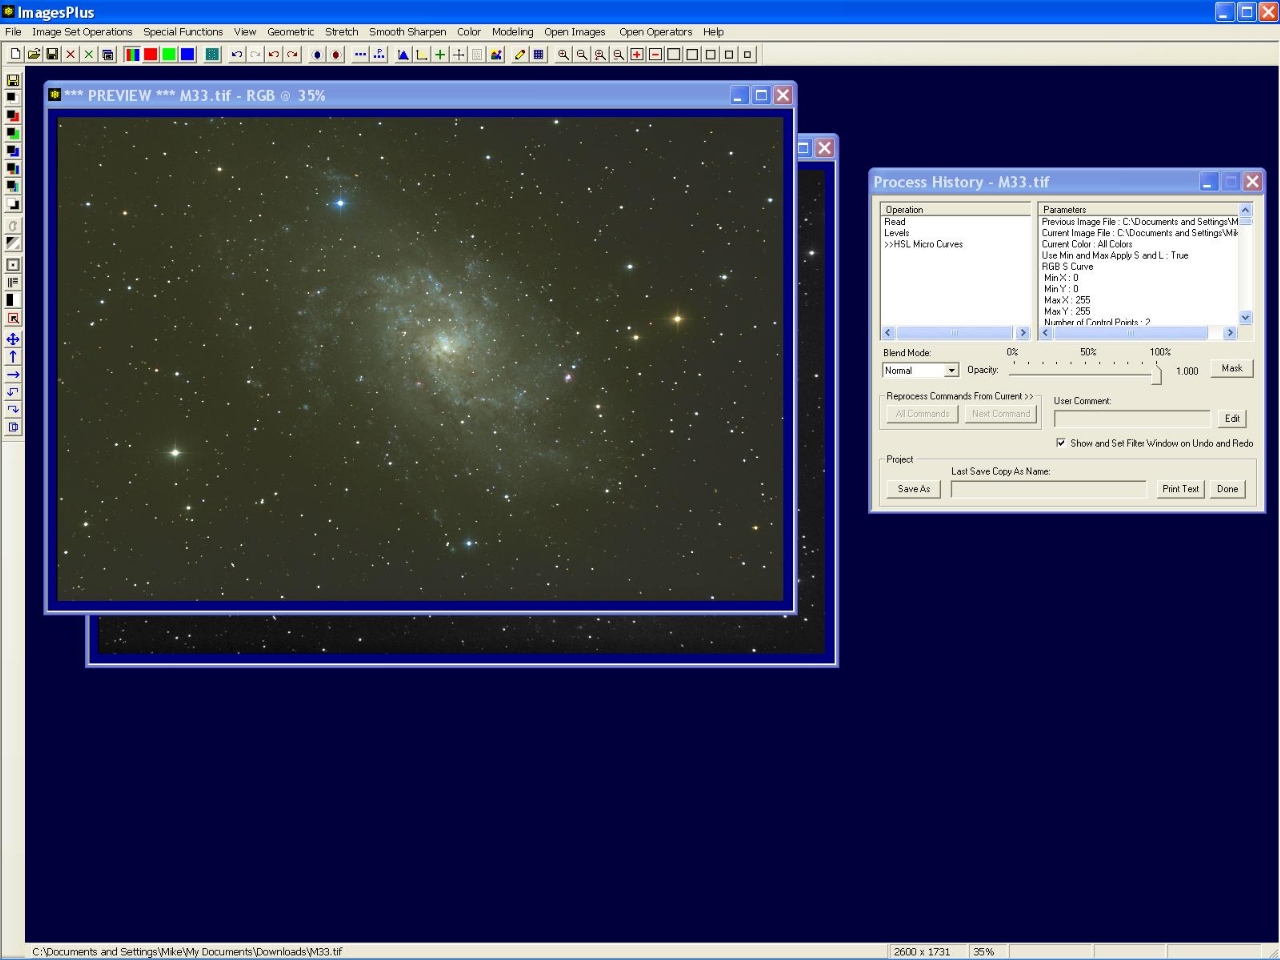
Processed RGB image with processing steps shown by the Process History window.
 |
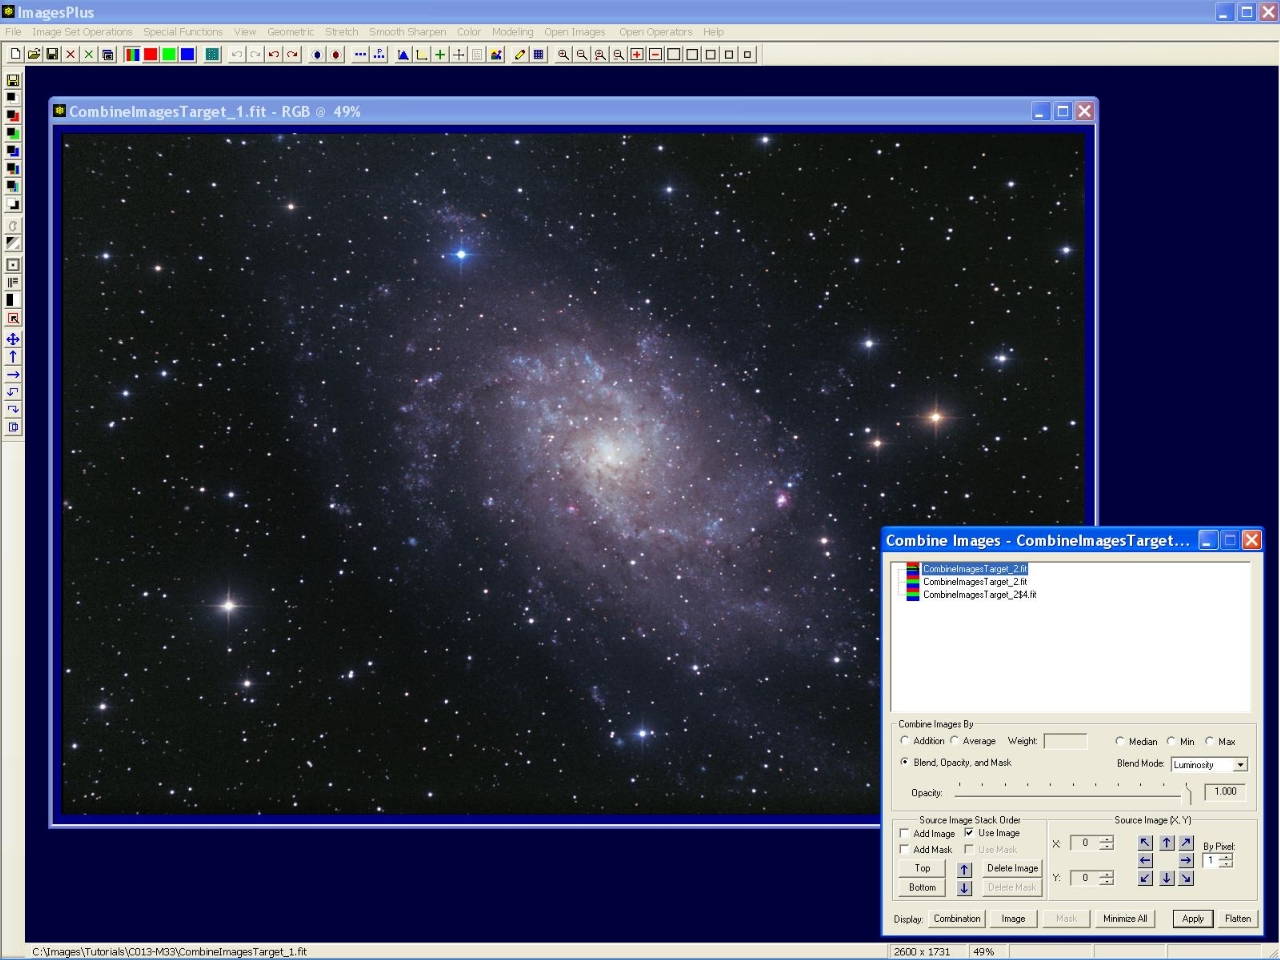
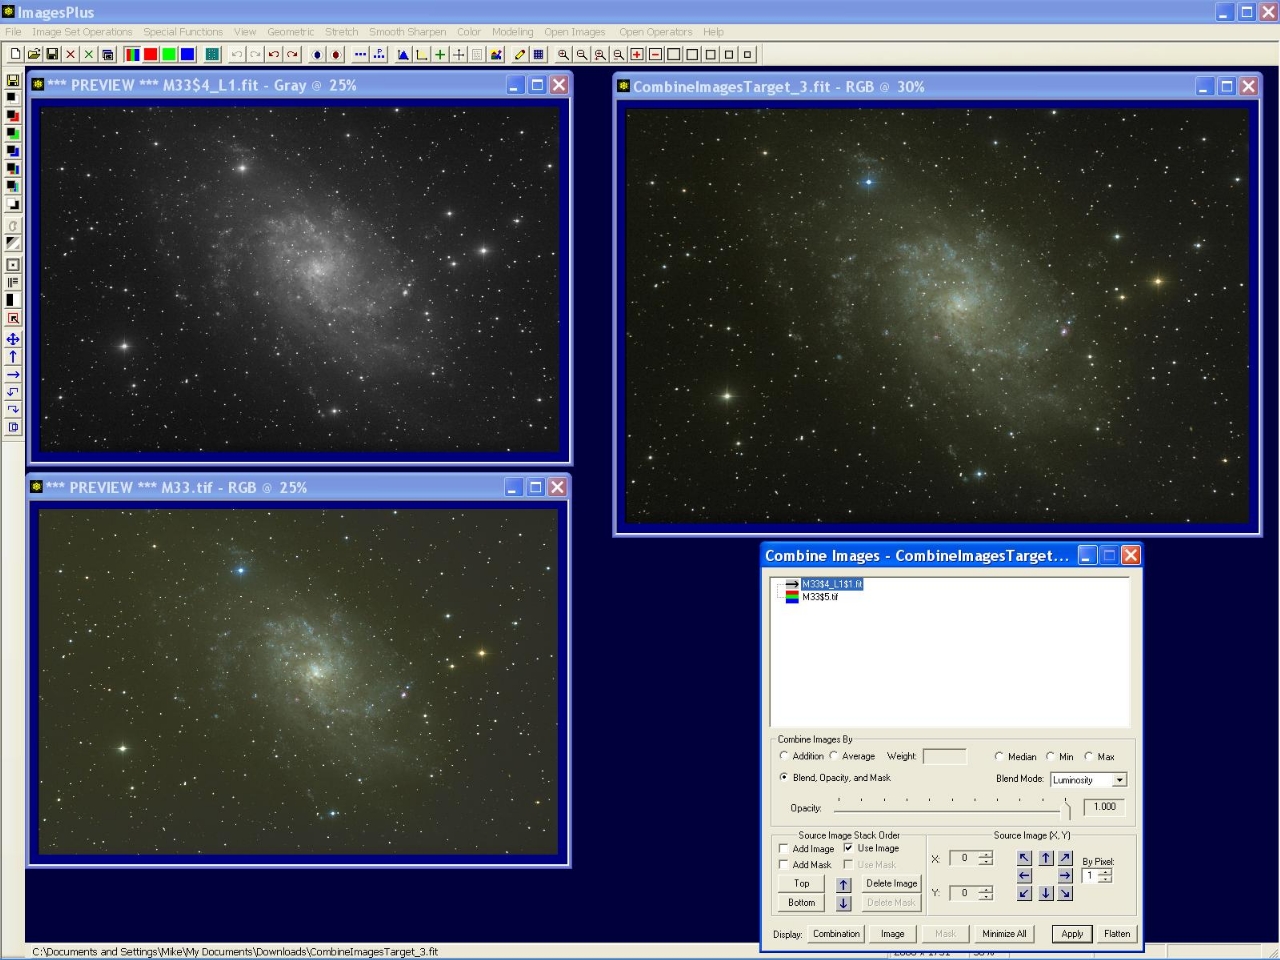
Step 3) Layer Luminance Image On RGB Image
Special Functions | Combine Images Using | Blend mode, Opacity and Mask layers the luminance image on top of the color RGB image. By default each image layer is added with normal blend mode and 100% opacity. If necessary use the up and down arrows on Combine Images to position the luminance image on top of the color image in the layer tree of Combine Images.
 |
Change the blend mode of the top luminance layer to luminosity. The combination image is now displayed with color from the bottom RGB image and luminance from the top grayscale image.
See Quick Guide to Combine Images & Mosaic Layers for examples and details on using layers with blend modes, opacity, and masks.
Tutorials on multiple luminance layering, combining H-alpha with color, and many other topics can be found at the main image process tutorial page.
 |
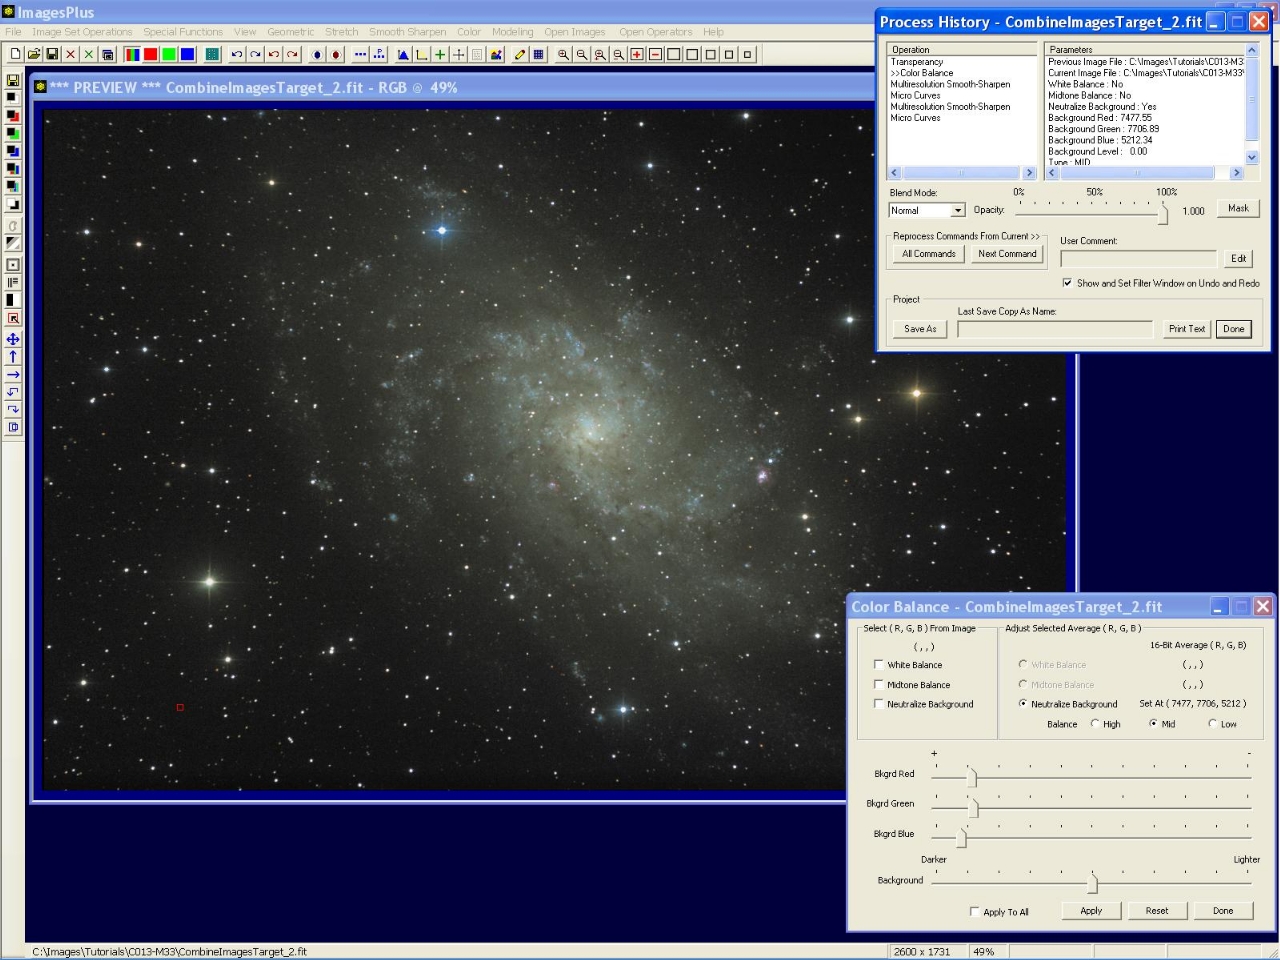
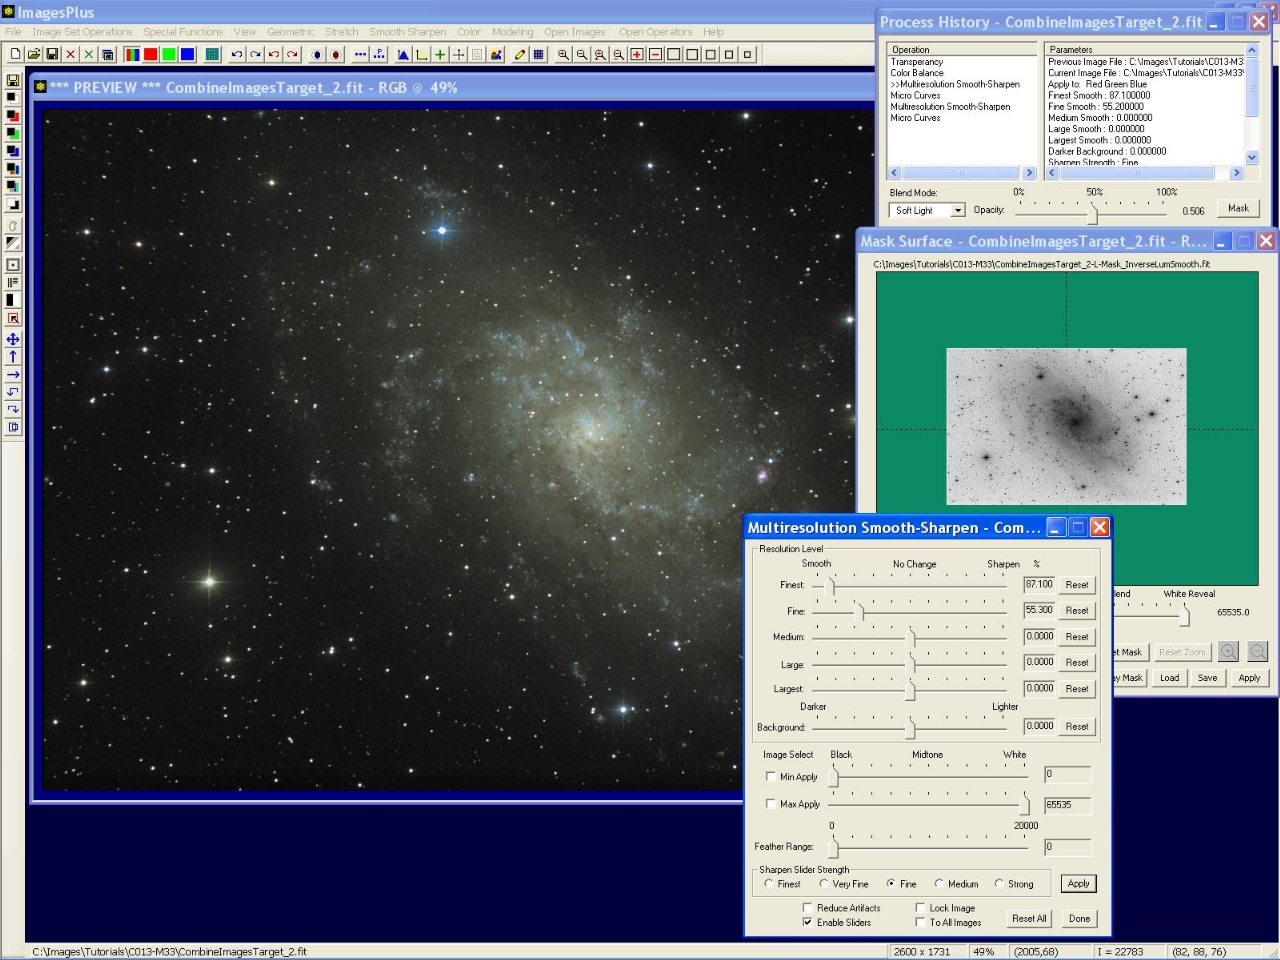
Step 4) Refine Layered RGB Combination Image
Press Flatten on Combine Images then close the processed lumiance and RGB images. The combination image is now shown ready for refinement.
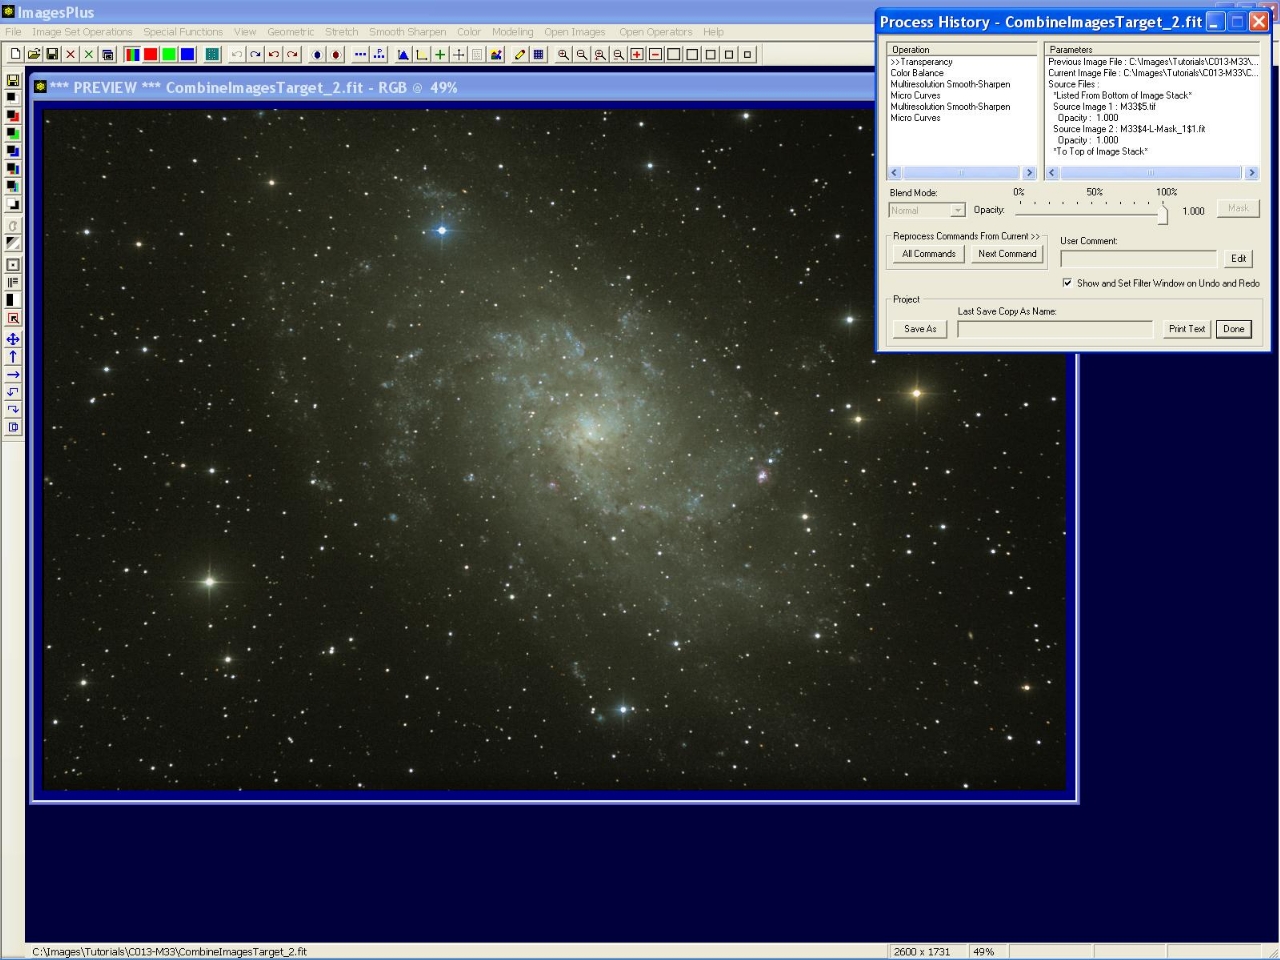 |
Mild contrast and brightness increase is appled to RGB with Micro Curves.
 |
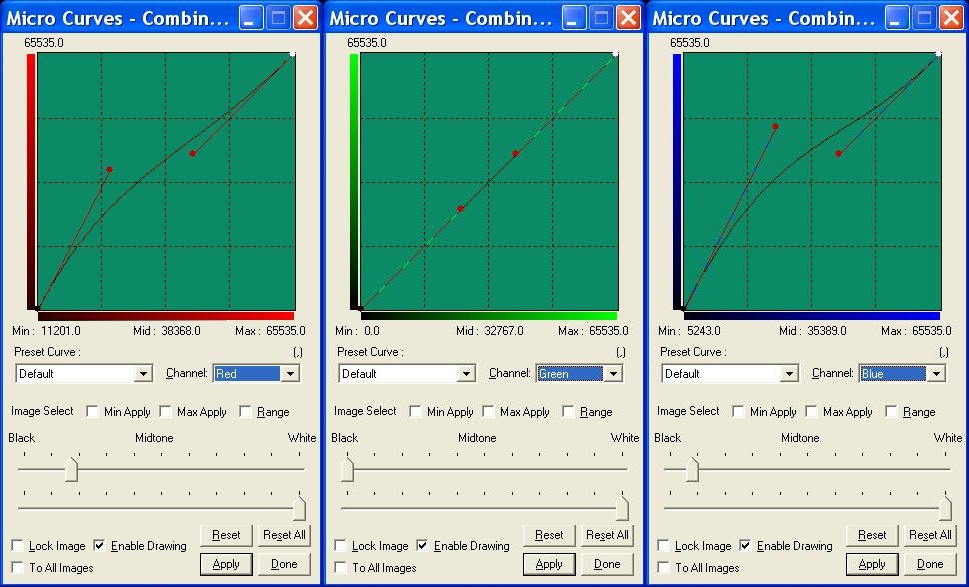
Mild increase of red and blue with no change to green using Micro Curves.
 |
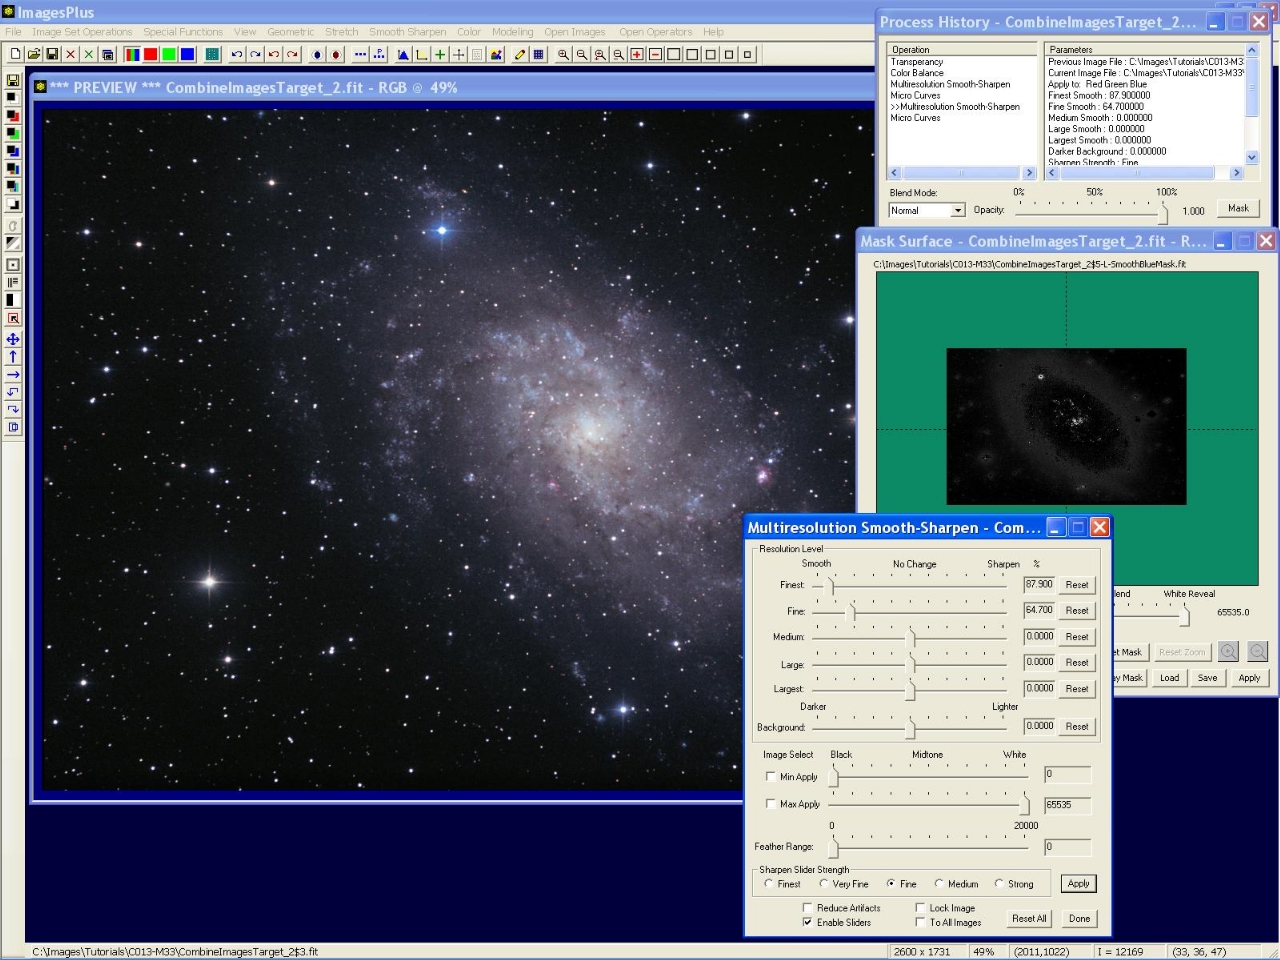
Blue areas of the image smoothed with a selective blue mask.
 |
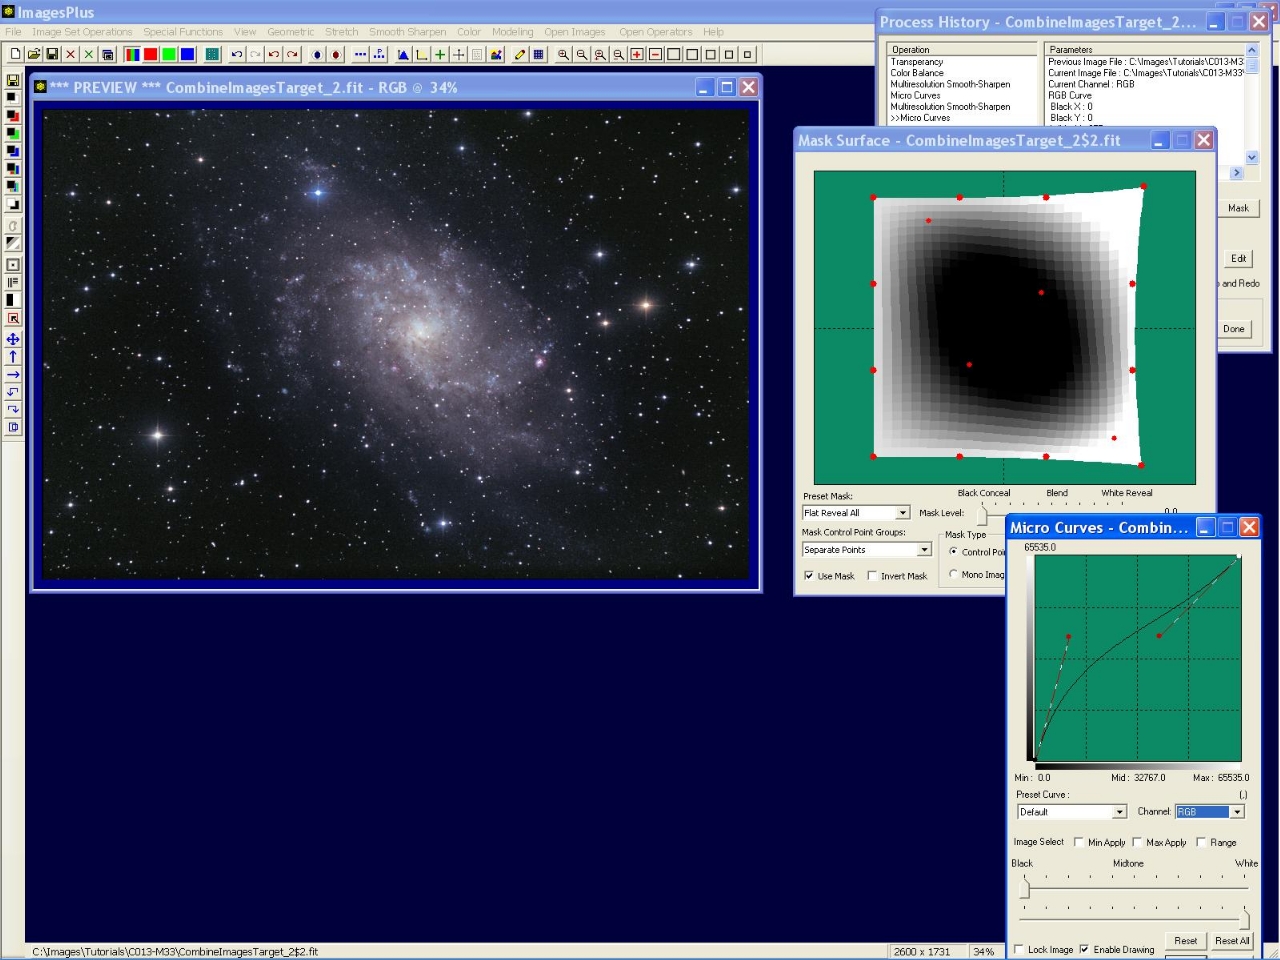
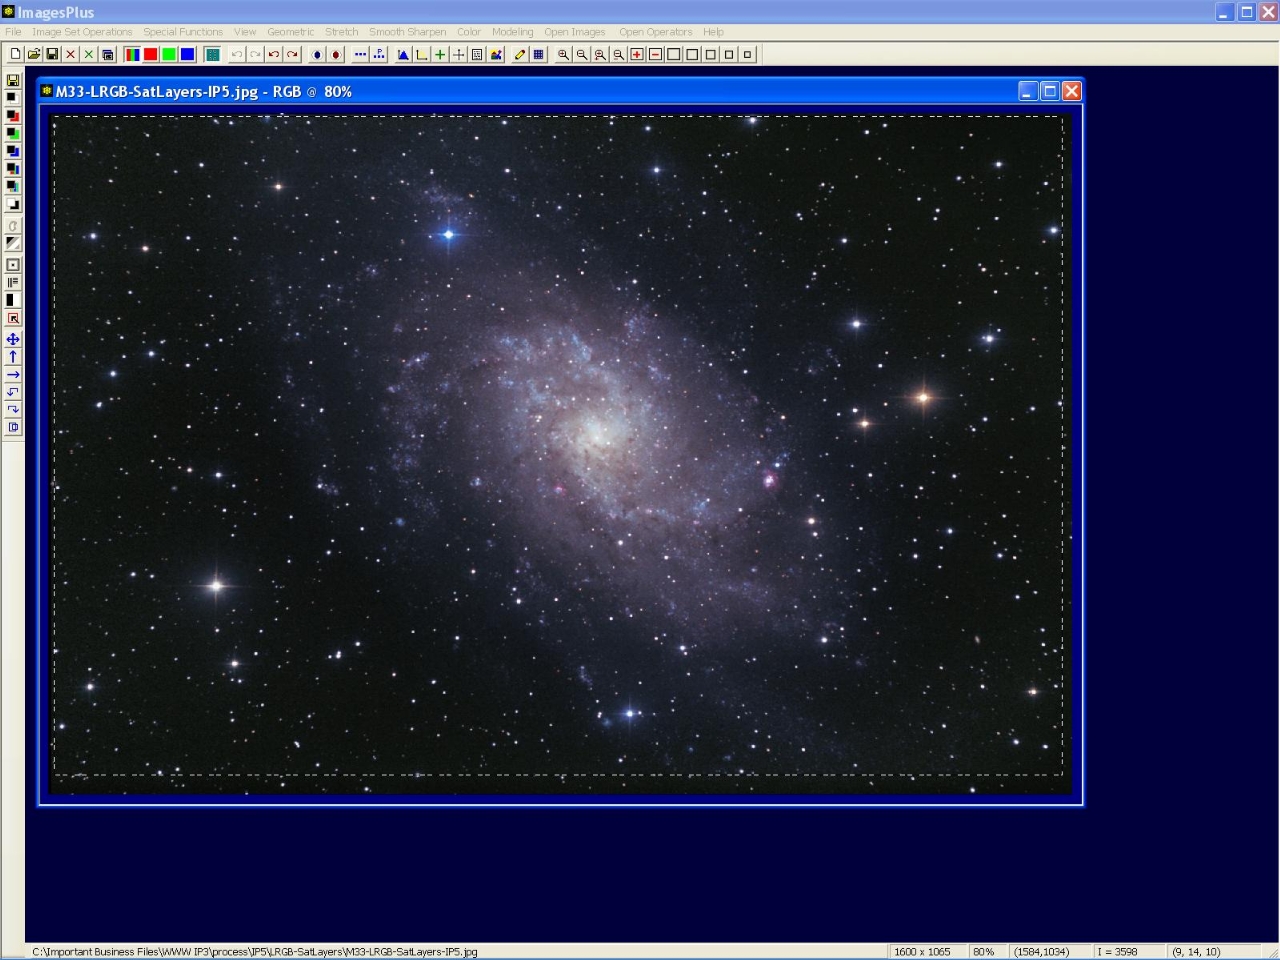
Step 5) Increase Color Saturation Using Layers
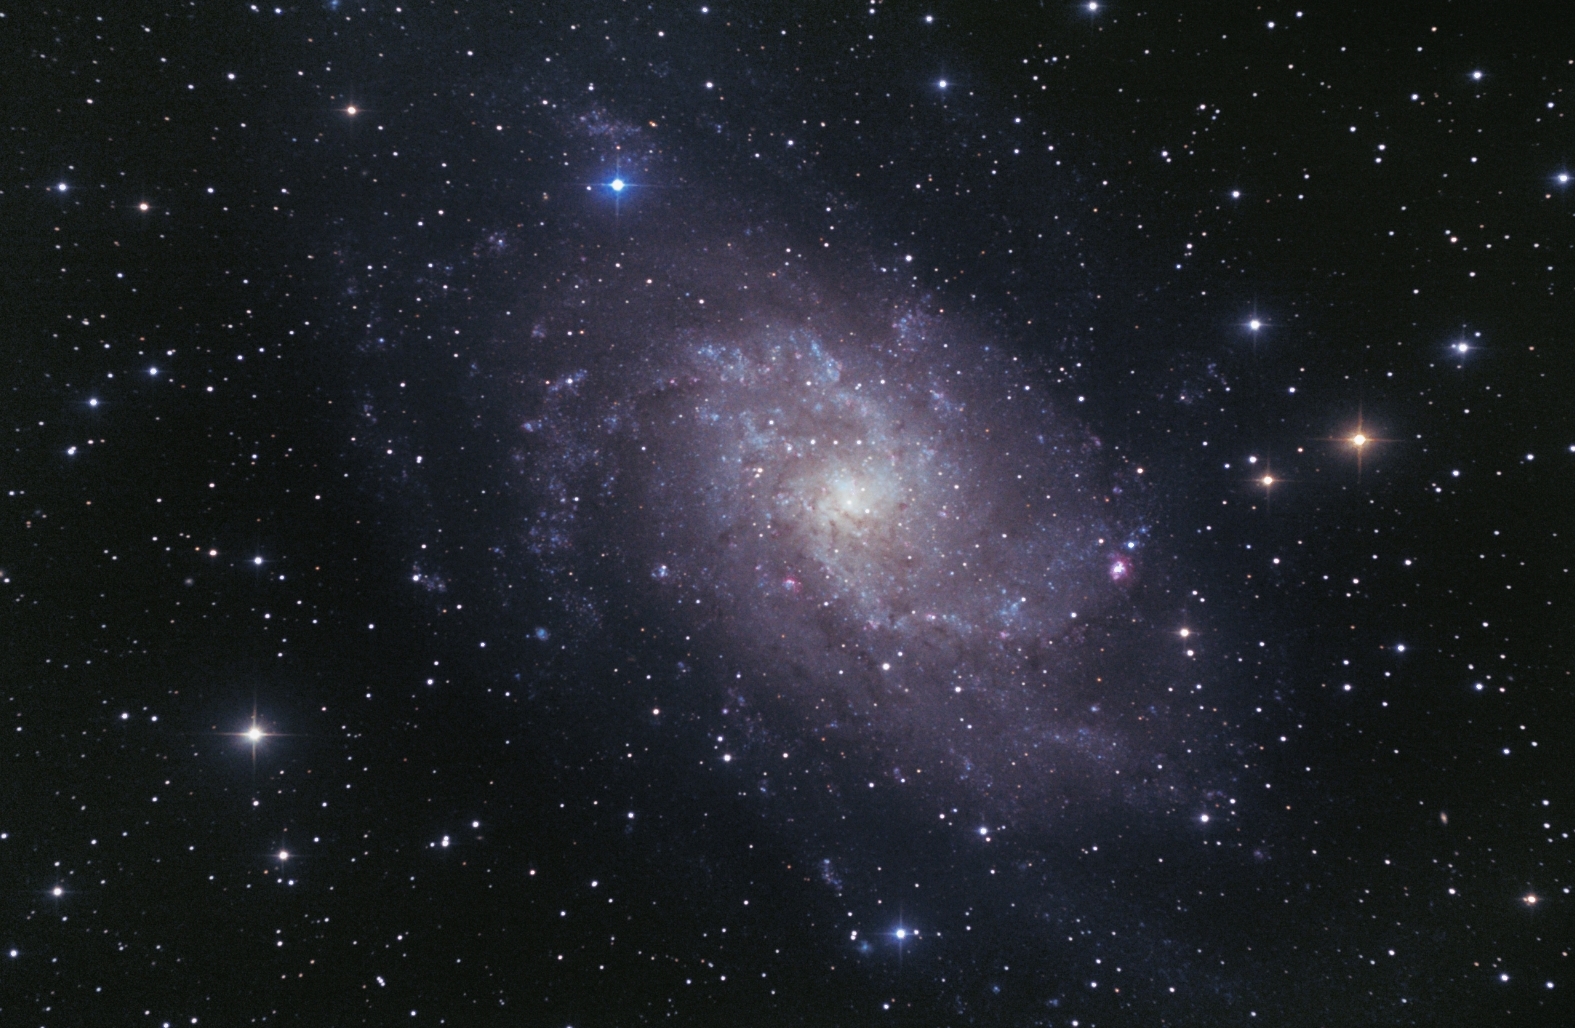
Step 6) Crop Final Image For DIsplay
Press the 'Copy A Portion of an Image' button on the top horizontal toolbar then left click and drag a rectangle on the image to define the cropped image position and size. Save the cropped image in JPEG format for display.
 |
Final cropped image of M33 taken with a DSLR.
 |
Copyright © 2012 MLUnsold Digital Imaging. All Rights Reserved.