- The Mix LRGB & Hue tool can be used to mix color from monochrome or color images. For example, red H-alpha data from a DSLR or one shot color CCD can easily be mixed with the LRGB or hue of a color image. Another example would be adding additional L,R,G,B or narrow band data to a previously processed color image.
- The Mix LRGB & Hue tool assumes that the components have already been aligned as shown by the
Align DSLR, one shot color CCD, and CCD Color Component example.
- The goal of this example is to combine H-alpha captured with a modified Canon 400D with a color image captured with a Canon 20Da. H-alpha is added to the luminance and red data of the color image first. H-alpha data is then assigned to custom blue and orange hues to achieve different color.
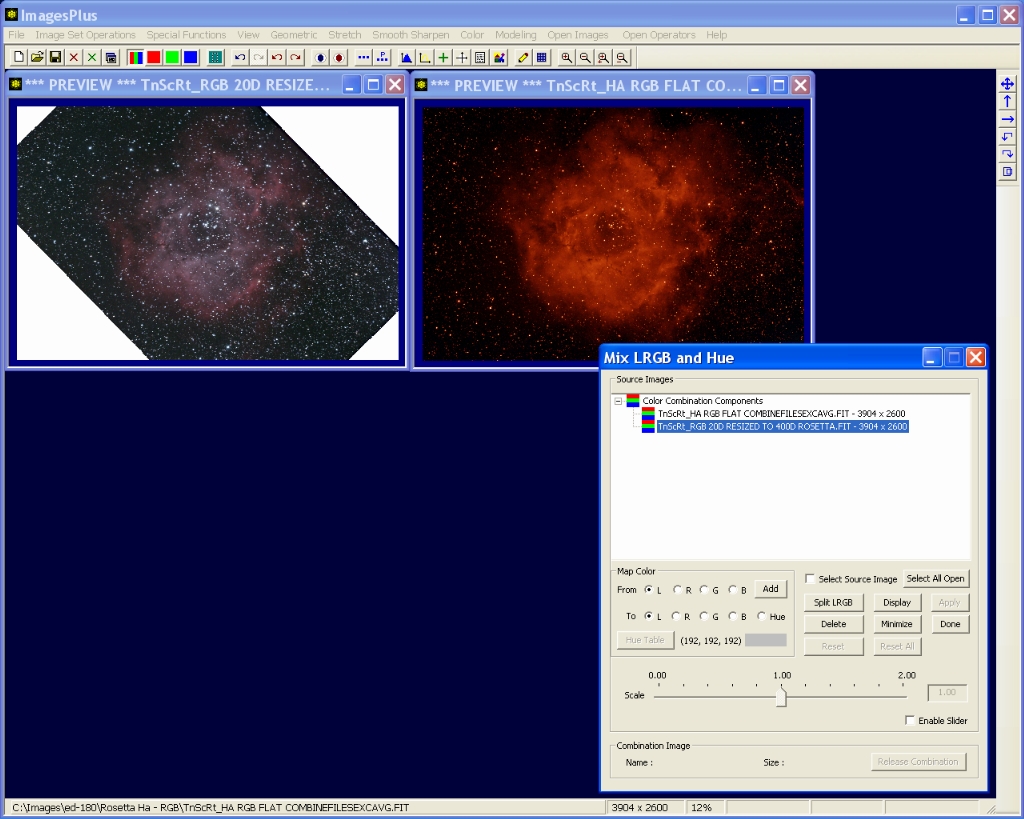
The aligned H-alpha (right) and RGB color (left) images are opened and stretched using HDR Digital Development. This example use Mix LRGB and Hue to mix color after a stretch of the component data is performed. The Narrow Band Hubble Palette and Narrow Band 4 Color Palette examples apply the initial stretch after the data is mixed into a color image.
 |
Step 1 - Select Source Color Components
Open the Color | Mix LRGB and Hue tool then press the Select All Open button to select all of the open images. You could also check the Select Source Image Box and left-click on the image area of the source image to select a single image. The RGB image in the tree to the left of each source image indicates that the source image is a RGB color image.
 |
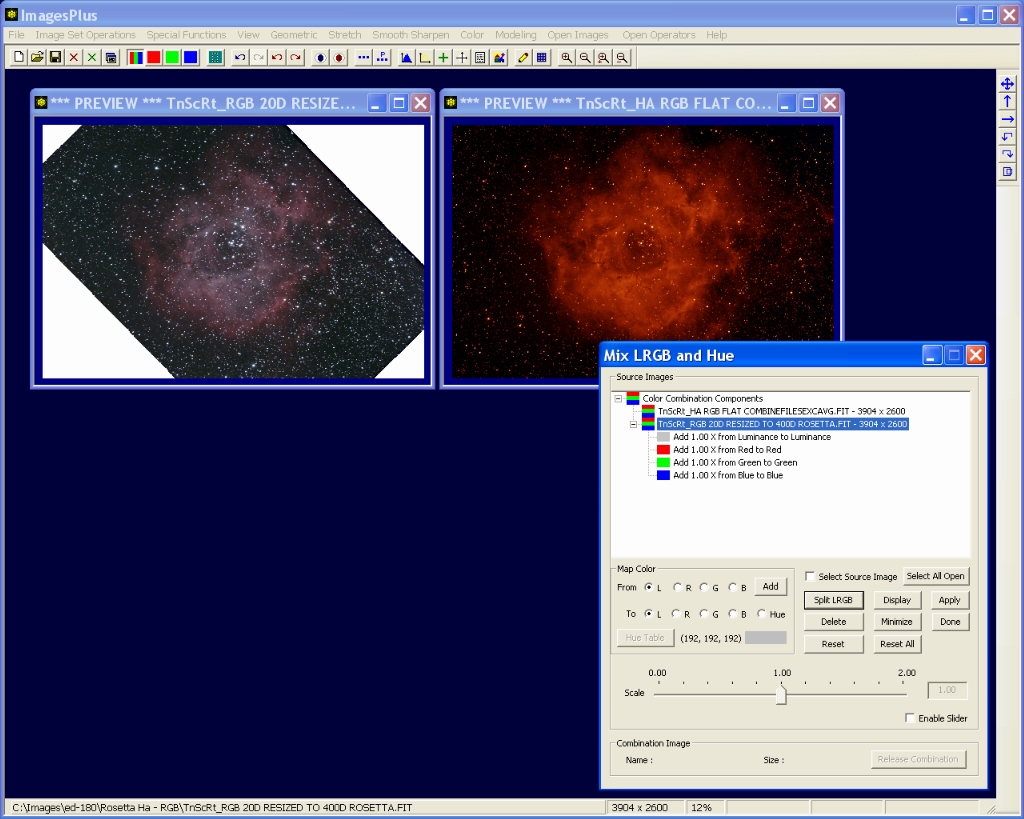
Step 2 - Assign luminance, red, green, and blue data from the 20D RGB source image to L, R, G, and B in the combination image.
Left-click on the 20D color source image in the tree then press the Split LRGB button. L, R, G, and B are assigned with a factor of 1.0x. This adds the 20D color data to the combination image with no change.
 |
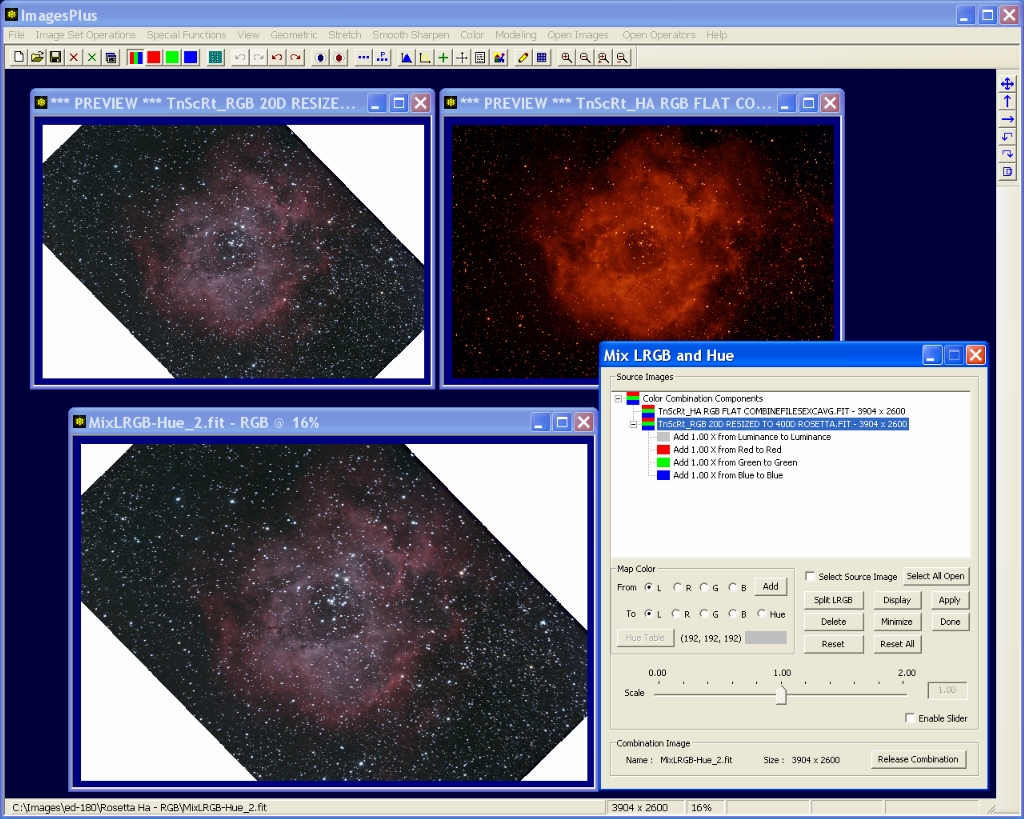
Step 3 - Build the Combination Image
Press the Apply button to build the combination image. The combination image is shown at bottom with initial 20D color image top left. Since only the 20D image was added to the combination with LRGB factors of 1.0 the two images are identical.
 |
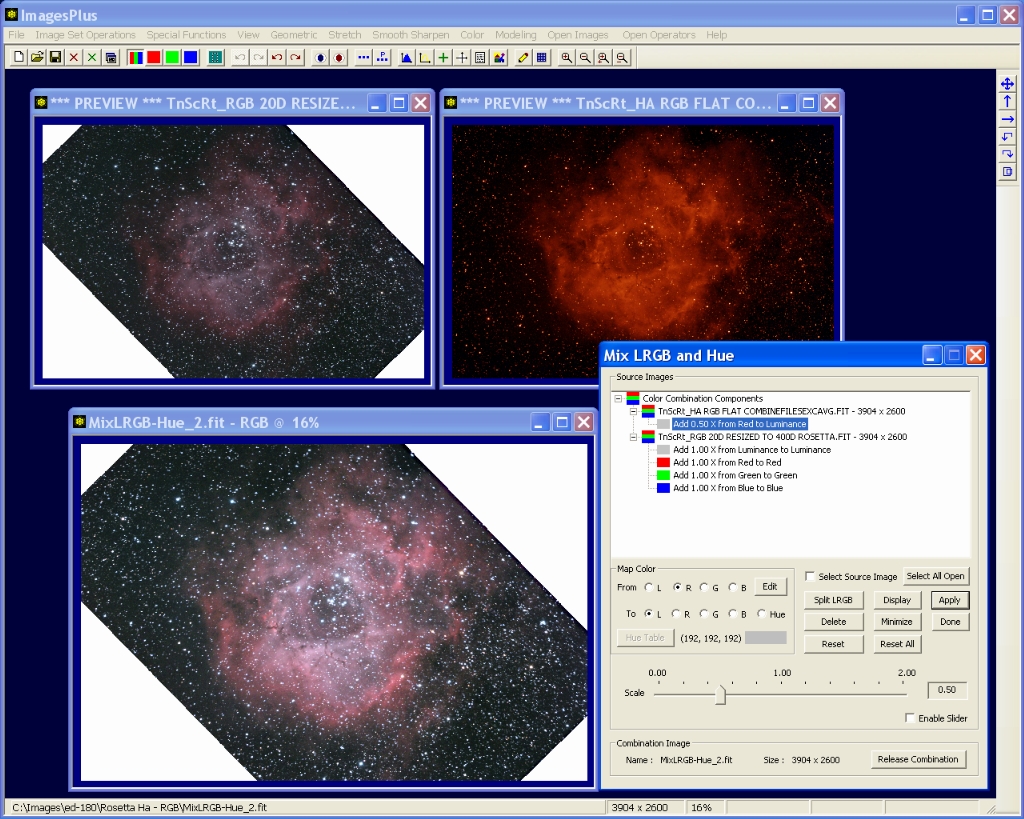
Variation 1 - Add H-alpha Data to Combination Image Luminance
Left-click on the H-alpha source image in the tree then from the Map Color control group select from R to L. From R is selected since the source H-alpha image is a RGB color image and H-alpha is stored in the red data. Press the Add button to add the from R to L color map. Adjust the slider so that 0.50x of H-alpha red is added to luminance. Press Apply to update the combination image. Note that the combination image retains the same color as the source RGB image top left but more detail is now visible.
 |
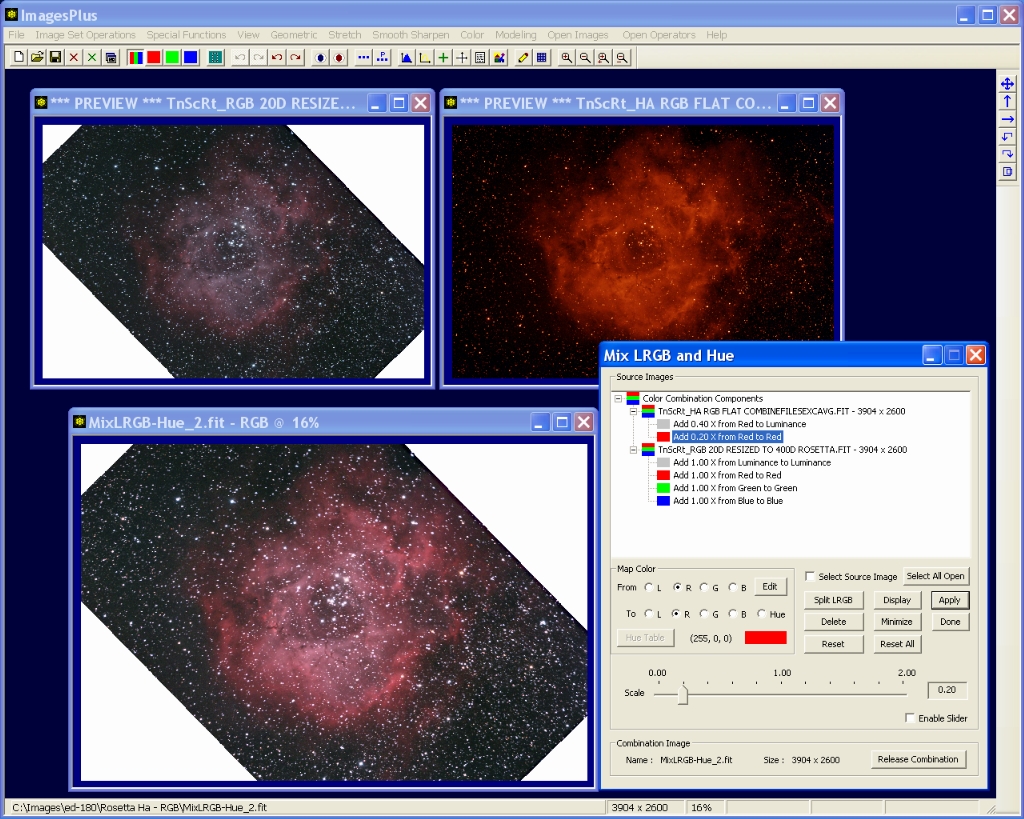
Variation 2 - Assign H-alpha to Luminance and Red
Lower the luminance factor from H-alpha red to 0.40x using the slider. Left-click on the H-alpha source image in the tree then from the Map Color control group select from R to R. Press the Add button to add the from R to R color map. Adjust the slider so that 0.20x of H-alpha red is added to the combination image red. Press Apply to update the combination image.
 |
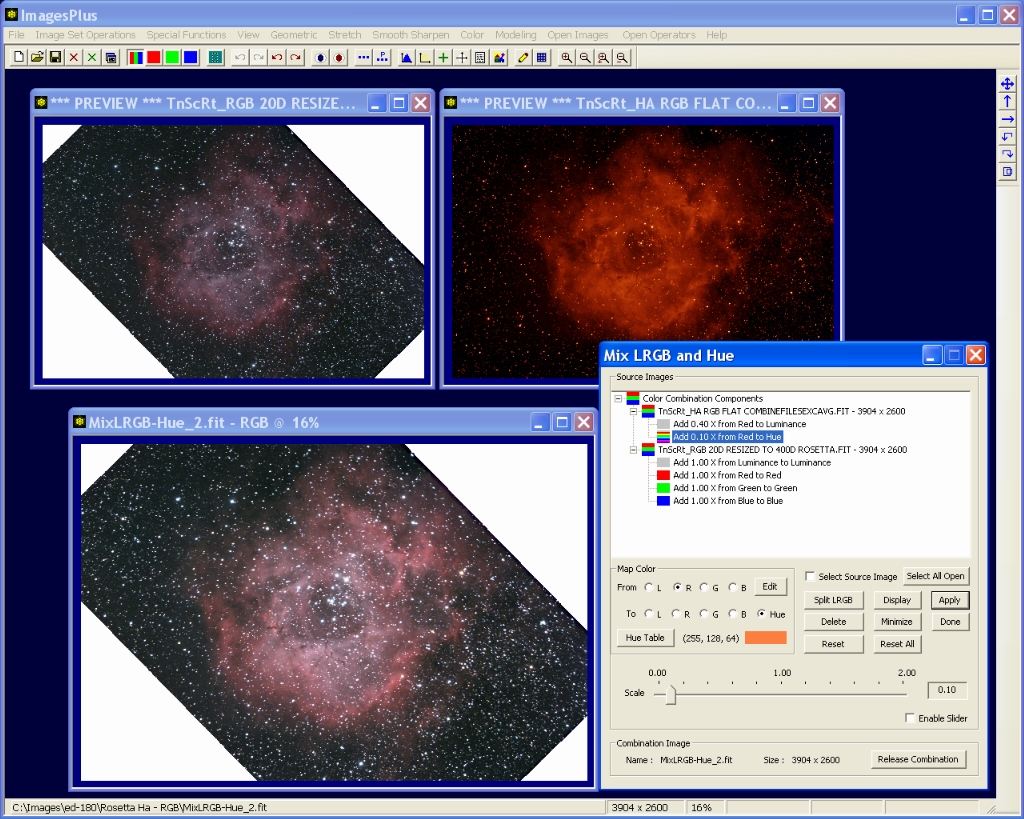
Variation 3 - H-alpha to Luminance, Red, and Orange
Left-click on the H-alpha source image in the tree then from the Map Color control group select from R to Hue then press the Hue Table button. Select the custom hue from the table. In this case orange was selected. Press the Add button to add the from R to orange color map. Adjust the slider so that 0.10x of H-alpha red is added to orange in the combination image. Press Apply to update the combination image.
 |
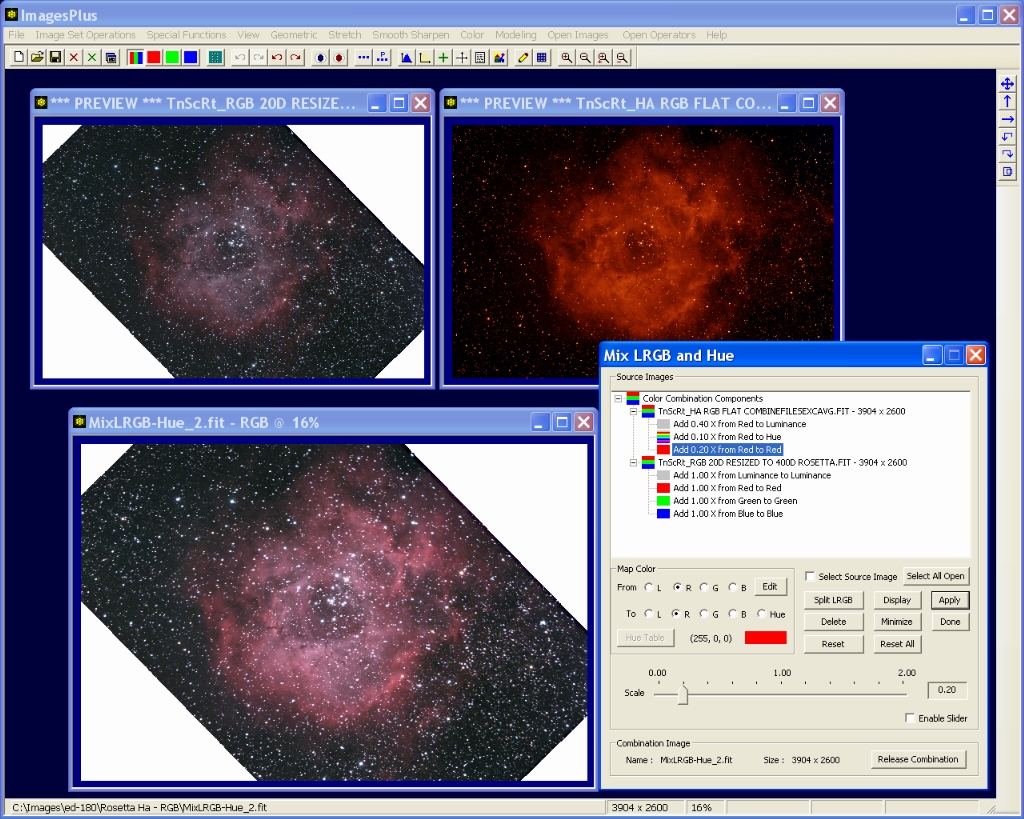
Variation 4 - Assign H-Alpha to Luminance and Orange Hue
Since H-alpha red is already mapped to luminance and orange in the combination image we only need to remove the from red to red color map. Select the from red to red color map in the tree under the H-alpha source image. Press the Delete button to remove the color map. Press Apply to update the color combination image. The combination image now has a small amount of orange in the center of the nebula.
 |
Variation 5 - Assign H-alpha to Luminance and a Blue Green Hue
Delete the from H-alpha red to orange color map then add a from red to blue green color map. Note that the overall red of the nebula is reduce. The center of the nebula now has a slight blue hue.
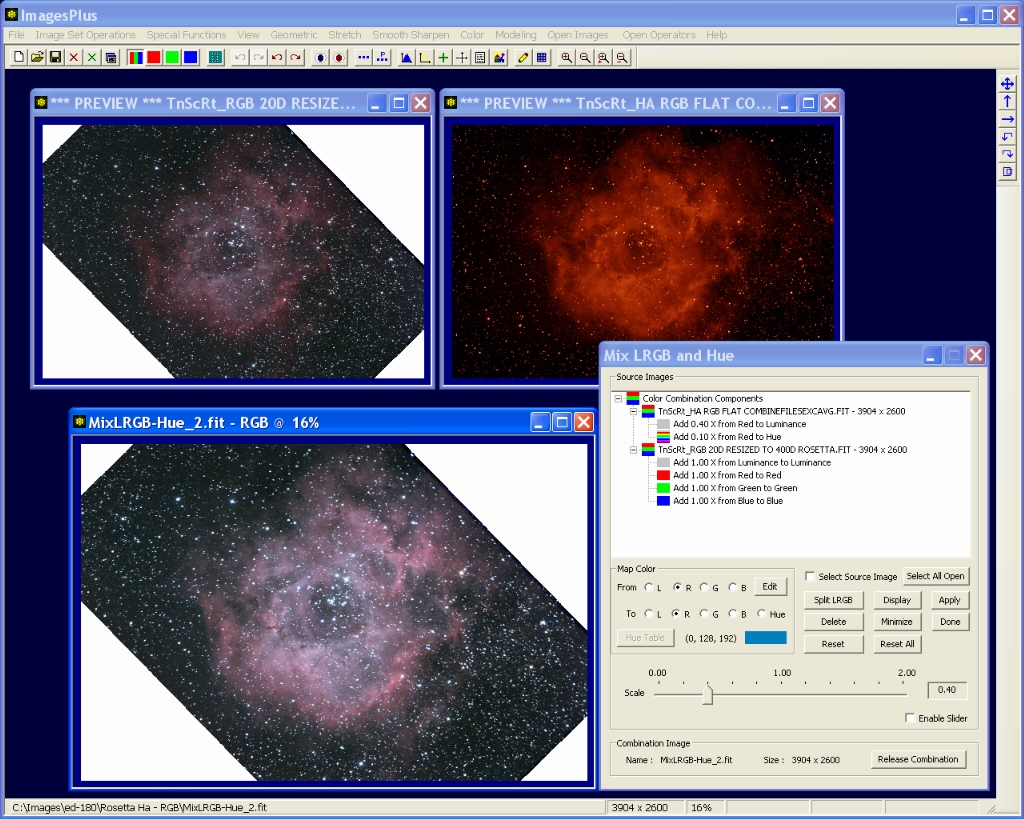 |
Variation 6 - Assign H-alpha to Luminance, Blue Green Hue, and Red
The above variation has h-alpha mapped to luminance for improved detail. To increase color 0.10x H-alpha is mapped to blue green and 0.20x H-alpha is mapped to red.
 |
Copyright © 2011 MLUnsold Digital Imaging. All Rights Reserved.