- The min max apply range of the sharpening and deconvolution tools on the Smooth and Sharpen main menu can be set using using the 8-16 bit histogram or by selecting points from the image . To select values from the image check the Min Apply or Max Apply box on the sharpening or deconvolution tools then left click on the image. A feather radius can be set to blend the boundry of the min max apply range into the unprocessed area of the image. A new reduce artifacts options is used to soften the sharpening or deconvolution and remove artifacts like dark halos around stars or bright edges.
- The initial image below was stacked then stretched using the HDR ArcSinH function as shown by
HDR general stretch functions. The background was smoothed as shown by the Setting Min Max Smoothing Range With The Histogram example.
- The goal is to apply a mild deconvolution to the midtones and highlights of the image using the 8-16 bit histogram to set the min and max apply range. All of the smoothing, sharpening, and deconvolution tools on the Smooth and Sharpen main menu with min max apply range can be set using the histogram and have an optional feather radius.
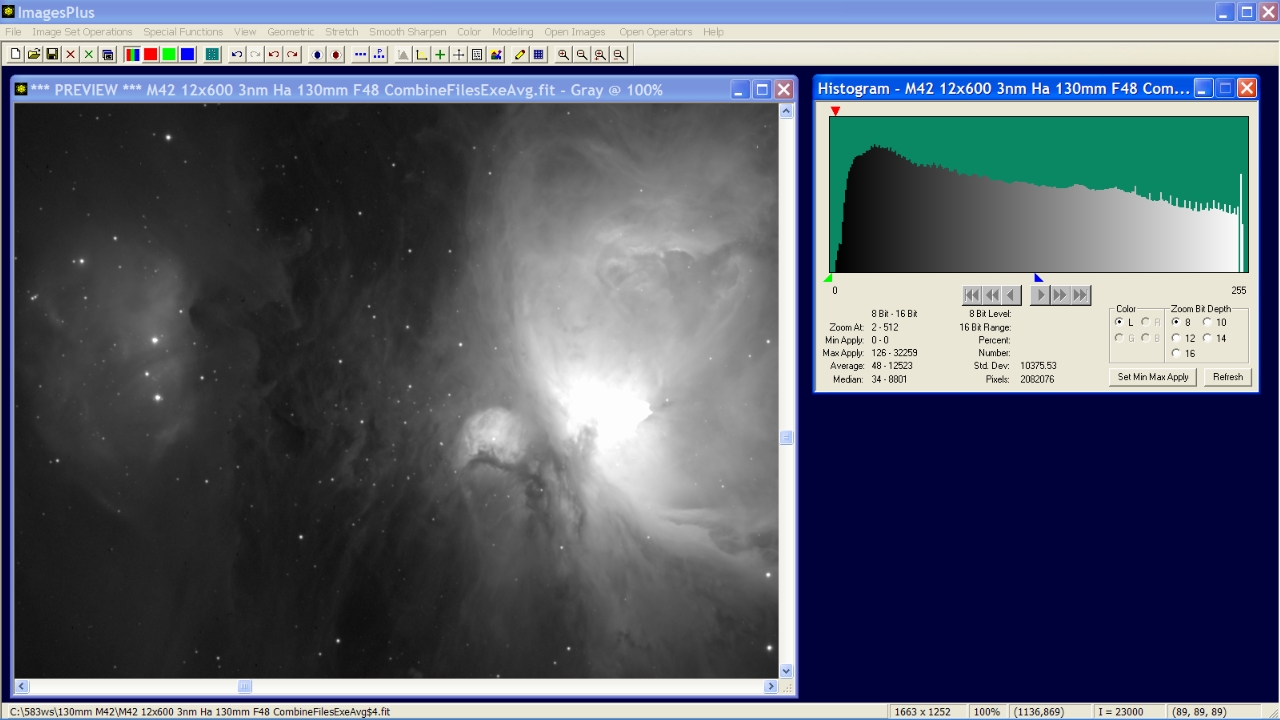
Initial HDR ArcSinH stretched 3nm H-alpha image of M42 with smoothed background. 8 bit histogram is displayed showing the position of the green min value and blue max value traingles used for smoothing.
 |
Step 1
- The red triangle at the top of the histogram is the current zoom position that was set during the background smoothing. The zoom position is set with a left-click above the histogram. The zoom radio buttons are used to zoom in and out with the red zoom position centered in the histogram.
- The left and right scoll buttons are enabled when a 10-16 bit histogram is displayed. The complete 8 bit histogram is displayed so the scroll buttons are disabled.
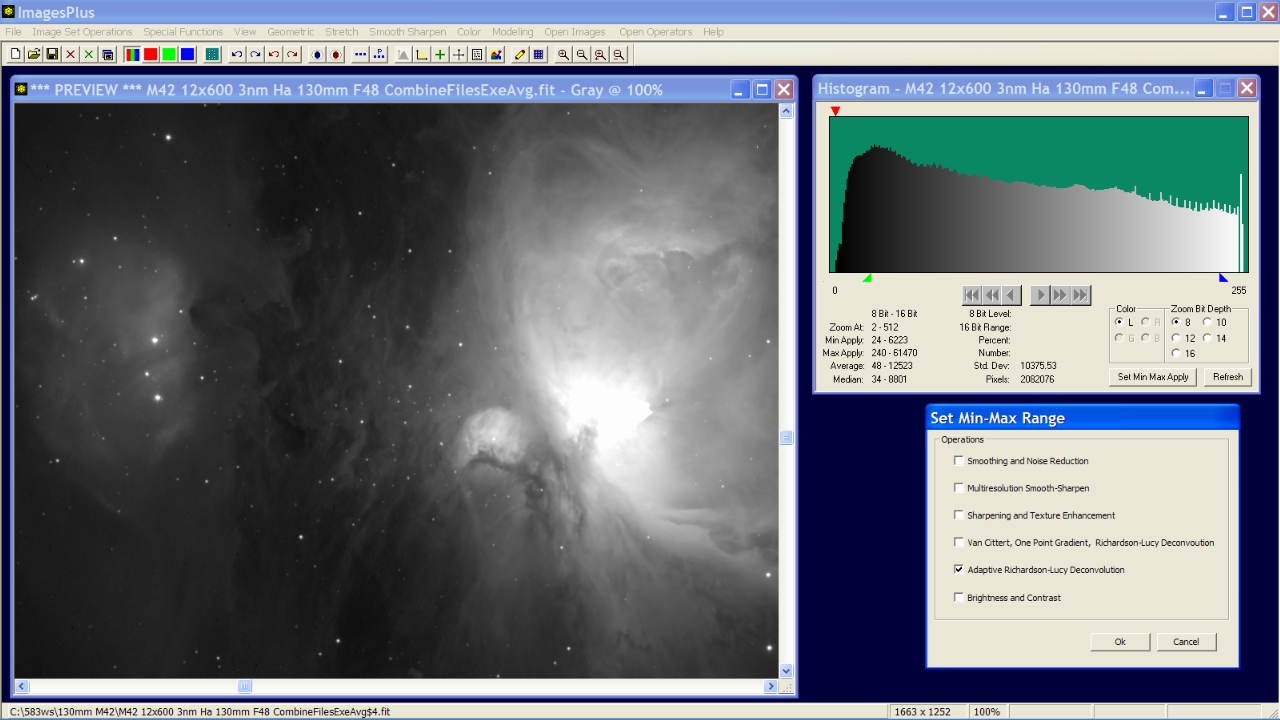
- The green and blue triangles at the bottom of the histogram are the min and max apply values, respectively. Left-click below the histogram to set the min position and right-click below the histogram to set the max position. The min and max values are set on smoothing, sharpening, and deconvolution tools using the Set Min Max Apply button.
- To select the min and max values for the midtone hightlight sharpening function left-click below the histogram at the left peak value then right-click at little to the left of the white histogram values. The green min triangle and blue max trinagle will then be set as shown in the histogram below.
- Press the Set Min Max Apply button then select Adaptive Richardson-Lucy Deconvolution. The deconvolution tool is displayed with the min and max levels set when the Ok button is pressed.
Setting the min max apply range for the adaptive Richardson-Lucy deconvolution tool using the histogram.
 |
Step 2
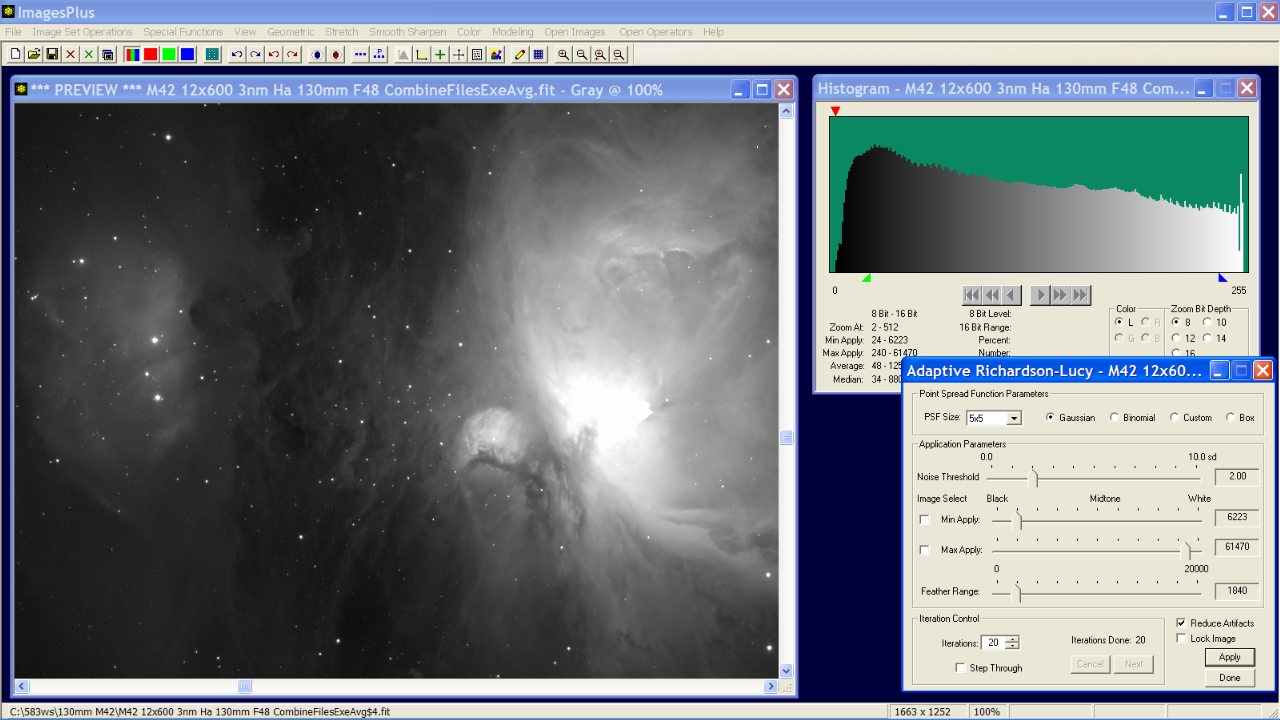
- The adaptive Richardson-Lucy deconvolution tool is opened with the min and max values set form the histogram.
- Feather radius is set to 1840 to blend the min and max range into the unprocessed image area. Since the max apply value of 61470 plus feather radius 1840 is less than white at 65535 the brightest area of the image is not processed by deconvolution. Areas darker than min value minus feather radius or 4383 are not processed by deconvolution also.
20 iterations of adaptive Richardson-Lucy deconvolution are applied with the reduce artifacts option checked to eliminate dark halos around stars and bright edges.
 |
Step 3
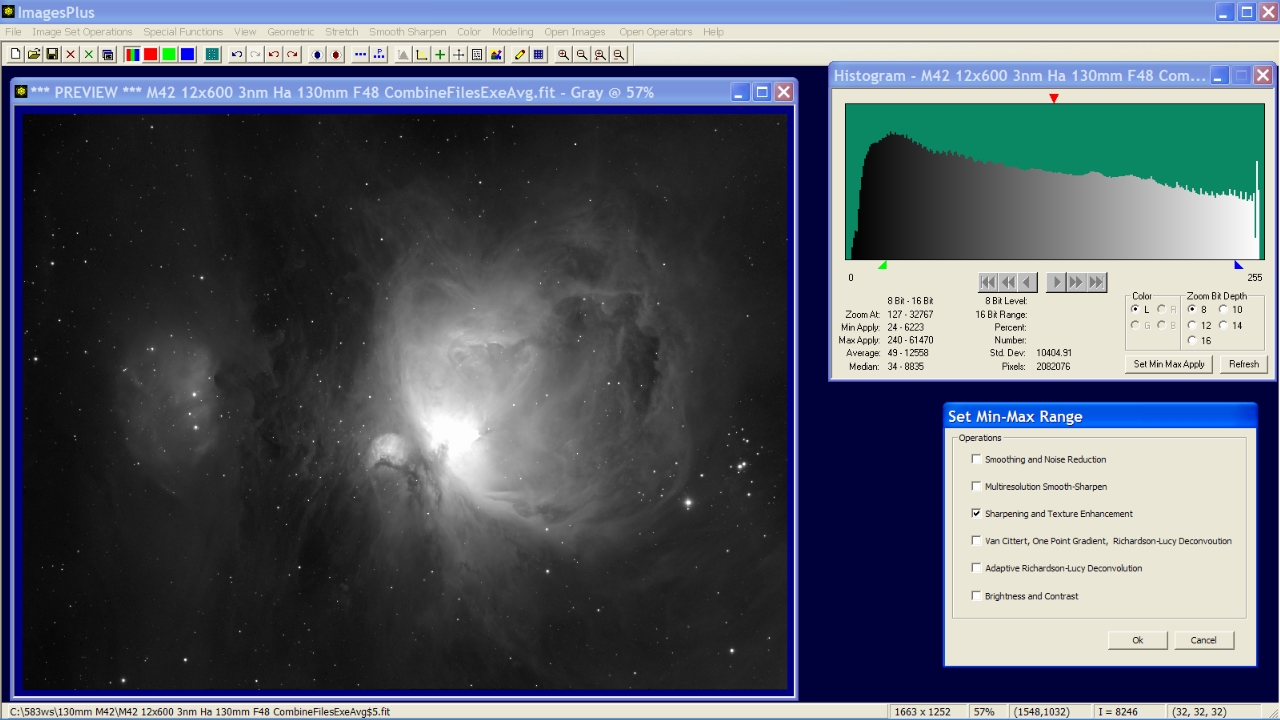
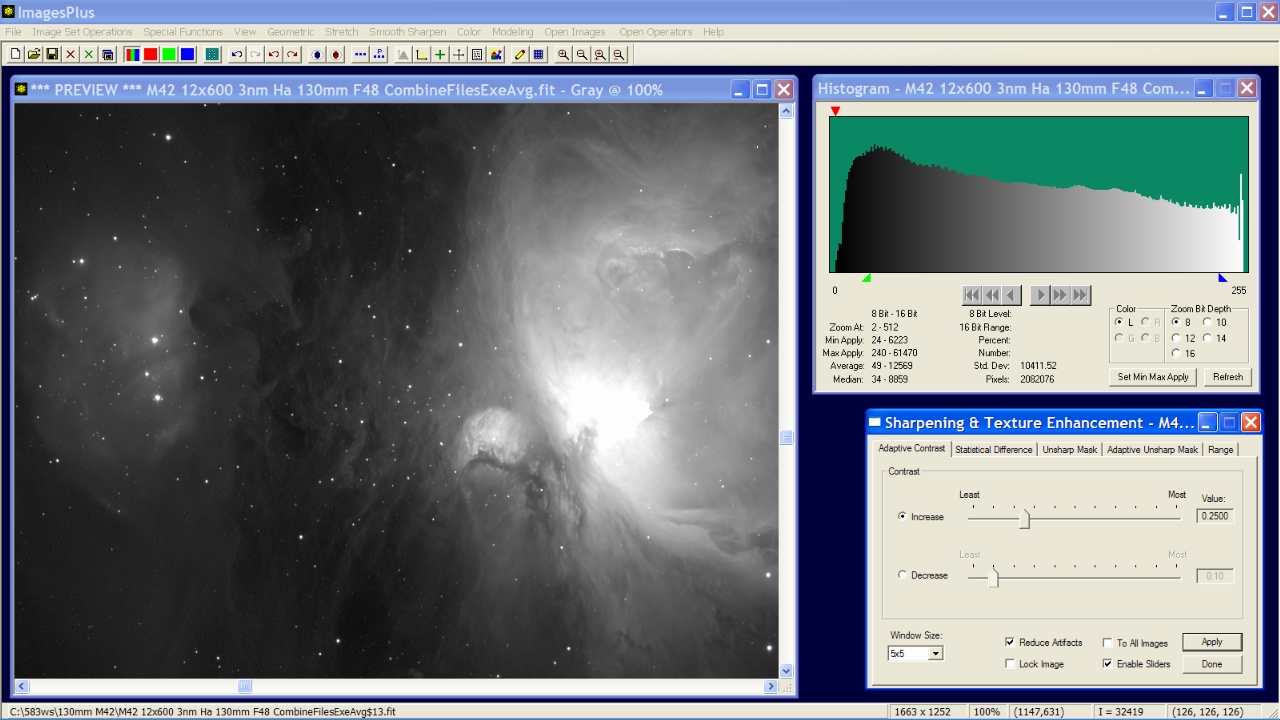
- Next contrast is increased in the same range as deconvolution was applied. So adaptive Richardson-Lucy is closed and the Set Min Max Apply button is pressed on the Histogram. Sharpening and Texture Enhancement is selected.
Adaptive contrast is selected from the histogram with the same range as deconvolution and used to increase contrast.
 |
Step 4
- The Sharpening and Texture Enhancement tool is opened with the min and max values set on the Range tab from the histogram.
- Feather radius is set to 1840 to blend the min and max range into the unprocessed image area. Since the max apply value of 61470 plus feather radius 1840 is less than white at 65535 the brightest area of the image is not processed by adaptive contrast. Areas darker than min value minus feather radius or 4383 are not processed by adaptive contrast.
Mild contrast increase with the reduce artifacts box checked to reduce halos around bright areas.
 |
Step 5
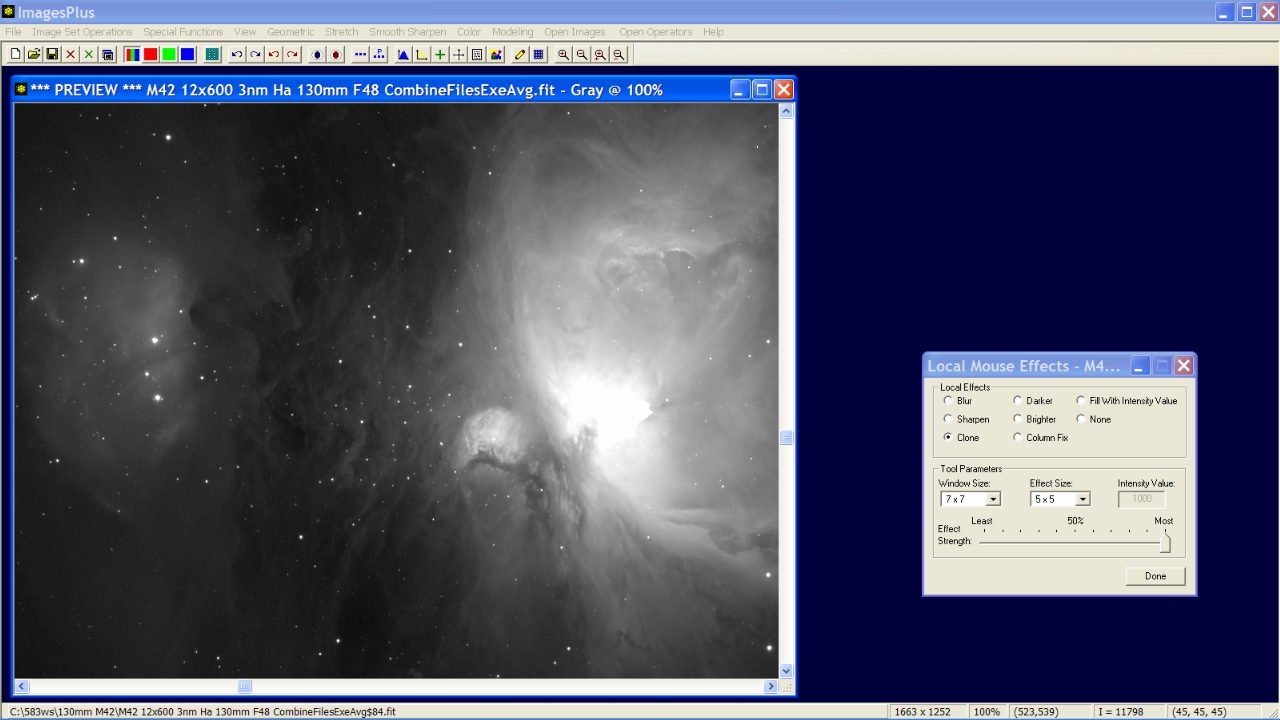
- The Smooth Sharpen | Local Mouse Controlled | Clone tool is used to remove the small dark dots on the left side of the image.
- The clone radius is set using the Window Size list. The number of pixels cloned at each left-click is controlled by the Effect Size list.
- Use Window Size = 3x3 and Effect Size = 3x3 near bright stars or edges.
Left-click on each bad pixel or dust mark to clone the adjacent pixels into the problem area.
 |
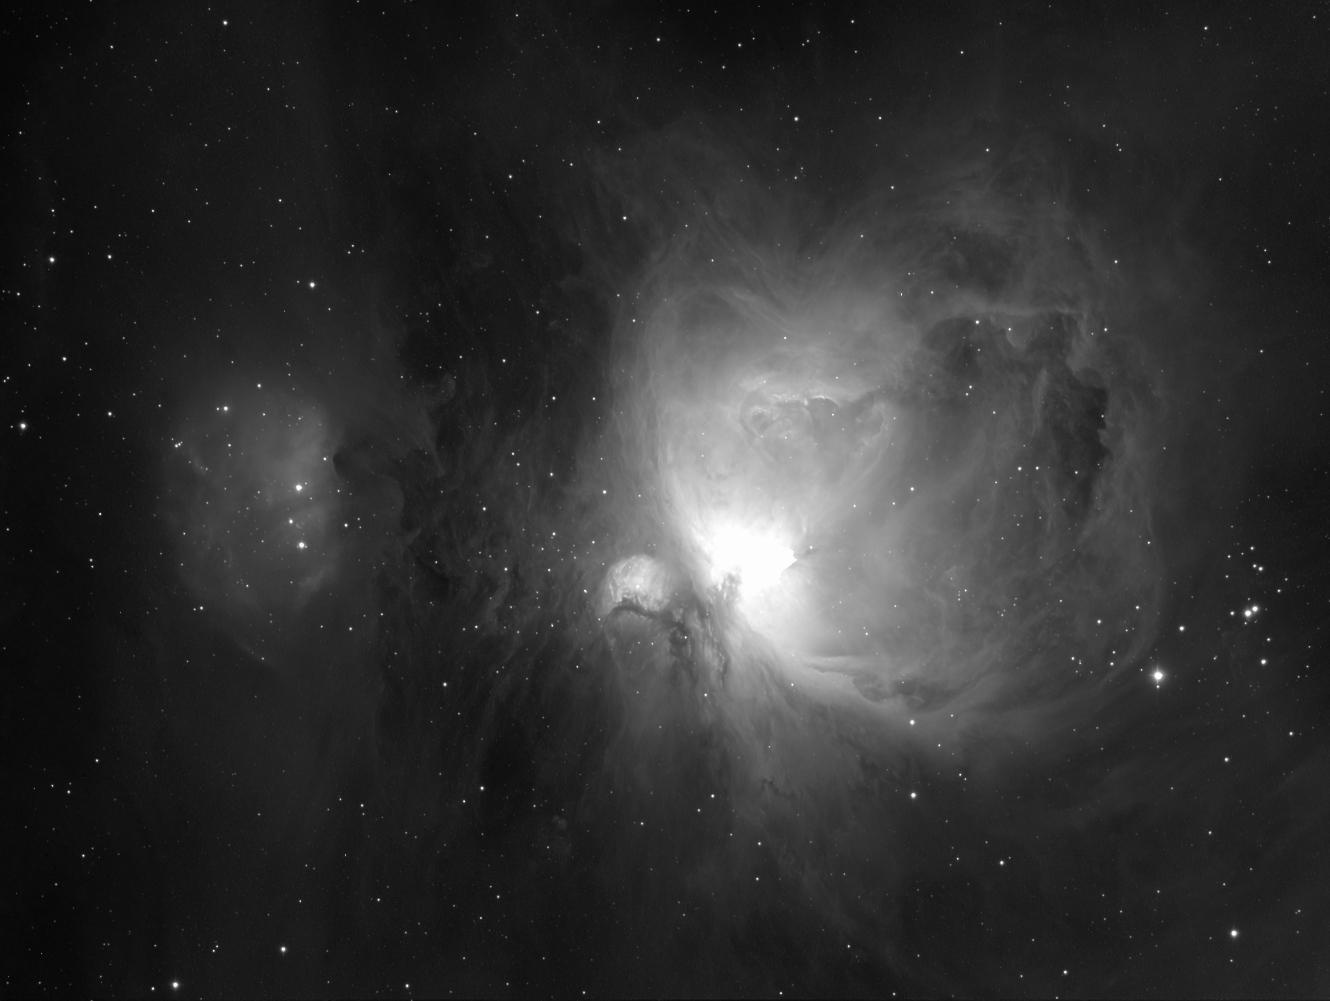
Final image of M42 with smoothed background mild midtone and highlight sharpened. Defects removed using the clone tool. Ready to combine with other images.
 |
Copyright © 2010 MLUnsold Digital Imaging. All Rights Reserved.


