- The Micro Curves tool on the main Stretch menu is used to apply a smooth brightness, contrast, or color balance change to the entire image or just the background, midtones, or highlights. The min max apply range of the Micro Curves tool can be set using the 8-16 bit histogram or by selecting points from the image. To select values from the image check the Min Apply or Max Apply box on the Micro Curves tool then left click on the image. Check the Range box then left click on the image to set min and max in a range about the value that is selected from the image. Preset curves can be selected as a starting point then modified to fit the image.
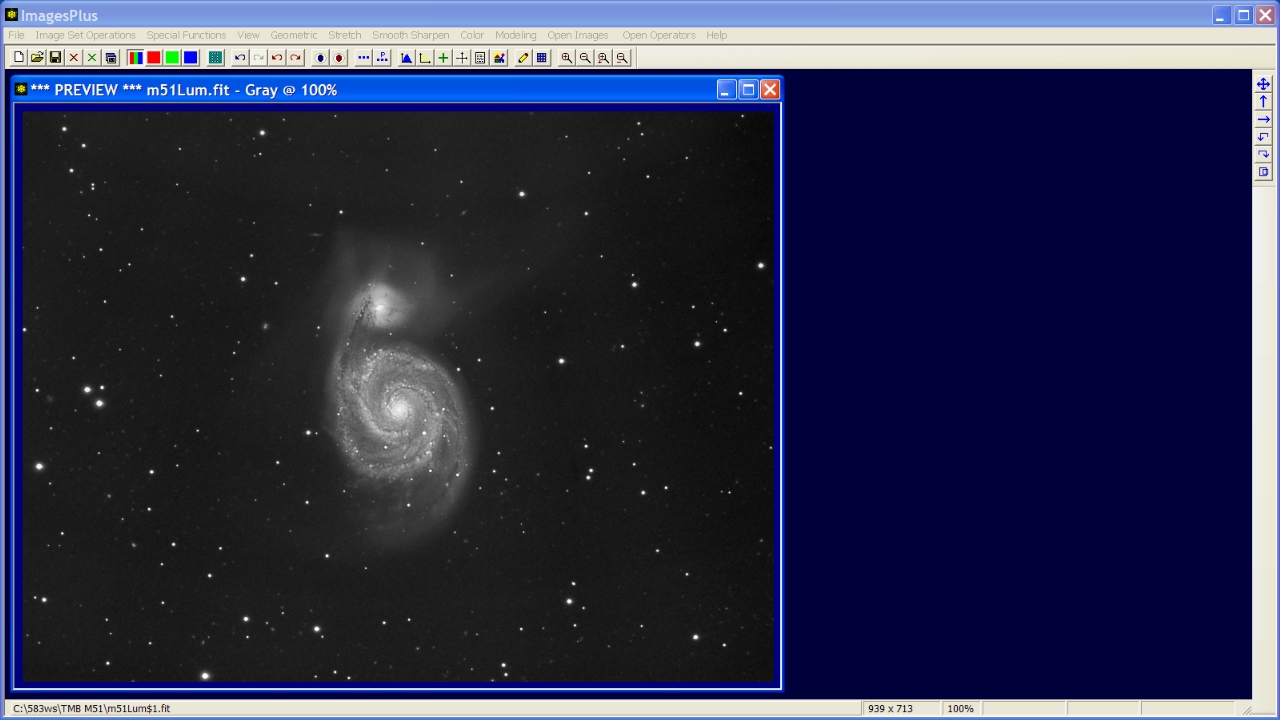
- The initial image below was stacked then stretched using methods similar to those shown by the
HDR general stretch functions or HDR digital development processing examples.
- The goal is to reduce the background and core brightness of M51 and increase contrast and detail in M51. Three different micro curves are applied to the image. First a smooth micro curve is applied to reduce the brightness of just the background. Next a different micro curve is applied to the core to reduce its brightness and increase contrast. Last a soft micro curve is used to adjust the background brightness followed by a mild smoothing.
Initial stacked and stretched image of M51.
 |
Step 1
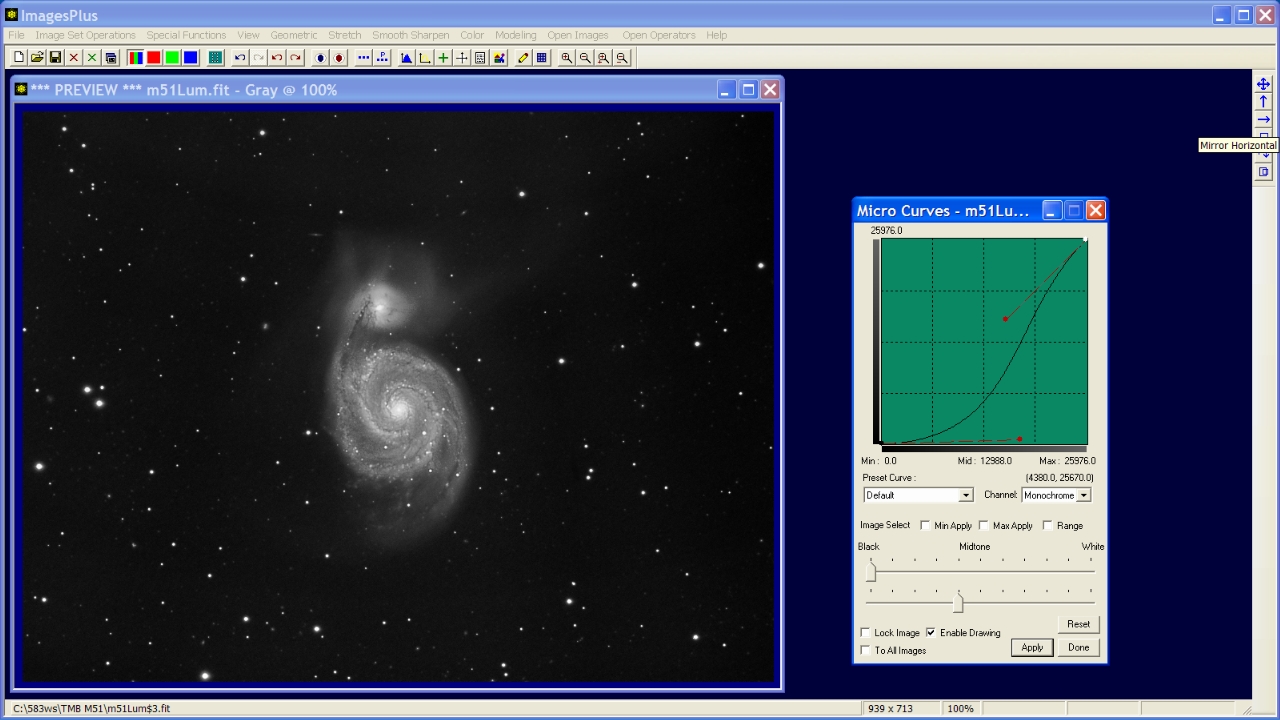
- Open the Stretch | Micro Curves tool then check the Max Apply box.
- Left-click on the image at the faintest edge of M51 to set the max apply value.
- Left-click on the lower right red control dot on Micro Curves and drag the red dot to the lower right to shape the curve.
- Adjust the Max Apply slider towards the left to fine tune the interval where the curve is applied.
- In the screen shot below the curve is applied only to the luminance interval [0.0, 25976.0] with values above 25976.0 unchanged.
Background reduced without any change to the midtones and highlights since the micro curve was applied only to the range form 0.0 to 25976.0.
 |
Step 2
- Press the Set View toolbar button to save the Micro Cuvre applied in step 1.
- Press the Reset button on Micro Curves then check the Range box.
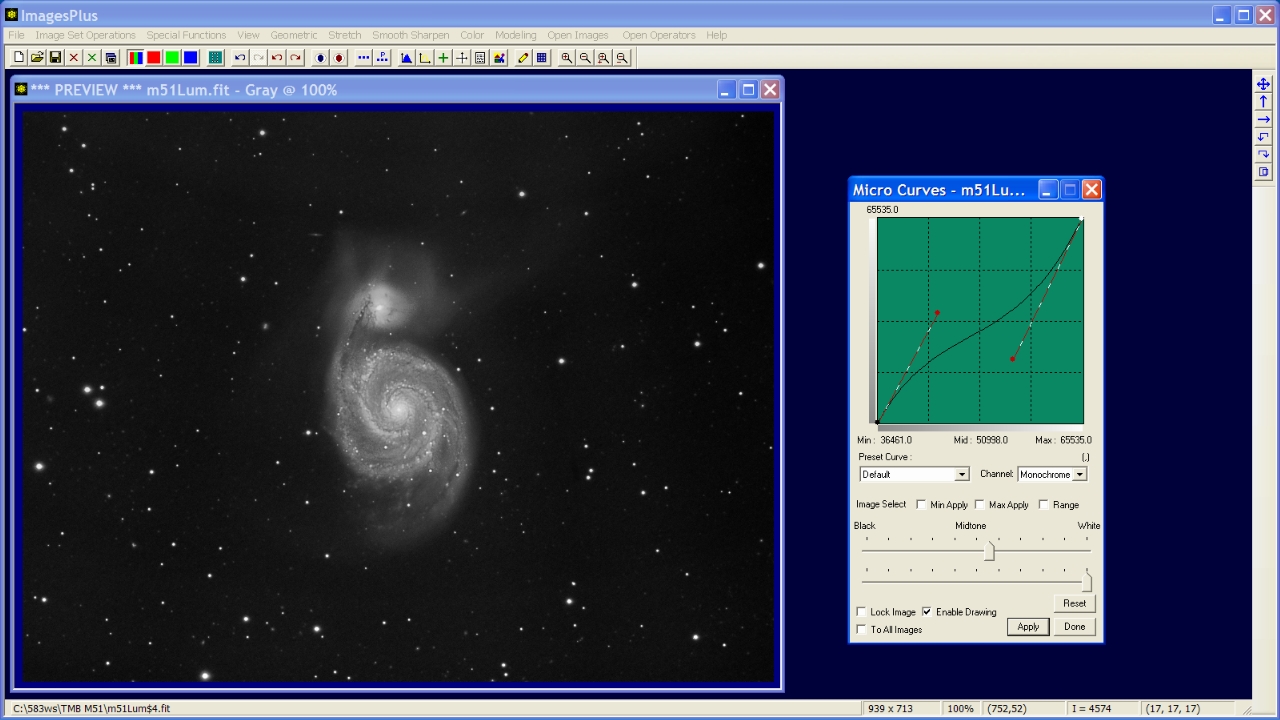
- Left-click on the center of the core of M51 to select a range of values to apply the next micro curve.
- Left-click on the bottom right red control dot then drag it towards the top left as shown by the screen shot below. Next adjust the postion of the top right red control dot.
- Move the Min Apply slider towards the left to fine tune the luminance interval where the micro curve is applied.
- In the screen shot below the curve is applied only to the luminance interval [36461.0, 65535.0] with little or no change to luminance values below 36461.0.
Micro curved applied to just the hightlights to reduce the core and increase contrast.
 |
Step 3
- Press the Set View toolbar button to save the Micro Cuvre applied in step 2.
- Press the Reset button on Micro Curves.
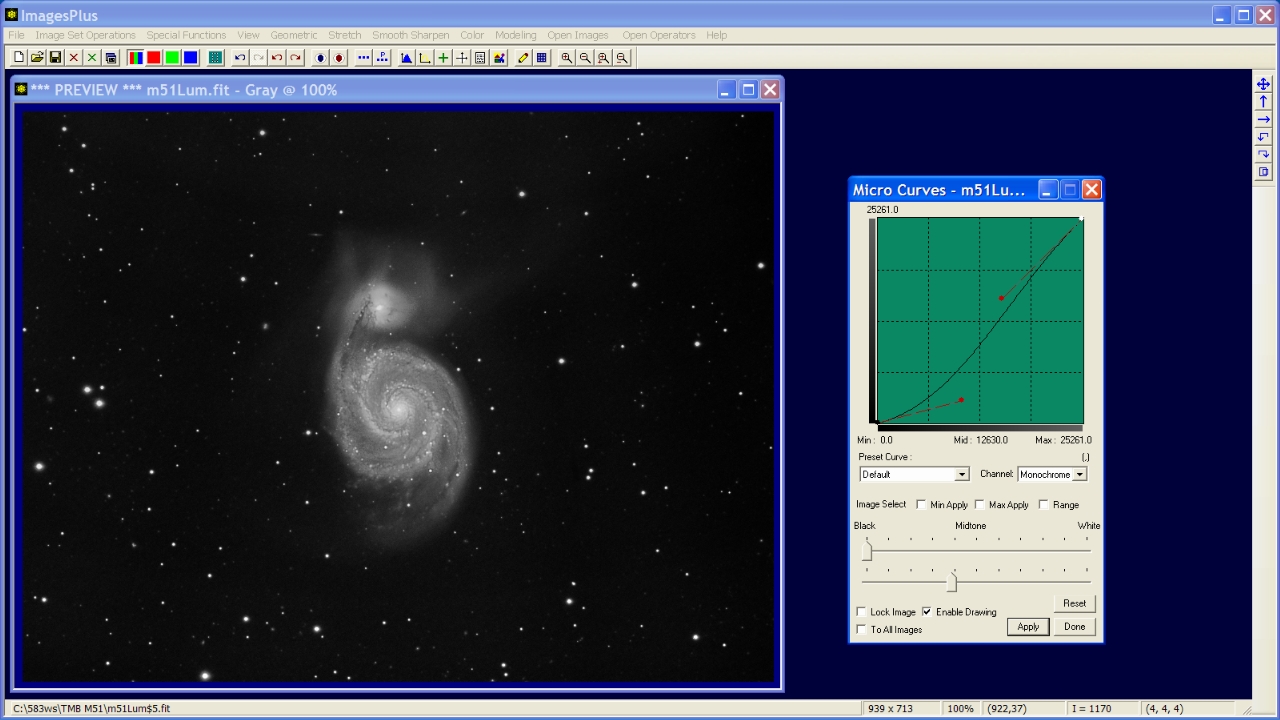
- Final fine adjustment of the background using a smooth weak micro curve as shown below.
- Both the curve shape and max slider are adjusted.
A weak reduction is applied to luminace range [0.0, 25261.0].
 |
Step 4
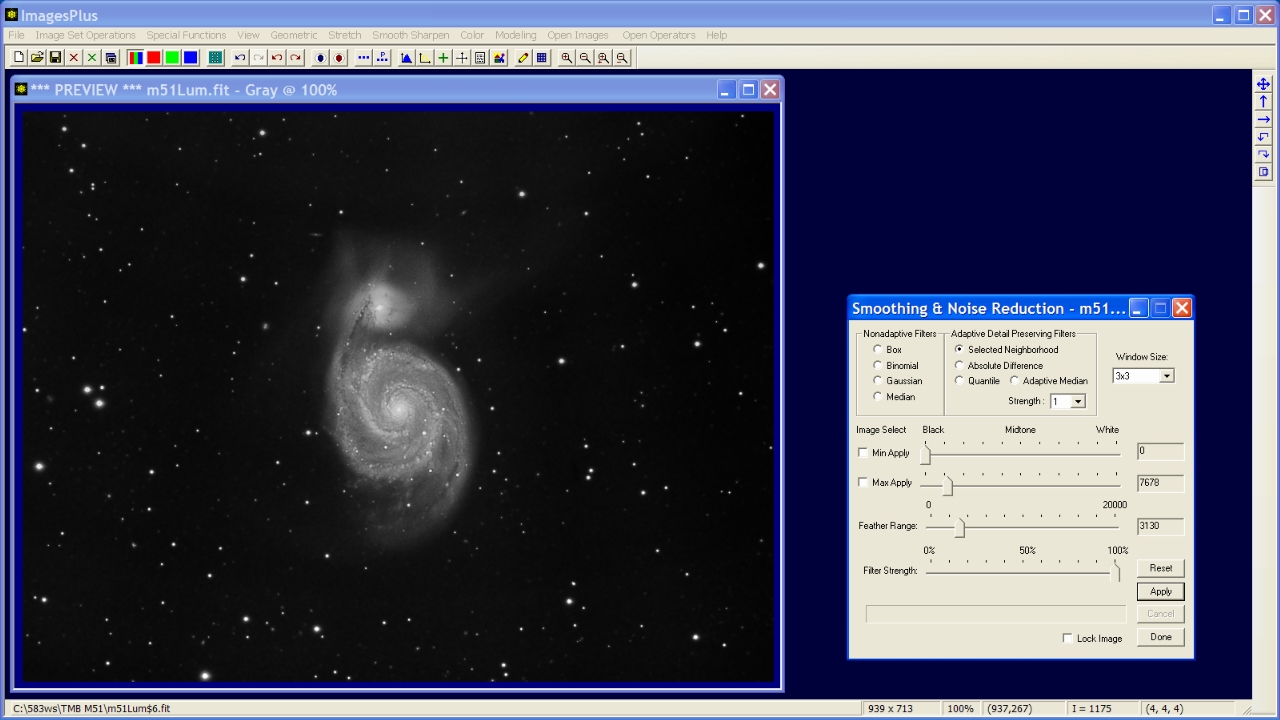
- The Smoothing & Noise Reduction tool is used to apply a mild smooth operation to the background.
- Left-click on the image at the faintest edge of M51 to set the max apply value.
- Adjust the Feather slider to 3130 to blend the data.
Mild background smoothing operation applied to luminance range [0.0, 7678.0] with feather radius 3130.
 |
Step 5
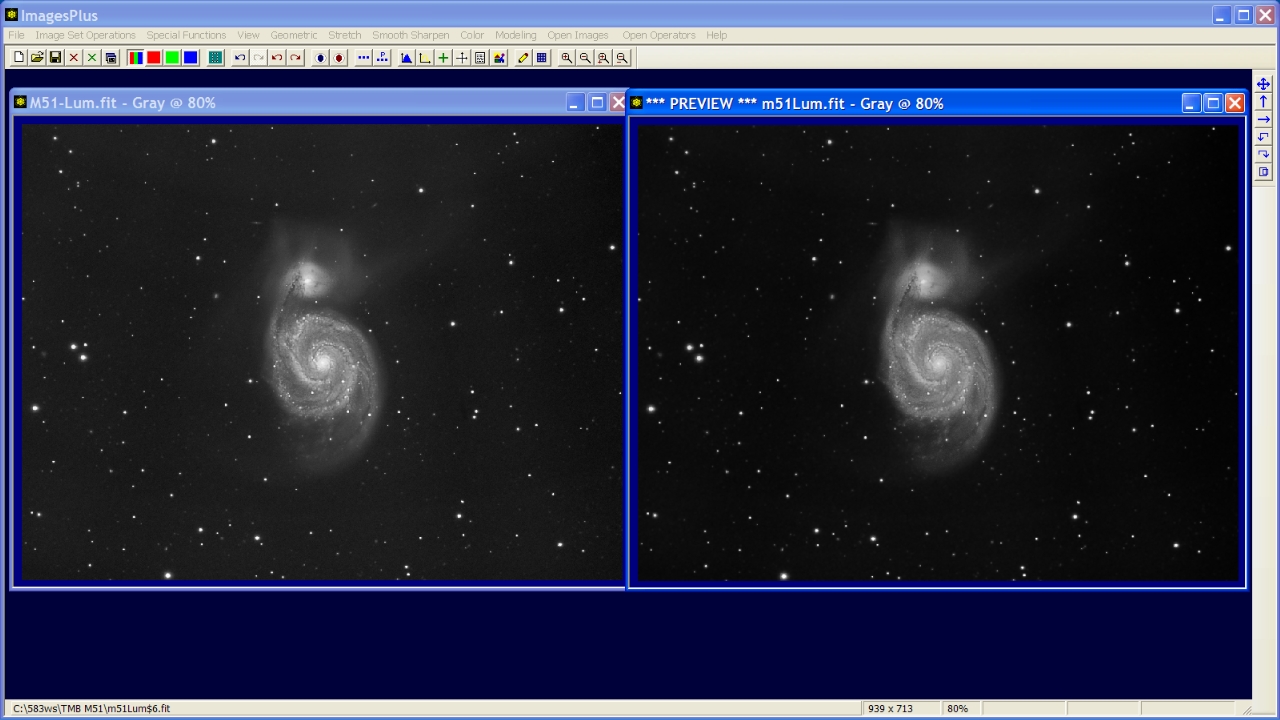
- Comparision of initial image left and corrected image right.
The corrected image of M51 right has smaller core and much better contrast without loss of the faint outer area of the galaxy.
 |
Copyright © 2011 MLUnsold Digital Imaging. All Rights Reserved.


