The goal of this example is to reduce saturation of the bright star centers then add saturation to red in the nebula.
HSL Micro CUrves is used twice. First reduce saturation of only bright star cores. Second increase red saturation in the nebula.
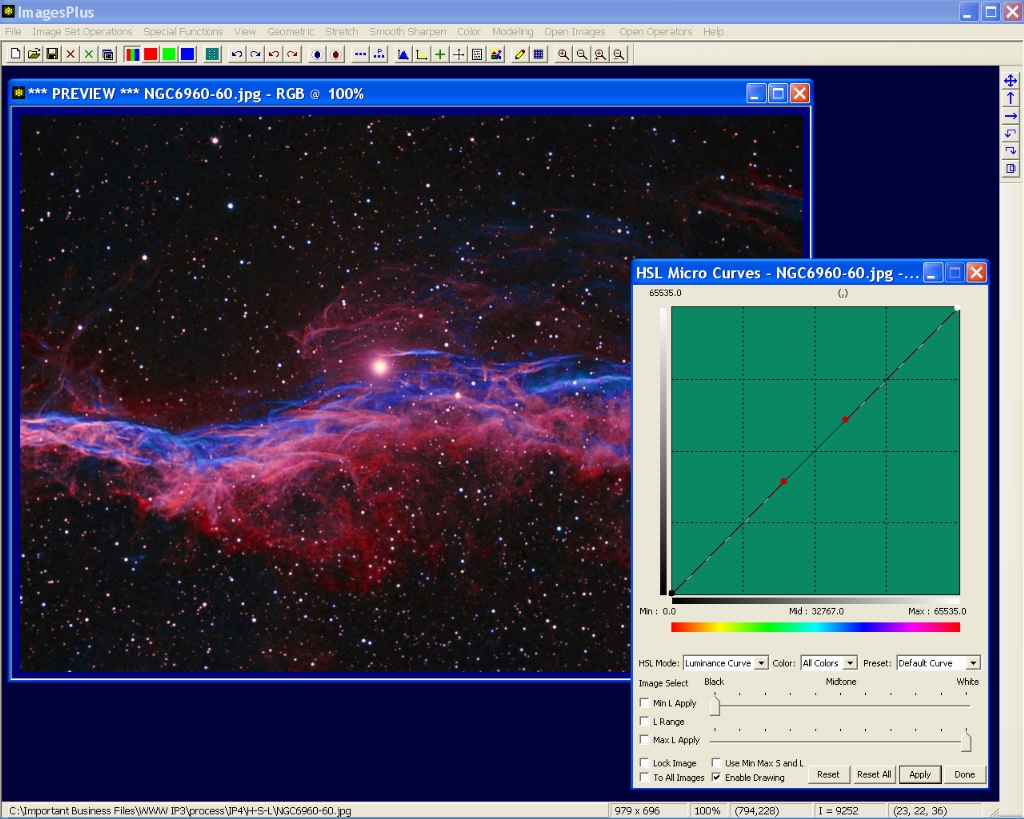
Step 1 - Bicolor image with magenta changed to red using the Selective HSL Color Balance Tool and the Color | HSL Micro Curves Tool
Bright star cores will have a saturation decrease. Bright red areas with low saturation will have a saturation increase.
 |
Step 2 - Select A Bright Star Core to Reduce Saturation
Set the HSL Mode list to Select Hue and check the HSL box. Left-click on the center of the bright star to set the hue range and feather triangles and also the saturation and luminance min max feather range.
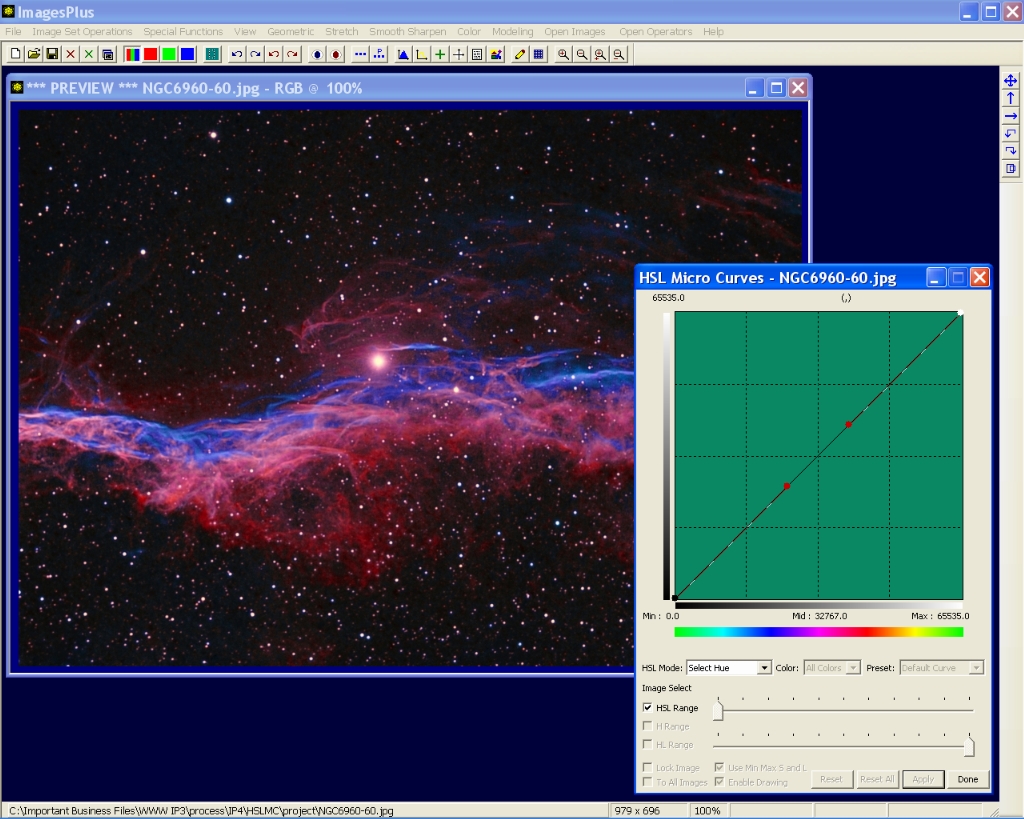 |
Step 3 - Bright Star Center HSL Range Selected
The hue range and feather triangles are center about the hue at the center of the bright star. Luminance constraints are set to min = 57778 and max = 65535. The luminance feather range is built into the luminance curve.
 |
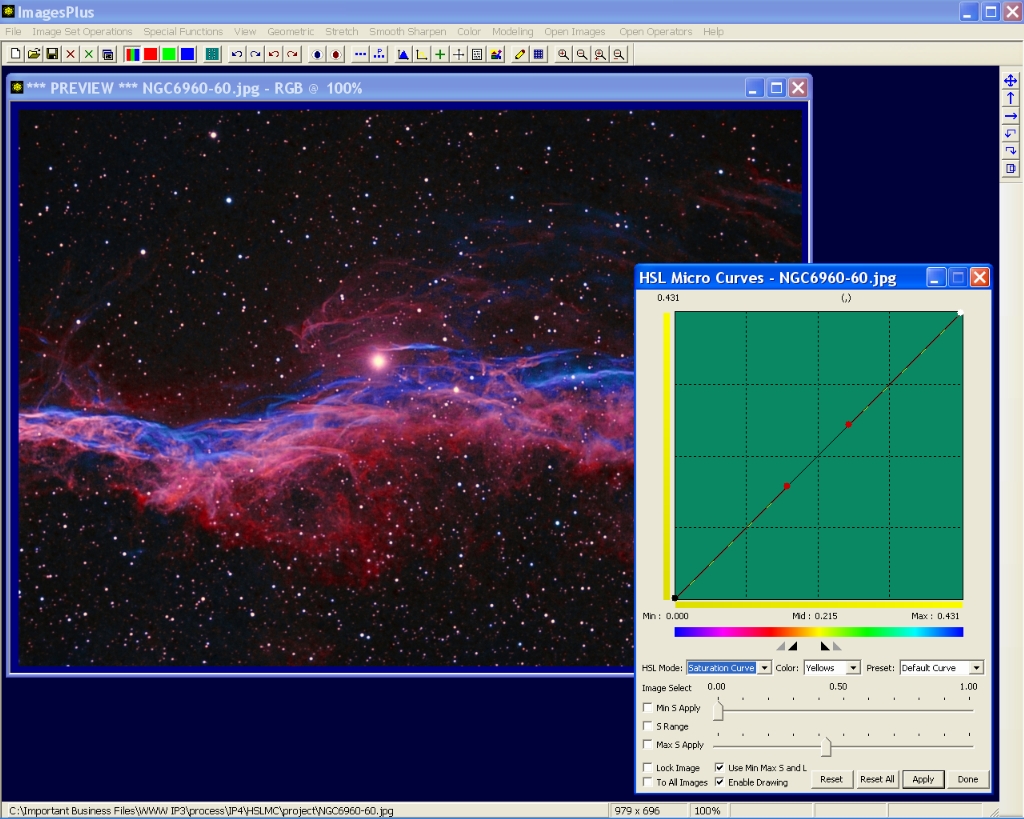
Saturation constraints are set to min = 0.0 and max = 0.431. The saturation feather range is built into the saturation curve. The Use Min Max S and L box is checked. As a result only very bright pixels with low saturation in the hue range are affected by the luminance and saturation curves.
 |
Step 4 - Lower Bright Star Core Saturation
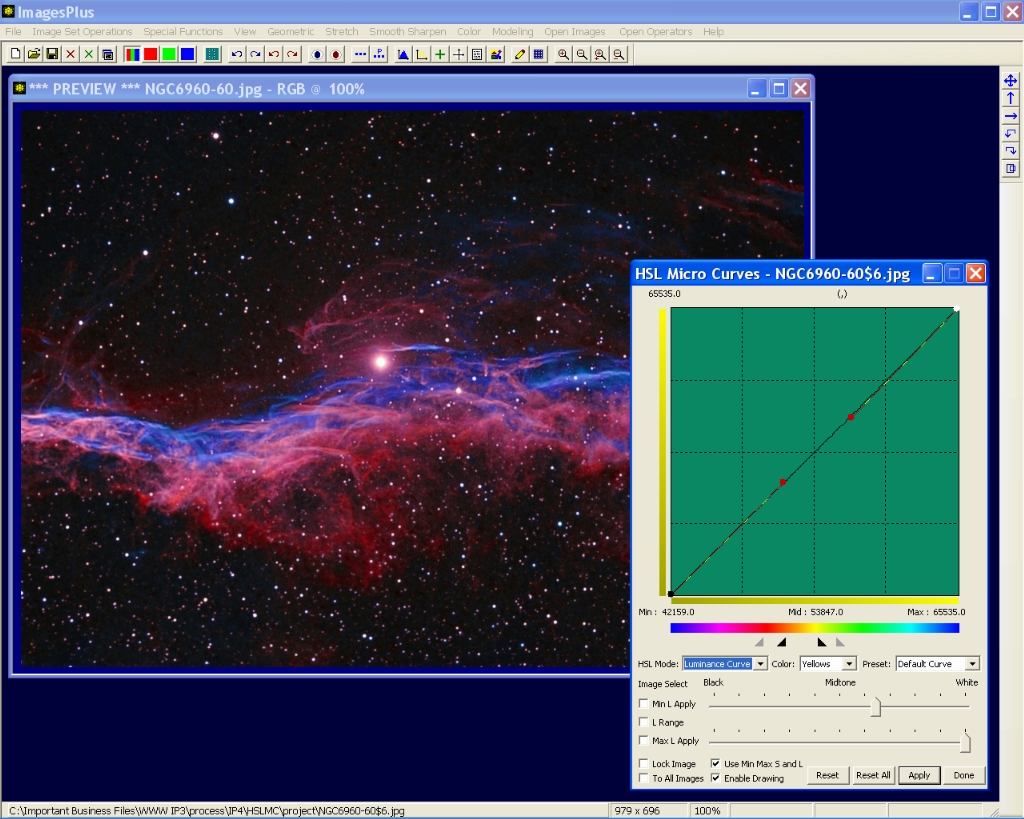
The hue range and feather traingles are made a little wider using the mouse. Luminance min apply is lowered to 42159 but the luminance curve is not changed from its default identity curve. So the min and max luminance values are used only as constraints and a pixels luminance does not change.
 |
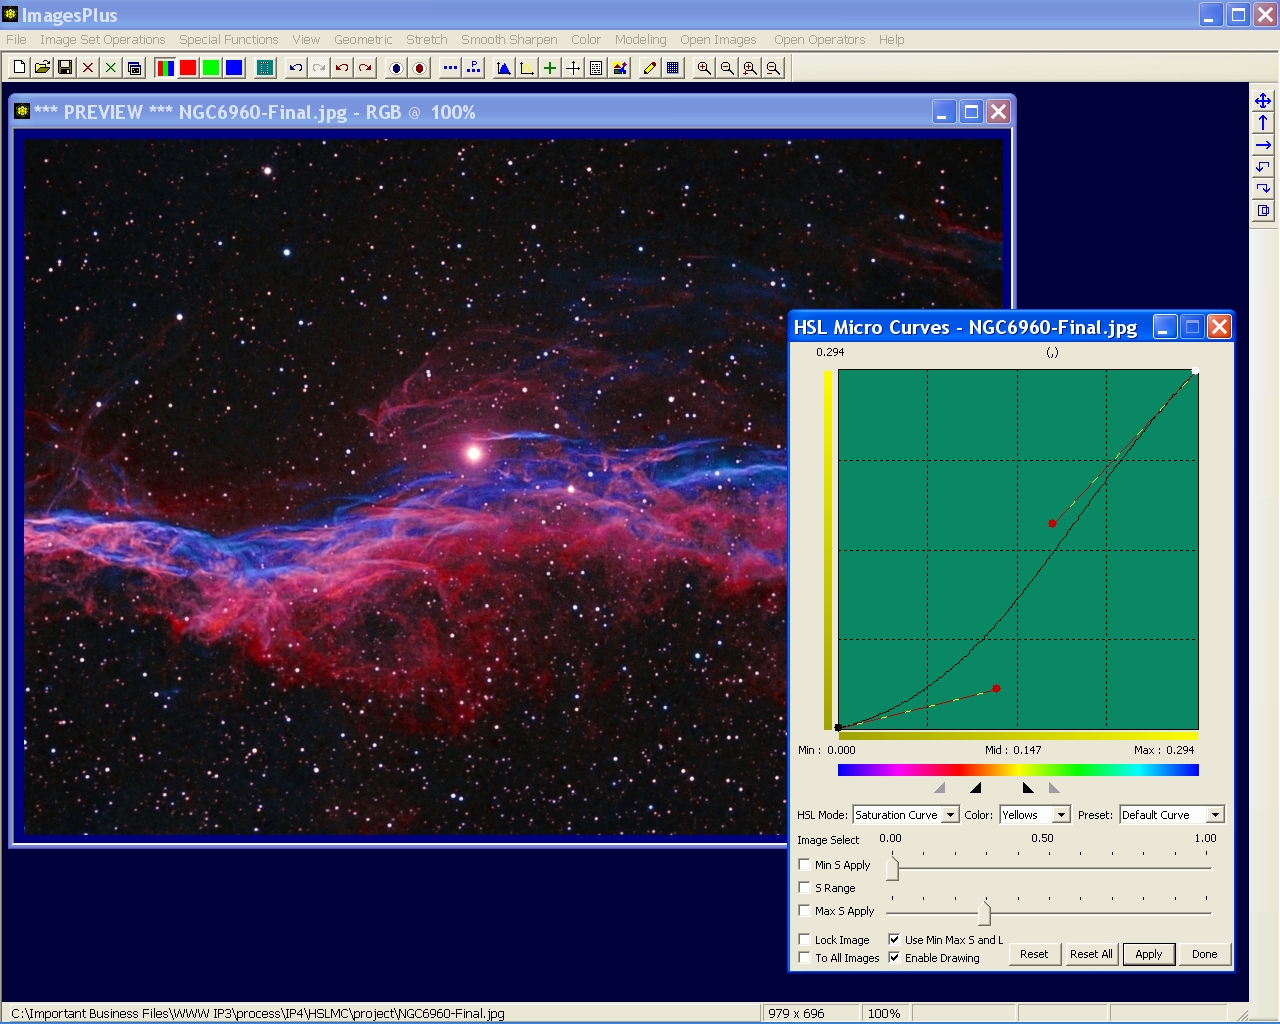
Saturation max apply is lowered to 0.294 and the saturation curve is lowered. Since the Use Min Max S and L box is checked only pixels in the orange to yellow hue range with high luminance and low saturation have a decrease in saturation and no change in luminance.
 |
Step 5 - Select Low Saturation Red In Nebula
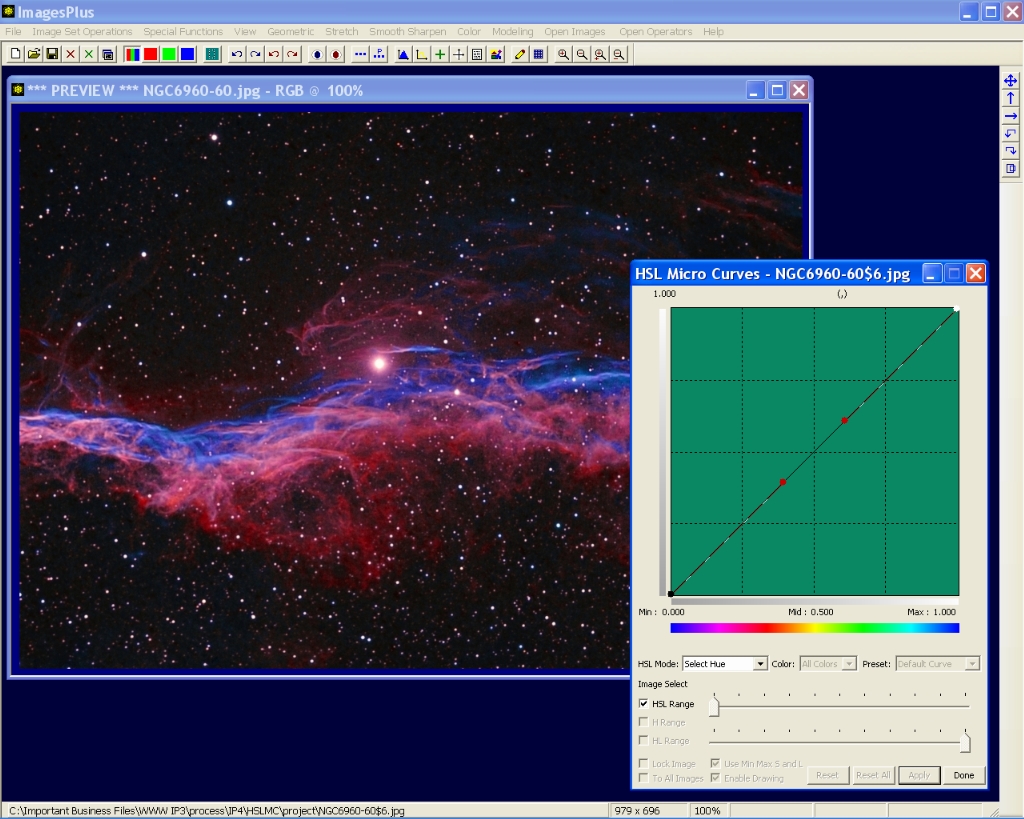
Press the main menu toolbar Set View button to save the HSL Micro Curve saturation decrease to bright star cores shown in steps 2 - 4. Press the Rest All button on HSL Micro Curves to reset all default parameters. Now set the HSL Mode list to Select Hue and check the HSL box. Left-click on the bright red area of the nebula with low saturation to set the hue, saturation, and luminance range.
 |
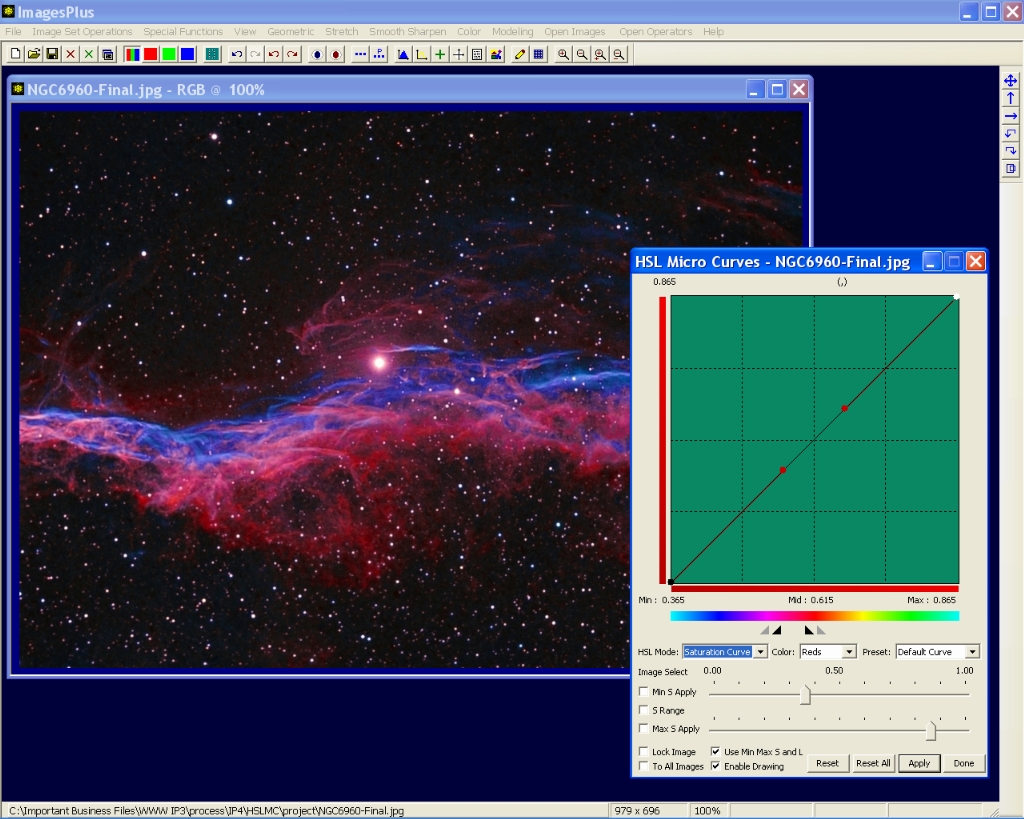
Step 6 - Low Satruation Red From Nebula Selected
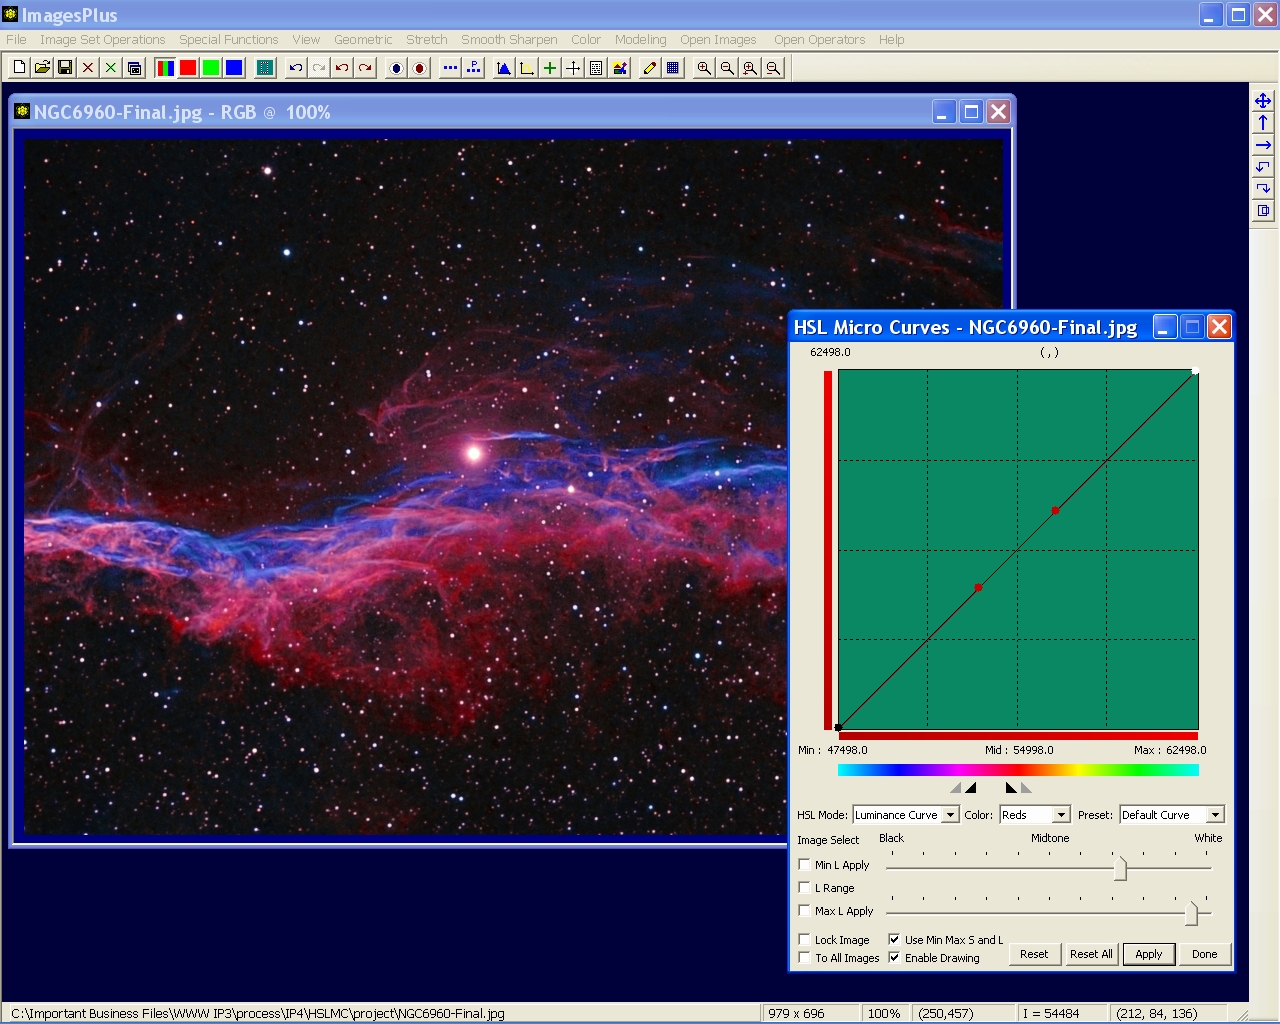
The hue range and feather triangles are center about the low saturation red in the nebula. Luminance constraints are set to min = 47498 and max = 62498. The luminance feather range is built into the luminance curve.
 |
Saturation constraints are set to min = 0.365 and max = 0.855. The saturation feather range is built into the saturation curve. The Use Min Max S and L box is checked. As a result only bright red pixels of low saturation are affected by the luminance and saturation curves.
 |
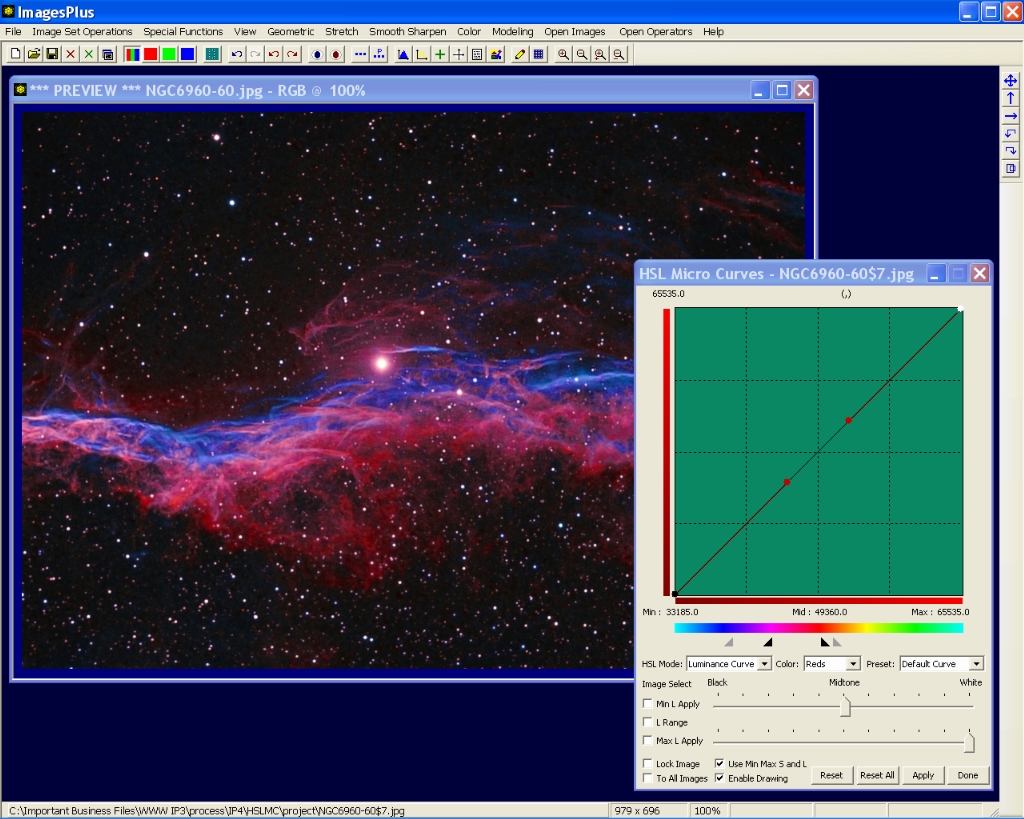
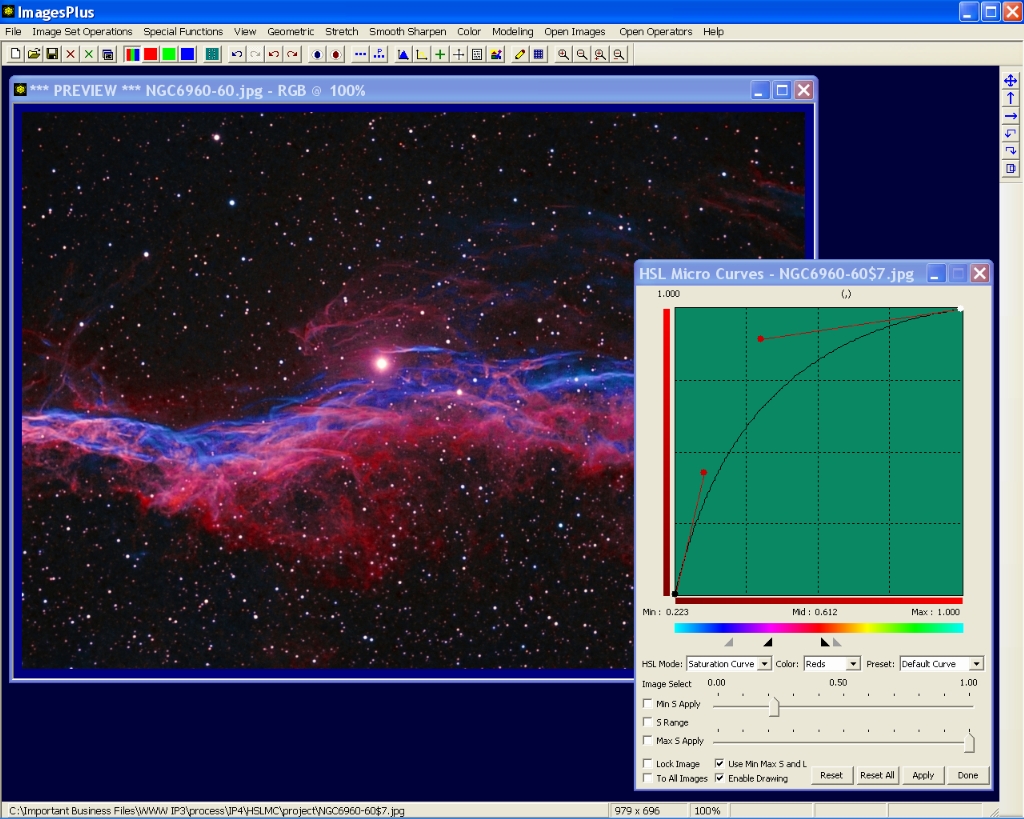
Step 7 - Adjust Bright Low Saturation Red
The hue range and feather traingles are made a little wider using the mouse. Luminance min apply is lowered to 33185, max apply is set to 65535, and the luminance curve is not changed from its default identity curve. So the min and max luminance values are used only as constraints and a pixels luminance does not change.
 |
Saturation min apply is lowered to 0.223 and max apply is set to 1.00. The saturation curve is raised. Since the Use Min Max S and L box is checked only pixels in the red range with higher luminance and saturation have an increase in saturation with no change in luminance.
 |
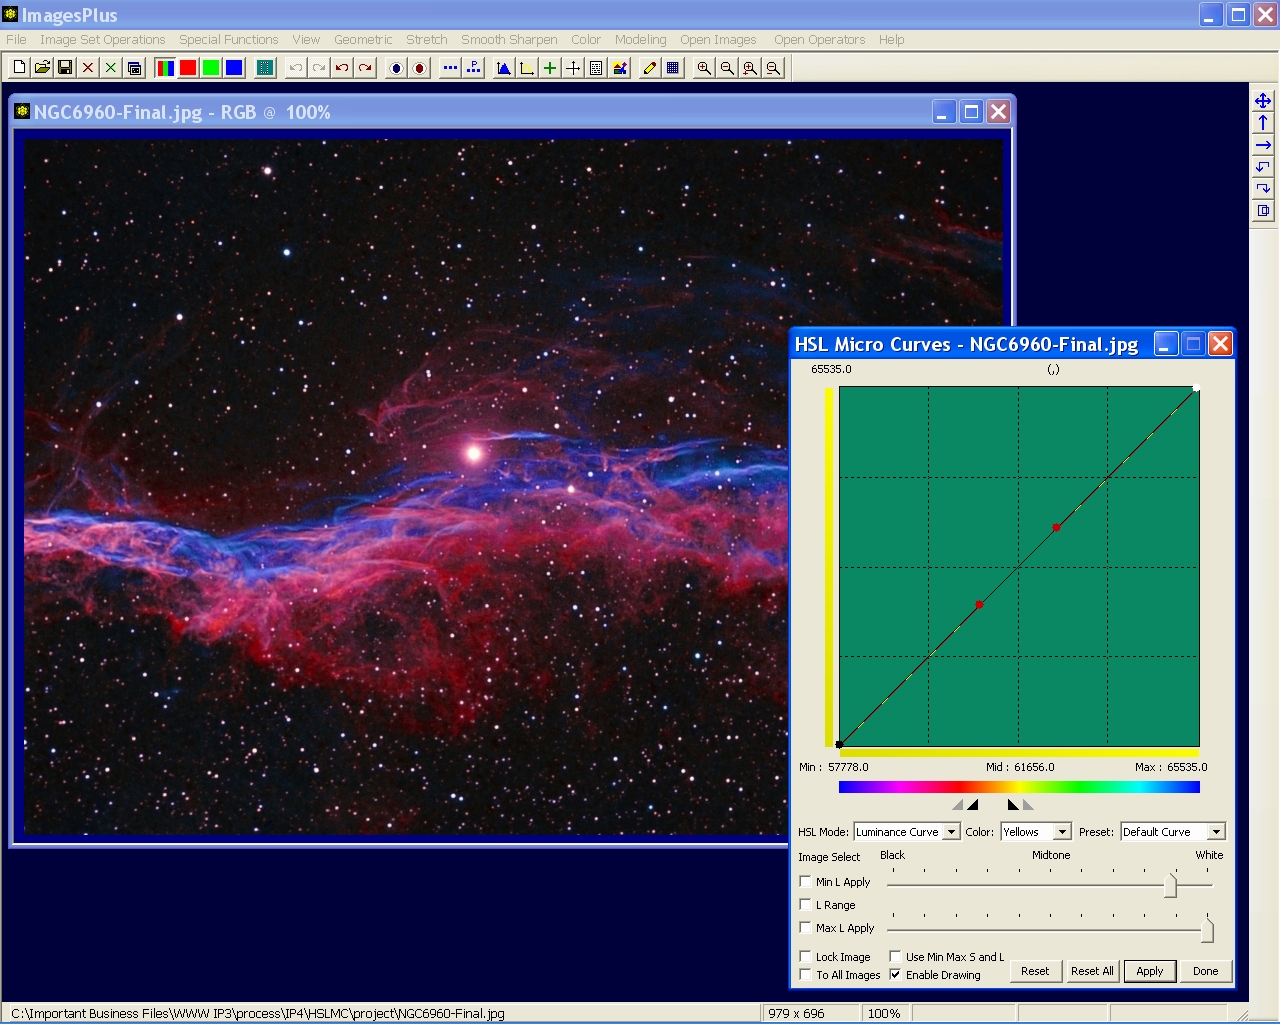
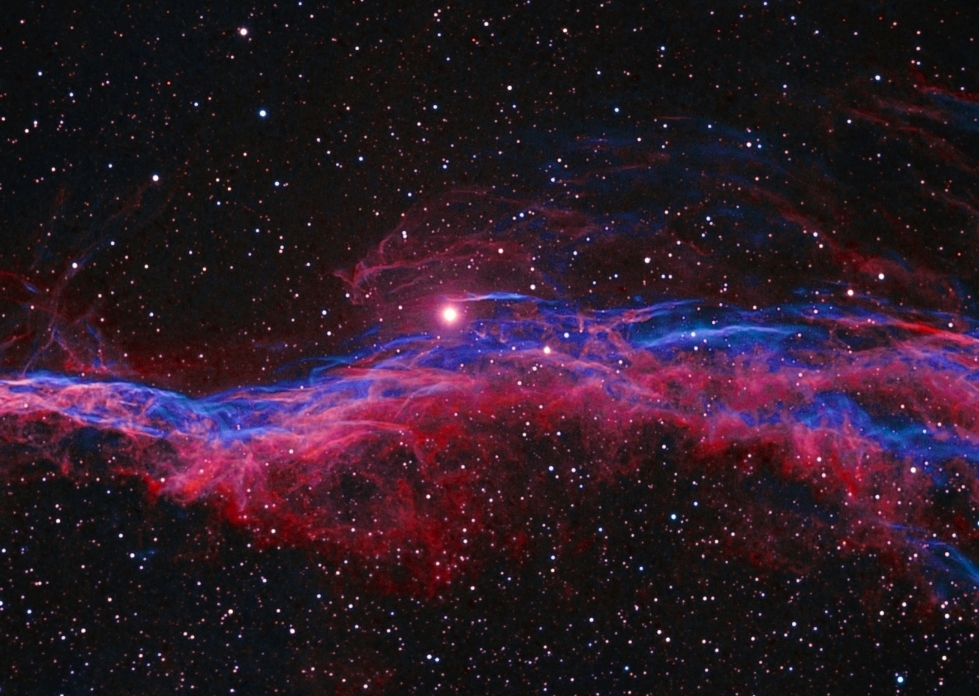
Finial Processed Image of NGC 6960
NGC 6960 Bi-color Narrow Band - (R,G,B) = (Ha, (Ha+OIII)/2, OIII)
 |
Copyright © 2011 MLUnsold Digital Imaging. All Rights Reserved.


