- The Smooth Sharpen | Local Mouse Effects | Column Fix or Clone options can be used to fix column and pixel defects in an open image or a set of images in batch mode.
- The example below demonstrates bad pixel and column fix correction saved in an ImagesPlus project file to correct a set of images in batch mode. Any of the smoothing, sharpening, deconvolution, or color commands tracked by the Process History list can be saved in a project file and used in a similar way with Filter Files.
- The goal is to use a single image to record the type and position of the bad pixels and column defects. The Local Mouse Effects | Column Fix or Clone options are used to mark and fix the problem columns and pixels, respectively. The correction commands are then saved in a project file. Filter Files is then used with the column and pixel fix correction project file to correct a set of images in batch mode.
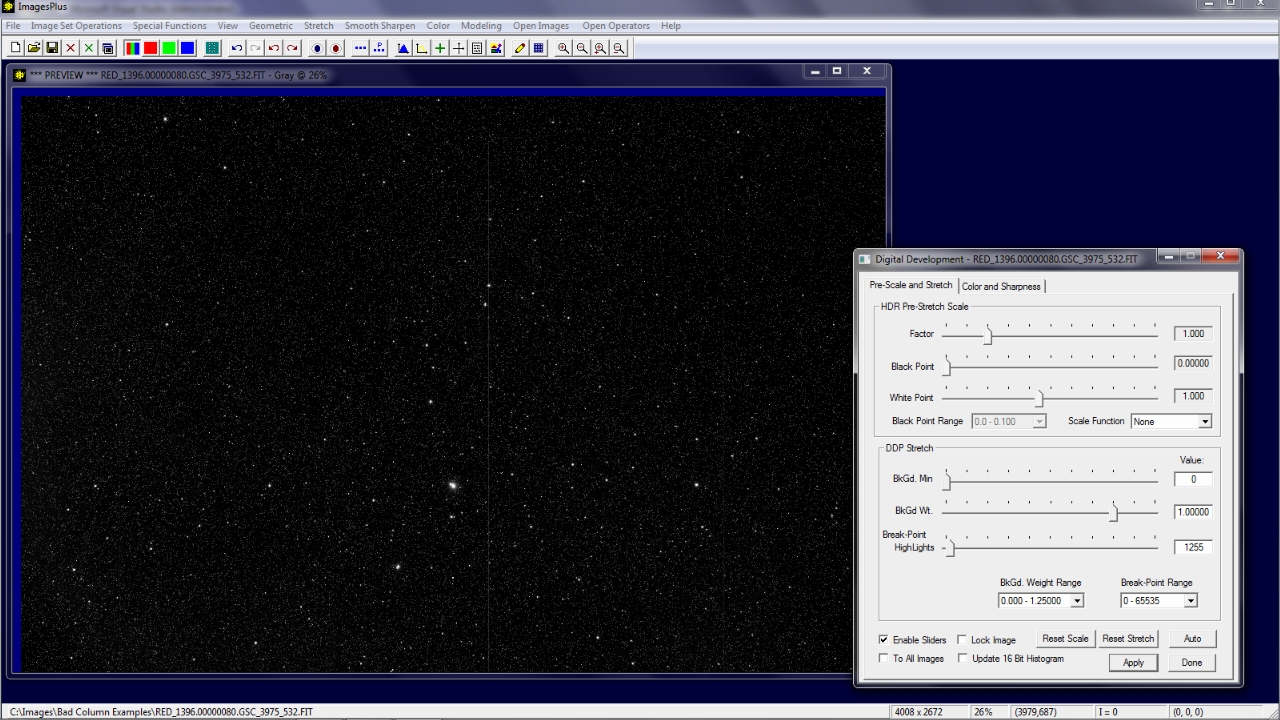
Initial raw image has been stretched to show the column defects.
 |
Step 1
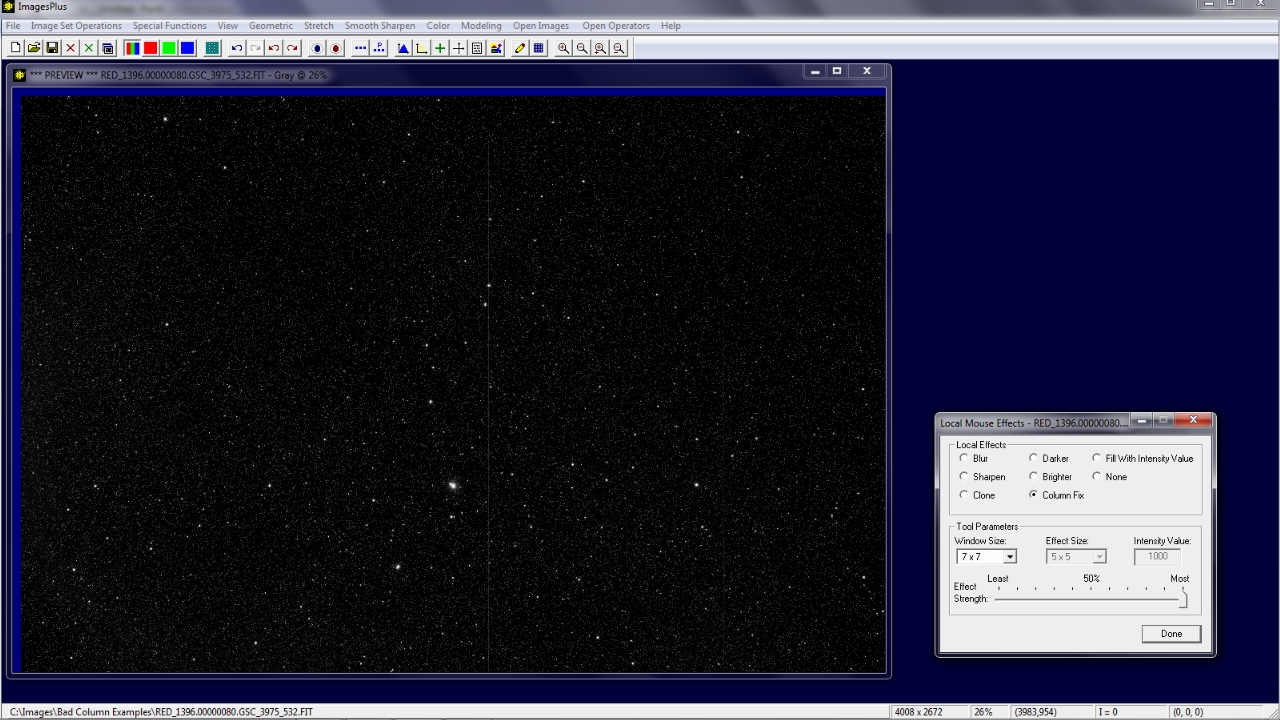
- The Smooth Sharpen | Local Mouse Effects with the Column Fix option is used to remove the problem column defects.
A left-click on the bad column with the Local Mouse Effects | Column Fix option will be used to fix the columns.
 |
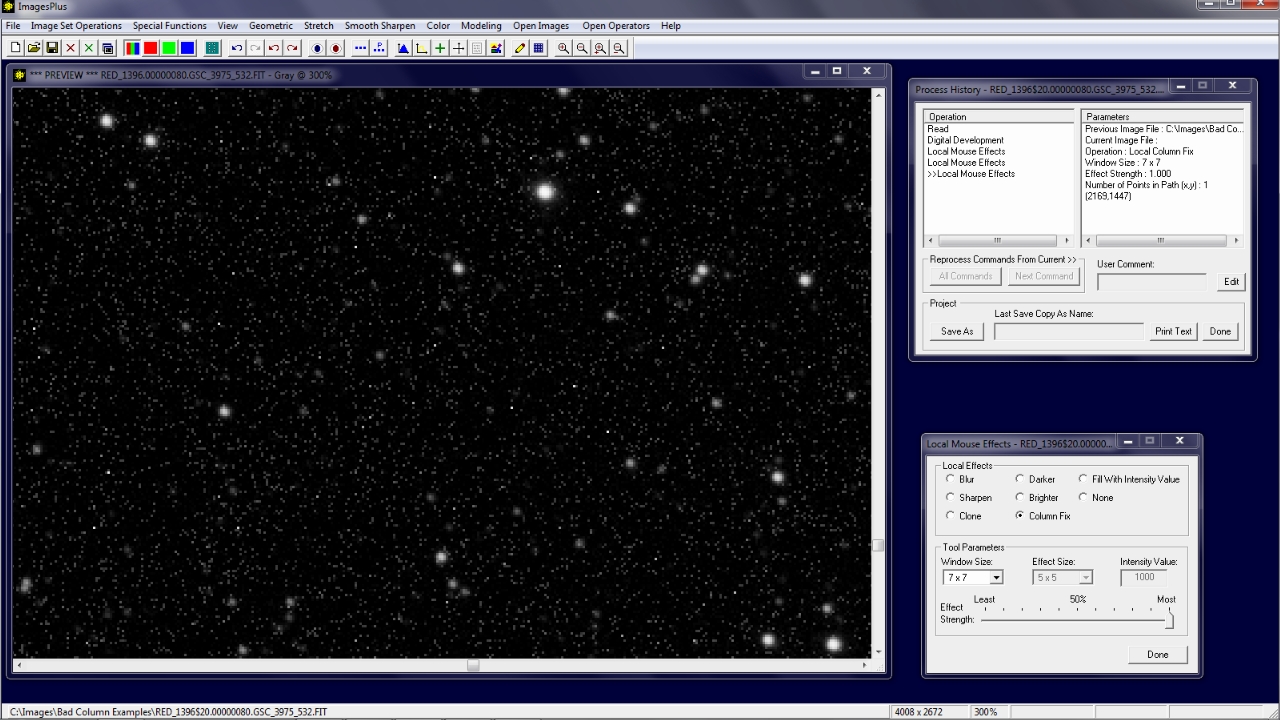
Step 2
- The image is zoomed to 300% and the Process History list is opened from the ImagesPlus main toolbar.
The image is scrolled at 300% zoom. Each problem column receives a left-click to fix. Two columns have been fixed with the Local Mouse Effect | Column Fix corrections shown in the Process History list.
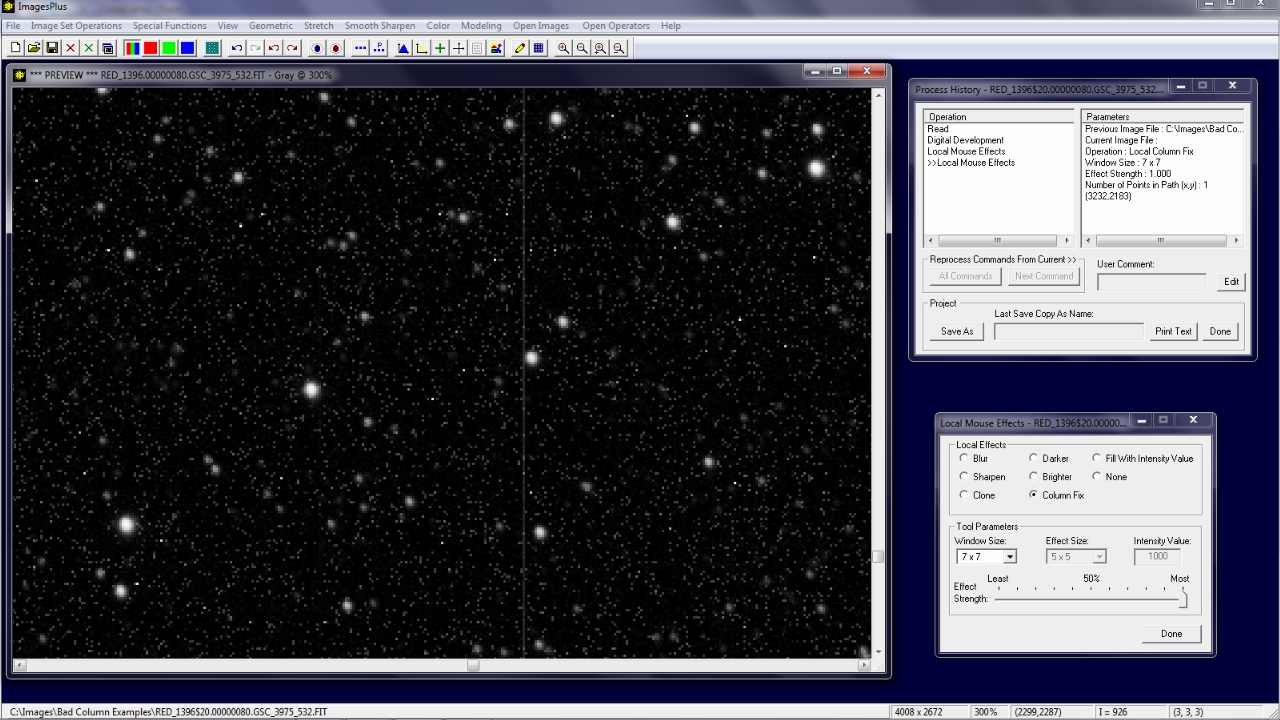 |
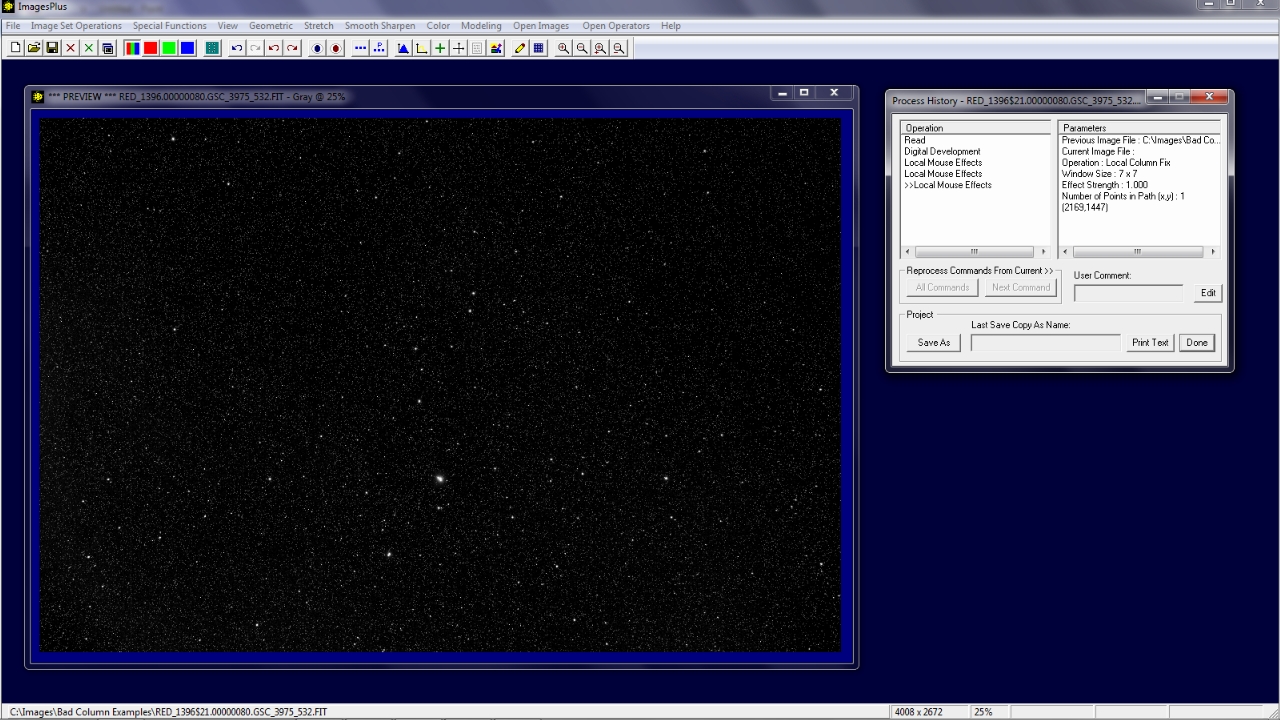
The last problem column receives a left-click and the Local Mouse Effects column correction is shown in the process history operation list. The undo and redo buttons can be used to remove column fix operations made in error from the process history list.
 |
Step 3
- The digital development stretch is removed form the process history list since only the column corrections are used to remove the column defects.
Digital development was used to brighten the image so that defective columns could be seen and fixed using the Local Mouse Effects tool. Only the column corrections are needed and the unwanted digital development brightness increase should be removed from the process history operation list.
 |
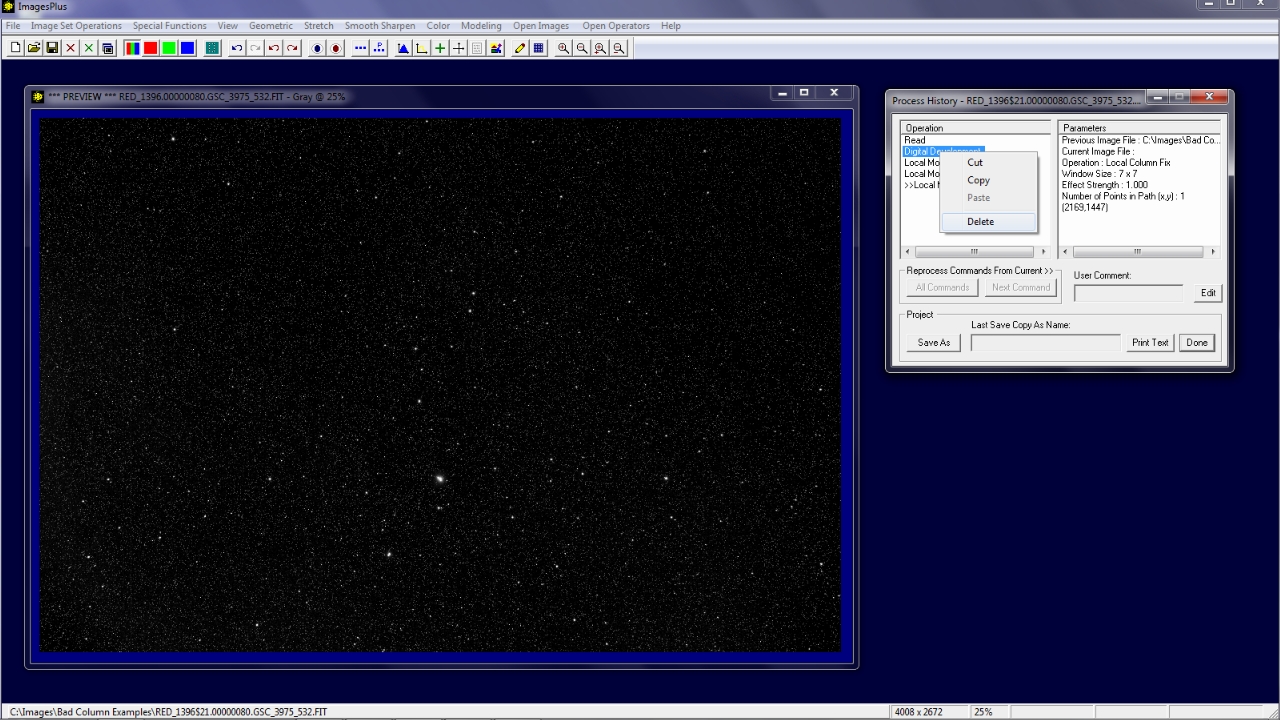
Right-click on Digital Development in the Process History window operation list then select Delete.
 |
Digital Development is removed from the process history list. The history list text turns red with ~~ as a prefix to the first Local Mouse Effects operation. The red text indicates that the process history list should be reprocessed form the starting Read command to make the image match the process history list. Double-click on Read in the process history list then press the All Commands button to automatically reprocess the history list from the beginning read command.
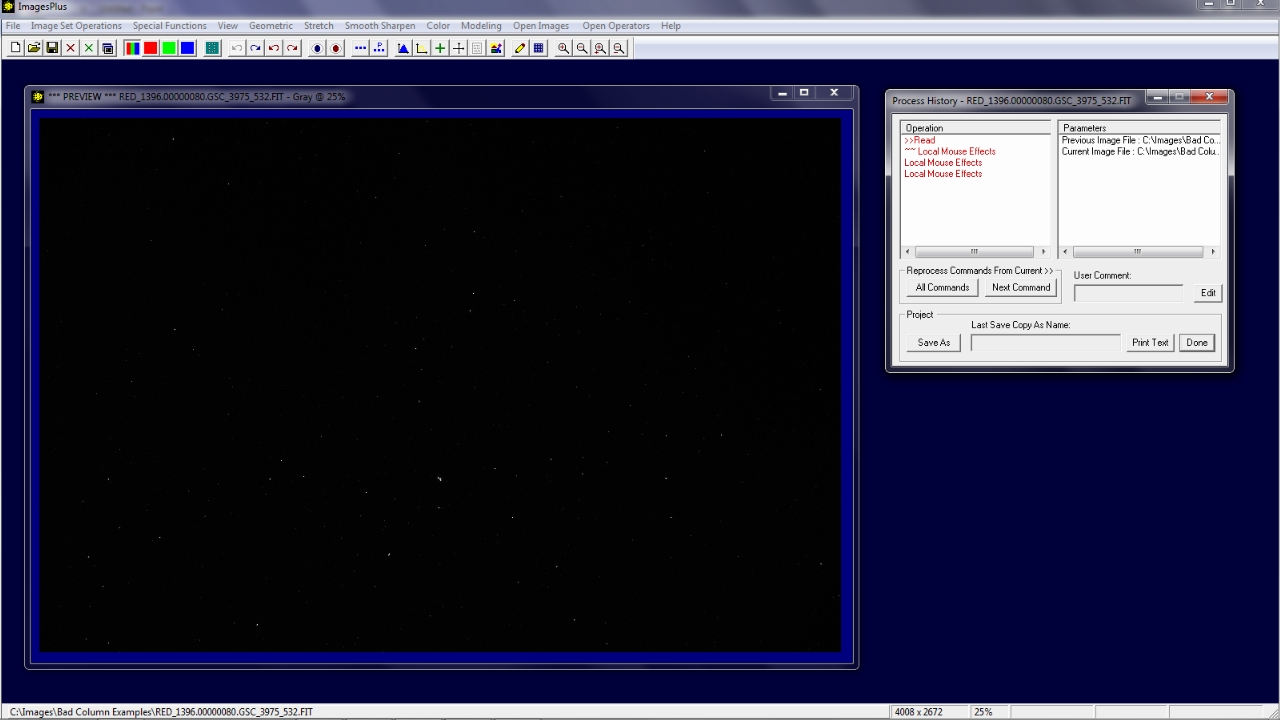 |
The process history text is now black with no ~~ marks which indicates that the command sequence is in order and matches the image displayed. Only the three column fix commands have been applied to the raw image.
 |
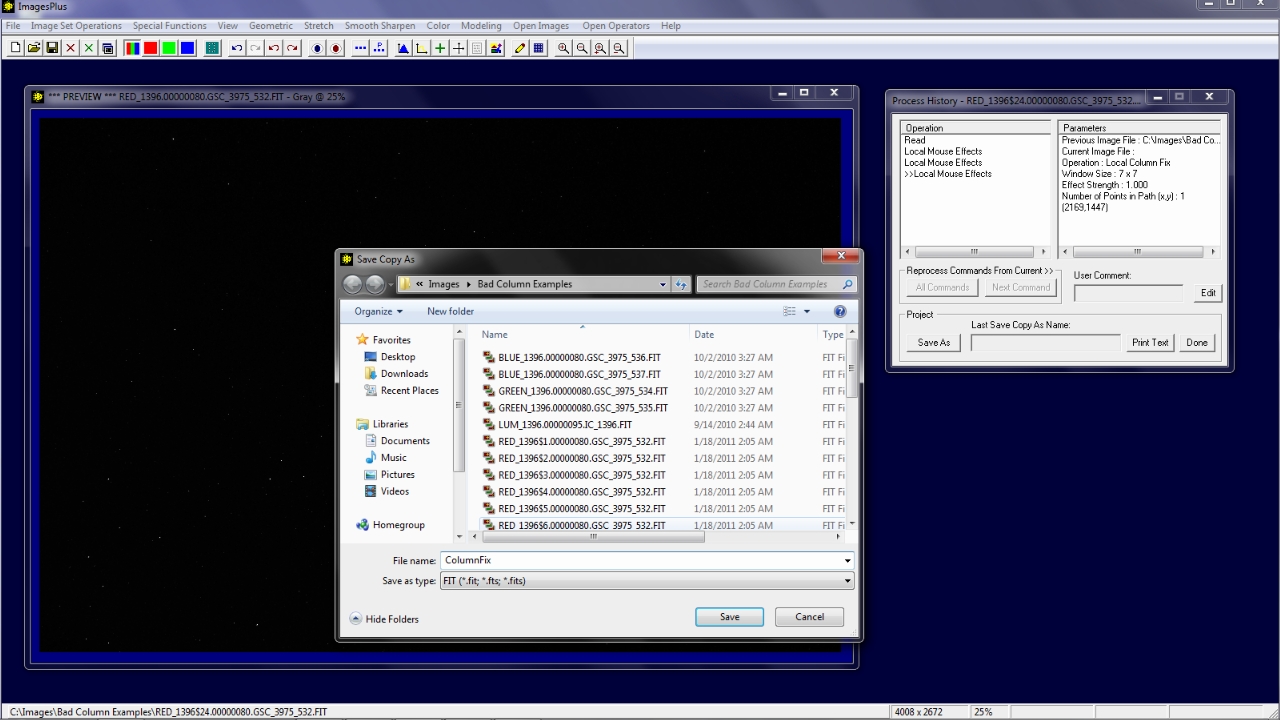
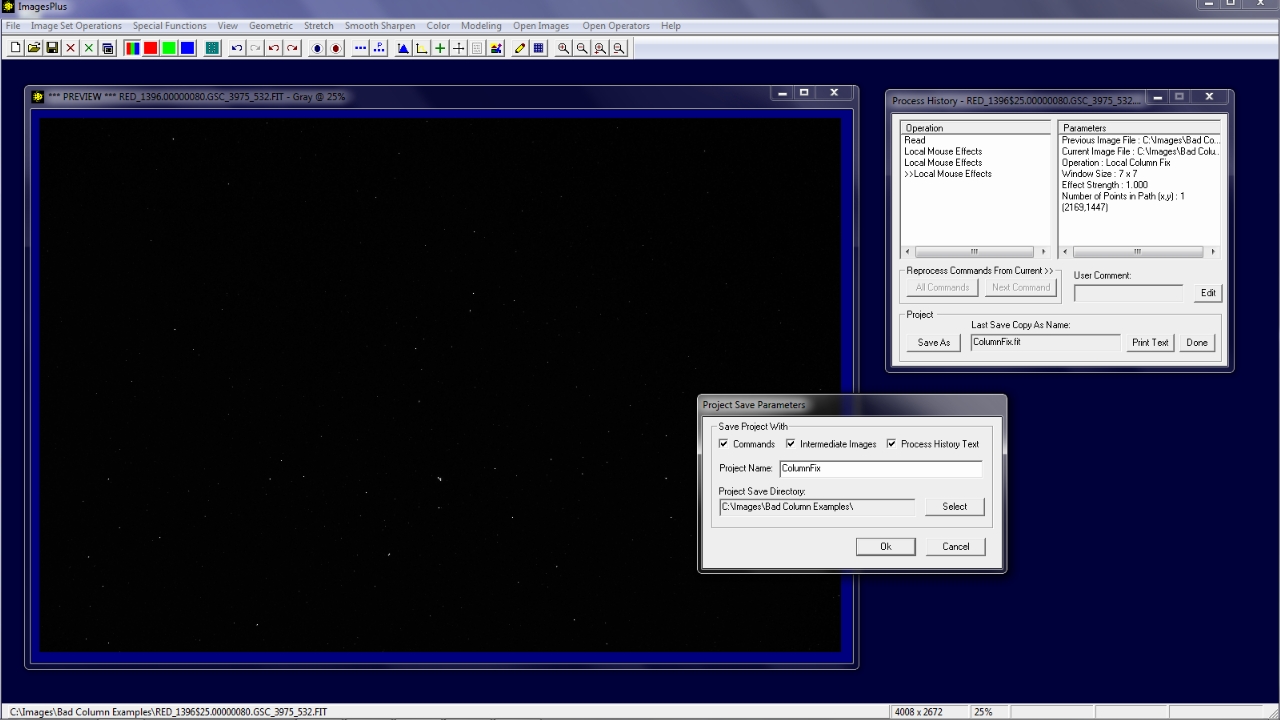
Step 4
- The column corrections are saved in an ImagesPlus project file for later use on an open image or in batch mode with Filter Files.
To save the column fix commands in a project file press the Save As button on Process History then enter a name such as ColumnFix. Press the Save button.
 |
The Project Save Parameters window appears with the default parameters set. Press Ok to save the commands in a project file called ColumnFix.
 |
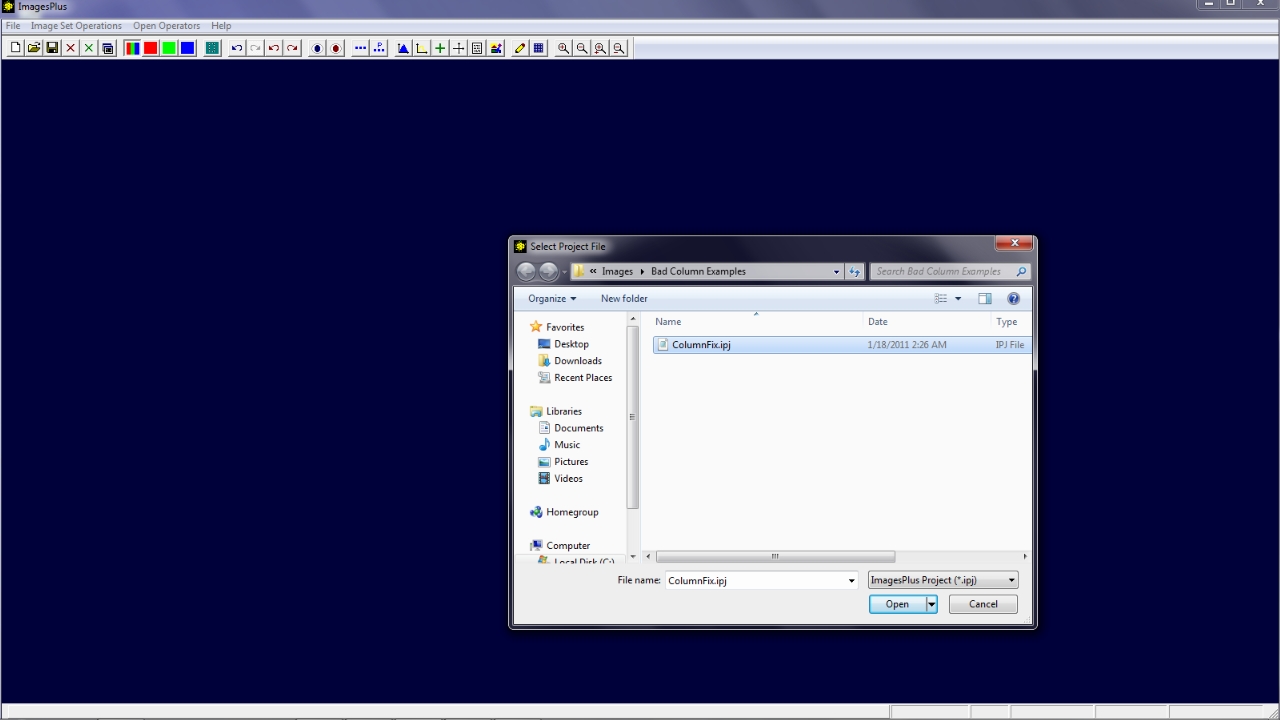
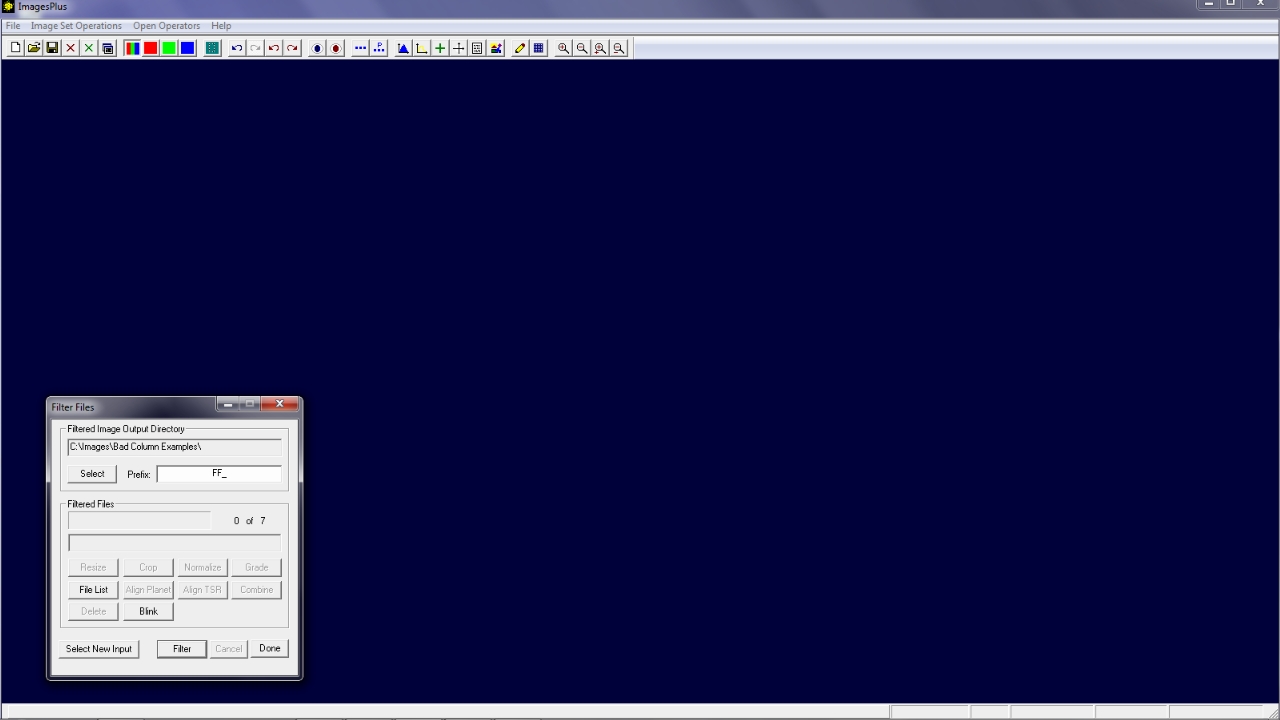
Step 5
- The column correction project file ColumnFix is used with Image Set Operations | Filter Files to correct a set of images in batch mode.
Select Image Set Operations | Filter Files from the main ImagesPlus menu then select ColumnFix in the project file window.
 |
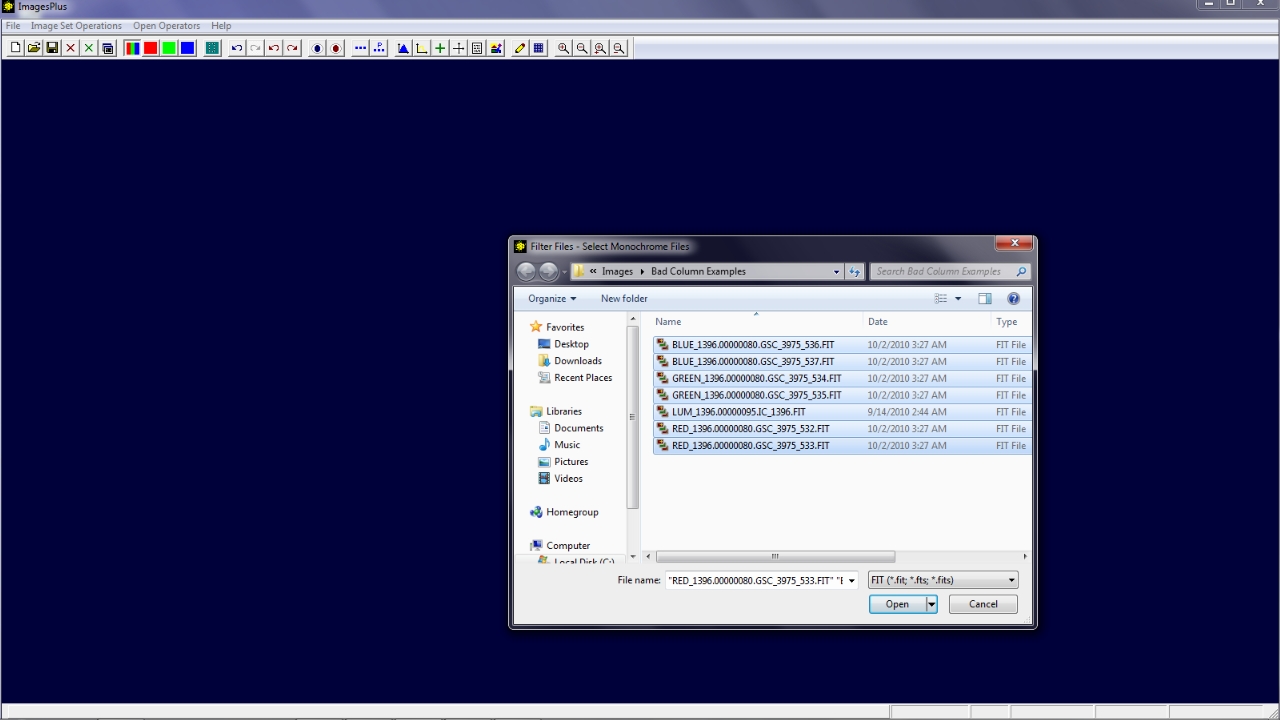
Select raw files that require column fix operations.
 |
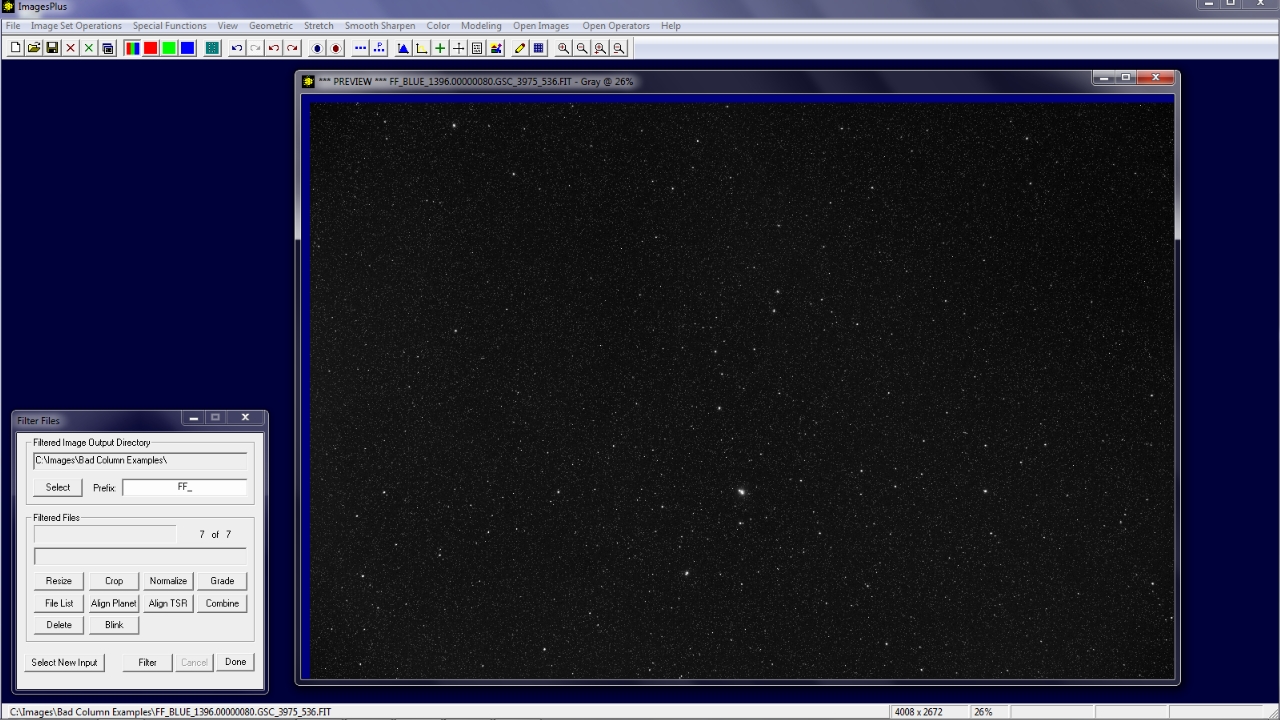
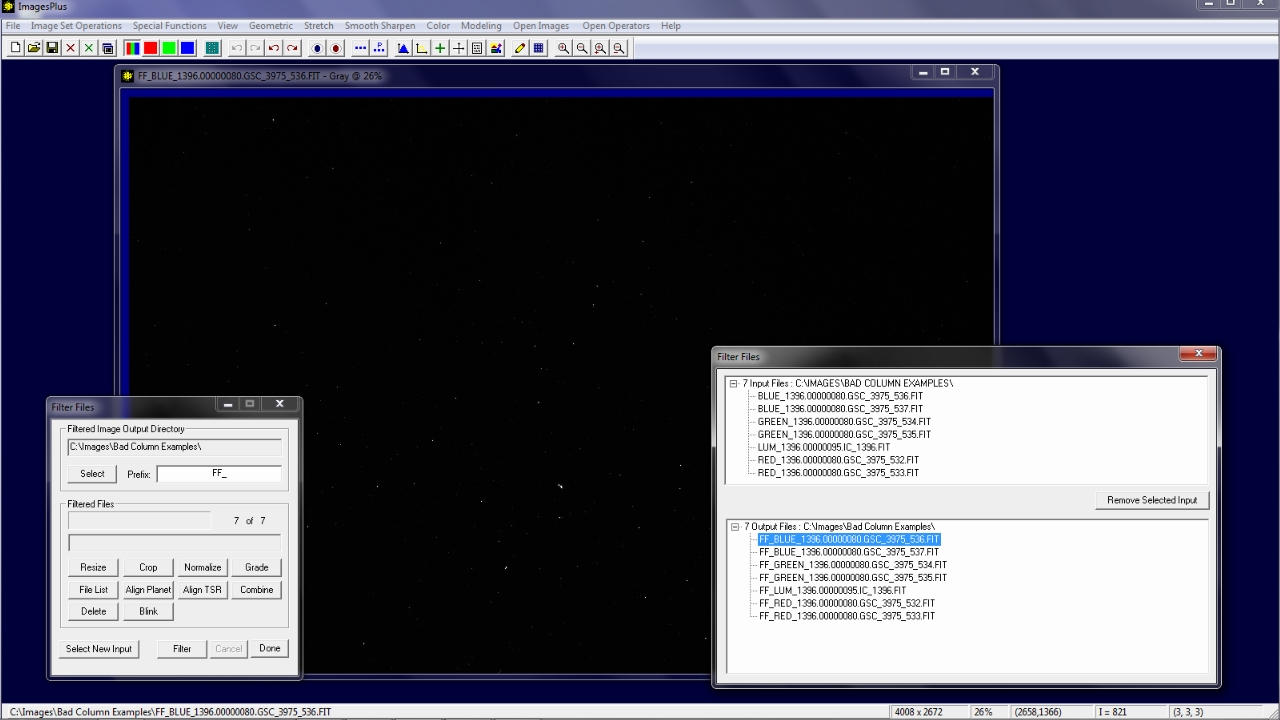
The Filter Files window appears. Press the Filter button to apply the column fix corrections stored in ColumnFix to each image in the set. Filter Files adds a FF_ prefix to each image that is processed.
 |
The Filtered Files buttons will be enabled when Filter Files is finished. To inspect the column corrected raw images press the File List button then double-click on an output file name to display the image.
 |
Copyright © 2011 MLUnsold Digital Imaging. All Rights Reserved.