A set of 15 light frames of M15 along with 20 dark, 20 flat, 20 flat dark, and 20 bias frames all in raw CR2 format from a Canon 50D were collected using a 203mm TMB APO at F9. The light, dark, and bias frames were all ISO 200 and 10 minutes each. Flat and flat dark frames were 1/25th second exposures at ISO 200. The flat frames were taken during the day using a uniform gray or blue part of the sky. Detailed processing of the initial light, flat, dark, flat dark, and bias image set is demonstrated by the DSLR Automatic Image Set Processing example.
The goal is to enhance the stacked image for display on the web.
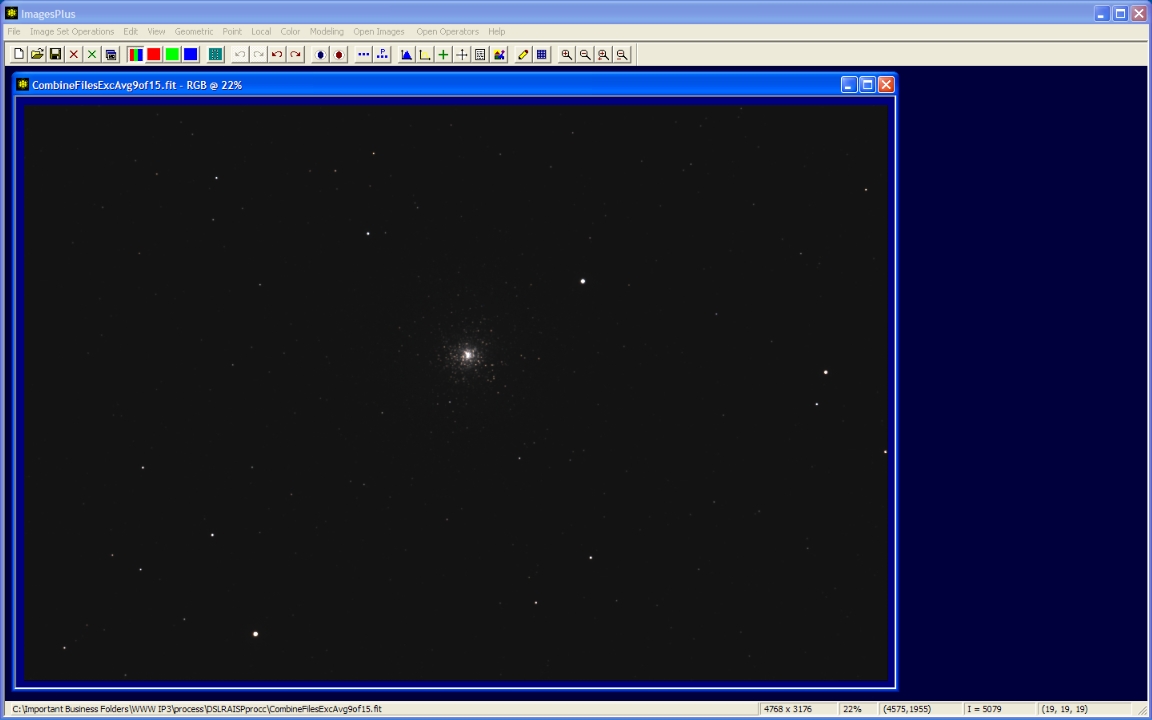
Initial stacked image
 |
Step 1
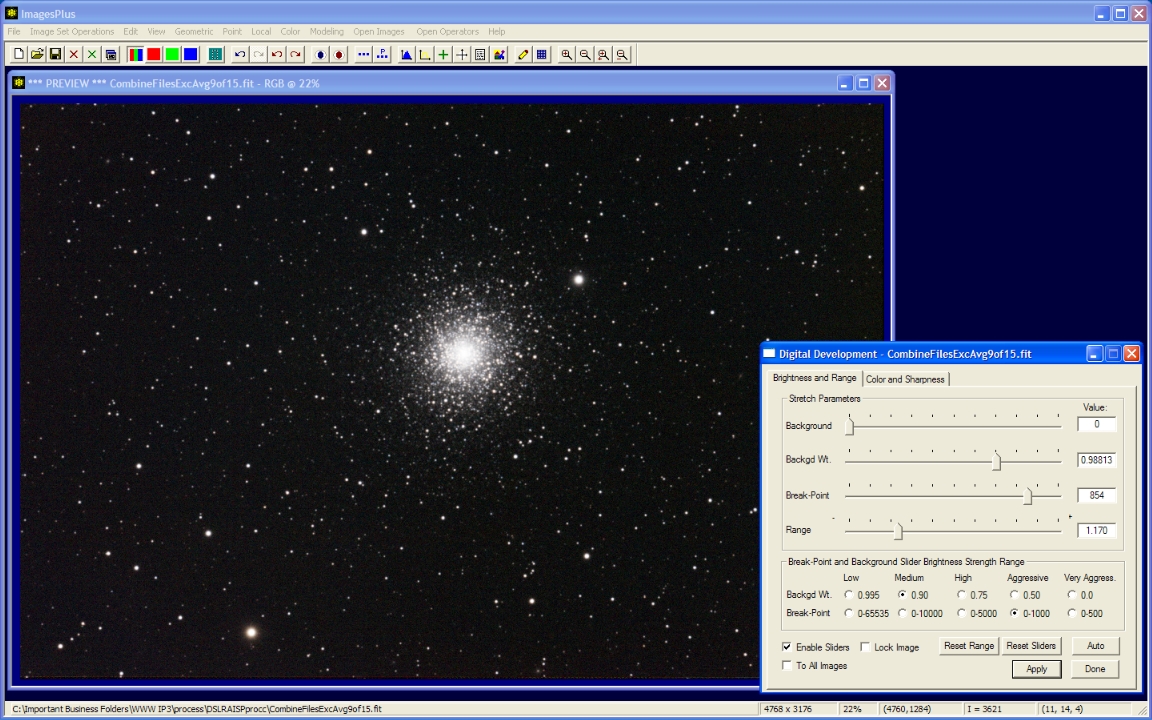
- Color | Digital Development is used to increase brightness and contrast.
- Tune the break-point and background weight sliders to match the image. The break-point and background weight slider strength is set to aggressive and medium respectively.
Digital Development brightness and contrast increase.
 |
Step 2
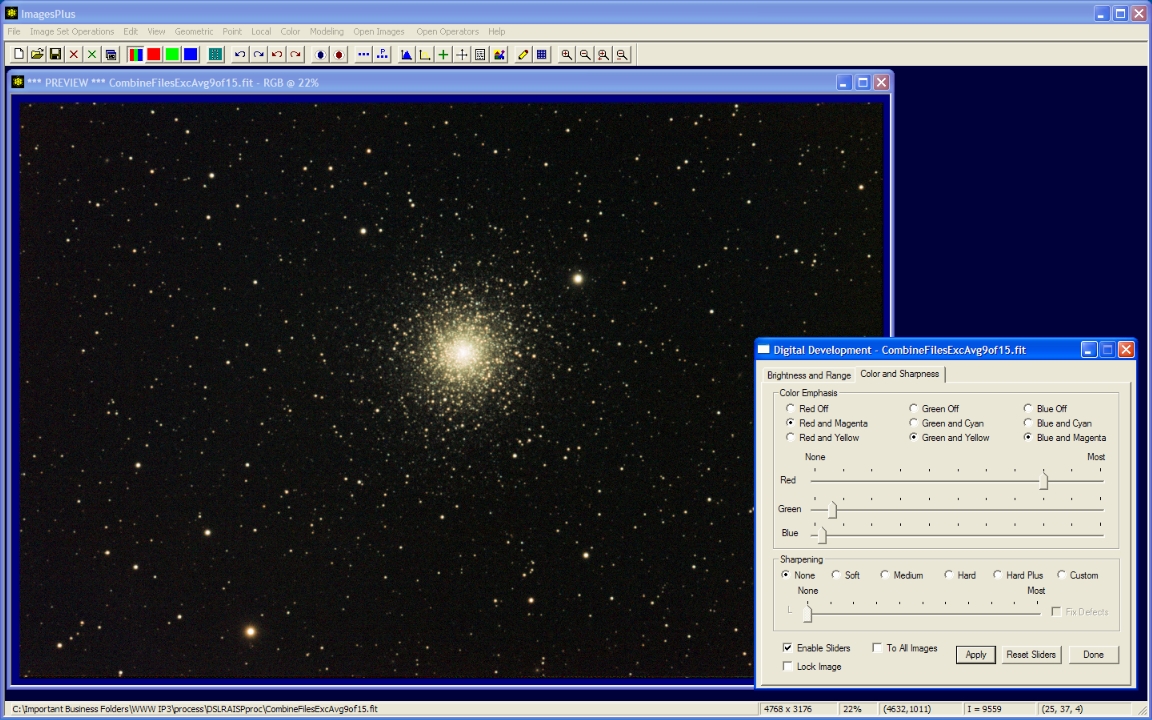
- Digital development brightness and contrast increase can compress color.
- The digital development color emphasis sliders are used to uncompress color.
Digital Development color adjustment.
 |
Step 3
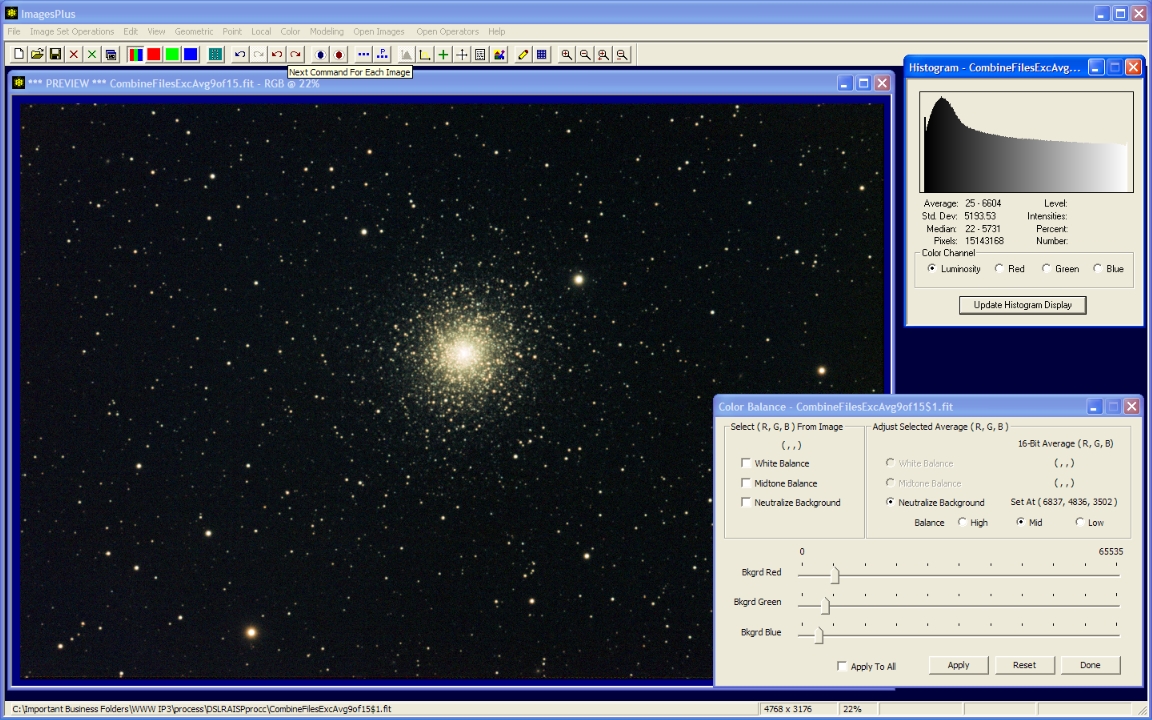
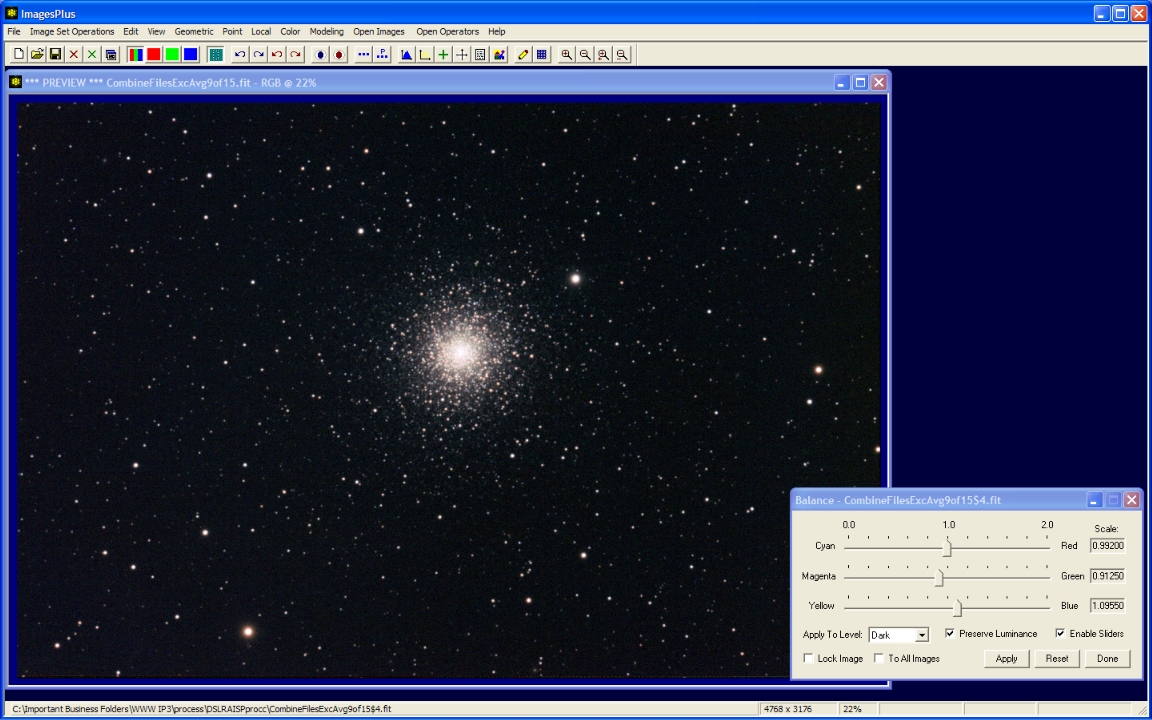
- Color | Color Balance command is used to neutralize the background.
- Check Neutralize Background then left-click on a typical background area.
- The Red, Green, and Blue sliders can be used to adjust color.
Neutralize background and andjust color.
 |
Step 4
- Color | Color Balance is used to adjust color.
Adjust Color Balance.
 |
Step 5
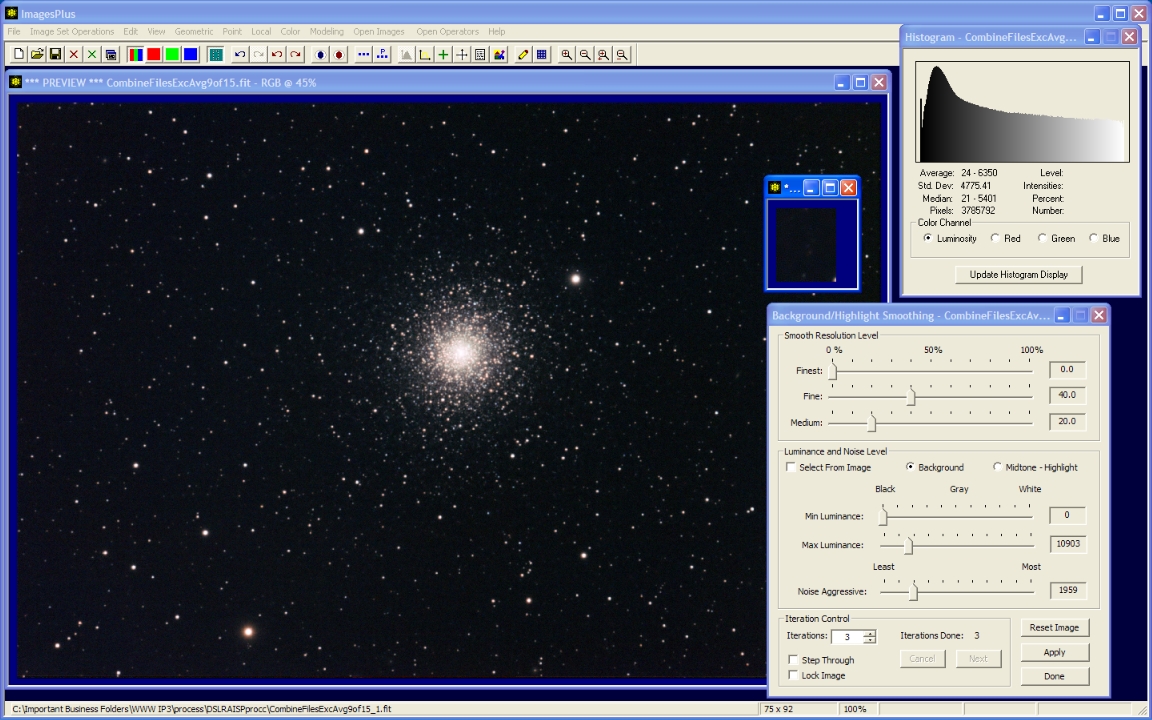
- Local | Background/Highlight Smoothing is used to smooth the dark background.
- A small preview window is first created of a typical background area using the Copy Portion toolbar button. Background smoothing parameters are first set by checking the Select From Image box then a left-click on the background area.
- Background smoothing parameters are adjusted using the preview window then applied to the full size image.
3 iterations of background smoothing.
 |
Step 6
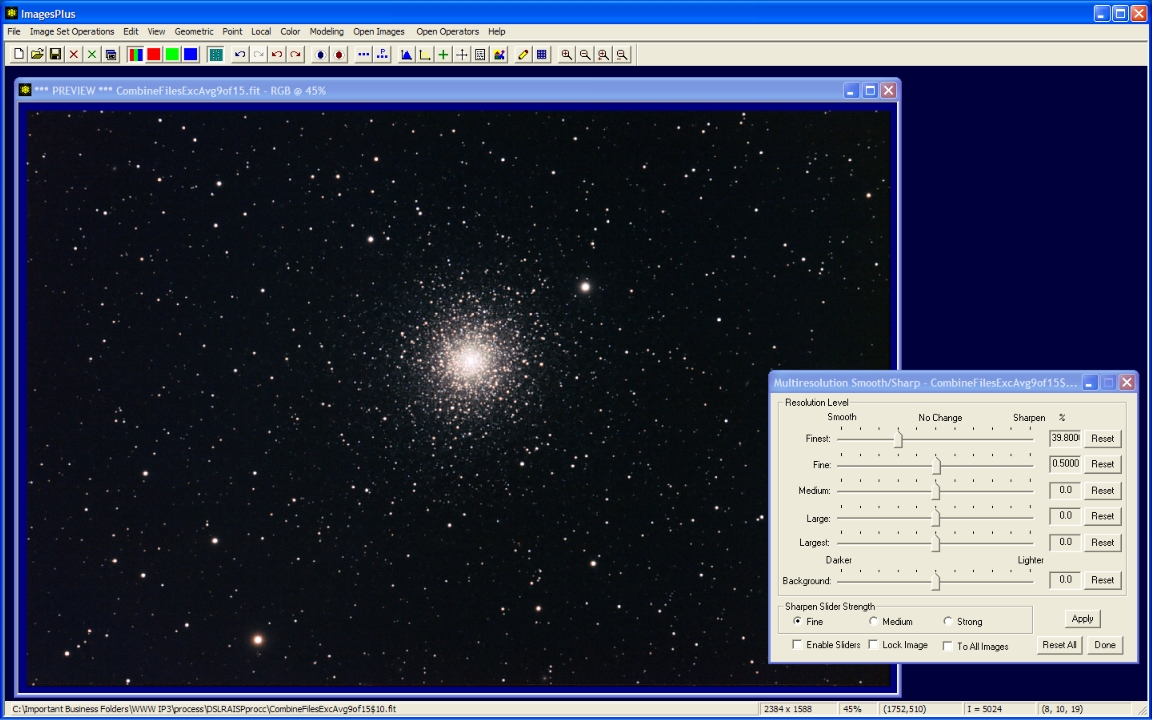
- Local | Multiresolution Smooth/Sharp command is used to sharpen the image.
- Finest detail is smoothed and fine detail is sharpened.
- The slider strength options and arrow keys can be used to enable very fine adjustment.
Smooth finest detail and sharpen fine detail.
 |
Step 7
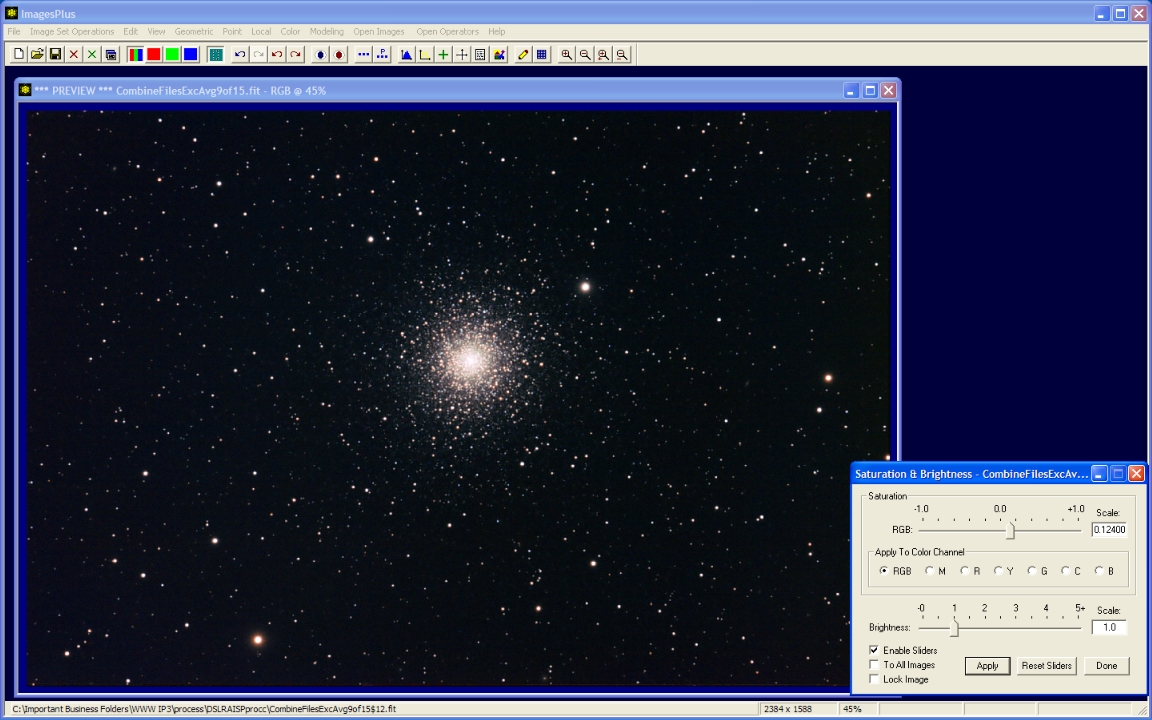
- Color | Saturation & Brightness is used to increase color.
Increase color saturation.
 |
Step 8
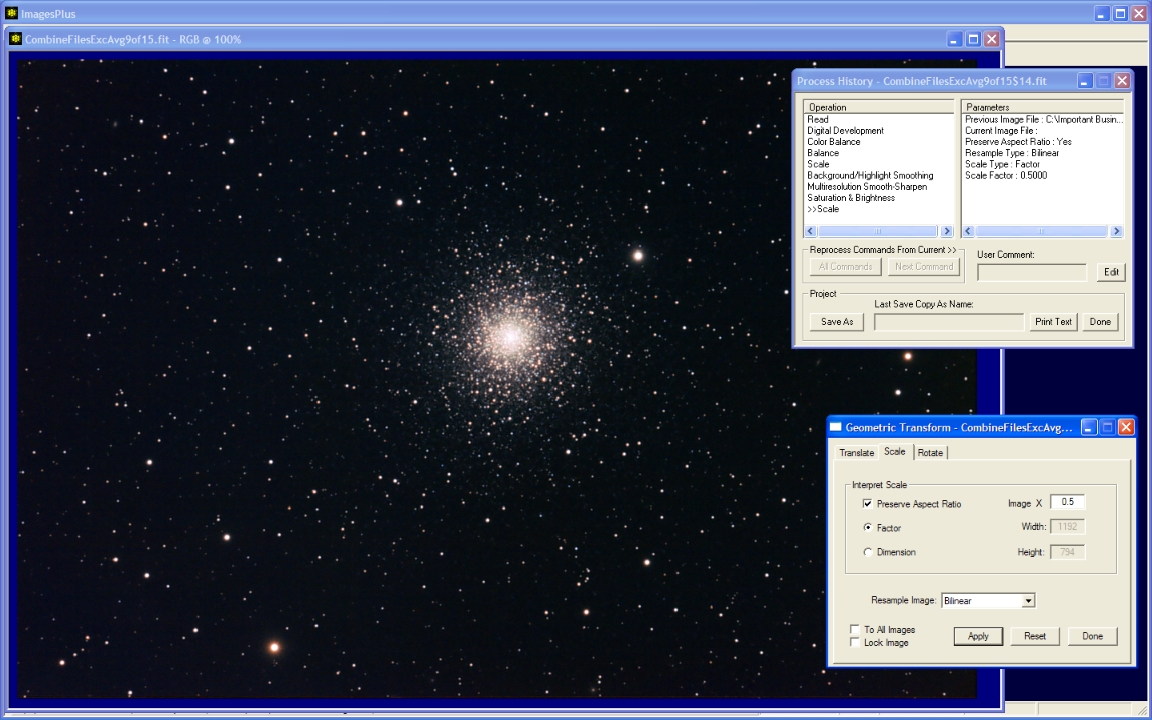
- The Geometric | Geometric Transform | Scale command is used to resize the image for display on the web.
- File | Save Copy As is used to save the FITS image as JPEG.
Scale the image by 0.5 for display on the web.
 |
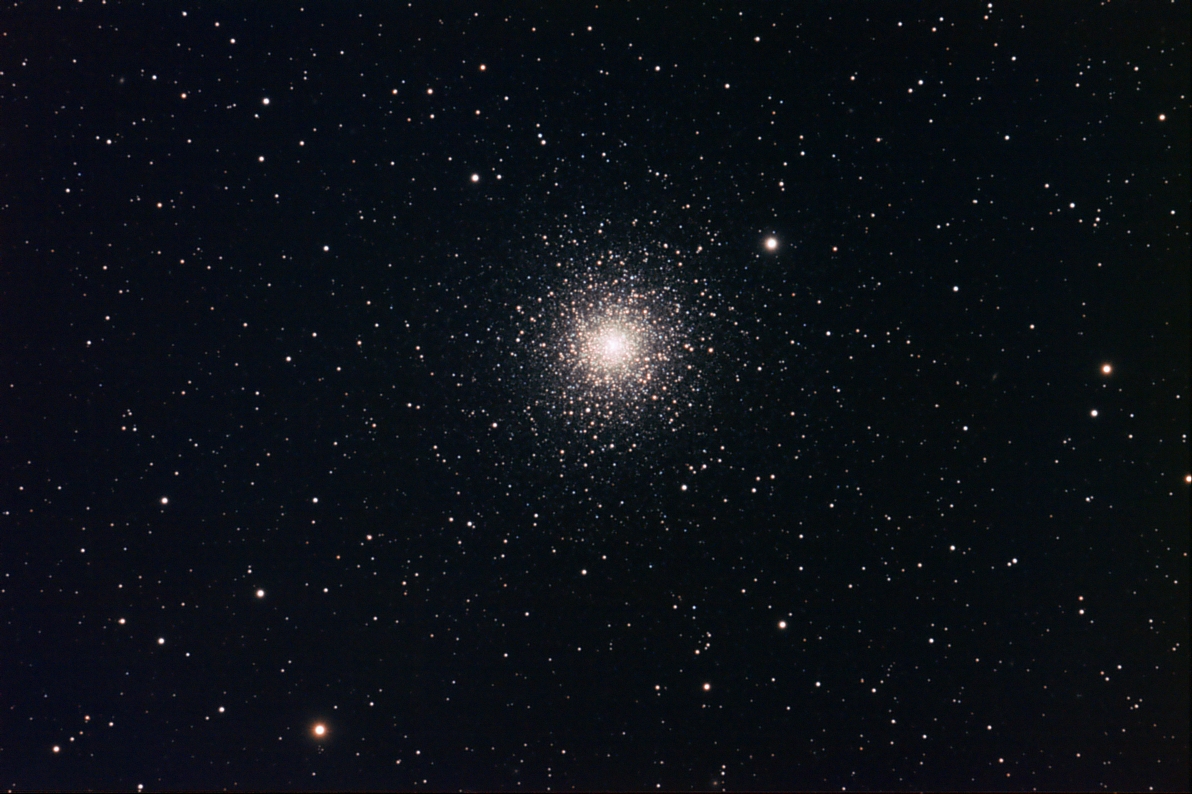
Final image of M15. Stack of 9 x 10 minute ISO 200 with Canon 50D and 203mm TMB APO at F9.
 |
Copyright © 2009 MLUnsold Digital Imaging. All Rights Reserved.
