A set of 15 light frames of M15 along with 20 dark, 20 flat, 20 flat dark, and 20 bias frames all in raw CR2 format from a Canon 50D were collected using a 203mm TMB APO at F9. The light and dark frames are all ISO 200 and 10 minutes each. Bias frames are also ISO 200 with the fastest shutter speed.
Flat and flat dark frames were 1/25th second exposures at ISO 200. The flat frames were taken during the day using a uniform gray or blue part of the sky.
The goal is to automatically process the set of images and create a single color image ready to enhance.
Detailed processing instructions of the stacked image can be found at
DSLR Image Enhancement - M15
Step 1
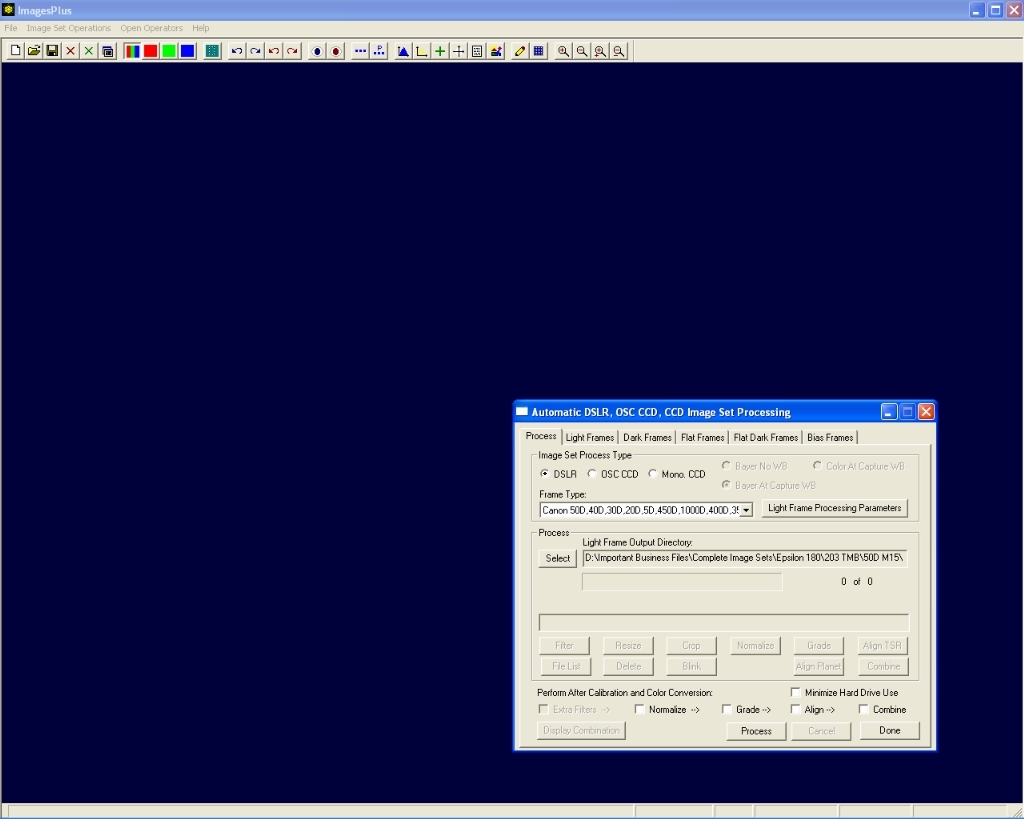
- From the main ImagesPlus menu open Image Set Operations | Automatic DSLR, OSC CCD, and CCD Image Set Processing.
- Select the raw CR2 light, dark, flat, flat dark, and bias frames on their tab windows. If more than one dark, flat, flat dark, or bias frames are selected then a master frame will be built and used for calibration. If only one dark, flat, flat dark, or bias frame is selected then it will be used as the master frame during calibration. Raw DSLR or converted FITS, TIF, BMP, and JPEG images can be selected. The width, height, and color type of all selected light and calibration frames must be the same. For example, all frames must be either color or monochrome images.
- Select DSLR with Bayer At Capture WB as the image set process type. This will convert all raw CR2 files to single channel Bayer format with at capture time color balance from the camera. After calibration the Bayer format light frames will be convert to color using the Bayer option selected on the Light Frame Processing Parameter window shown in step 2 below. The Color At Capture WB option will first convert all CR2 files to color before calibration and further processing. Bayer At Capture WB is the best option since it runs fast, saves hard drive space, and produces the best results.
Standard Process tab for DSLR light frame processing.
 |
Step 2
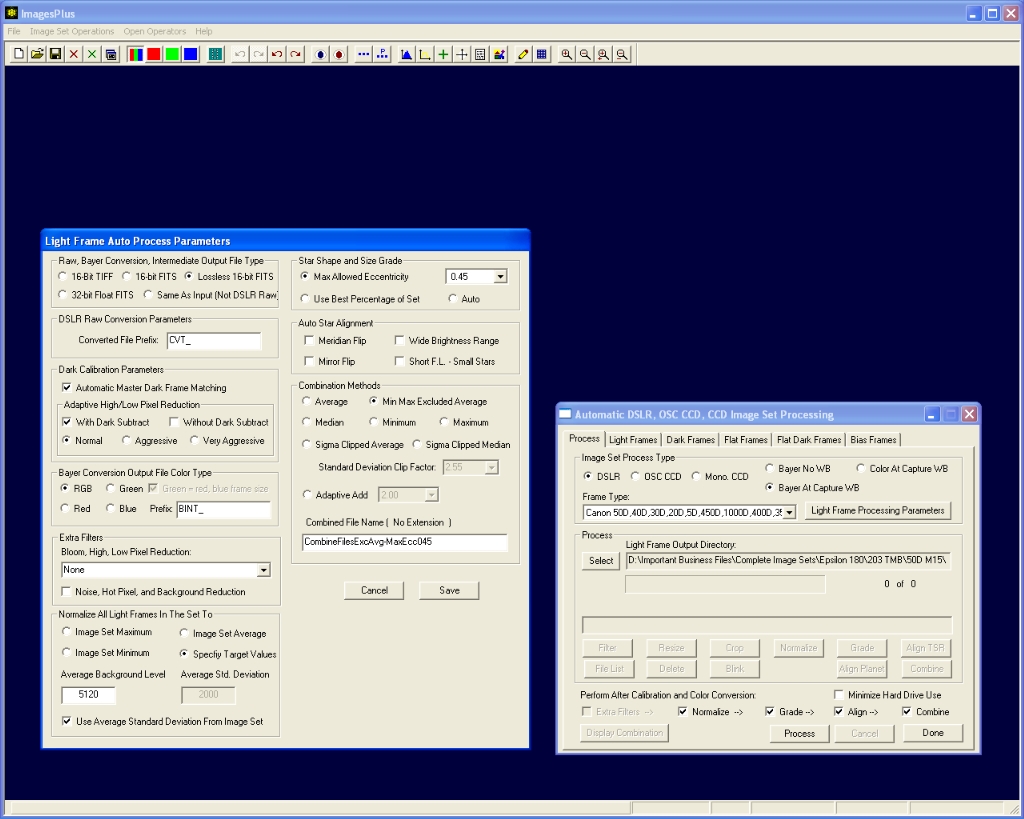
- Press the Light Frame Processing Parameters button on the Process tab of Auto Image Set Processing to display the light frame processing parameters window.
- Raw, Bayer Conversion, Intermediate Output File Type : Specifies the output file type for raw conversion and Bayer conversion to color. 16 bit compressed FITS is the default.
- Dark Calibration Parameters : Automatic Dark Frame Matching is used to match the master dark to each light frame. Normal adaptive high/low pixel reduction with dark subtraction is performed after dark subtraction to remove fixed problem pixels.
- Bayer Conversion Output File Color Type : The RGB option is used to convert calibrated Bayer format light frames to color images before further processing.
- Extra Filters : Not used in this example but you could do additional high and low pixel reduction after the dark calibration options. You can customize and save the extra filter parameters using the Local | Reduce High, Low, Bloom Pixel command. See CCD image set processing with bloom removal for an example of using bloom removal.
- Normalize All Light Frames In the Set To : Specify target value of 5120 or a dark gray background is used to normalize all calibrated color light frames to have the same dark gray background level. This can simplify color balance and enhancement processing.
- Star Shape and Size Grade : All frames with a star eccentricity of 0.45 or less are selected for alignment and stacking.
- Auto Star Align : Standard auto star alignment is used to align the star shape graded images.
- Combination Methods : Aligned color images are stacked using excluded min/max average and saved in a file called CombineFilesExcAvg-MaxEcc045.fits
- The Normalize -> Grade -> Align -> Combine boxes are checked to automate processing. Automatic processing will stop after the last checked option. Customized processing is available from any step.
Standard DSLR light frame processing parameters.
 |
Step 3
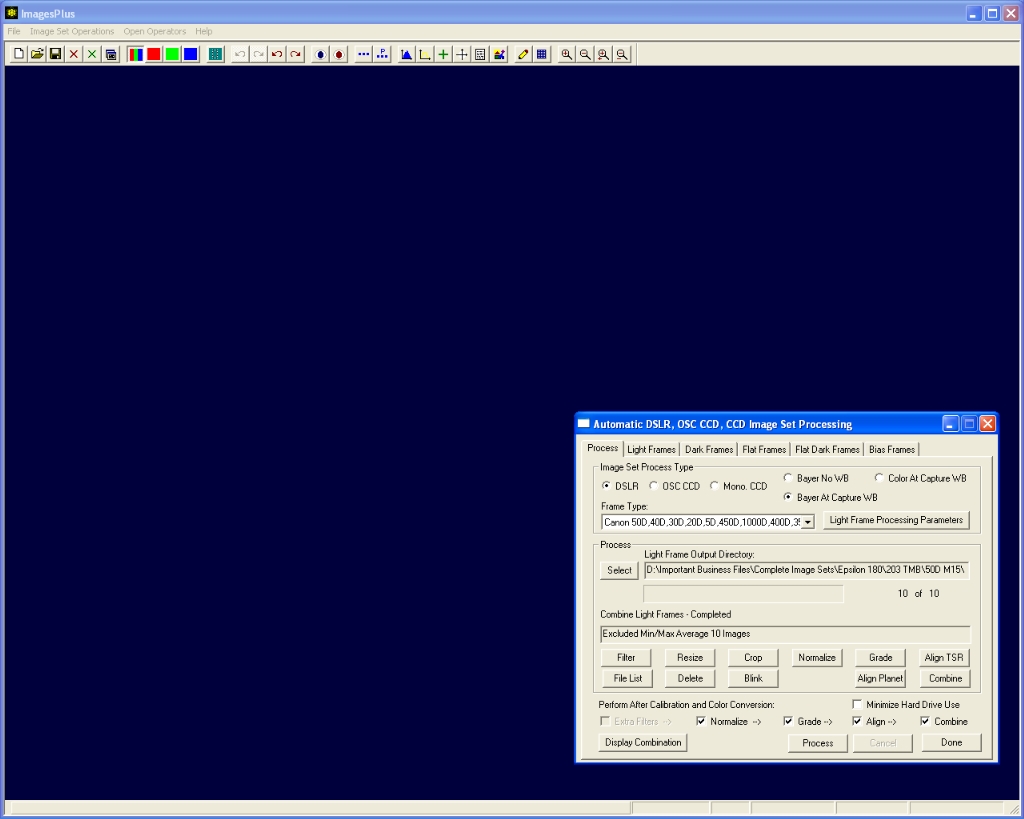
- Press the Process button on the Process tab to start the specified automatic processing.
- After Auto Image Set Processing is finished the Process buttons are enabled to allow inspection and reprocessing if desired. 10 of the 15 light frames have a maximum star eccentricity of 0.45 or less so they were used for alignment and stacking.
- Press the Display Combination button to display the final stacked image created from the best 10 light frames.
Auto image set completed with 10 of the 15 ligth frames since star shape grading eliminated 5 images with max star eccentricity > 0.45. Press the Display Combination button to display the final stacked image created from the best 10 light frames.
 |
Step 4
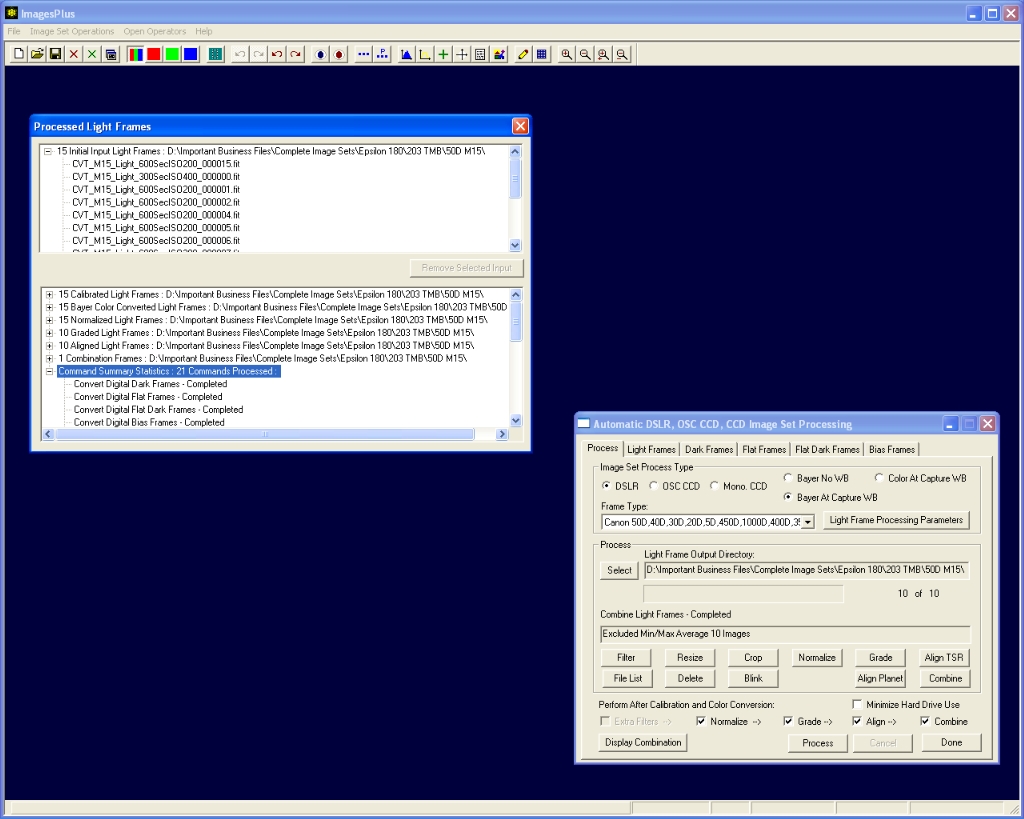
- A summary of all commands performed along with statistics is displayed by pressing the File List button.
- Double-click on an image in the list to display it.
- The Blink option can be used with any of the intermediate image sets for visual inspection and to redo processing. Step 5 below demonstrates the use of Blink Files to further refine the aligned image set before stacking.
Auto image set process summary.
 |
Step 5
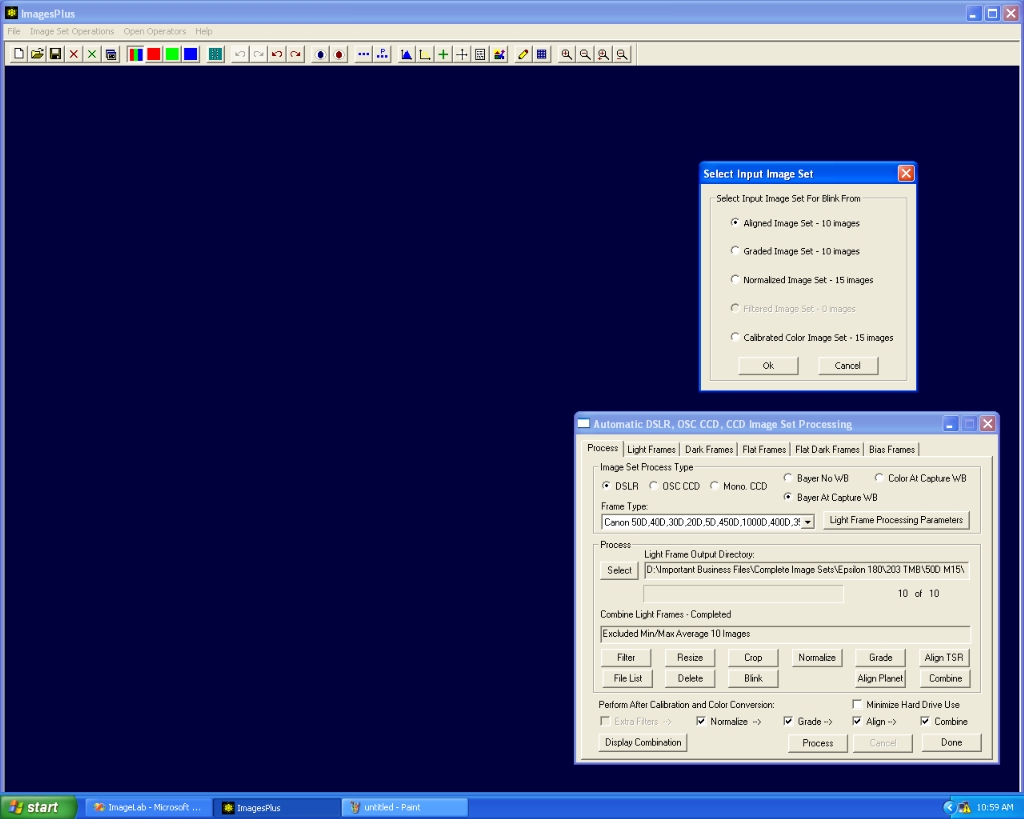
- Press the Blink button on auto image set process to display the input file list for Blink Files.
- Since normalize, grade, and align were selected as process options a complete set of intermediate image sets are available for input into Blink Files.
- Select aligned image set as the input set for Blink Files.
The 10 aligned images are used as input to Blink Files.
 |
Step 6
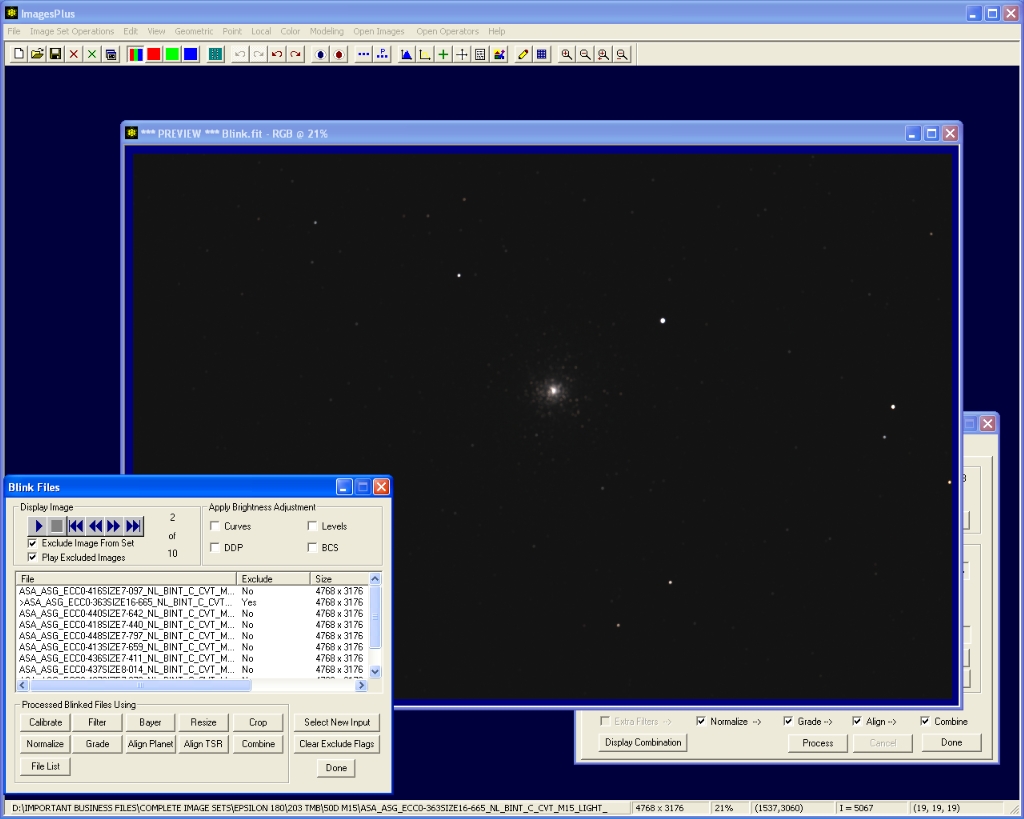
- Press the Play button on Blink Files to blink the 10 aligned images.
- Note that the second image is not as sharp as the other nine images.
- Press the Stop button then exclude the second image from the set.
- Play only the 9 images that are not excluded to verify the image set quality.
- Press the Combine button on Blink Files to stack the best 9 out of 10 images.
The second image is excluded from the set.
 |
Step 7
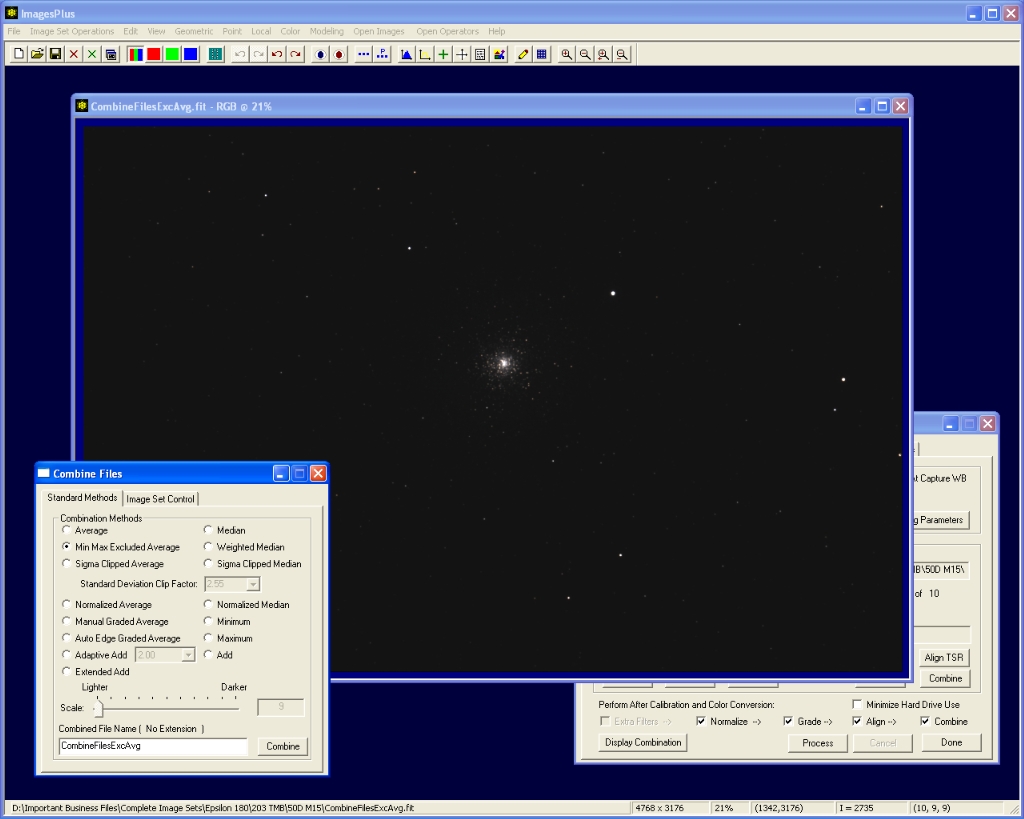
- Excluded min/max average is used to stack the 9 images.
- The stacked image appears automatically since Auto Display is checked on the Image Set Control tab.
Stack of 9 calibrated, normalized, and aligned color images of M15. The stacked image is often very dark since no brightness increase is applied before display.
Detailed processing instructions of the stacked image can be found at DSLR Image Enhancement - M15
 |
Step 8
- Press the Delete button on Automatic DSLR, OSC CCD, and CCD Image Set Processing to delete the intermediate files before closing the command. The original files, master calibration frames, and stacked image will remain.
Copyright © 2009 MLUnsold Digital Imaging. All Rights Reserved.


